
Related Manuals for GE Druck DPI 841


Summary of Contents for GE Druck DPI 841
- Page 1 GE Infrastructure Sensing Druck DPI 841/842 Frequency calibrator and Frequency loop calibrator User manual - K395...
- Page 2 DPI 842 Test Equipment Depot - 800.517.8431 - 99 Washington Street Melrose, MA 02176 K395 Issue 1 FAX 781.665.0780 - TestEquipmentDepot.com...
-
Page 3: Table Of Contents
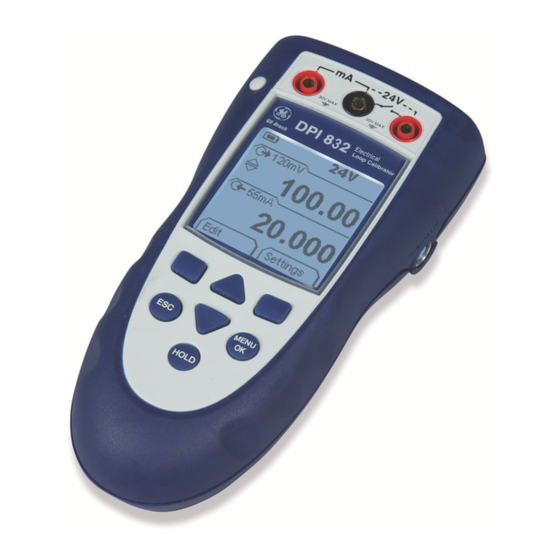
Table of Contents Introduction The DPI 841 Frequency Calibrator and DPI 842 Frequency Introduction ................. 1 Loop Calibrator are part of the Druck DPI 800 series of Safety ..................1 hand held instruments. Safety - Marks and symbols on the instrument ....2 The DPI 800 series uses Intelligent Digital Output Sensor To start .................. -
Page 4: Safety - Marks And Symbols On The Instrument
Safety (Continued) To start - Items on the display Item Description • To prevent electrical shocks or damage to the DPI 842 only. Task indication for the switch test. instrument, do not connect more than 30V between = switch closed the terminals, or between the terminals and the = switch open ground (earth). -
Page 5: To Start - Power On Or Off
To start - Power on or off To start - Select a task (Measure and/or supply) To turn the instrument on or off, press (A1 - item [1]). The When the instrument is set up (Table 1), use the Select Task instrument does a self test and then shows the applicable menu to select the applicable task. -
Page 6: To Start - Set Up The Settings
To start - Set up the settings Table 4: (Part of table) Menu options - Settings (Input) When the task is set up (Table 2/3), use the Settings menu Options Description to adjust the input and/or output operation. (If applicable) To select and set up a tare value for the Display: Task Settings selection... - Page 7 Example 2) Set up values for x:y Scaling = 0 to 100%. Table 5: (Part of table) Menu options - Settings (Output) Settings Settings Options Description Edit To select and set up values for the “Defined Step” ... Step output. Example output cycle: Auto Repeat - Optional Sk1 = Edit = Flow scaling (mA, pressure only)
-
Page 8: Operation
Operation Operation - Change the output values When the output operation is set up (Table 5), use one of This section gives examples of how to connect and use the these procedures to change the output values: instrument. Before you start: •... -
Page 9: Operation - Supply Hz Or Pulses
Operation - Supply Hz or pulses To supply Hz or pulses: Maximum: 30V 1. Connect the instrument (Figure 2) and, if necessary, adjust the Set Up (Table 1). 2. Select a Hz or Pulses output task from Select Task (Table 2/3) and, if necessary, adjust the Settings (Table 5). -
Page 10: Operation - Ma Measurements
Operation - mA measurements 3. Supply the output values to the system (Table 7). DPI 842 only. To measure a current: • Example - “Nudge” output. 1. Connect the instrument (Figure 5) and, if necessary, a. Use Edit ( ) to set a value less than the switch adjust the Set Up (Table 1). -
Page 11: Operation - Upm Pressure Measurements
Operation - UPM Pressure measurements Read all the instructions supplied with the UPM and then use the specified procedures to connect it (Figure 7/8). Settings Start Settings a) Pressure b) Leak test Settings Figure 8: Example configuration - To measure pressure Figure 7: Example configuration - Pressure measurement and frequency with a UPM... -
Page 12: Maintenance
Square Wave and then the Calibration Sine/Triangular Wave. Note: GE can provide a calibration service that is traceable IDOS ... UMM only. To calibrate the specified IDOS UMM. Refer to the user manual for the IDOS UMM. -
Page 13: Calibration - Procedures (Ma Input)
5. To make sure that the calibration is correct, set up the 5. Make sure that the error is in the specified limits equipment to do one of these calibration checks: (Table 11). • Hz input calibration check (Figure 1): Table 11: mA input error limits Applied Calibrator... -
Page 14: Calibration - Procedures (Idos Umm)
7. To make sure that the calibration is correct, set up the Specification - Frequency DPI 841/842 with these conditions: cpm = Pulses/minute, cph = Pulses/hour Range (Measure): Accuracy: Output Hz = 0 (For direct current output) 0 ... 999.999 Hz For all the ranges: Output amplitude: Set to Unipolar (Table 5) 1 ...