ABB AC500 Installation Instructions Manual
Hide thumbs
Also See for AC500:
- Installation instructions manual (262 pages) ,
- Introduction manual (139 pages) ,
- Safety instructions (24 pages)

Related Manuals for ABB AC500


Summary of Contents for ABB AC500
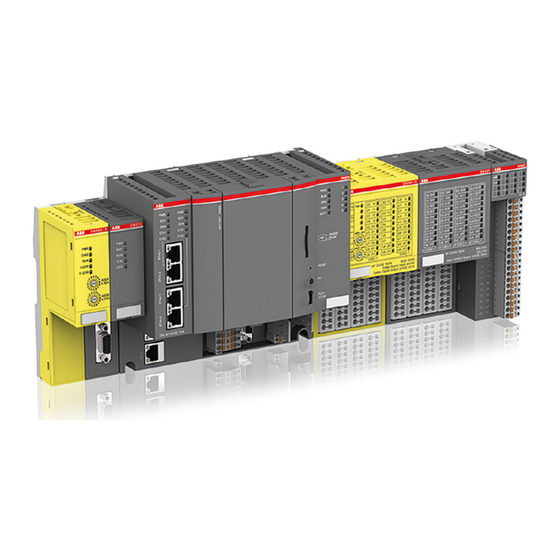
- Page 1 TECHNICAL DOCUMENTATION AC500 Product Family Installation Instructions Read this manual prior to performing any task!
- Page 2 ABB Automation Products GmbH Eppelheimer Straße 82 69123 Heidelberg, Germany Telephone: +49 62 21 701 1444 Fax: +49 62 21 701 1382 E-mail: [email protected] Internet: www.abb.com/PLC 3ADR024117M02xx, 4, en_US © 2017 AC500 Product Family Installation Instructions 25.07.2017...
-
Page 3: Table Of Contents
Table of contents Table of contents PM56xx-2ETH............................4 TB56xx-2ETH............................10 TU5xx(-XC)............................17 DO526(-XC)............................25 CM582-DP(-XC)............................ 32 CM589-PNIO(-4)(-XC).......................... 38 25.07.2017 AC500 Product Family Installation Instructions... -
Page 4: Pm56Xx-2Eth
PM56xx-2ETH PM56xx-2ETH PM5630-2ETH PM5650-2ETH PM5670-2ETH PM5675-2ETH Fig. 1: PM5650-2ETH AC500 Product Family Installation Instructions 25.07.2017... - Page 5 For more information about recycling, please contact your local environmental office, an electrical/electronic waste disposal company or the store where you purchased the product. 25.07.2017 AC500 Product Family Installation Instructions...
- Page 6 PM56xx-2ETH Assembly The CPU is put on the Terminal Base - CPU clicks in. Disassembly ➀ Press above and below. ➁ Remove the CPU. AC500 Product Family Installation Instructions 25.07.2017...
- Page 7 PM56xx-2ETH Dimensions PM5650 mounted on TB5620. Attention! The CPUs PM56xx-2ETH with 2 onboard ETH (1SAPxxx000R0278) can only be used with Terminal Base TB56xx-2ETH (1SAPxxx300R0278). 25.07.2017 AC500 Product Family Installation Instructions...
- Page 8 The connection part may be different on various Terminal Base types. See installation instructions of the specific Terminal Base suitable for this CPU for connection specifications. Cleaning instruction Do not use cleaning agent for cleaning the device. Use a damp cloth instead. AC500 Product Family Installation Instructions 25.07.2017...
- Page 9 PM56xx-2ETH 25.07.2017 AC500 Product Family Installation Instructions...
-
Page 10: Tb56Xx-2Eth
TB56xx-2ETH TB56xx-2ETH TB5600-2ETH TB5610-2ETH TB5620-2ETH TB5640-2ETH Fig. 2: TB5620-2ETH AC500 Product Family Installation Instructions 25.07.2017... - Page 11 For more information about recycling, please contact your local environmental office, an electrical/electronic waste disposal company or the store where you purchased the product. 25.07.2017 AC500 Product Family Installation Instructions...
- Page 12 TB56xx-2ETH Assembly The Terminal Base is put on the DIN rail above and then snapped-in below. Disassembly ➀ Pull down the Terminal Base ➁ and remove it. AC500 Product Family Installation Instructions 25.07.2017...
- Page 13 Assembly with screws TA526 are snapped on the rear side of the Terminal Base like DIN rails. One TA526 is turned by 180°. The insertion of the accessories TA526 for screw mounting is essential. 25.07.2017 AC500 Product Family Installation Instructions...
- Page 14 TB56xx-2ETH Fasten Terminal Base with 3 (M4, max 1.2 Nm) screws (front view). Dimensions AC500 Product Family Installation Instructions 25.07.2017...
- Page 15 ③ Slots for Communication Module ④ Interface for CAN ⑤ Supply for 24 V DC ⑥ Serial interface COM1 ⑦ Network interface ⑧ Holes for screw mounting (ø 4 mm) ④ CAN ➄ 24 V 25.07.2017 AC500 Product Family Installation Instructions...
- Page 16 TB56xx-2ETH ⑥ COM 1 ⑦ ETHERNET Cleaning instruction Do not use cleaning agent for cleaning the device. Use a damp cloth instead. AC500 Product Family Installation Instructions 25.07.2017...
-
Page 17: Tu5Xx(-Xc)
Improper installation and maintenance may result in injury and can damage the PLC modules! – Installation and maintenance have to be performed according to the technical rules, codes and rel- evant standards, e.g. EN 60204-1. – Only by skilled electricians. 25.07.2017 AC500 Product Family Installation Instructions... - Page 18 For more information about recycling, please contact your local environmental office, an electrical/electronic waste disposal company or the store where you purchased the product. AC500 Product Family Installation Instructions 25.07.2017...
- Page 19 TU5xx(-XC) Assembly The Terminal Unit is put on the DIN rail above and then snapped-in below. Disassembly ➀ Shove the Terminal Units from each other. 25.07.2017 AC500 Product Family Installation Instructions...
- Page 20 TU5xx(-XC) ➀ Pull down the Terminal Unit ➁ and remove it. AC500 Product Family Installation Instructions 25.07.2017...
- Page 21 TU5xx(-XC) Assembly with screws TA526 is snapped on the rear side of the Terminal Unit like DIN rails. The insertion of the accessories TA526 for screw mounting is essential. 25.07.2017 AC500 Product Family Installation Instructions...
- Page 22 TU5xx(-XC) Fasten Terminal Unit with 2 (M4, max 1.2 Nm) screws (front view). Dimensions AC500 Product Family Installation Instructions 25.07.2017...
- Page 23 ④ With a screwdriver, inserted in this place, adjacent Terminal Units can be shoved from each other ⑤ Holes for wall mounting ⑥ 40 screw-type terminals or spring terminals (signals and process voltage) Cleaning instruction Do not use cleaning agent for cleaning the device. Use a damp cloth instead. 25.07.2017 AC500 Product Family Installation Instructions...
- Page 24 TU5xx(-XC) AC500 Product Family Installation Instructions 25.07.2017...
-
Page 25: Do526(-Xc)
Improper installation and maintenance may result in injury and can damage the PLC modules! – Installation and maintenance have to be performed according to the technical rules, codes and rel- evant standards, e.g. EN 60204-1. – Only by skilled electricians. 25.07.2017 AC500 Product Family Installation Instructions... - Page 26 For more information about recycling, please contact your local environmental office, an electrical/electronic waste disposal company or the store where you purchased the product. AC500 Product Family Installation Instructions 25.07.2017...
- Page 27 DO526(-XC) Assembly Put the module on the Terminal Unit - Module clicks in. Disassembly ➀ Press the module above and below. ➁ Remove the module. 25.07.2017 AC500 Product Family Installation Instructions...
- Page 28 DO526(-XC) Dimensions DO526 mounted on TU542. The dimensions are in mm and in brackets in inch. AC500 Product Family Installation Instructions 25.07.2017...
- Page 29 ⑥ 2 red LEDs to display errors ⑦ TA525: Label ⑧ TU542(-XC): I/O Terminal Unit All I/O channels (digital and analog) are protected against reverse polarity, reverse supply and contin- uous overvoltage up to 30 V DC. 25.07.2017 AC500 Product Family Installation Instructions...
- Page 30 The process voltage must be included in the earthing concept of the control system. Outputs Example for connection as an output: Cleaning instruction Do not use cleaning agent for cleaning the device. Use a damp cloth instead. AC500 Product Family Installation Instructions 25.07.2017...
- Page 31 DO526(-XC) 25.07.2017 AC500 Product Family Installation Instructions...
-
Page 32: Cm582-Dp(-Xc)
Improper installation and maintenance may result in injury and can damage the PLC modules! – Installation and maintenance have to be performed according to the technical rules, codes and rel- evant standards, e.g. EN 60204-1. – Only by skilled electricians. AC500 Product Family Installation Instructions 25.07.2017... - Page 33 For more information about recycling, please contact your local environmental office, an electrical/electronic waste disposal company or the store where you purchased the product. 25.07.2017 AC500 Product Family Installation Instructions...
- Page 34 CM582-DP(-XC) Assembly The module is first inserted below, then clicked-in above. Disassembly ➀ Press the module above. ➁ Swing out the module and remove it. AC500 Product Family Installation Instructions 25.07.2017...
- Page 35 CM582-DP(-XC) Dimensions CM582-DP(-XC), TA524 mounted on TB511(-XC), TB521(-XC) or TB541(-XC). 25.07.2017 AC500 Product Family Installation Instructions...
- Page 36 ③ System LEDs ⑤ TA525: Label ⑥ Interface for PROFIBUS ⑦ TA524: Dummy communication module Interface for PROFIBUS CM582-DP-XC In corrosive environment, please protect unused connectors using the TA535 accessory. Not supplied with this device. AC500 Product Family Installation Instructions 25.07.2017...
- Page 37 CM582-DP(-XC) Cleaning instruction Do not use cleaning agent for cleaning the device. Use a damp cloth instead. 25.07.2017 AC500 Product Family Installation Instructions...
-
Page 38: Cm589-Pnio(-4)(-Xc)
Improper installation and maintenance may result in injury and can damage the PLC modules! – Installation and maintenance have to be performed according to the technical rules, codes and rel- evant standards, e.g. EN 60204-1. – Only by skilled electricians. AC500 Product Family Installation Instructions 25.07.2017... - Page 39 For more information about recycling, please contact your local environmental office, an electrical/electronic waste disposal company or the store where you purchased the product. 25.07.2017 AC500 Product Family Installation Instructions...
- Page 40 CM589-PNIO(-4)(-XC) Assembly The module is first inserted below, then clicked-in above. Disassembly ➀ Press the module above. ➁ Swing out the module and remove it. AC500 Product Family Installation Instructions 25.07.2017...
- Page 41 CM589-PNIO(-4)(-XC) Dimensions CM589-PNIO(-4)(-XC) mounted on TB511-ETH(-XC), TB521-ETH(-XC) or TB541-ETH(-XC). 25.07.2017 AC500 Product Family Installation Instructions...
- Page 42 ⑤ TA525: Label ⑥ Ethernet network interfaces ⑦ TA524: Dummy communication module Ethernet network interfaces CM589-PNIO-XC and CM589-PNIO-4-XC In corrosive environment, please protect unused connectors using the TA535 accessory. Not supplied with this device. AC500 Product Family Installation Instructions 25.07.2017...
- Page 43 CM589-PNIO(-4)(-XC) Cleaning instruction Do not use cleaning agent for cleaning the device. Use a damp cloth instead. 25.07.2017 AC500 Product Family Installation Instructions...