
Related Manuals for Kenwood CKB 250E


Summary of Contents for Kenwood CKB 250E
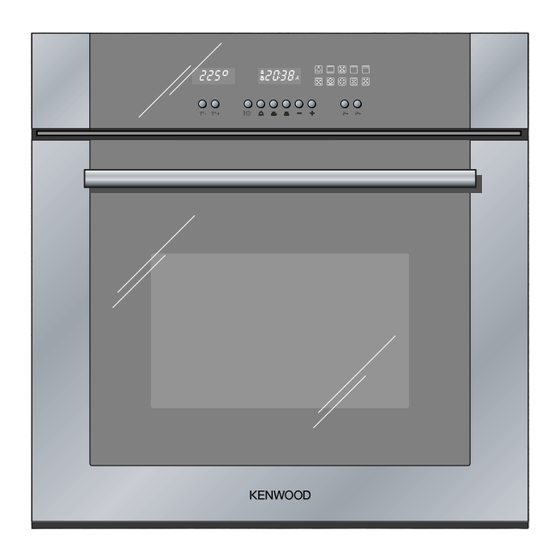
- Page 1 MULTI-FUNCTION ELECTRONIC OVEN CKB 250E Instructions for use - Installation advice Before operating this oven, please read these instructions carefully...
-
Page 3: Table Of Contents
CONTENTS Page Number Introduction ..........4 Important Safeguards &... -
Page 4: Introduction
Dear Customer, Thank you for purchased a Kenwood Multifunction Electronic Oven. The safety precautions and recommendations within this booklet are for your own safety and that of others. They will also provide a means by which to make full use of the features offered by your appliance. -
Page 5: Important Safeguards & Recommendations
IMPORTANT SAFEGUARDS & RECOMMENDATIONS Do not carry out any cleaning or maintenance without first disconnecting the • appliance from the electrical supply. During and after use of the oven, certain parts will become very hot. Do not • touch hot parts. After use always ensure that the controls are in the OFF position. - Page 6 BEFORE USING FOR THE FIRST TIME Read the instructions carefully before installing and using the appliance. • After unpacking the appliance, check that it is not damaged. In case of doubt, • do not use the appliance and contact your supplier or a qualified engineer. Remove all the packing materials (i.e.
-
Page 7: Oven Features
1 - OVEN FEATURES GENERAL FEATURES OPERATING PRINCIPLES This is an oven that presents partic- Heating and cooking in the FULL ELECTRON- ular features from an operational IC MULTIFUNCTION oven are obtained in the point of view. It is possible to insert following ways: 9 different cooking programs to sat- a. - Page 8 CONTROL PANEL Programmer display Functions display Temperature display Fig. 1.1 Temperature Cooking functions operating zone operating zone Electronic programmer On/Off and "Children Care" operating zone operating zone...
-
Page 9: Oven Using & Electronic Programmer
2 - OVEN USING & ELECTRONIC PROGRAMMER SYMBOL DIGITS Lit = minute minder in operation Normally time of the day Flashing = countdown completed by the minute minder SYMBOL SYMBOL Lit = semi-automatic or automatic cooking programmed Lit = operation of heating Flashing = semi-automatic or elements (cooking functions) automatic cooking completed... - Page 10 ELECTRONIC PROGRAMMER FEATURES The electronic programmer performs the follow- ing functions: • 24 hours clock with illuminated display. • Timer (up to 23 hours and 59 minutes). • Program for semi-automatic oven cooking. • Program for automatic oven cooking. • Automatic switch off (after 10 hours when using the oven in manual operation).
- Page 11 OVEN PROGRAMMER ACTIVATION / DEACTIVATION (ON / OFF) To activate the oven programmer: • Press the button “ ”; appears for 2 seconds on the programmer display and the oven lamp lights (symbol “ ” illuminated on the functions display). Then the time of the day appears.
- Page 12 "CHILDREN CARE" SAFETY SELECTION By pressing the button “ ” for about 5 seconds it is possible to activate the “Children Care” option. n - - 0 The display shows “ ”, and then the time appears again. When the “Children Care” option has been selected it is possible only to turn off the oven (stand-by mode), operate the minute minder and check the cooking time or the end of the cooking time.
- Page 13 MINUTE MINDER The minute minder consists simply of an acoustic signal which can be set for a max- imum of 23 hours an 59 minutes. The minute counter, at the end of countdown, does not stop the operation of the oven (heating elements stay on).
- Page 14 MANUAL USE OF THE OVEN Activate the oven programmer as indicated in the “OVEN PROGRAMMER ACTIVA- TION/DEACTIVATION (ON/OFF)” chapter. If “A” symbol is shown on the programmer display (semi-automatic or automatic cooking selected) the programmed cooking time shall be cancelled as indicated in the “CAN- CELLING A SET PROGRAMME”...
- Page 15 SEMI-AUTOMATIC COOKING - ONLY END OF COOKING This automatically switches off the oven after the required cooking time. Two methods of semi-automatic cooking are available: METHOD: Programming the duration of the cooking • Set the oven (function and temperature) as indicated in the “USING THE OVEN - COOK- ING FUNCTIONS”...
- Page 16 METHOD: Programming the time when cooking will be completed. • Set the oven (function and temperature) as indicated in the “USING THE OVEN - COOKING FUNCTIONS” chapter. • Set the time when cooking will be completed (“hh:mm” - hours and minutes) by pressing button “...
- Page 17 AUTOMATIC COOKING - START AND END OF COOKING This automatically switches on the oven and switches it off at the required time. To cook the food in the automatic mode follow these instructions: 1. Set the duration of the cooking Set it (“hh:mm”...
- Page 18 3. Set the cooking temperature and function Operate as indicated in the "USING THE OVEN - COOKING FUNCTIONS" chapter. The oven starts to operate for the programmed cooking time considering the time for which the food has to be cooked. “A”...
- Page 19 END OF A PROGRAMMED SEMI-AUTOMATIC OR AUTOMATIC COOKING At the end of the programmed semi-automatic or automatic cooking the oven switches off automatically the heating elements and the oven lamp. An intermittent acoustic signal sounds and the “A” letter and “ ”...
- Page 20 ABNORMAL SITUATIONS - ERROR CODES In case of abnormal situations the oven is automatically switched off: only the cooling fan motor operates and on the programmer display, an error message code appears. The oven is stalled. If this condition disappears the oven returns in the stand-by ( ) condition where the central programmer display is activated and the time is displayed.
-
Page 21: Using The Oven - Cooking Functions
3 - USING THE OVEN - COOKING FUNCTIONS OVEN TEMPERATURE SELECTION AND REGULATION " " (Celsius degrees) symbol When the symbol is flashing the oven is preheating. When the symbol is permanently lit the oven is at temperature. Cooking temperature All cooking functions start to operate with a pre-set temperature which can be modified, at any time, by pressing the relative buttons... - Page 22 OVEN FUNCTION SELECTION AND REGULATION Oven cooking functions During selection of a cooking function the relative symbol is activated. "P+" setting "P-" Oven lamp setting When the symbol is activated only the oven lamp is on. Fig. 3.2 Set oven function button Decreasing.
- Page 23 SETTING THE OVEN FUNCTION AND TEMPERATURE Turn on the oven programmer as indicated in the "OVEN PROGRAMMER ACTIVATION/ DEACTIVATION (ON/OFF)" chapter. Select the oven function as indicated in the "OVEN FUNCTION SELECTION AND REG- ULATION" chapter. Select the oven temperature as indicated in the "OVEN TEMPERATURE SELECTION AND REGULATION"...
- Page 24 GRILLING The infrared heating element switches on. The heat is diffused by radiation. The temperature can be set between 50 and 225°C. This function starts cooking with a pre-heating temperature set at 225°C. To vary the temperature proceed as indicated in the "OVEN TEMPERATURE SELECTION AND REGULATION"...
- Page 25 HOT AIR COOKING WITH LOWER HEAT This mode combines the lower heating element, the circular heating element and the fan. The food is cooked by forced air circulation with additional heat from the bottom of the oven. The temperature can be set between 50 and 250°C. This function starts cooking with a pre-heating temperature set at 210°C.
-
Page 26: Cooking Advice
COOKING ADVICE ROASTING To obtain classical roasting, it is neces- sary to remember: STERILIZATION • that it is advisable to maintain a tem- Sterilization of foods to be conserved, in perature between 180 and 200 °C. full and hermetically sealed jars, is done •... -
Page 27: Cleaning & Maintenance
4 - CLEANING AND MAINTENANCE GENERAL ADVICE WARNING When correctly installed, your product Important: meets all safety requirements laid Before cleaning or carrying out any down for this type of product catego- maintenance disconnect the appli- ry. However special care should be ance from the electrical supply. - Page 28 WIRE RACKS REPLACING THE OVEN LIGHT – Assemble the wire racks to the oven Before any maintenance is started walls using the 2 screws (Fig. 4.1). involving electrical parts of the appli- – Slide into the guides, the shelf and the ance, it must be disconnected from the tray (fig.
- Page 29 REMOVING THE OVEN DOOR The oven door can easily be removed as follows: – Open the door to the full extent (fig. 4.5a). – Open the lever A completely on the left and right hinges (fig. 4.5b). Fig. 4.5a – Hold the door as shown in fig. 4.4. –...
-
Page 30: Advice For The Installer
Advice for the installer IMPORTANT • The appliance is designed and approved for domestic use only and should not be installed in a commercial, semi commercial or communal environment. Your product will not be guaranteed if installed in any of the above environments and could affect any third party or public liability insurances you may have. -
Page 31: Installation
5 - INSTALLATION IMPORTANT • The appliance should be installed by a QUALIFIED INSTALLATION TECHNICIAN. The appliance must be installed in compliance with regulations in force. The oven can be fitted in standard units, width and depth 60 cm. Installation requires a compartment as illustrated in figures 5.1 and 5.2. - Page 32 50 mm 30 mm Fig. 5.3 Fig. 5.4 To ensure internal ventilation, aeration channels must be provided as illustrated in the figures 5.3 and 5.4. The walls surrounding the oven must be made of heat-resistant material. Taking care NOT to lift the oven by the door handle.
- Page 33 FIXING THE OVEN Introduce the oven into the furniture opening and fix it with screws as figure 5.5. It is essential that the oven rests on a surface which will support its weight, as the screw fixing is only complementary. Note It is essential that when installing your oven adequate air circulation is allowed for within the installation.
- Page 34 OVEN DOOR LOWER TRIM AIR FLOW Fig. 5.6 IMPORTANT: To avoid damage to the lower trim please note the following instructions. The lower trim is designed to allow for good air circulation and the correct opening of the oven door. To ensure the trim is not damaged due to the appliance being placed on the floor, the appliance should be suitably supported as in above illustrations.
-
Page 35: Electrical Section
6 - ELECTRICAL SECTION Before effecting any intervention on the electrical parts the appliance must be disconnected from the network. GENERAL • The connection to the electrical network must be carried out by qualified personnel and must be according to existing norms. •... - Page 36 CONNECTION OF THE POWER SUPPLY CABLE Unhook the terminal board cover by inserting a screwdriver into the two hooks “A” (fig. 6.1). Open the cable gland by unscrewing screw “F” (fig. 6.2), unscrew the terminal screws and remove the cable. The new supply cable, of suitable type and section, is connected to the terminal board following the diagram fig.
-
Page 37: Guarantee
GUARANTEE UK only If your appliance goes wrong within one year from the date you bought it, we will repair it (or replace it if necessary) free of charge provided: • you have not misused, neglected, or damaged it; • it has not been modified; •... - Page 39 Descriptions and illustrations in this booklet are given as simply indicative. The manufacturer reserves the right, considering the characteristics of the models described here, at any time and without notice, to make eventual necessary modifications for their construction or for commercial needs.
- Page 40 Cod. 1102952 - ß4...