Table of Contents
Table of Contents

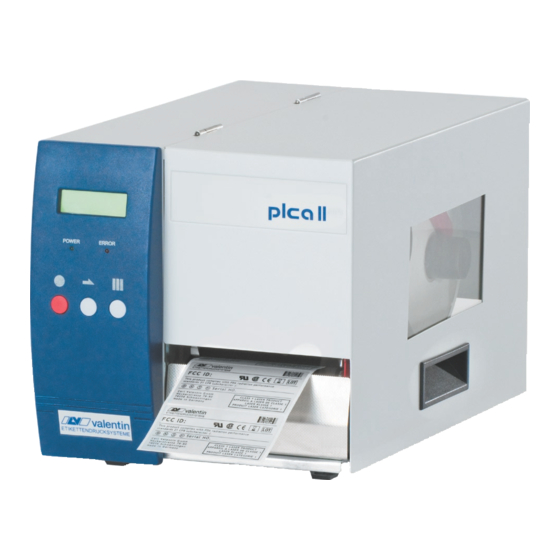
Related Manuals for Carl Valentin PICA II


Summary of Contents for Carl Valentin PICA II
- Page 1 PICA II Operating Manual...
- Page 2 It must not be concluded from the missing labelling that it is not a registered brand or a registered trademark. Carl Valentin label printers comply with the following safety guidelines: EG Low-Voltage Directive (2006/95/EC) EG Electromagnetic Compatibility Directive (2004/108/EC)
-
Page 3: Table Of Contents
Pica II Serie Table of Contents Table of Contents Table of Contents ................3 Introduction ................5 General Instructions ..............5 Intended Use ................5 Environmentally-Friendly Disposal .......... 6 Connector Pin Assignment (Printer Rear) ....... 6 ... -
Page 5: Introduction
Pica II Series Introduction Introduction 1.1 General Instructions Important information and instructions in this document are designated as follows: identifies an extraordinarily great and immediate DANGER danger which could lead to serious injury or even death. identifies a possible danger would could lead to... -
Page 6: Environmentally-Friendly Disposal
It may only be organised, used and disposed of by the manufacturer. Valentin products accordingly labelled can therefore be returned to Carl Valentin GmbH. This way, you can be sure your old equipment will be disposed of correctly. -
Page 7: Safety Instructions
Pica II Series Safety Instructions Safety Instructions The label printer is configured for a voltage of 230 V. It has to be plugged into a grounded socket only. Couple the label printer to devices using extra low voltage only. Before making or undoing connections, switch off all devices involved (computer, printer, accessories etc.). -
Page 8: Operating Conditions
Safety Instructions Pica II Series 2.2 Operating Conditions these operating conditions Before initial operation and during operation have to be observed to guarantee save and interference-free service of our printers. Therefore please carefully read these operating conditions. Shipment and storage of our printers are... - Page 9 Pica II Series Safety Instructions The installation of the power supply to connect our printers has to be Installation of effected according to the international rules and regulations, power supply especially the recommendations of one of the three following commissions: ...
- Page 10 Safety Instructions Pica II Series Immunity to interference according to EN 61000-6-2: 2005 Stray radiation and industrial sector immunity from disturbance Stray radiation against discharge of static electricity according to EN 61000-4-2: 12-2001 Electromagnetic fields according to EN 61000-4-3: 11-2003, ENV 50204: 03-1995 ...
- Page 11 Pica II Series Safety Instructions To avoid inadmissible heating, free air convection has to be ensured. Air convection Protection according IP: 20 Limit values Ambient temperature °C (operation): Min. +5 Max. +35 Ambient temperature °C (storage): Min. −20 Max. +60 Relative air humidity % (operation): Max.
-
Page 13: Technical Data
Pica II Series Technical Data Technical Data Pica II 104/8 Pica II 106/12 Pica II 103/8 T Pica II 108/12 T Print Resolution 200 dpi 300 dpi 203 dpi 300 dpi Max. Print Speed 100 mm/s 100 mm/s 100 mm/s... - Page 14 Technical Data Pica II Series Operation Panel Keys Test Print, Status Print, Feed, Enter LCD Display Graphic Display 132 x 64 Pixel Green Backlight Monitoring Stop Printing If Transfer Ribbon End End of Label Status Print Extensive status print with information about settings e.g.
- Page 15 Pica II Series Technical Data Tear-Off Edge Standard equipment Real time clock with printout date and time Automatic daylight saving time Storage of data with shut-down Integrated Rewinder (max. outside diameter 180 mm Thermal Direct or Thermal Transfer Version ...
-
Page 16: Control Inputs And Outputs
Technical Data Pica II Series 3.1 Control Inputs and Outputs By means of a maximum of 16 control inputs and outputs which, in the following, are also referred to as ports, different functions of the printer system can be triggered and operating states can be displayed. - Page 17 Pica II Series Technical Data Configuration of D-Sub socket Figure 3 Port 1 to Port 16 = Assignment for I/O Profile 'Std_Label' Identification Description / Function Port 1 Print start and cut (Input) Port 2 Reprint last printed label (Input)
- Page 18 Technical Data Pica II Series Identification Description / Function + 5 VDC 5 Volt DC output for external use. Max. 1 A. This voltage is provided from direct print module and can be used e.g. as control voltage. Never apply any external voltage to this output.
- Page 19 Pica II Series Technical Data Device connection to a machine with S7-300 SPS. Example 1 Figure 4 Device connection to a operating panel. Example 2 Figure 5 10.15 Operating Manual...
- Page 20 Technical Data Pica II Series Device connection version if 'Option: 2. LED'. Example 3 Figure 6 When connecting a reed contact with a control input, the contact must Precautions have a switching capacity of min. 1 A in order to prevent the contact from sticking due to the inrush current.
-
Page 21: Plug & Play
Pica II Series Technical Data 3.2 Plug & Play Plug & Play capable printers can be recognised automatically at parallel ports, USB-IEEE 1394- or infra-red connections but the last both are not important for our printers. The following table shows the Plug & Play capability of the different operating systems. -
Page 23: Installation
Pica II Series Installation Installation Unpack the Lift the label printer out of the box. label printer Check the label printer for transport damages. Check delivery for completeness. Label Printer. Scope of delivery Power Cable. -
Page 24: Connecting The Label Printer
Installation Pica II Series 4.2 Connecting the Label Printer The label printer is equipped with an universal AC adaptor and is Connection to the operated according to standard with nominal voltage of 230 V. power supply The conversion to 115 V is only allowed by trained personnel. -
Page 25: Start-Up
Pica II Series Installation 4.4 Start-Up NOTICE! The printer can be controlled either by our printer driver or our label design software. After switching on the label printer the main menu appears which shows the current status as well as current date and time. -
Page 27: Loading Media
Pica II Series Loading Media Loading Media 5.1 Loading Label Roll Loading label roll for standard mode Figure 7 1. Open the printer cover. 2. Open printhead (K) by turning the red pressure lever (J) anticlockwise. 3. Remove the outside label mounting plate (A). - Page 28 Loading Media Pica II Series Loading labels for rewinding mode Figure 8 1. Open the printer cover. 2. Open printhead (H) by turning the red pressure lever (G) anticlockwise. 3. Remove the outside label mounting plate (A). 4. Load the label roll with inner winding onto the unwinding roll (B).
- Page 29 Pica II Series Loading Media Loading label roll for cutting mode Figure 9 1. Open the printer cover. 2. Open printhead (J) by turning the red pressure lever (I) anticlockwise. 3. Remove the outside label mounting plate (A). 4. Load the label roll with inner winding onto the unwinding roll (B).
- Page 30 Loading Media Pica II Series Loading label roll fop peel-off mode Figure 10 1. Open the printer cover. 2. Open printhead (K) by turning the red pressure lever (J) anticlockwise. 3. Remove the outside label mounting plate (A). 4. Load the label roll with inner winding onto the unwinding roll (B).
- Page 31 Pica II Series Loading Media 10. Unlock the dispense roll (H) by pressing the red locking part (G). 11. Strip some labels from the backing paper and lead the backing material over the dispenser edge (I). 12. Press the dispense roll (H) backwards towards the backing paper.
-
Page 32: Loading Fan-Fold Labels
Loading Media Pica II Series 5.2 Loading Fan-Fold Labels Figure 11 1. Open the printer cover. 2. Open printhead (F) by turning the red pressure lever (E) anticlockwise. 3. Place the fan-fold material (A) from behind to the printer bottom. -
Page 33: Loading Transfer Ribbon
Pica II Series Loading Media 5.3 Loading Transfer Ribbon NOTICE! For the thermal transfer printing method it is necessary to load a ribbon, otherwise when using the printer in direct thermal print it is not necessary to load a ribbon. The ribbons used in the printer have to be at least the same width as the print media. - Page 34 Loading Media Pica II Series 6. Move the printhead (C) down by turning the red lever (D) in clockwise direction until it locks. 7. Close the printer cover. NOTICE! As for the electrostatic unloading the thin coating of the thermal printhead or other electronic parts can be damaged, the transfer ribbon should be antistatic.
-
Page 35: Control Panel
Pica II Series Control Panel Control Panel 6.1 Structure of the Control Panel With the control panel the user can control the operation of the printer. The following processes can be done: Interrupt, continue or cancel print orders. ... -
Page 36: Key Functions
Control Panel Pica II Series State Display Description Pause The print order was interrupted by the Name Stopped user. Name of the printed label. Specified and actual number of prints inside a current print order. Waiting Only with option dispenser:... - Page 37 Pica II Series Control Panel State Description/Function Not ready Change to the online mode. Short press = Label feed. Longer press = Single cut. Short press = Test print. Longer press = Status print. Keep the keys together pressed to access the service functions (page 43).
-
Page 39: Printing
Pica II Series Printing Printing CAUTION! Printhead damage caused by improper handling! Do not touch the underside of the printhead with the fingers or sharp objects. Ensure that the labels are clean. Ensure that the label surfaces are smooth. Rough labels act like emery paper and reduce the service life of the printhead. -
Page 40: Label Feed
Printing Pica II Series 7.3 Label Feed The printer must be in Offline mode. Press key to start the feed of one label. 7.4 Saving Labels The saving of data e.g. text or graphic is done in the internal data memory. -
Page 41: Dispenser Mode
Pica II Series Printing 7.7 Dispenser Mode The label dispenser unit removes the label from backing paper and provides it for further processing. After removing the label, the following print order is activated by the dispenser photocell or an external impulse to the dispenser inputs. The backing paper can be rolled up again with the internal rewinder. -
Page 42: Cutter Mode
Printing Pica II Series 7.8 Cutter Mode CAUTION! Risk of injury, particularly during maintenance, the cutter blades are sharp! Switch off the before attaching the cutter! The cutter may only be used when it is mounted on the printer! ... -
Page 43: Service Functions
Pica II Series Service Functions Service Functions The printer must be in Offline mode. Press and hold the keys (> 3 s) to access the service functions. Adjust Sensibility of Label Photocell Lbl-PC TR S.[V] Reflexion / Transmission Photocell - depending on setting 4.65... - Page 44 Printer emulat. CVPL Press keys to change the protocol. ® Change between CVPL protocol and ZPL II protocol. CVPL: Carl Valentin Programming Language ® ZPL: Zebra Programming Language Press key to confirm the selection. ® The printer performs a restart and ZPL II...
- Page 45 Pica II Series Service Functions Press key to arrive the next menu. ZP X-Adjust Zero point adjustment in Y direction Indication of value in 1/100 mm. After replacing the printhead - the print cannot be continued at the same position on the label, the difference can be corrected across the printing direction.
-
Page 47: Maintenance And Cleaning
Pica II Series Maintenance and Cleaning Maintenance and Cleaning DANGER! Risk of death by electric shock! Disconnect the label printer from power supply before performing any maintenance work. NOTICE! When cleaning the label printer, personal protective equipment such as safety goggles and gloves are recommended. -
Page 48: General Cleaning
Maintenance and Cleaning Pica II Series 9.1 General Cleaning CAUTION! Abrasive cleaning agents can damage the label printer! Do not use abrasives or solvents to clean the outer surface of the label printer. Remove dust and paper fuzz in the printing area with a soft brush or vacuum cleaner. -
Page 49: Cleaning The Printhead
Pica II Series Maintenance and Cleaning 9.3 Cleaning the Printhead Printing can cause accumulation of dirt at printhead e.g. by colour particles of transfer ribbon, and therefore it is necessary to clean the printhead in regular periods depending on operating hours, environmental effects such as dust etc. -
Page 50: Cleaning The Label Photocell
Maintenance and Cleaning Pica II Series 9.4 Cleaning the Label Photocell CAUTION! Label photocell can be damaged! Do not use sharp or hard objects or solvents to clean the label photocell. The label photocell can become dirtied with paper dust and this can adversely affect label detection. -
Page 51: Replacing The Printhead (General)
Pica II Series Maintenance and Cleaning 9.5 Replacing the Printhead (General) NOTICE! The printhead (D) is preinstalled on a head plate (A) and aligned at the factory. Figure 16 Head plate Plug connection signal Plug connection tension Printhead Focal line... -
Page 52: Replacing The Printhead
Maintenance and Cleaning Pica II Series 9.6 Replacing the Printhead Figure 17 1. Remove labels and transfer ribbon from the label printer. Removing the printhead 2. When printhead is closed, loosen the fixing screw (B). 3. Turn red lever (D) counter clockwise to lift up the printhead. -
Page 53: Adjusting The Printhead
Pica II Series Maintenance and Cleaning 9.7 Adjusting the Printhead Complete the following printhead settings to achieve the best possible print image: Align the heating line with the highest point of the print roller. Density of the print image is the greatest at this point. - Page 54 Maintenance and Cleaning Pica II Series An important characteristic for a high quality print is the parallelism of Parallelism the focal line of the thermal printhead to the pressure roll. Because of the fact that the position of focal line of the printhead depends on fluctuations caused by production, it is necessary to adjust the parallelism.
-
Page 55: Error Correction
Pica II Series Error Correction 10 Error Correction In case an error occurred the printer stops and the print order is interrupted. After removing the error, press key to acknowledge the error. An active print order is now interrupted. Press key to print the last printed label once more. - Page 56 Error Correction Pica II Series Error message Cause Remedy Parity error. Check parity. COM PARITY Check baud rate. Check cable (printer and PC). Loss of data at serial interface Check baud rate. COM OVERRUN (RS-232). Check cable (printer and PC).
- Page 57 Pica II Series Error Correction Error message Cause Remedy Real Time Clock function is Change battery. System clock selected but the battery is Change RTC component. empty. Defective RTC. Interrupted connection CPU - Check connection CPU - CF No CF interface CF card.
- Page 58 Error Correction Pica II Series Error message Cause Remedy Internal file system error. Please contact your distributor. Internal file error The max. number (64) of main Delete at least one main Root full directory entries is reached. directory entry and create subdirectories.
- Page 59 Pica II Series Error Correction Error message Cause Remedy As page number either 0 or a Select a number between 1 Invalid page number > 9 is selected. and 9. A page which is not available is Check the defined pages.
- Page 60 Error Correction Pica II Series Error message Cause Remedy Error at programming the RFID Check RFID data definitions. RFID lock label (locked fields). Label was already programmed. Error at programming the RFID Check RFID definitions. RFID programming label. The scanner could not read the...
- Page 61 Pica II Series Error Correction Error message Cause Remedy Transferred GS1-128 bar code Verify bar code data (see GS1- GS1-128 invalid is invalid. 128 bar code specification). Error at EPC calculation. Verify data (see EPC EPC parameter specification). When starting the print order...
- Page 62 Error Correction Pica II Series Error message Cause Remedy The label photocell do not work Check label size and gap size. Print asynchronous in the order as it is expected according to print data. The settings of the photocell Check label photocell settings.
-
Page 63: Index
Pica II Series Index 11 Index C Connecting printer ................24 Connector pin assignment, printer rear ..........6 Control inputs and outputs ..............17 Control panel ..................35 Cutter mode description ..................42 printing .................... 42 E Environmentally-friendly disposal ............6 Error messages/corrections ............... - Page 64 Index Pica II Serie Printer key functions ................36, 37 states ..................35, 36 Printhead adjusting ..................53 parallelism, adjusting ..............54 pressure, adjusting ................. 54 replacing ..................52 Printing ....................39 cutter mode ..................42 label feed ..................40 label feed synchronization ..............
- Page 66 Carl Valentin GmbH Neckarstraße 78 – 86 u. 94 . 78056 Villingen-Schwenningen Phone +49 (0)7720 9712-0 . Fax +49 (0)7720 9712-9901 [email protected] . www.carl-valentin.de...