
Related Manuals for Pioneer Eclipse PE340AS


Summary of Contents for Pioneer Eclipse PE340AS
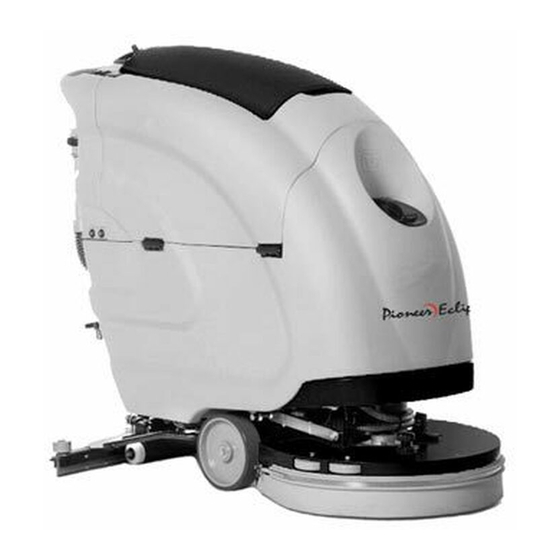
- Page 1 Grou p A company of the Operation Manual Subtitle PE340AS Title We help you shine.™...
-
Page 2: Table Of Contents
CONTENTS ON CONSIGNMENT OF THE MACHINE............................4 SERIAL NUMBER PLATE ................................4 INTRODUCTORY COMMENT ............................... 4 TECHNICAL DESCRIPTION................................4 SYMBOLS USED ON THE MACHINE ............................5 GENERAL SAFETY REGULATIONS ............................6 MACHINE PREPARATION ................................7 1. INTENDED USE ..................................7 2. -
Page 3: On Consignment Of The Machine
If necessary, remember that our assistance service (organized in collaboration with our dealers) is always available for advice or direct intervention. TECHNICAL DESCRIPTION PE340AS Rated power 1260 Working width Width of rear squeegee Work capacity... -
Page 4: Symbols Used On The Machine
SYMBOLS USED ON THE MACHINE Tap symbol Used to indicate water regulation changes. (CDS versions) Detergent symbol Used to indicate detergent regulation changes. (CDS versions) Indicator showing battery charge level on the upper line and hour-counter on the lower line. Indicator showing the type of hour-counter (total) on the upper line and the type of service (none) on the lower line. -
Page 5: General Safety Regulations
GENERAL SAFETY REGULATIONS The regulations below must be carefully followed in order to avoid harm to the operator and damage to the machine. Read the labels on the machine carefully. Do not cover them for any reason and replace them immediately if they become damaged. -
Page 6: Machine Preparation
2. HANDLING THE PACKED MACHINE The machine is contained in specific packaging. It is not possible to place more than two packages on top of each other. The overall dimensions of the package are: PE340AS 1152 1684 3. HOW TO UNPACK THE MACHINE 1. -
Page 7: How To Move The Machine
MACHINE PREPARATION 4. HOW TO MOVE THE MACHINE 1. To safely move the machine, you should use a pallet to support it (positioning wooden wedges to block the wheels, as shown in the previous paragraph). 2. Lower the squeegee (1) by means of the lever or the key (AU version). 3. -
Page 8: Type Of Battery
MACHINE PREPARATION TYPE OF BA TERY To power the mach ine it is necessary to use: • Liquid electroly te lead traction ba tteries. • Sealed traction batteries with gas recombination or gel technology. OTHER TYPES MUST NOT BE USED. The batteries must meet the requisites laid out in standards CEI EN 60254-1:2005- 12 (CEI 21-5) + CEI EN 60254-2:2008-06 (CEI 21-7). -
Page 9: Recharging The Batteries (Version With Built-In Battery Charger)
MACHINE PREPARATION 10. RECHARGING THE BATTERIES (VERSION WITH BUILT-IN BATTERY CHARGER) When replacing the battery, be sure to use batteries suitable for the battery charger installed. The machine is shipped with the battery connector (if supplied) disconnected. Connect the battery connector to the machi ne. -
Page 10: Instrument Panel Components
MACHINE PREPARATION 12. INSTRUMENT PANEL COMPONENTS The instrument panel components are identified as follows: 1- Levers to activate brushes/traction (located beneath the grip) 2- Water outlet regulation switch (CDS versions) 3- Detergent outlet regulation switch (CDS versions) - Autom atic sque egee command lever (automatic version) 6- Automatic base command lever (automatic version) -
Page 11: Assembling The Squeegee
MACHINE PREPARATION 15. ASSEMBLING THE SQUEEGEE For packaging reasons, the squeegee is supplied disassembled from the machine, and must be assembled on the machine connection. You must raise the squeegee connection using the lever or key (AU version), th 1. Raise the squeegee and insert the small left-hand co lumn (1) in the connection hole. -
Page 12: Recovery Tank
MACHINE PREPARATION 18. RECOVERY TANK Check the cap of the drainage tube (on the rear of the machine) is correctly closed. ATTENTION: To avoid foam production, put a minimum quantity of antifoam liquid in the recovery tank before starting to clean. 19. -
Page 13: Solution Tank With Automatic Cds Distribution System
MACHINE PREPARATION SOLUTION TANK WITH AUTOMATIC CDS DISTRIBUTION SYSTEM 1. Check the switch key is on “OFF”. 2. Apply the parking brake by pulling the lever and blocking the handle with the pin. 3. Check the recovery tank is empty before y ou open it. -
Page 14: Assembling The Brush (Bases With Disc Brushes)
MACHINE PREPARATION ASSEMBLING THE BRUSH (BASES WITH DISC BRUSHES) 1. Use the parking brake handle (1) to stop the machine. Unthread the pin (3) from its seat on the handlebars, and in sert it in the holes of the handle (2) to prevent the lever slipping. - Page 15 4. Remove the right-side splash guard by loosen ing the closure element (A). ATTENTION: During this operation, check that there are no people or objects near the brushes.
-
Page 16: Regulating The Solution In Versions Without Cds
MACHINE PREPARATION 5. Insert the brush (the side with 5 teeth) in the tunnel until it couples with the dragging device hub on the opposite side of the tunnel. 6. Insert the idle hub (1) of the mobile support in the brush (the side with 5 teeth). 7. -
Page 17: Work
WORK . PREPARING TO WORK . Connect the connector (1) to the batteries (versions without a bu ilt-in battery charger). ATTENTION: Before using the machine, the operators must be suitable trained. We therefore suggest you read this instruction booklet carefully and read it again whenever difficulties arise while using the machine. -
Page 18: Work
WORK . Release the lever (3) and lower the base. In the case of an automatic machine, lower the key (7). . Lower the squeegee, rotating the lever (4) anticlockwise. If the machine automatic, use the key (5); when you have tu rned it as far as it will go, the suction motor will switch on. -
Page 19: At The End Of The Work
AT THE END OF THE WORK 1. AT THE END OF THE WORK At the end of the work, and before carrying out any type of maintenance: 3. Raise the base by means of the pedal (2) or the key (6) (automatic version). 4. -
Page 20: Daily Maintenance
DAILY M AINTEN ANCE 1. CLEANING THE RECOVERY TANK Raise the suction ver and keep it still using the lifting rod (1) at the side. Remove the drainage tube (2) from its seat. Remove the cap and empty the tank. Rinse the inside of the tank well with a jet of water. -
Page 21: Disassembling And Cleaning The Squeegee
DAILY MAINTENANCE 4. DISASSEMBLING AND CLEANING THE SQUEEGEE Check the squeegee is always clean, for better drying results. To clean it you must: 1. Remove the tube (1) from the squeegee. Remove the squeegee, pushing the plate (2) to the left in order to release the squeegee small column from its seat. - Page 22 DAILY MAINTENANCE Clean the hopper as described in the “AT THE END OF THE WORK” paragraph heck that there are no wires, bits of plastic or anything else at the ends of the b rushes; hese objects could stop the brushes from rotatin g freely.
-
Page 23: Weekly Maintenance
W EEKLY MAINTENANCE CLEA NING THE SQUEEGEE TUBE Every week, or whenever suction seems to be unsatisfactor y, check the squeegee tube is not obstructed. To clean it, proceed as follows: 1. Remove the tube from the sleeve on the squeegee. 2. -
Page 24: Troubleshooting
TROUBLESHOOTING 1. REPLACING THE BRUSHING BASE SPLASH GUARDS To ensure the water is collected efficiently while the machine is working, you should iodically check the state of wear and tear of the side splash guards. When you nee to replace them, proceed as follows: 1. -
Page 25: Insufficient Water On The Brush
The front rubber (3) should be replaced when the s queegee does not rest even ly on the floor and does not generate a closed suction chamber (letting a lot of air enter from the front). To replace the rubber, you must: 4. -
Page 26: Excessive Foam Production
6. EXCESSIVE FOAM PRODUCTION Check that a low foam detergent has been used. If necessary, add a small quantity of antifoam liquid to the recovery tank. Remember that, when the floor is not very dirty, more foam is generated. In this case the detergent solution should be more diluted. -
Page 27: Disposal
DISPOSAL To dispose of the machine, take it to a demolition centre or an authorized collection centre. Before scrapping the machine it is necessary to remove and separate th e following materials and send them to the appropriate collection centers in accordance w ith the environmental hygiene regulations currently in force: •... -
Page 28: Choosing And Using The Brushes
TABLE FOR CHOOSING THE BRUSHES Machine No.° of brushes Code Type of bristles Ø Bristles Ø Brush Length Notes 422189 422971 PE340AS 422972 ABRASIVE 422981 CENTER LOCK PAD PAD LOCKING 422973... - Page 29 CONTENTS PARTS LIST ......................................1. Brushes Base Assembly ................................2. Brushes Control Assembly................................ 3. Squeegee Assembly ................................. 4. Squeegee Control Assembly..............................5. Body Work Assembly ................................6. Tank and Water Unit Assembly..............................7. Suction Assembly ..................................8 Water U nit ....................................
- Page 30 Le descrizioni contenute nella presente pubblicazione non si intendono impegnative. L’azienda pertanto, si riserva il diritto di apportare in qualunque momento, le eventuali modifiche ad organi, dettagli, forniture di accessori, che essa ritiene convenienti per un miglioramento o per qualsiasi esigenza di carattere costruttivo o commerciale. La riproduzione anche parziale dei testi e dei disegni, contenuti nella presente pubblicazione, è...
-
Page 79: Limited Warranty
2) Batteries are warranted by battery manufacturer for (1) year. Call APEC for R/A number. 3) The model PE340AS is warranted to be free from defects in You will need the Engine Serial Number, Machine Serial Number, material and workmanship for a period of one (1) year from date and the Machine Model Number. - Page 80 A company of the Grou p Subtitle Title Amano Pioneer Eclipse Corporation 1 Eclipse Rd PO Box 909 Sparta, North Carolina 28675 USA www.pioneer-eclipse.com +1-336-372-8080 1-800-367-3550 Fax 1-336-372-2913 shine on. © 2011 Amano Pioneer Eclipse Corporation We help you shine.™...