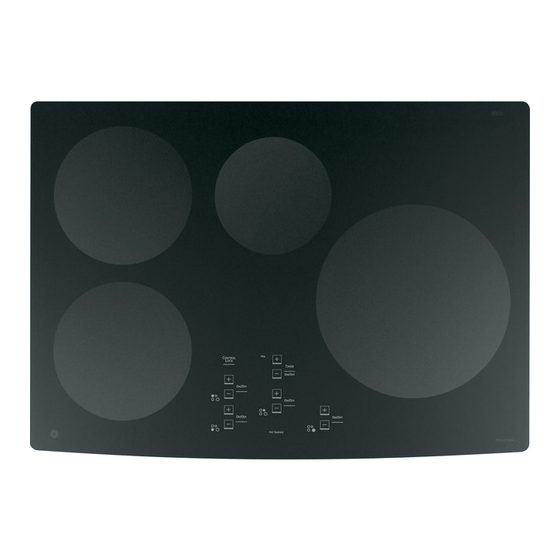
GE PHP900 Installation Instructions Manual
30" induction cooktop
Hide thumbs
Also See for PHP900:
- Owner's manual (72 pages) ,
- Technical service manual (35 pages) ,
- Installation instructions manual (33 pages)
Table of Contents
Quick Links
Installation
Instructions
"If you have questions, call 800.GE.CARES or visit our website at: ge.com"
"In Canada, call 800.561.3344 or visit our website at: geappliances.ca"
BEFORE YOU BEGIN
Read these instructions completely
and carefully.
IMPORTANT
•
for local inspector's use.
IMPORTANT
•
codes and ordinances.
• Note to Installer – Be sure to leave these
instructions with the Consumer.
• Note to Consumer – Keep these instructions
for future reference.
• Product failure due to improper installation is
not covered under the Warranty.
WARNING
properly grounded.
ATTENTION INSTALLER
•
COOKTOPS MUST BE HARD WIRED (DIRECT
WIRED) INTO AN APPROVED JUNCTION BOX.
A "PLUG AND RECEPTACLE" IS NOT PERMITTED
ON THESE PRODUCTS.
• Proper installation is the responsibility
of the installer and product failure due to
improper installation is NOT covered under
warranty.
PARTS INCLUDED
Baffle
(For all installations
except over an oven.)
Foam Tape
31-10667
(06-07 JR)
— Save these instructions
— Observe all governing
— This appliance must be
— ALL
2 Hold-Down Brackets
6 Hex-Head Screws
2 Thumbscrews
30" Induction Cooktop
PHP900, ZHU30
MATERIALS YOU WILL NEED
Junction Box
(Sized for conduit
per local electrical
codes.)
TOOLS YOU WILL NEED
Phillips Head
Screwdriver
1/4" Nut Driver
Ruler or Straightedge
Safety Glasses
1
Large Size
Wire Nuts
Pencil
1/8" Drill Bit & Electric or
3/4" Strain Relief
Saber Saw
Hand Drill
Table of Contents

Summary of Contents for GE PHP900
-
Page 1: Installation Instructions
Installation 30″ Induction Cooktop Instructions PHP900, ZHU30 “If you have questions, call 800.GE.CARES or visit our website at: ge.com” “In Canada, call 800.561.3344 or visit our website at: geappliances.ca” BEFORE YOU BEGIN MATERIALS YOU WILL NEED Read these instructions completely and carefully. -
Page 2: Important Safety Instructions
Installation Instructions IMPORTANT SAFETY INSTRUCTIONS FOR YOUR SAFETY ELECTRICAL REQUIREMENTS • For Personal Safety, remove house fuse or open This appliance must be supplied with the proper circuit breaker before beginning installation. voltage and frequency, and connected to an Failure to do so could result in serious injury individual, properly grounded branch circuit, or death. -
Page 3: Pre-Installation Checklist
Installation Instructions PRE-INSTALLATION CHECKLIST BEFORE YOU BEGIN ADVANCE PLANNING Combination Installations WARNING – The electrical power to These cooktops may be installed in combination the cooktop supply line must be shut off while with an approved downdraft vent or a single oven. connections are being made. -
Page 4: Preparing The Opening
Installation Instructions PREPARING THE OPENING VERTICAL CLEARANCES (CONT.) The following MINIMUM clearance dimensions must be maintained. IMPORTANT: To ensure long life of the 13″ MAX. Depth of uprotected 2″ MIN. Clearance electronic components, allow a minimum of overhead cabinets from cutout to 12″... -
Page 5: Installing Option-For Ge Monogram
Installation Instructions INSTALLING OPTION—FOR GE MONOGRAM MONOGRAM INDUCTION COOKTOP COOKTOP REQUIREMENTS AND MONOGRAM DOWNDRAFT VENT The countertop must have a deep flat surface to COMBINATION INSTALLATION ONLY. accommodate the cooktop and vent. Countertops with a rolled front edge and backsplash will not The installation of the downdraft vent with provide the flat surface area required. -
Page 6: Installing Options
INSTALLING OPTIONS COOKTOP INSTALLATION OVER A POWER SUPPLY GE OR GE MONOGRAM SINGLE OVEN The oven requires a separate, properly grounded 20 Amp, 3-wire 208 or 240 volt, 60 Hz power supply. These cooktops may be installed over a single The cooktop requires a separate 40 Amp, 3-wire, oven. -
Page 7: Electrical Connections
Installation Instructions ELECTRICAL CONNECTIONS NEW CONSTRUCTION AND BRANCH THREE-CONDUCTOR BRANCH CIRCUIT CIRCUIT CONNECTION CONNECTION When connecting to a three-conductor branch WARNING: Improper connection circuit, if local codes permit: of aluminum house wiring to copper a. Connect the cooktop ground conductor lead leads can result in an electrical hazard or to the brach circuit ground using a wire nut. -
Page 8: Installing The Cooktop
Installation Instructions INSTALLING THE COOKTOP PROTECT SURFACE OF COOKTOP ATTACH FOAM TAPE Place a towel or tablecloth onto the countertop. Apply the foam tape around the outer edge of the Lay the cooktop upside down onto the protected glass. Do not overlap the foam tape. surface. - Page 9 Installation Instructions INSERT COOKTOP INTO CUTOUT ATTACH HOLD-DOWN BRACKETS TO CABINET Insert the cooktop centered into the cutout opening. Make sure the front edge of the countertop is Open the cabinet door. Install the second screw parallel to the cooktop. Make final check that all through the bracket and tighten.
-
Page 10: Pre-Test Checklist
Installation Instructions CHECKLISTS PRE-TEST CHECKLIST OPERATION CHECKLIST Remove all protective film, if present, and any Remove all items from the top stickers. of the cooktop surface. Check to be sure that all wiring is secure and Turn on the power to the cooktop. not pinched or in contact with moving parts.


