
Related Manuals for Honeywell Ademco Vista-48LA


Summary of Contents for Honeywell Ademco Vista-48LA
- Page 1 ADEMCO VISTA-48LA Security System Installation and Set-Up Guide K0749-6EN 5/05 Rev. A...
-
Page 3: Table Of Contents
Table Of Contents • • • • • • • • • • • • • • • • • • • • • • • • • • • • • • • • • • • • • Features and Installation Highlights...................... - Page 4 Table Of Contents (continued) Menu Mode Programming..........................5-1 About Zone Programming (∗56 and ∗58 Menu Modes) ..................5-1 ∗56 Zone Programming Procedure ........................5-1 Completing Zone Programming........................5-4 ∗58 Expert Programming Mode Procedures ....................5-4 Wireless Key Programming Templates......................5-6 About Output Device Programming (*79/*80 Menu Mode) ................5-8 *79 Menu Mode: Output Device Mapping.......................5-8 *80 Menu Mode: Defining Output Functions ....................5-10 About Zone Lists (∗81 Menu Mode) .......................5-13...
-
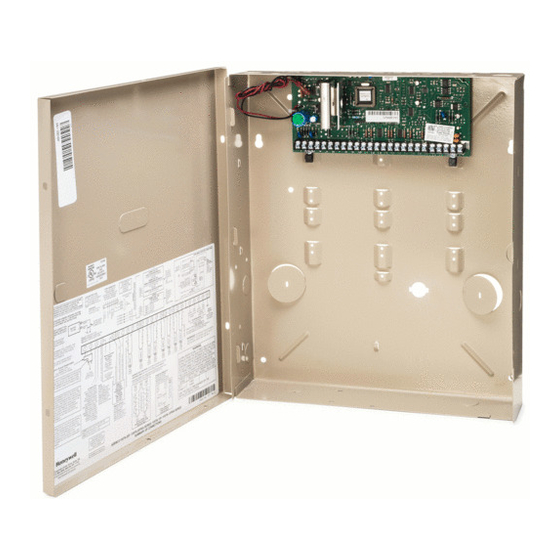
Page 5: Features And Installation Highlights
S E C T I O N Features and Installation Highlights • • • • • • • • • • • • • • • • • • • • • • • • • • • • • • • • • • • • • • • Capabilities •... -
Page 6: Compatible Devices
Installation and Setup Guide Compatible Devices • Supports up to 8 Addressable Keypads: 6148/6150 Fixed-Word Display Keypads, 6164 Alpha Keypad, 6128RF/6128RFH/6150RF/6160RF Keypad/Transceivers, 6160V Voice Keypad • Supports up to two (2) Touch Screen (AUI) Devices (Symphony, 6270), which are in addition to the standard eight (8) addressable keypads. -
Page 7: Mounting And Wiring The Control
S E C T I O N Mounting and Wiring the Control • • • • • • • • • • • • • • • • • • • • • • • • • • • • • • • • • • • • • • • This section describes the procedures for mounting and wiring this control and its peripheral devices. -
Page 8: Mounting Board With Rf Receiver
Installation Instructions Notes Mounting Board with RF Receiver • Do not mount the cabinet on or near metal a. Remove the receiver board from its case, then objects. This will decrease RF range and/or block insert the top of the board into the slots at the top RF transmissions from wireless transmitters. -
Page 9: Wiring To Keypads
Mounting and Wiring the Control Notes Wiring to Keypads • Typical Fixed-Word Display: Connect keypads to the control’s keypad terminals as 6128RF/6148/6150/6150RF/6150V shown on the Summary of Connections diagram. • Typical Alpha Display: 6160/6160V/6160RF/6164 Determine wire size using the Wiring Run Chart •... -
Page 10: Sounder (Siren) Connections
Installation Instructions Notes Sounder (Siren) Connections • The 12VDC sounder output activates when an 1. Make sounder connections to alarm output terminals 3 alarm occurs. (+) and 4 (–). • Total current drain from this output cannot For supervised output, continue with steps 2 and 3. exceed 2 amps (going beyond 2 amps will 2. -
Page 11: Backup Battery
Mounting and Wiring the Control Notes Backup Battery IMPORTANT: The panel will not power up 1. Place the 12-volt backup battery in the cabinet. initially on battery power only. You must plug the 2. After all connections to the control are completed and transformer in first, and then connect the battery. -
Page 12: Basic Wired Zones
Installation Instructions Notes Basic Wired Zones • EOLR: If the EOLR is not at the end of the loop, Normally Open Zones/Normally Open EOLR Zones the zone is not properly supervised and the system 1. Connect open circuit devices in parallel across the may not respond to an “open”... -
Page 13: 4219/4229 Expansion Zones
Mounting and Wiring the Control Figure 7. 4-Wire Smoke Detector Connections RELAY PROGRAM AUX PWR RELAY AUX PWR OUTPUT AS ZONE TYPE 54 TERMINALS POWER (FIRE ZONE TO OUTPUT 17 N.O. SUPERVISION RESET) PROGRAM OUTPUT 17 RELAY MODULE FOR "OUT NORM POWER N.C. -
Page 14: 6164 Keypad Expansion Zones
Installation Instructions Notes 6164 Keypad Expansion Zones • Each 6164 keypad supports up to 4 wired 1. Connect each keypad to the control’s keypad expansion EOLR or double-balanced zones and terminals. one relay output. 2. Using the keypad’s program mode, assign each •... -
Page 15: Installing The Rf Receiver
Mounting and Wiring the Control Notes Installing the RF Receiver • The receiver is supervised and a trouble report is Use one of the following receivers: sent (“CHECK 100” displayed) if communication RF Receiver Number of Zones between the panel and receiver is interrupted, or 5881ENL up to 8 (including keyfob buttons) if no valid RF signals from at least one supervised... -
Page 16: Installing A Keyswitch
Installation Instructions Transmitter Battery Life • See Wireless Transmitter paragraph in the Limitations of This Alarm System statement located at the end of this manual for information on transmitter battery life. • Some transmitters (e.g., 5802 and 5802CP) contain long-life but non-replaceable batteries, and no battery installation is required. -
Page 17: Connecting Relay Modules
Mounting and Wiring the Control Notes Connecting Relay Modules • Use 4204/4229 modules or 6164 keypad. 1. Mount either remotely or in the control panel. • Supervision: 4204/4229 modules and 6164 2. Connect to control’s keypad terminals using the keypad are supervised against removal. The connector harness supplied with the module. -
Page 18: Powerline Carrier Devices
Installation Instructions Notes Powerline Carrier Devices • When using Powerline Carrier devices, you must 1. Install up to 16 powerline carrier devices (if no relays use a Powerline Carrier Device Modulator. It are used) according to the instructions included with supplies signals from the control panel through each. -
Page 19: On-Board Triggers
Mounting and Wiring the Control Notes On-Board Triggers • There are two on-board triggers that can be Connect field wiring to the desired trigger pin on the used to activate output devices. 8-pin trigger connector centrally located above the • These outputs are normally high, and go low terminal strip. -
Page 20: Phone Line Connections
Installation Instructions Notes Phone Line Connections • If you are using an Audio Alarm Verification Connect incoming phone line and handset wiring to the (AAV) unit, refer to Audio Alarm Verification main terminal block (via an RJ31X jack) as shown in the (AAV) section for special wiring connections. -
Page 21: Programming Overview
S E C T I O N Programming Overview • • • • • • • • • • • • • • • • • • • • • • • • • • • • • • • • • • • • • • • About Programming You can program the system at any time, even at the installer's premises prior to the actual installation. -
Page 22: Keypads
Installation Instructions Keypads Keypads are identified by predefined addresses (starting at address 16) as follows: Address Keypad Program Field • always enabled for partition 1, all sounds enabled. keypad 1 NOTE: First keypad is address 16. • data field *190 keypad 2 •... -
Page 23: Function Keys
4. If using child-not-home pager report, define the report schedule using Scheduling mode (master code + [#] [6] [4] then select event type “03”). 5. If using a function key to manually send a message to a pager, see Function Keys paragraph below. 6. - Page 24 Installation Instructions • Assign to a zone covering a sensitive area such as a stock room, drug supply Type 05 Trouble when room, emergency exit door, etc. Disarmed/ • Can also be used with a sensor or contact for an area where immediate Alarm when Armed notification of an entry is desired.
- Page 25 • Usually assigned to all sensors or contacts on windows and infrequently used Type 24 Silent Burglary exterior doors where siren sounding is NOT desired for alarms. • Provides an instant alarm, with NO audible indication at any keypad or external sounder, if the zone is faulted when the system is armed in the Away, Stay, Instant, or Maximum modes.
-
Page 26: Mechanics Of Programming
Installation Instructions Mechanics of Programming To program the system from a keypad: • You must use a 2-line Alpha display keypad. • All partitions must be disarmed. Data Field Programming Procedures Task Procedure A) Press both [ ∗ ] and [#] at the same time within 50 seconds after power is applied Entering Program Mode to the control, OR B) After power-up, enter [Installer code (4-1-1-2)] + 8 0 0 (long beep indicates one... - Page 27 Table of Device Addresses †† This Device Uses Address Reports as Enabled By… RF Receiver *56 zone programming: input device type entry Alternative Communication automatic if output to ACM field *29 enabled † Media (ACM) Telecommand Voice Module 17-23 117-123 same as keypad enables;...
- Page 28 Installation Instructions...
-
Page 29: Data Field Programming
S E C T I O N Data Field Programming • • • • • • • • • • • • • • • • • • • • • • • • • • • • • • • • • • • • • • • About Data Field Programming The following pages list this control’s data fields in numerical order. -
Page 30: Zone Sounds & Timing
Installation Instructions FIELD TITLE and DATA ENTRIES EXPLANATION Powerline Carrier devices require a House ID, identified in this field. Powerline Carrier Device (X-10) Program Powerline Carrier devices in interactive modes ∗79, *80 and House ID *81. 0 = A 6 = G # + 11 = L 1 = B 7 = H... -
Page 31: Dialer Programming ( ∗ 40 - ∗ 50)
Upon entering, the system must be disarmed before the time entered Entry Delay 1 expires, otherwise it sounds an alarm. Common area zones use same 00 - 96 = 0 - 96 seconds delay as partition 1. 97 = 120 seconds 98 = 180 seconds 99 = 240 seconds Entry Delay 2... - Page 32 Installation Instructions FIELD TITLE and DATA ENTRIES EXPLANATION Enter up to 10 digits, depending on the report format selected in field Part. 1 Secondary Subs. Acct. No. *48. To clear entries from field, press ∗44∗. Enter digits 0–9; # + 11 for B, # + 12 for C, # + 13 for D, # + 14 for E, # + 15 for F.
-
Page 33: System Status Report Codes
Intended for use with Alternative Communication Media reporting. Dynamic Signaling Priority You must also enable field ∗29, ECP Contact ID Output for ACM. 0 = Primary dialer first; Select the initial reporting destination for messages as follows: 1 = ECP Contact ID output first. Primary Dialer First selected (0): •... -
Page 34: Miscellaneous System Fields
Installation Instructions Sent periodically to test that the communicator and phone lines are Test Report Code operational. Frequency of report is set in Scheduling mode (event 11). 0 = disable; 1-F = see description above ∗59 Sent upon disarming of the system in the selected partitions. Open Report Code 0 = disable;... - Page 35 FIELD TITLE and DATA ENTRIES EXPLANATION Auto-Stay Arm If enabled, the system will automatically change AWAY or MAXIMUM modes to STAY and INSTANT modes respectively if the entry/exit door 0 = no is not opened and closed within the exit delay time after a user arms in 1 = partition 1 only AWAY mode from a wired keypad (non-RF device).
-
Page 36: Installation Instructions
Installation Instructions FIELD TITLE and DATA ENTRIES EXPLANATION If an Event Logging selection is made in field ∗90, a message can be Event Log Full Report Code 0 = disable; 1-F = see description above ∗59 sent to the central station receiver when the log is 80% full. If the log becomes full, new messages overwrite the oldest messages in the log. -
Page 37: Pager Programming Fields
FIELD TITLE and DATA ENTRIES EXPLANATION Refer to the chart below and program this field accordingly. Ring Count For Downloading phone answer/fax down- 0 = Disable Monitoring Station initiated Set field ∗ ∗ ∗ ∗ 95 to… module machine loading downloading 1–14 = number of rings before control 1-14 (not 0) -
Page 38: Miscellaneous System Fields
Installation Instructions Pager 2 Phone No. If you enter fewer than 20 digits, exit by pressing [∗] and next field *163 number. To clear entries from this field, press ∗163∗. Enter up to 20 digits See field ∗161 for explanation. If fewer than 16 characters, exit by Pager 2 Characters *164 pressing [∗] and next field number. - Page 39 FIELD TITLE and DATA ENTRIES EXPLANATION Select desired option. See field *22 for related options. *178 RF Supervision / RF Jam Option Entry 0: RF jam conditions report as Trouble zone 90 (Contact ID 0 = RF supervision and RF jam detection code 344, RF Rcvr Jam Detect) plus a zone trouble report for reporting each RF zone in the system (CID code 383, Trouble Sensor...
- Page 40 Installation Instructions Downloader Suppression Select the desired options. *185 Options 0 = no suppression 1 = suppress user code viewing 2 = suppress commands and program download when armed 3 = suppress user code viewing, commands, and program download when armed* Select the desired keypad display options.
-
Page 41: Keypad Programming Fields
AUI Device and Keypad Programming Fields NOTE: Each keypad must be assigned a unique address. Keypads programmed with the same address will give unpredictable results. FIELD TITLE and DATA ENTRIES EXPLANATION The System supports up to two touch screen style keypads (e.g., AUI Device 1 and 2 Enable *189 Symphony Advanced User Interface, and 6270 Touch Screen Keypad). - Page 42 Installation Instructions 4-14...
-
Page 43: Menu Mode Programming
S E C T I O N Menu Mode Programming • • • • • • • • • • • • • • • • • • • • • • • • • • • • • • • • • • • • • • • • • • • • • • • • • •... - Page 44 Installation Instructions PROMPT VALID ENTRIES EXPLANATION Zone Type (ZT) Each zone must be assigned to a zone type, which defines the way in 10 Zone Type which the system responds to faults in that zone. 00-24, 77, 82, 90-93 = zone Perimeter Enter the Zone Type code from the list below: type (see table at right)
- Page 45 PROMPT VALID ENTRIES EXPLANATION Used only when enrolling wireless transmitters. Serial number Entry 10 INPUT S/N: a. Transmit two open/close sequences. If using a button-type and Loop Number Entry A 0 2 2 - 4 0 6 4 transmitter, press and release the button twice, but wait about 4 see explanation seconds before pressing the button the second time.
-
Page 46: Completing Zone Programming
Installation Instructions Completing Zone Programming When you have finished programming all zones, test each zone using the system’s TEST mode. Do not use the Sensor Sniffer Mode for checking wireless transmitting devices, as it will only check for transmission of one zone on a particular transmitter, NOT the zones assigned to each additional loop. - Page 47 PROMPT VALID ENTRIES EXPLANATION Manually enter the serial number (found on the transmitter label), by Serial number 10 INPUT S/N: typing digits in the “X” locations, using the [A] (advance) or [B] (back) S/N = serial number A X X X - X X X –...
-
Page 48: Wireless Key Programming Templates
Installation Instructions Wireless Key Programming Templates This procedure programs the wireless keys, but a key is not active until it is assigned to a user number (see System Operation section, assigning attributes command). If the D key was previously pressed (from *58 Menu mode) to enter and duplicate 5804 and/or 5804BD wireless keys, the following screens appear. - Page 49 If the serial number transmitted does not match the serial number Not Confirmed Entd A022-4063 entered, a display similar to the one shown will appear. If the loop [∗] to continue Rcvd A022-4064 number does not match, it will also be displayed. If so, activate the button on the wireless key once again.
-
Page 50: About Output Device Programming (*79/*80 Menu Mode)
Installation Instructions About Output Device Programming (*79/*80 Menu Mode) Output Devices: The system supports up to 16 relays and/or Powerline Carrier devices (X-10 devices) plus 2 built-in trigger outputs in any combination. These 18 “outputs” are assigned to system-wide output numbers (01-18). Use *79 Menu Mode to assign output numbers and map them to device addresses. - Page 51 Start Output Device Mapping by pressing *79 while in Data Programming Mode. The following prompts are displayed: ∗ ∗ ∗ ∗ 79 Menu Mode PROMPT VALID ENTRIES EXPLANATION Device Output Number This is the logical (or reference) relay number as used in the system. ENTER OUTPUT NO.
-
Page 52: *80 Menu Mode: Defining Output Functions
Installation Instructions *80 Menu Mode: Defining Output Functions Use this mode to program output function definitions (up to 48 functions) that provide automated control of any of the output devices, based on events occurring on individual zones or zones with certain zone types. - Page 53 Select where the initiating event for this output definition is to occur Activated By 01 Activated By: as follows: 0 = delete Zone List 0 = delete (deletes the output function and any previous 1 = zone list programming;-see prompt below) 2 = zone type 3 = zone number 1 = zone list (go to “A”...
- Page 54 Installation Instructions “C” If zone number was selected, this screen appears. Zone Number 01 Enter Zn No. Enter the desired zone number associated with this output number. Press [ ∗ ] to continue. Enter the zone event that will activate this output. 01 Enter Event 0 = restore;...
-
Page 55: About Zone Lists (∗81 Menu Mode)
About Zone Lists (∗ ∗ ∗ ∗ 81 Menu Mode) Zone lists let you group individual zones for use with certain system actions. The following table shows the available zone lists and their purposes: List No. Used for… 1, 2 general purpose chime-by-zone linked zones... -
Page 56: About Function Key Programming (∗57 Menu Mode)
Installation Instructions About Function Key Programming (∗ ∗ ∗ ∗ 57 Menu Mode) The system provides the ability to program each of the four keypad function keys to perform one of 12 system operations. The end user can then activate the function by simply pressing and holding the programmed key for 2 seconds. -
Page 57: About Descriptor Programming (*82 Menu Mode)
About Descriptor Programming (*82 Menu Mode) The system lets you directly enter zone descriptors for each protection zone so when an alarm or trouble occurs in a zone, an appropriate description for that zone's location can be displayed at the keypad. Each description is composed of up to 16 characters. -
Page 58: Configurable Zone Type Programming (*83 Menu Mode)
Installation Instructions Configurable Zone Type Programming (*83 Menu Mode) Start Configurable Zone Type Programming Mode by pressing ∗ 83 while in Data Programming mode. Enter the configurable zone type number being programmed. Zone Type Number E n t e r Z o n e T y p e 90-93 = zone type ( 0 0 = q u i t ) [∗] to continue... - Page 59 If selected, faults on zones assigned to this zone type will delay Dial Delay? 9 0 D i a l D e l a y reporting for whatever length of time that is selected in dial delay 0=no 0 = N o , 1 = Y e s (*50).
-
Page 60: Programming Installer And User Schedules
Installation Instructions Programming Installer and User Schedules The system provides up to 32 schedules, which can be used to control 11 types of system events at pre- defined times. 24 schedules are intended for use by the end-user, and 8 are reserved for the installer. In addition, some events are also reserved for the installer only (listed in the “Enter Event”... - Page 61 Enter the event’s start time and days of the week to occur. Start Time S T A R T S M T W T F S To select days, position the cursor under the desired days using the † 01-12 (00-23) = hour 0 0 1 0 0 0 0 H H M M A M...
- Page 62 Installation Instructions 5-20...
-
Page 63: System Communication And Operation
S E C T I O N System Communication and Operation • • • • • • • • • • • • • • • • • • • • • • • • • • • • • • • • • • • • • • • Panel Communication with Central Station This system accommodates several formats for reporting alarms and other system conditions to the Central Station. - Page 64 Installation Instructions The following table lists codes for reports sent in different formats: Code for Code for Type of 3+1/4+1 3+1/4+1 Code for Report Standard Expanded 4+2/Robofon 8** Alarm SSS(S) A SSS(S) A SSSS (SS) AZ AAA(A) Z Trouble SSS(S) T SSS(S) T SSSS (SS) Tt TTT(T) t...
-
Page 65: Robofon 8 Format
Robofon 8 Format send data in a pulsed frequency format in the following protocol: Robofon 8 format First bit Last Tone = 0, No tone = 1 Freq = 1000Hz ± 5Hz First Byte Last Byte ‘U’ 50 baud (20ms / bit) 200ms / char, 11 chars / message (‘U’... -
Page 66: Ademco Contact Id
Installation Instructions ® ADEMCO Contact ID ® ADEMCO and Robofon Contact ID Reporting takes the following format: CCCC(CCCCCC) Q EEE GG ZZZ where: CCCC(CCCCCC) = 4-digit or 10-digit Customer (subscriber) ID Q = 1-digit Event qualifier, where: E = new event , and R = restore EEE = 3-digit (hexadecimal) Event code (see central office receiver manual for a complete list of event codes) GG = 2-digit Partition Number (system messages show “00”) -
Page 67: Security Codes
Security Codes The system supports up to 48 security codes, which can each be assigned one of 5 authority levels. The authority level determines the functions each code can perform as follows: Authority Levels (authority levels can be assigned to users 3-49 only; users 1 and 2 cannot be changed) Level User No. -
Page 68: Keypad Functions
Installation Instructions Keypad Functions The following is a brief list of system commands. For detailed information concerning system functions, refer to the User's Manual. Keypad Commands Function Description Silence alarms Pressing any key will silence the keypad sounder for 10 seconds. Disarming the system will silence both keypad and external sounders. -
Page 69: Follow-Me Feature
Follow-Me Feature • This feature lets users of each partition enter a phone number that the system will call in the event of an alarm at the protected premises, thus alerting the user to the alarm. • The message sent consists of a series of multi-frequency (DTMF) tones (beeps). •... -
Page 70: Various System Trouble Displays
Installation Instructions Various System Trouble Displays Alpha Display Fixed Disp. Meaning ALARM CANCELED Appears if an exit or interior zone contained a fault during closing at the time the Exit Delay ended (e.g., exit door left open and the zone was not auto-bypassed), but the system was disarmed during the Entry Delay time. -
Page 71: Testing The System
S E C T I O N Testing the System • • • • • • • • • • • • • • • • • • • • • • • • • • • • • • • • • • • • • • • About Test Procedures After the installation is complete, you should perform the following tests: System Test:... -
Page 72: Go/No Go Test Mode
Installation Instructions NOTES: • All BR type RF units (e.g., 5804) must physically be activated to clear the display. • When one button of a transmitter (RF, UR, or BR) is activated, all zones assigned to other buttons on that transmitter are cleared. This also applies to multiple-loop transmitters (e.g. 5816 and 5817). •... -
Page 73: Specifications & Accessories
S E C T I O N Specifications & Accessories • • • • • • • • • • • • • • • • • • • • • • • • • • • • • • • • • • • • • • • SECURITY CONTROL 1. -
Page 74: Series Transmitter Input Loop Identification
Installation Instructions 2-Wire Smoke Detector: Detector Type System Sensor Model No. Photoelectric w/heat sensor, direct wire 2300TB Photoelectric, direct wire 2400 Photoelectric w/heat sensor, direct wire 2400TH Photoelectric 2451 w/B401B base Photoelectric w/heat sensor 2451TH w/B401B base Ionization, direct wire 1400 Ionization 1451 w/B401B base... - Page 75 Compatible 5800 Series Transmitters Table Model Product Input Type Description • Four pushbuttons, each with a unique input (loop) code. 5801 Wireless Panic UR or RF • Programmable responses (e.g., Panic, Arm, Disarm, etc.) Transmitter • Has single pushbutton. 5802 Pendant BR Only (Personal...
- Page 76 Installation Instructions – NOTES –...
-
Page 77: Limitations And Warranty
S E C T I O N Limitations and Warranty • • • • • • • • • • • • • • • • • • • • • • • • • • • • • • • • • • • • • • • WARNING THE LIMITATIONS OF THIS ALARM SYSTEM While this System is an advanced design security system, it does not offer guaranteed protection against burglary, fire or other emergency. - Page 78 Installation Instructions – INDEX – 1321..........2-4 DIP Switches........2-9 Phone Line........2-14 24-Hour Audible Alarm ..... 3-4 Disarming......3-4, 5-11, 6-6 Phone Module1-1, 2-3, 2-5, 2-14, 4-2, 4- 24-Hour Auxiliary Alarm ....3-4 Double-Balanced......2-6 24-Hour Silent Alarm ......3-4 Enrolling ........
- Page 79 Figure 17. VISTA-48LA Summary of Connections...
-
Page 80: Limited Warranty
Honeywell factory service. Connection of any device(s) to a communicating bus of a Honeywell security system (e.g., keypad bus, polling loop) other than those manufactured or approved by Honeywell shall void this warranty. For warranty service, return product(s) transportation prepaid, to the nearest authorised distributor.