Table of Contents
Table of Contents

Related Manuals for Suzuki SP-47


Summary of Contents for Suzuki SP-47
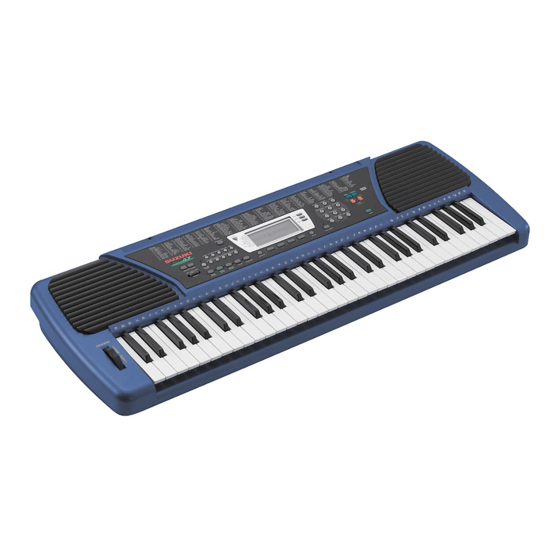
- Page 1 SUZUKI Pianos SP-47 Portable Keyboard OWNER’S MANUAL SUZUKI...
- Page 3 WELCOME! We would like to express our appreciation and congratulate you for purchasing this Suzuki portable keyboard. This keyboard has been designed to provide you with years of musical enjoyment. State of the art electronics and elegant functionality are a trademark of all Suzuki Keyboards.
- Page 4 GENERAL PRECAUTIONS CAUTION RISK OF ELECTRIC SHOCK DO NOT OPEN CAUTION: TO REDUCE THE RISK OF ELECTRIC SHOCK, DO NOT REMOVE COVER OR BACK NO USER-SERVICEABLE PARTS INSIDE REFER SERVICING TO QUALIFIED SERVICE PERSONNEL INSTRUCTIONS PERTAINING TO A RISK OF FIRE, ELECTRIC SHOCK OR INJURY: The lightning flash with arrowhead symbol, within an equilateral triangle, is intended to alert the user to the presence of uninsulated or “dangerous voltage”...
- Page 5 TAKING CARE OF YOUR DIGITAL PIANO This Suzuki digital piano will supply you with years of musical enjoyment if you follow the simple rules listed below. LOCATION CLEANING Do not expose the instrument to the follow- Clean the cabinet and panel with a dry ing conditions to avoid deformation, discol- soft cloth.
-
Page 6: Table Of Contents
TABLE OF CONTENTS EASY SET UP AND QUICK PLAY ..........7 PANEL CONTROLS ..............8 WHEEL ..................16 DISPLAY ................... 17 DEMO ..................18 KEYBOARD VOICES ..............19 Voice Selection ................19 Layer ..................20 Lower ..................21 RHYTHM SECTION ..............22 Rhythm Style Select .............. -
Page 7: Easy Set Up And Quick Play
Please note, to prevent possible damage due to battery leakage, remove the batteries from the instrument if it is not to be used for an extended period of time. Battery leakage is not covered under the SUZUKI warranty. USING THE AC POWER ADAPTOR: Plug the output cable of the supplied power adaptor into the DC 12V IN jack on the back of the unit. -
Page 8: Panel Controls
PANEL CONTROLS SUZUKI TEMPO/TAP SP- 47 – DANCE 70’s ROCK BOOGIE TECH.POP LOUNGE COUNTRY REGGAE S.BALLAD RHUMBA MASTER VOLUME SAVE ACCOMP MODE SYNC START/ INTRO/ FILL IN VARIATION START STOPT ENDING POWER SWITCH - Slide the power switch to the middle, ON setting, to turn the piano on. - Page 9 PANEL CONTROLS SUZUKI TEMPO/TAP SP- 47 – DANCE 70’s ROCK BOOGIE TECH.POP LOUNGE COUNTRY REGGAE S.BALLAD RHUMBA MASTER VOLUME SAVE ACCOMP MODE SYNC START/ INTRO/ FILL IN VARIATION START STOPT ENDING ACCOMP MODE - Most of the rhythm styles have an additional auto accompaniment, often called the auto bass chord.
- Page 10 PANEL CONTROLS SUZUKI TEMPO/TAP SP- 47 – DANCE 70’s ROCK BOOGIE TECH.POP POP LOUNGE COUNTRY REGGAE S.BALLAD RHUMBA MASTER VOLUME SAVE ACCOMP MODE SYNC START/ INTRO/ FILL IN VARIATION START STOPT ENDING SYNC START - Synchronized start mode makes the auto accom- paniment standby.
- Page 11 PANEL CONTROLS SUZUKI TEMPO/TAP SP- 47 – DANCE 70’s ROCK BOOGIE TECH.POP POP LOUNGE COUNTRY REGGAE S.BALLAD RHUMBA MASTER VOLUME SAVE ACCOMP MODE SYNC START/ INTRO/ FILL IN VARIATION START STOPT ENDING INTRO / ENDING - Most of the rhythm styles can be started with an appropriate introduction.
- Page 12 PANEL CONTROLS OVERALL DSP i VOICE TUNING i GRADE i LAYER VOLUME i LOWER TALKING i TRANSPOSE i TOUCH i SPLIT POINT i METRO i REG/OTS STORE OVERALL - The OVERALL button is used to adjust or change the parameter of a number of settings. The DSP (or depth), tuning, accompaniment volume, grade and vocal promp for the music training lessons, transpose, touch response (or curve velocity), split point and the metronome are all use the OVERALL button.
- Page 13 PANEL CONTROLS OVERALL DSP i VOICE TUNING i GRADE i LAYER VOLUME i LOWER TALKING i TRANSPOSE i TOUCH i SPLIT POINT i METRO i REG/OTS STORE OTS (ONE TOUCH SETTING) - The OTS (ONE TOUCH SET- TING) will automatically select the optimum keyboard settings for your previously selected rhythm style.
- Page 14 PANEL CONTROLS SONG LESSONS G PIANO E PIANO ORGAN VIBRAPHONE STRINGS NYLON GTR. – LEVEL + SAXOPHONE FLUTE CHOIR RESET BRASS STL. DRUMS SYN. VOICE – VOICE DIRECT DEMO VOICE DIRECT - When the VOICE DIRECT button is engaged, the numeric pad buttons can be used as voice quick select but- tons.
- Page 15 PANEL CONTROLS SONG LESSONS G PIANO E PIANO ORGAN VIBRAPHONE STRINGS NYLON GTR. – LEVEL + SAXOPHONE FLUTE CHOIR RESET BRASS STL. DRUMS SYN. VOICE – VOICE DIRECT DEMO SONG - This music training feature can be used as an aid to learn 100 songs built into this piano.
-
Page 16: Wheel
WHEEL The pitch bend wheel is located on the left of the keyboard. PITCH BEND – PITCH BEND WHEEL - The PITCH BEND wheel, located on the left side of the keys, allows you to smoothly rise or lower the played instruments pitch. During or immediately after a note or notes have been played on the keyboard, roll the PITCH BEND wheel up, away from you, to raise the pitch, or down, towards you, to lower the pitch of the... -
Page 17: Display
DISPLAY This Suzuki piano is equipped with a backlit LCD multi-display. It will display the voice, accompanaiment type and other parameter changes in real time. The notes that are played will be indicated on the keyboard replica, and shown on the scale. -
Page 18: Demo
DEMO PLAYING THE DEMO SONGS - This piano many different demonstration songs that are designed to showcase the different sampled voices that are available. The display will show the song number with a “DEMO” suffix. When playing all the songs, “ALL” will appear on the display initially, and will change to the demo song number as it plays. -
Page 19: Keyboard Voices
KEYBOARD VOICES VOICE SELECTION - There are 128 GM voices on this Suzuki piano. There is a complete list of all 128 voices both on the piano, and in the back of this manual. QUICK SELECT - There are twelve voices that can be selected quickly by pressing one of the twelve numeric/voice quick select buttons. -
Page 20: Layer
KEYBOARD VOICES LAYER (DUAL) VOICE - Layer, or dual, refers to an additional voice that is tone mixed with the selected upper keyboard voice. The as- signed layer voice will be heard with the main voice when the layer feature is engaged. The layer voice is assigned as follows. Press the LAYER button, the layer mode will engage, the currently LAYER assigned layer voice will show on the display, and the indicator will... -
Page 21: Lower
KEYBOARD VOICES LOWER VOICE - In the lower mode the keyboard is divided into two sections. In the right hand section the selected upper voice, or the layer voice will sound. In the left hand section a different voice can be assigned to sound when the keys are played. Press the LOWER button, the lower mode will be engaged, the LOWER currently assigned lower voice will show on the display, and the... -
Page 22: Rhythm Section
RHYTHM SECTION RHYTHM STYLE SELECTION - This piano offers 100 professionally produced rhythm styles and a variation of each style pattern to choose from. There is a complete list of all 100 styles in the back of the manual and on the piano cabinet. DANCE 70’s ROCK BOOGIE TECH.POP POP LOUNGE COUNTRY REGGAE S.BALLAD RHUMBA QUICK SELECT - There are ten styles that can be selected quickly by... -
Page 23: Adjusting The Tempo
RHYTHM SECTION ADJUSTING THE TEMPO - There is a beat indicator, within the metro- nome icon, on the right side of the display that indicates the tempo and the beat for the accompaniment playing. The tempo can be adjusted before or during rhythm style play. TEMPO/TAP Press and hold the TEMPO/TAP button, the current tempo will show on the display... -
Page 24: Starting And Stopping The Rhythm Style
RHYTHM SECTION STRAIGHT START - The START/STOP button starts the selected rhythm style immediately with the percussive rhythm. Press the START/STOP button again to stop the accompaniment. START/ STOPT Main A Rhythm pattern Beat TEMPO indicator STARTING WITH AN INTRODUCTION - Most of the styles can be started with a appropriate introduction. -
Page 25: Fill-In
RHYTHM SECTION FILL-IN - The fill feature will insert a short rhythmic pattern of one to two measures in length, depending on the rhythm style selected and the variation. Holding down the FILL IN button will extend the fill indefinitely. Fill in1 Fill-in pattern... -
Page 26: Auto Accompaniment
AUTO ACCOMPANIMENT AUTO ACCOMPANIMENT (AUTO BASS CHORD) - Most rhythm styles have their own auto accompaniment, or auto bass chord, dedicated to that rhythm style. These auto accompaniments create fully orchestrated rhythm, bass and chord progressions based on the chords that you play with your left hand. The selected rhythm style determines the characteristics of the auto accompaniment. -
Page 27: Single
AUTO ACCOMPANIMENT SINGLE (INTELLIGENT) MODE - Single fingering mode makes it simple to produce four types of orchestrated accompaniment chords using a minimum of fingers, (one, two, or three fingers at the most), while playing in the auto accompaniment section of the keyboard. -
Page 28: Fingered
AUTO ACCOMPANIMENT FINGERED MODE - The fingered mode is ideal if you already know how to play chords on the keyboard. It allows you to play the chords in the auto accompaniment section of the keyboard that produce the selected auto accompaniment pattern. Please note, if a chord played cannot be recognized (fingered beyond the table), the previous chord will keep playing. -
Page 29: Manual Bass Chord
AUTO ACCOMPANIMENT PIANO STYLE AUTO ACCOMPANIMENT - The rhythm styles numbered from 80-99, are piano style accompaniments that use the piano voice only. They are similar to regular auto accompaniment but there is no percussion rhythm, so it is impossible to start the accompaniment by pressing the START/STOP button. -
Page 30: Fill-In
AUTO ACCOMPANIMENT SYNCHRONIZED START - Synchronized Start mode makes the auto accompaniment standby. The auto accompaniment will start as soon as you play a recognized chord in the auto accompaniment section of the keyboard. SYNC START Press the SYNC START button, the beat indicator in the display will blink at the current tempo, showing that the synchronized start mode is ready. -
Page 31: Overall Controls
OVERALL CONTROLS The Overall control function is used to set up or to adjust various parameters related to the operation of this keyboard. The OVERALL button will access a menu for the DSP depth, fine tuning, the grading of the music training course, the auto accompaniment volume, the “talking”... -
Page 32: Dsp Depth
OVERALL CONTROLS DSP DEPTH - The DSP (Digital Signal Processing) feature adds field effect to the original voice. It simulates the effect of playing in a small room, a large room, or a concert hall where the sound reverberates off the walls and ceiling. The level of the effect can be adjusted in the range of 00, no effect, to 16, the maximum level. -
Page 33: Grade
OVERALL CONTROLS GRADE - Grade is a setting used in the music training course. The training system will evaluate your performance and give a vocal comment, with a screen dis- play. The grading values are, “Try again”, “Good”, “Very good”, and “Excellent”. Use the Overall controls if you want to disable the evaluation function. -
Page 34: Vocal Prompt
OVERALL CONTROLS VOCAL PROMPT VOLUME (for SP-67e only) - The musical training course uses vocal prompting in the lessons. The volume of the vocal prompts can be ad- justed independently from the overall keyboard volume. The vocal prompt volume can be adjusted from 00, no sound, to 24, maximum level. The key- board voice and accompaniment will not be affected by the vocal prompt vol- ume adjustment. -
Page 35: Transpose
OVERALL CONTROLS TRANSPOSE - The transpose feature can shift the pitch of the keyboard up or down in semitone intervals up to a maximum of 12 semitones, one octave. Transpos- ing the pitch of the keyboard makes it easier to play in difficult key signatures. Please note, transpose does not affect notes that are sounding, transpose does not affect the keyboard percussion, and it does not affect the note position on the stave display. -
Page 36: Split Point
OVERALL CONTROLS TOUCH continued Press the OVERALL button seven times, until the triangle in the display screen moves to the TOUCH position. The current curve number followed by “Curve” will appear on the display screen. Use the + button to increase the level or the – button to decrease the level. The number pad can also be used to directly enter a value ranged from 1-4. -
Page 37: Metronome
OVERALL CONTROLS METRONOME SETTING - The built in metronome is a timing device that ticks at a constant tempo to be used as a timing reference to aid with practice or performance. Use the metronome menu to engage the metronome feature. The metronome will tick with the selected rhythm styles tempo beat and time signature as soon as the metronome feature is turned on. -
Page 38: One Touch
ONE TOUCH When the one touch setting feature is engaged the piano will automatically change to the optimum setting for each rhythm style in one quick operation. There are four one touch settings for each rhythm style. Please note, the selected one touch settings may be edited to create a unique setting of your own, and then saved in the registration memory. -
Page 39: Registration Memory
REGISTRATION MEMORY A registration is a particular set up of style, voice, chord and other parameters or features you are using. This piano has four registration memories for your favorite settings to be saved and recalled quickly by pressing a button. Please note, the registration buttons are shared with the one touch setting. -
Page 40: Training
TRAINING The SONG and the LESSONS buttons will access a music training package that can be used to improve your playing. There are 100 songs built into the piano as reference for your performing exercises. Pressing the SONG or the LESSONS buttons will engage the music training course, a open book icon with “TEACH”... - Page 41 TRAINING SELECT A LEVEL - Use the – LEVEL + buttons to select a level within the selected lesson. The vocal prompting will call out each lesson level number as the buttons are pressed, cycle through the SONG LESSONS levels until you reach the level you want to use. Please see the level descriptions listed later in this Training section.
- Page 42 TRAINING Lesson Unit 1: Listen and Play - There are twelve lessons in this unit. Each lesson consists of several groups, 1: ListnTst which have ten notes or TEACH chords. As soon as you en- gage the lesson by pressing the START/STOP button a TEMPO note or chord will sound on...
- Page 43 TRAINING Lesson Unit 3: Melody Training - There are 50 lesson levels in this unit. Each lesson level has one melody piece. 3: MldyTest Press the START/STOP TEACH button, after four leading beats of the metronome the melody piece will sound twice. TEMPO Listen carefully and replay the melody on the keyboard after...
- Page 44 TRAINING Lesson Unit 5: Chord Training - There are 20 lesson levels in this unit. Press the START/ STOP button and after the four 5: Chd Test leading metronome beats the FINGERED TEACH chord or chord sequence will appear on the display. Play the chord or chord sequence on TEMPO the keyboard within four sec-...
- Page 45 TRAINING Level Lesson 2: Right hand training - Press the START/STOP button, after the leading metronome beats, L-2: RightHnd the accompaniment will sound TEACH while the chords and notes will appear on the great stave and the keyboard replica. Play the MEASURE right hand melody following the rhythm.
-
Page 46: M I D I
Whether you interface with computers, sequencers, expanders or other keyboards your musical horizons will be greatly enhanced. For further information on MIDI and MIDI equipment that is available, please contact your local Suzuki music store. MIDI CONNECTION - The MIDI terminals are located on the left side panel of the piano. - Page 47 M I D I MIDI CONNECTION continued MIDI Out: This terminal transmits data from this instrument to other MIDI devices. The transmitted data includes the note and touch velocity produced while playing on the keyboard, as well as voice changes, wheel operation, and recorded playback for the MIDI melody tracks.
-
Page 48: Midi Implementation Chart
MIDI IMPLEMENTATION CHART Function Transmitted Recognized Remark Basic Channel 1 CH 1-16 CH Channel changed 1-16 CH 1-16 CH Default Mode Note Number 24-108 0-127 Velocity: Note On Velocity: Note Off Pitch Bender Control Change: 0 Variation page Modulation Portamento value 7, 10 Volume, Pan Expression... -
Page 49: Voice List
VOICE LIST PIANO STRINGS SYNTH LEAD SOUND EFFECT 001 Grand Piano 041 Violin 081 Square 121 Guitar Fret Noise 002 Bright Piano 042 Viola 082 Sawtooth 122 Breath Noise 003 Electric Piano 043 Cello 083 Caliope 123 Seashore 004 Honky-tonk Piano 044 Contra bass 084 Chiffer 124 Bird Tweet... -
Page 50: Style List
STYLE LIST JAZZ BALLROOM 00 Pop 1 29 Big Band 1 62 Slow Fox 01 Pop 2 30 Big Band 2 63 Fox Trot 02 Pop 3 31 Blues 64 5/4Beat 03 Pop 4 32 Boogie 65 Waltz 1 04 Pop 5 33 Filp 66 Waltz 2 05 Pop 6... -
Page 51: Drum Kit List
DRUM KIT LIST DRUM KIT LIST 1 No.-Key 145 Standard 146 Chinese 147 Room 148 Power 149 Electronic 27-E High Q Drum + Hey! High Q High Q High Q 28-E1 Slap Low Pai Gu Slap Slap Slap 29-F1 Scratch Push Small Cymbal Scratch Push Scratch Push... - Page 52 DRUM KIT LIST DRUM KIT LIST 2 No.-Key 150 TR-808 151 Jazz 152 Brush 153 Orchestra 154 SFX High Q High Q High Q High Q 27-E Slap Slap Slap Slap 28-E1 Scratch Push Scratch Push Scratch Push Scratch Push 29-F1 Scratch Pull Scratch Pull...
- Page 53 DRUM KIT LIST Drum Kit Note: The “No.” refers to MIDI note number, and “Key” refers to the key on the keyboard. A blank space in the table mean there is no sound there. Keys from A0 to D1 sound as timpani, except for in the effects kit.
-
Page 54: Pedals
PEDALS (Optional) Press a pedal down with your foot to engage that pedal. MIDI FOOT SUSTAIN HEADPHONES DC 12V IN VOLUME PEDAL VOLUME (SOFT) PEDAL - When the volume pedal is en- gaged the overall keyboard volume is reduced. This pedal responds as the Master Volume Control. -
Page 55: Connector Panel
Two sets of head- phones may be used. DC 12V IN - This is the jack that the power outlet cord is plugged into. For proper operation use the correct Suzuki adapter for this keyboard. -
Page 56: Specifications
SPECIFICATIONS SPECIFICATIONS KEYBOARD 100 Auto accompaniment styles 61-note, touch senstive keyboard ten quick select style buttons VOICES ACCOMPANIMENT CONTROL 128 Voices 100 One Touch Settings 9 Drum kits Tempo/Tap 1 Effects kit Synchro start 12 quick select voice buttons Start/Stop Introduction/Ending VOICE MODE Fill-In... -
Page 57: Warranty
WARRANTY This product, except the exterior cosmetic parts, is warranted by the Suzuki Corporation to the original purchaser to be free from defects in material and workmanship under normal use as follows: 1. For a period of 90 days from the date of purchase, the Suzuki Corporation will pay the labor charges to repair the defective product. - Page 58 NOTES...
- Page 59 NOTES...
- Page 60 SUZUKI PORTABLE KEYBOARD SP-47 OWNER’S MANUAL SUZUKI P.O. BOX 261030 SAN DIEGO, CALIFORNIA 92196 (858) 566-9710 Visit us on the web at www.suzukimusic.com Copyright 2003 Suzuki Musical Instrument Corporation...