Table of Contents
Table of Contents

Related Manuals for Suzuki SP-37


Summary of Contents for Suzuki SP-37
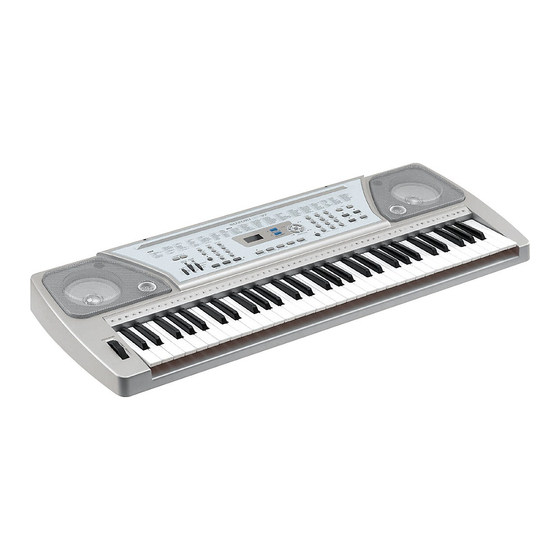
- Page 1 SUZUKI Pianos SP-37 Portable Keyboard OWNER’S MANUAL SUZUKI...
- Page 3 This keyboard has been designed to provide you with years of musical enjoyment. State of the art electronics and elegant functionality are a trademark of all Suzuki Keyboards. Some of the features your new piano is equipped with include:...
- Page 4 GENERAL PRECAUTIONS CAUTION RISK OF ELECTRIC SHOCK DO NOT OPEN CAUTION: TO REDUCE THE RISK OF ELECTRIC SHOCK, DO NOT REMOVE COVER OR BACK NO USER-SERVICEABLE PARTS INSIDE REFER SERVICING TO QUALIFIED SERVICE PERSONNEL INSTRUCTIONS PERTAINING TO A RISK OF FIRE, ELECTRIC SHOCK OR INJURY: The lightning flash with arrowhead symbol, within an equilateral triangle, is intended to alert the user to the presence of not insulated or “dangerous voltage”...
- Page 5 TAKING CARE OF YOUR DIGITAL PIANO This Suzuki keyboard will supply you with years of musical enjoyment if you follow the simple rules listed below. LOCATION CLEANING Do not expose the instrument to the follow- Clean the cabinet and panel with a dry ing conditions to avoid deformation, discol- soft cloth.
-
Page 6: Table Of Contents
TABLE OF CONTENTS EASY SET UP AND QUICK PLAY ........7 PANEL CONTROLS ............8 ORCHESTRATION ............17 KEYBOARD VOICES ............20 Voice Selection ..............20 RHYTHM SECTION ............22 Rhythm Style Selection............ 22 Adjusting the Tempo ............23 Starting and Stopping the Rhythm Style ......24 Fill-In ................ -
Page 7: Easy Set Up And Quick Play
Please note, to prevent possible damage due to battery leakage, remove the batteries from the instrument if it is not to be used for an extended period of time. Battery leakage is not covered under the Suzuki warranty. USING THE AC POWER ADAPTOR - Plug the output cable of the sup- plied power adaptor into the DC 12V IN jack on the back of the unit. -
Page 8: Panel Controls
PANEL CONTROLS – ACCOMP VOL + POP 1 DANCE TECH. POP EURO POP E. DANCE TRANCE ROCK SOUL LOUNGE MASTER ACOMP VOLUME CHORD 8 BEAT 16 BEAT R&B 1 REGGAE RHUMBA POWER POP 2 JAZZ FINGERED SINGLE COUNTRY BOOGIE POLKA R&B 2 METRO PERCUSS... - Page 9 PANEL CONTROLS – ACCOMP VOL + POP 1 DANCE TECH. POP EURO POP E. DANCE TRANCE ROCK SOUL LOUNGE MASTER ACOMP VOLUME CHORD 8 BEAT 16 BEAT R&B 1 REGGAE RHUMBA POWER POP 2 JAZZ FINGERED SINGLE COUNTRY BOOGIE POLKA R&B 2 START/STOP METRO...
- Page 10 PANEL CONTROLS POP 1 DANCE TECH. POP EURO POP E. DANCE TRANCE VOICE/STYLE ROCK SOUL LOUNGE 8 BEAT 16 BEAT R&B 1 REGGAE RHUMBA VOICE DIRECT POP 2 JAZZ COUNTRY BOOGIE R&B 2 POLKA SYNCH START/STOP INTRO/ENDING FILL IN VARI METRO PERCUSS ONE TOUCH...
- Page 11 Please see the Select Controls section of this manual for more information. DISPLAY - This Suzuki piano is equipped with a numeric LCD display. It will display any of the features or functions of the piano that you are currently adjusting, the voice number, accompaniment type or other parameter changes, in real time.
- Page 12 PANEL CONTROLS G.PIANO E. PIANO VOICE/STYLE HARPSI N.GUITAR VOICE DIRECT A.SAX ORCHESTRATION S.SAX CHOIR – START/STOP INTRO/ENDING FILL IN VARIATION SYNCH VOICE OOHS START VOICE / STYLE - There are 128 GM (General MIDI) voices, and 100 rhythm styles available for selection on this piano. You can use the –/+ buttons from the numeric pad to change a voice or style number, or enter a voice or style number directly.
- Page 13 PANEL CONTROLS G.PIANO E. PIANO VOICE/STYLE HARPSI N.GUITAR VOICE DIRECT A.SAX ORCHESTRATION S.SAX CHOIR – START/STOP INTRO/ENDING FILL IN VARIATION SYNCH VOICE OOHS START ORCHESTRATION (L1, L2, R1, R2) - The ORCHESTRATION group lets you select and play from one to four parts at the same time using a variety of orches- trations.
- Page 14 PANEL CONTROLS G.PIANO E. PIANO VOICE/STYLE HARPSI N.GUITAR VOICE DIRECT A.SAX ORCHESTRATION S.SAX CHOIR – START/STOP INTRO/ENDING FILL IN VARIATION SYNCH VOICE OOHS START INTRO (INTRODUCTION) / ENDING - All of the 100 rhythm styles can be started with an appropriate introduction. As soon as you press this button, the rhythm of the introduction will start followed by the main pattern.
- Page 15 PANEL CONTROLS G.PIANO H.PIANO ORGAN – TEMPO E. PIANO VIBES P.ORGAN VOICE/STYLE HARPSI STRINGS A.BASS N.GUITAR SYN.STRINGS SLAP BASS OICE DIRECT TRANSPOSE TOUCH A.SAX TRUMPET CLARINET ORCHESTRATION S.SAX BRASS FLUTE CHOIR STL.DRUMS SYNTH TUNE DEMO – VARIATION VOICE OOHS POLY SYNTH CRYSTAL QUICK SELECT VOICE - When the VOICE DIRECT button is engaged, there are twenty four voices that can be selected quickly by using one of the twelve buttons of...
- Page 16 PANEL CONTROLS G.PIANO H.PIANO ORGAN – TEMPO E. PIANO VIBES P.ORGAN VOICE/STYLE HARPSI STRINGS A.BASS N.GUITAR SYN.STRINGS SLAP BASS OICE DIRECT TRANSPOSE TOUCH A.SAX TRUMPET CLARINET ORCHESTRATION S.SAX BRASS FLUTE CHOIR STL.DRUMS SYNTH TUNE DEMO – VARIATION VOICE OOHS POLY SYNTH CRYSTAL TOUCH - This piano offers four types of keyboard touch sensitivity settings, soft, normal, hard, and off.
-
Page 17: Orchestration
ORCHESTRATION One of the most valuable features on the piano is the orchestration feature that lets you play and edit up to four voices at once. The ORCHESTRATION button group allows the user to assign up to four keyboard voices using a variety of orchestration settings. - Page 18 ORCHESTRATION ORCHESTRATION MODES - There are a number of variations on the below orchestra- tions. The L1, L2, R1, and R2 orchestration buttons are used to set up the exact type of orchestration you want. Single is one voice over the entire keyboard. Dual is two voices simultaneously over the entire keyboard.
- Page 19 ORCHESTRATION SPLIT VOICE MODE - In the split ,or lower mode, the keyboard is divided into two sec- tions, at the split point, the G2 key. In the right hand section one voice will sound and in the left hand section a different voice can be assigned. Selecting a split mode is simply a matter of pressing the buttons corresponding to the desired left and right voiced parts you wish to play.
-
Page 20: Keyboard Voices
KEYBOARD VOICES VOICE SELECTION - There are 128 GM (general MIDI) voices available on this piano. There is a complete list of all 128 voices in the back of the manual and on the piano cabinet. G.PIANO H.PIANO ORGAN E. PIANO VIBES P.ORGAN VOICE/STYLE... - Page 21 KEYBOARD VOICES SELECTING ONE OF THE 128 VOICES Use the orchestration part button, L1, L2, R1, or R2 or the or- chestration edit button to select the orchestration part on which you want to change the voice. The edit indicator for that part should be lit.
-
Page 22: Rhythm Section
RHYTHM RHYTHM STYLE SELECTION - This piano offers 100 professionally produced rhythm styles and a variation of each style pattern to choose from. There is a complete list of all 100 styles in the back of the manual and listed on the keyboard cabinet. For dynamic effect you may select from 5 different drum kits. -
Page 23: Adjusting The Tempo
RHYTHM G.PIANO H.PIANO ORGAN E. PIANO VIBES P.ORGAN VOICE/STYLE HARPSI STRINGS A.BASS N.GUITAR SYN.STRINGS SLAP BASS VOICE DIRECT A.SAX TRUMPET CLARINET ORCHESTRATION S.SAX BRASS FLUTE CHOIR STL.DRUMS SYNTH – INTRO/ENDING FILL IN VARIATION VOICE OOHS POLY SYNTH CRYSTAL SELECTING ONE OF THE 100 RHYTHM STYLES Press the VOICE/STYLE button to engage the style selection mode, the indicator will go out. -
Page 24: Starting And Stopping The Rhythm Style
RHYTHM VOICE/STYLE VOICE DIRECT ORCHESTRATION SYNCH START/STOP INTRO/ENDING FILL IN VARIATION START STRAIGHT START - The START/STOP button starts the selected rhythm style immediately with the percussive rhythm. Press the START/STOP button again to stop the accompaniment. START/STOP STARTING WITH AN INTRODUCTION - All of the 100 styles can be started with a appropriate introduction. -
Page 25: Fill-In
RHYTHM FILL - IN - The fill feature will insert a short rhythmic pattern of one to two measures in length, depending on the rhythm style selected and the variation. Holding down the FILL IN button will extend the FILL IN fill indefinitely. -
Page 26: Auto Accompaniment (Auto Base Chord)
AUTO ACCOMPANIMENT AUTO ACCOMPANIMENT (AUTO BASS CHORD) - Most rhythm styles have their own auto accompaniment, dedicated to that rhythm style. These auto accompaniments create fully orchestrated rhythm, bass and chord progressions based on the chords that you play with your left hand. The selected rhythm style determines the characteristics of the auto accompaniment. -
Page 27: Single
AUTO ACCOMPANIMENT SINGLE (INTELLIGENT) MODE - Single fingering mode makes it simple to produce four types of orchestrated accompaniment chords using a minimum of fingers, ( one, two, or three fingers at the most), while playing in the auto accompaniment section of the keyboard. -
Page 28: Fingered
AUTO ACCOMPANIMENT FINGERED MODE - The fingered mode is ideal if you already know how to play chords on the keyboard. It allows you to play the chords in the auto accompaniment section of the keyboard that produce the selected auto accompaniment pattern. Please note, if a chord played cannot be recognized (fingered beyond the table), the previous chord will keep playing. -
Page 29: Manual Bass Chord
AUTO ACCOMPANIMENT MANUAL BASS CHORD - When the single or fingered mode is selected, you may play in the auto accompaniment section of the keyboard without starting the auto accompaniment, do not press the START/STOP or SYNCH START buttons. The voice on this section of the keyboard will be a layered bass and chord voice determined by the current style. -
Page 30: Starting And Stopping The Auto Accompaniment
AUTO ACCOMPANIMENT VOICE/STYLE VOICE DIRECT ORCHESTRATION SYNCH START/STOP INTRO/ENDING FILL IN VARIATION START STRAIGHT START - The START/STOP button starts rhythm style immediately, the auto accompaniment will start as soon as you play a recognized chord in the auto accompaniment section of START/STOP the keyboard, depending on the mode selected. -
Page 31: Fill-In
AUTO ACCOMPANIMENT SYNCHRONIZED START - Synchronized Start mode makes the auto accompaniment standby. The auto accompaniment will start as soon as you play a recognized chord in the auto accompaniment section of the keyboard. Press the SYNC START button, the beat indicator dots in the display window will blink at the current tempo, showing that the synchronized start mode is ready. -
Page 32: Select Controls
SELECT CONTROLS POP 1 DANCE TECH. POP EURO POP E. DANCE TRANCE ROCK SOUL LOUNGE 8 BEAT 16 BEAT R&B 1 REGGAE RHUMBA POP 2 JAZZ COUNTRY BOOGIE POLKA R&B 2 SYNCH START/STOP INTRO/ENDING METRO PERCUSS ONE TOUCH START METRO (METRONOME) - The built in metronome is a timing device that ‘ticks’... -
Page 33: Keyboard Percussion (Drum Kit)
SELECT CONTROLS PERCUSS (KEYBOARD PERCUSSION and DRUM KIT SELECTION) - When keyboard percussion has been engaged, the entire key- board will play the percussion voices from the selected Drum kit. These voices are graphically depicted above the keys. There are five drum kits, based on the Standard Kit, that can be as- signed. -
Page 34: Tempo
SELECT CONTROLS G.PIANO H.PIANO ORGAN – TEMPO E. PIANO VIBES P.ORGAN HARPSI STRINGS A.BASS N.GUITAR SYN.STRINGS SLAP BASS TRANSPOSE TOUCH A.SAX TRUMPET CLARINET ORCHESTRATION S.SAX BRASS FLUTE CHOIR STL.DRUMS SYNTH TUNE DEMO – VOICE OOHS POLY SYNTH CRYSTAL TEMPO - There is a three dot beat indicator within the display that indi- cates the tempo and the beat for the accompaniment playing. -
Page 35: Transpose
SELECT CONTROLS TRANSPOSE - The transpose feature can shift the pitch of the keyboard up or down in semitone intervals up to a maximum of 12 semitones, one octave. Transposing the pitch of the keyboard makes it easier to play in difficult key signatures. Please note, transpose does not affect notes that are sounding, or the keyboard percussion. -
Page 36: Tune
SELECT CONTROLS TUNE - The pitch of this piano is very accurate and stable, it is automati- cally set to standard A440 pitch when the piano is turned on. The tuning feature makes it possible to tune the pitch of the instrument in fine intervals. -
Page 37: Midi
Whether you interface with computers, sequencers, expanders or other keyboards your musical horizons will be greatly enhanced. For further information on MIDI and MIDI equipment that is available, please contact your local Suzuki music store. MIDI OUT MIDI IN... - Page 38 MIDI Output from an external MIDI devise - Connect the MIDI In terminal of the piano and the MIDI Out terminal of an external device. Data MIDI OUT MIDI IN generated on another devise can sound on your piano. Output to and external sound generator - Connect the MIDI Out terminal of the piano and the MIDI in terminal of an external device, keyboard, synthesizer, or sound module, and the external devise will respond to your playing.
-
Page 39: Midi Implementation Chart
MIDI IMPLEMENTATION CHART Function Transmitted Recognized Remark Basic Channel 1 CH 1-16 CH Channel changed 1-16 CH 1-16 CH Default Mode Note Number 9-120 0-127 Velocity: Note On Velocity: Note Off Pitch Bender Control Change: 0 Variation page Modulation Portamento value 7, 10 Volume, Pan Expression... -
Page 40: Voice List
VOICE LIST No. VOICE No. VOICE No. VOICE No. VOICE BASS REED SYNTH EFFECT PIANO 033 Acoustic Bass 065 Soprano Sax 097 Rain 001 Grand Piano 034 Finger Bass 066 Alto Sax 098 Soundtrack 002 Bright Piano 035 Pick Bass 067 Tenor Sax 003 Electric Piano 099 Crystal... -
Page 41: Style List
STYLE LIST STYLE STYLE STYLE STYLE DISCO 8BEAT/16BEAT SWING LATIN / AFRICA Disco 1 8Beat 1 Swing 1 Tango 1 Disco 2 8Beat 2 Swing 2 Tango 2 Disco 3 8Beat 3 Shuffle 1 Rhumba 1 Disco 4 8Beat 4 Shuffle 2 Rhumba 2 Disco 5... -
Page 42: Drum Kit List
DRUM KIT LIST DRUM KIT LIST 1 No.-Key Standard (0) Room (8) Power (16) Electronic (24) TR-808 (25) P-1: Standard P-2: Room P-3: Power P-4: Electronic P-5: TR-808 27-D#1 High Q High Q High Q High Q High Q 28-E1 Slap Slap Slap... - Page 43 DRUM KIT LIST Please note: For the drum kit list on the previous page, in the first title row, the number in the bracket, after the kit name, is the MIDI program number. The Drum number that is shown on the LCD display is listed in the second title row.
-
Page 44: Connector Panel / Pedal
CONNECTOR PANEL / PEDAL These connector jacks are located on the back panel of the piano. MIDI OUT MIDI IN FOOT VOLUME PHONES DC 12V LINE OUT MIDI OUT / MIDI IN - This piano contains MIDI in and MIDI output ports. MIDI jacks allow communication with other products equipped with MIDI interfaces. -
Page 45: Specifications
SPECIFICATIONS SPECIFICATIONS KEYBOARD Synchro start 61-note, touch sensitive keyboard Start/Stop Introduction/Ending VOICES Fill-In 128 Voices Variation Five Drum kits Twelve quick select voice buttons with, AUXILIARY JACKS Twenty four voices available Headphone / Line Out Foot Volume Pedal VOICE MODE Power In Four part orchestration MIDI In/Out... -
Page 46: Warranty
WARRANTY This product, except the exterior cosmetic parts, is warranted by the Suzuki Corporation to the original purchaser to be free from defects in material and workmanship under normal use as follows: 1. For a period of 90 days from the date of purchase, the Suzuki Corporation will pay the labor charges to repair the defective product. - Page 47 NOTES...
- Page 48 SUZUKI Portable Keyboards SP-37 OWNER’S MANUAL SUZUKI P.O. BOX 261030 SAN DIEGO, CALIFORNIA 92196 (858) 566-9710 Visit us on the web at www.suzukimusic.com Copyright 2003 Suzuki Musical Instrument Corporation...