Fujitsu ScanPartner 15C User Manual
Image scanner
Hide thumbs
Also See for ScanPartner 15C:
- User manual (23 pages) ,
- Consumable replacement and cleaning instructions (7 pages) ,
- Upgrade manual (6 pages)
Table of Contents
Quick Links
Table of Contents

Related Manuals for Fujitsu ScanPartner 15C


Summary of Contents for Fujitsu ScanPartner 15C
- Page 1 ScanPartner 15C Image Scanner User's Manual Version 1.0 (Doc. No. 250-0062-E)
-
Page 2: Fcc Radio Frequency Interference Statement
FCC Radio Frequency Interference Statement This equipment has been tested and found to comply with the limits for a class B digital device, pursuant to Part 15 of the FCC rules. These limits are designed to provide reasonable protection against harmful interference in a residential installation. -
Page 3: Table Of Contents
Table of Contents 1. INTRODUCTION ................... 1-1 2. INSTALLATION AND CONNECTIONS ........... 2-1 2.1 S ..................2-1 HIPPING RACKET 2.1.1 Removing the Shipping Bracket (refer to figures 2-1 and 2-2) ..2-1 2.1.2 Refitting the Shipping Bracket:............2-3 2.2 SCSI I ID ................2-3 NTERFACE EVICE... -
Page 4: Introduction
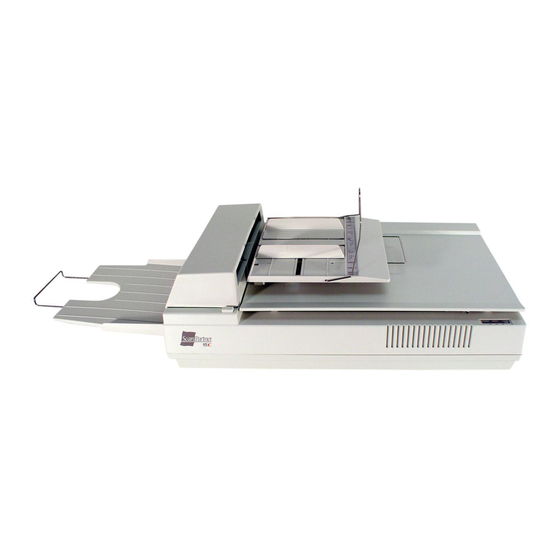
INTRODUCTION Congratulations on your purchase of Fujitsu ScanPartner 15C scanner. Before you install and operate the new scanner, please take a few minutes to read through this manual. It provides you with the proper instructions on how to unpack, install, operate and maintain the scanner. - Page 5 Scanner Body S/W PACKAGE Output Paper Stacker Power Cable SCSI Cable SCSI Host Adapter ScanRight Kit Carton Cushion Output Paper Stacker Figure 1-1 Scanner Packing...
-
Page 6: Installation And Connections
2. INSTALLATION AND CONNECTIONS Please unpack the scanner carefully, and check the contents against the c hecklist. If any items are missing or damaged, please contact your authorized local dealer immediately. Precautions Keep the scanner out of direct sunlight. Direct exposure to the sun or excessive ❖... - Page 7 Shipping Position Figure 2-1 Removing the Shipping Bracket Use Position Figure 2-2 Securing the Shipping Bracket...
-
Page 8: Refitting The Shipping Bracket
2.1.2 Refitting the Shipping Bracket: Whenever you need to move the scanner to a new location it is advisable to refit the shipping bracket to avoid causing damage to the scanners’ internal mechanism. Please follow the instructions below to refit the shipping bracket. Turn off the scanner power at the power on/off switch. - Page 9 SCSI Terminator Switch SISI ID Selector SCSI ID Selector Figure 2-3 Adjusting the SCSI ID setting.
-
Page 10: Adf Paper Chute (Figure 2-4)
2.3 ADF Paper Chute (Figure 2-4) Raise the right side of the paper chute to about 45 degrees. ii). Pull down the wire leg from under the paper chute. iii). Insert the wire leg into the grips on the document cover. iv). -
Page 11: Adf Output
2 2 . . 4 4 A A D D F F O O u u tput Tray (Figure 2-5) Hold the output paper tray approximately 30 degrees aslant as shown in Figure 2-5. ii). Insert the three tabs on the output paper tray to the three slots on the ADF. iii). -
Page 12: Document Loading
2.5 Document Loading For flatbed scanning. Documents that can not be scanned using the ADF can be placed on the flatbed for scanning. (Refer to Figure 2-6) i). Place the document to be scanned onto the document glass face down. ii). -
Page 13: Adf Scanning
2.6 ADF Scanning Standard paper size can be scanned automatically using the ADF. Refer to figure 2-7. To prevent occasional paper jam when automatically feeding multiple documents, fan the paper before loading. ii). Lift the balance wire and place the documents to be scanned onto the ADF paper chute face down, with the leading edge in the auto feeder entrance. -
Page 14: C Onnecting The
SCSI Termination The Fujitsu ScanPartner 15C comes complete with a built in SCSI terminator. If the scanner is the last device in a SCSI chain the terminator should be switched on. If the scanner is not the last device the terminator should be off. The terminator on/off switch is located on the back of the scanner, to the left of the SCSI cable connectors. - Page 15 POWER CABLE Power Switch POWER SWITCH Figure 2-8 ScanPartner 15C scanner Cable Connection SCSI Cable SCSI CABLE Host HOST COMPUTER Computer POWER Power Cable CABLE Power Switch POWER SWITCH Figure 2-9 ScanPartner 15C SCSI scanner Cable Connections with Mac 2-10...
-
Page 16: Maintenance
3. MAINTENANCE 3.1 Cleaning the ADF Your scanner is designed to be maintenance free. However, it still needs to be cleaned occasionally to ensure optimum image quality and performance. From time to time the pad assembly and feeding rollers may become contaminated with ink, toner particles or paper dust. - Page 17 Pad Module Pad Assembly Feed Roller Feed Roller ADF Unit ADF Unit ADF release ADF release button button Document Board Glass Document Board Glass Figure 3-1 Opening the ADF unit and Document Cover...
-
Page 18: Cleaning The Glass
3.2 Cleaning the Glass The procedures: Soak a cotton swab with some isopropyl alcohol (95%). ii). Open the ADF unit and document cover by depressing the ADF cover release button as shown in Figure 6-2. Wipe the glass of flatbed area and ADF area by moving the swab from side to side. iii). -
Page 19: Replacing The Snap - In Pad Module
3.3 Replacing the ADF snap-in pad module After scanning approximately 150,000 pages through the ADF, the pad spring may be worn out and you may experience problems with document feeding. In this case, it is highly recommended to replace the pad module with a new one. - Page 20 Assembling Procedure 1. Take out the spare ADF pad module. 2. Hold the upper part of the pad clamp and place it gently to the pad holder as shown in Figure 3-4. Upper part of Pad holder the pad clamp Figure 3-4 Installing the pad module...
-
Page 21: Troubleshooting
4. TROUBLESHOOTING The scanner will automatically perform a simple self-test each time it is turned on. This will help spot major system errors in the scanner itself. When the test is initiated, the READY LED is flashing. When the test is completed, if no error occur, the READY LED is steadily on. - Page 22 Question: When I power on the scanner, it makes noises and will not stand ready. Answer: There are two possibilities: a) You forgot to remove the shipping retainer from the scanner. Please remove the shipping retainer first. b) You did not place the scanner on a flat desktop surface. This may cause the scanner to function improperly.
-
Page 23: Paper Jam In The Adf
4.2 Paper Jam in the ADF In the event of paper jam, please follow the procedures below. i). Press the button at the front left of the scanner as shown in Figure 4-1, arrow A. The ADF cover will be released. ii). - Page 24 Document Document (blank side) (blank side) Figure 4.2 ADF Paper Jam - Removing the Paper...
-
Page 25: Specifications
5. SPECIFICATIONS All specifications are subject to change without notice. The following can not be properly fed by ADF: Paper with clip or staple attached; ❖ Paper with ink not totally dry; ❖ Paper with inconsistent thickness, such as envelopes; ❖... -
Page 26: Scanpartner 15C Specifications
5.1 ScanPartner 15C Specifications scanner Type ❖ 1-pass colour ❖ Flatbed with ADF built-in Scanning Mode ❖ 30-bit colour ❖ Grey Scale (256 levels) ❖ Line Art/Halftone (64 levels) ❖ Error Diffusion (single bit) Optical Resolution ❖ 300 x 600 dpi Light Source ❖...