
Related Manuals for Emerson MONACO CF830GES00


Summary of Contents for Emerson MONACO CF830GES00
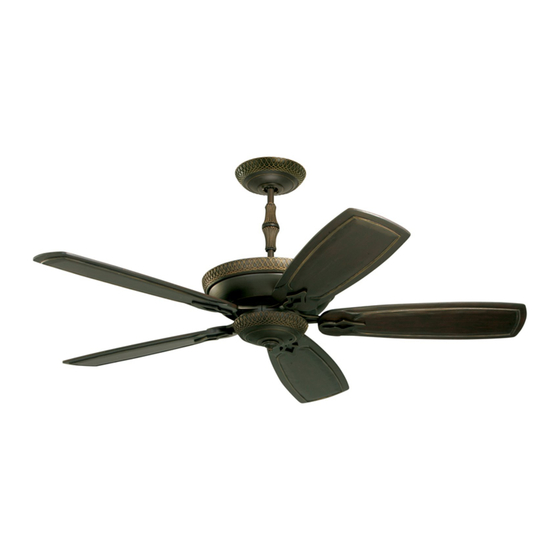
- Page 1 READ AND SAVE THESE INSTRUCTIONS MONACO ™ 60” Ceiling Fan Owner's Manual Model Number CF830GES00 Golden Espresso 35.3 Net Weight: Lbs. Part No. F40BP74050000 Form No. BP7405 U.L. Model No.: CF830...
-
Page 2: Safety Instructions
WARNING: To reduce the risk of fire or electric shock, this fan should only be used with fan speed control, Model No. SW90/U.L. No. UC9031, manufactured by Rhine Electric Co., Ltd. WARNING: To avoid fire, shock or injury, do not use an Emerson or any other brand of control not specifically approved for this fan. -
Page 3: Unpacking Instructions
Emerson Electric Co. could result in personal injury or property damage. 1. Open styrofoam unit containing fan. Remove upper and center sections of styrofoam unit. Remove parts and check to see that you have received the following: a. -
Page 4: Electrical Requirements
This allows you to regulate your ceiling fan speed, airflow direction, and light intensity. Optional IMPORTANT: Remove the five motor retainers Emerson Electric Remote and Wall Control may from the motor hub and discard the retainers and also be used, see store or catalog. - Page 5 1/4-20 x 12mm OVAL HEAD BLADE SCREW (2 per flange) BLADE FLANGE SWITCH HOUSING SWITCH HOUSING ADAPTER INTERLOCKING FEATURE Figure 3 WARNING SWITCH HOUSING SWITCH HOUSING COLOR CODED ADAPTER COLOR CONNECTOR CODED CONNECTOR To reduce the risk of personal injury, do not bend the blade flange when installing the blade flanges, Figure 5 balancing the blades or cleaning the fan.
- Page 6 11. Obtain the 10” hanger ball/downrod assembly and remove the hanger ball by loosening the setscrew MOTOR COUPLING in the hanger ball until the ball falls freely down SETSCREW (2) the downrod (Figure 7). Remove the pin from the HAIRPIN CLEVIS PIN CLIP downrod, then remove the hanger ball.
- Page 7 17. 10” Downrod Installation: Remove the grommet 22. Reinstall the hanger ball on the downrod from the coupling cover, then slide the coupling as follows. Route the motor leads through the cover on the downrod until it rests on the motor hanger ball and slide the hanger ball over the housing.
-
Page 8: Your Ceiling Fan How To Hang
How to Hang OUTLET Your Ceiling Fan WARNING TWO SCREWS SUPPLIED WITH The fan must be hung with at least 7' of clearance HANGER OUTLET BOX from floor to blades (Figure 14). Do NOT hang this BRACKET fan on an 8’ ceiling when using the 10” downrod. CEILING Figure 15 2. -
Page 9: How To Wire Your Ceiling Fan
WARNING Figure 17 To avoid possible fire or shock, make sure that the NOTE: If you are using an Emerson Light Fixture electrical wires are completely inside the outlet box with your fan, see Light Fixture Owner’s Manual and not pinched between the ceiling cover and the for wiring. - Page 10 How to Wire Your Ceiling Fan • Blue and yellow wires from fan to blue wire from fan/light control. - Dual Slide Wall Control • Black/white wire from fan/light control to black wire from the 120V AC supply source. NOTE: Installation of this control requires that a three-conductor cable with ground wire be run BLUE LIGHT SWITCH LEAD between the control wall box and the ceiling fan...
- Page 11 NOTE: This wiring configuration will control accent/light and accessory downlight together. For other possible wiring/switch combinations to control accent light and downlight, consult a licensed electrician or see other Emerson accessory control. Schematic “A” CONNECTIONS REQUIRED WHEN SUPPLY VOLTAGE IS FED INTO CEILING OUTLET BOX.
-
Page 12: Operating Your Ceiling Fan
3. To set the level of light brightness, push the light knob up to operate your light on low to high settings (See Figure 23). 4. To turn the lights off, position the knob below the number bottom setting. REVERSE SWITCH Figure 24 EMERSON Figure 23 U.L. Model No.: CF830... -
Page 13: Maintenance
Emerson Electric Co. Substitution of parts or accessories not designated for use with this product by Emerson Electric Co. could result in personal injury or property damage. WARNING: For your own safety, turn off power at fuse box or circuit breaker before trouble shooting your fan. -
Page 14: Repair Parts
Repair Parts U.L. Model No.: CF830... -
Page 15: How To Order Repair Parts
Repair Parts Listing Model No. Description CF830GES00 Hanger Pack, Consisting of: 761655-87 Hanger Bracket (1) — Hanger Ball (1) — Downrod - 10” (1) — Parts Bag Containing: 763973 Pin, Clevis (1) — Clip, Hairpin (1) — Connector Wire Nut, 12 GA (5) —... -
Page 16: Limited Warranty
You will be responsible for all insurance, freight or other transportation charges to our factory or authorized service center. Your Emerson Air Comfort Ceiling Fan should be properly packed to avoid damage in transit since we will not be responsible for any such damage.