Table of Contents
Quick Links
Table of Contents

Related Manuals for Haier HWF5300


Summary of Contents for Haier HWF5300
- Page 1 Front load Clothes Washer (french) lavadora de Ropa Carga Frontal User Manual Model # HWF5300, HWF5200, HWF5000 Guide de l’Utilisateur Modéle # HWF5300, HWF5200, HWF5000 Manual del Usuario Para Modelo de # HWF5300, HWF5200, HWF5000 Quality Innovation Style ß ß...
-
Page 2: Safety Instructions
English IMPORTANT SAFETY INSTRUCTIONS WARNING - To reduce the risk of fire, electric shock, or injury to persons when using your appliance, follow the basic precautions, including the following: 1. Read all of the instructions before using this appliance. 2. Use this appliance only for its intended purpose as described in this user manual. 3. -
Page 3: Grounding Instructions
Risk of child entrapment. Before you throw away your old appliance, take off the door so that children may not easily get trapped inside. Thank you for purchasing our Haier product. This easy-to-use manual Model number will guide you in getting the best use of your washer. -
Page 4: Electrical Connections
English ElECTRICAl CONNECTIONS This appliance must be grounded. In the event of an electrical short circuit, grounding reduces the risk of electric shock by providing an escape wire for the electric current. This appliance is equipped with a cord having a grounding wire with a grounded plug. -
Page 5: Table Of Contents
English TABlE OF CONTENTS SAFETY INSTRUCTIONS ..............1 GROUNDING INSTRUCTIONS ............2 ElECTRICAl CONNECTING ............. 3 PARTS AND FEATURES ..............5 Front ....................5 Back ....................6 INSTAllATION INSTRUCTIONS ............. 7 Tools and Materials Required .............. 7 Unpacking Your Washer ..............8 Installation .................. -
Page 6: Parts And Features
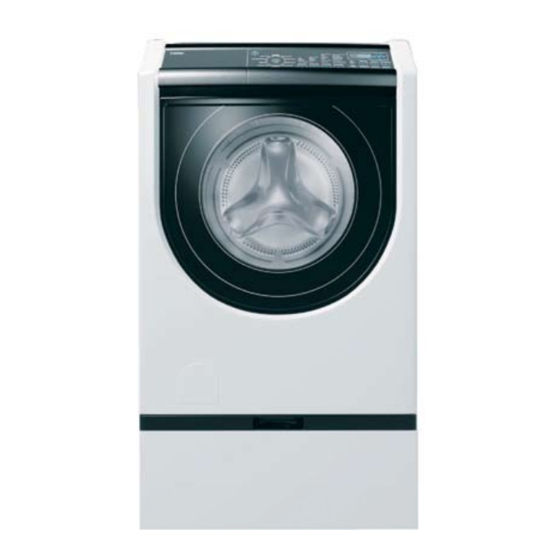
English PARTS AND FEATURES Front 1. Detergent / Softner Dispenser 5. Coin/Button Trap 2. See-through Glass Door 6. Wash Tub 3. Control Panel 7. Adjustable Leveling Legs (Not Shown) 4. Cabinet... -
Page 7: Back
English PARTS AND FEATURES Back 1. Power Supply Cord 6. Back Plate 2. Back Plate Screw (3) 7. Adjustable Leveling Legs (Not Shown) 3. Drainage Hose 8. Valve (Hot and Cold) 4. Drainage Hose Clip (3) 9. Vent 5. Transportation Bolt (4) -
Page 8: Installation Instructions
English INSTAllATION INSTRUCTIONS Tools and Materials Required You will need to have the following tools to help you in the installation of your washer: • Scissors • Standard Screwdriver • Pliers • Wrench • Tape Measure • Gloves • Level Accessories Supplied Quantity 1. -
Page 9: Unpacking Your Appliance
English Unpacking Your Appliance • Remove all packing materials including transportation bolts. • Inspect and remove any remains of packing, tape or printed materials before using the washer. • Transportation Bolts must be removed before using the machine. Once removed, save them so when moving you can reinstall to protect the machine from damage during shipping. - Page 10 English • As shown in figure1, remove all the packing materials (including Fig. 1 the foam base). Upon opening of the package, water drops may be seen on the plastic bag and the porthole. This is a normal phenomenon resulting from water tests in the factory.
-
Page 11: Installation
English INSTAllATION Connection of Water Inlet Hose and Washing Machine • Connect the straight coupling of the inlet hose to the water tap and make sure to tighten it. Pressure Regulator • Install the pressure regulator to each inlet valves of the unit. -
Page 12: Power Supply
English Power Supply • Unit should be connected to a regular 120V~60 Hz 15A grounded outlet. Make sure local city codes are followed. Y Adapter Connection Note: “Y Adapter” shown in below figure is only for illustration. It is not provided in the box as an accessory. -
Page 13: Operational Instructions
English OPERATIONAl INSTRUCTIONS HWF5300 HWF5200AW 印刷图 SANITARY SANITARY NORMAL NORMAL EXTRA HOT/CO LD HEAVY HEAVY HEAVY PERM PERM PERM EXTRA HIGH DUTY DUTY DUTY PRESS PRESS PRESS SPIN RINSE HOT/CO LD WASH HIGH QUICK QUICK WARM /WARM MEDIUM HEAVY WHITE... - Page 14 If any button except “Off” is pressed to start, the washer will no start in the Normal cycle mode. • If Start/Pause button isn’t pressed within 5 minutes after powering “On” the unit will automatically switch off and return to stand by mode. HWF5300 Preset Cycle Settings Cycles Time (in...
- Page 15 English HWF5200, 5000 HWF5000AW 印刷图 HEAVY NORMAL NORMAL DUTY PERM PERM PERM WHITE PRESS PRESS PRESS SPIN RINSE WASH HOT/CO LD HIGH QUICK QUICK WARM /WARM HEAVY MEDIUM WOOL WOOL WASH WASH WARM /COLD CUST OM PROG RAM PREW ASH MEDIUM DELA Y COLD/ COLD...
- Page 16 English Signal (7) • Select clothes soil level. There are 3 levels to choose from Heavy, Medium and Light. • Wash cycle increases 2 minutes for each level increased. Selection should be based on the soil level in clothes. The dirtier the clothes the heavier the level. Delay (8) •...
-
Page 17: Loading The Washer
English Loading the Washer • Load each item loosely. • Separate the white and colored clothes. Separate heavy clothes from light clothes. • Carefully check all pockets and cuffs for small items. They can easily slide into the tub and may damage the tub. •... -
Page 18: Water Level
English Operating Procedure - GWT950AW 1. Press any button except “Off” button • If you press the “Start/Pause” button to start the washer, the washer will run in the last cycle used. If you press any button except “Off” to start, the washer will run the Normal cycle. - Page 19 English Capacity of Detergent Wash (lbs.)
-
Page 20: Soil Level
English Operating Procedure - HWF5200, 5000 1. Press Power ON/OFF • If you press the “Start/Pause” button to start, the washer will run in the last cycle used. • If “Start/Pause” button isn’t pressed within 5 minutes after powering “On” the unit will automatically switch off and return to stand-by mode. -
Page 21: Loading
English Loading • Load each item loosely. • Seperate the white and colored clothes. Separate heavy clothes from light clothes. • Carefully check all pockets and cuffs for small items. They can easily slide into the tub and damage the tub. •... -
Page 22: Washing Methods
English WASHING METHODS Washing Program Setting To set the desired wash program, turn the knob to "0" first. This will reset the timer. Then select a program from the list on the detergent dispenser. Now press the "Pause/Start" button to start operation. Caution: If you want to choose another program, first turn project knob to “0”, then turn off the power. -
Page 23: Normal Operating Sounds
English Normal Operating Sounds The following sounds are normally heard during the operation of the washer: • Tumbling sounds: This is normal as the heavy wet clothes in the washer are continuously being tossed around. • Air rushing noise: This happens when the washer tub spins at a very high RPM. •... -
Page 24: Moving And Vacationing
English Moving & Vacationing • Turn off water supply faucets and disconnect hoses. Drain water from all hoses. This will prevent from damaging due to water leakage if the hoses accidentally get ruptured or they become loose. • Unplug the electrical cord from the wall outlet. •... -
Page 25: Troubleshooting
English TROUBlESHOOTING Washer does not operate: • Check if unit is plugged in. The plug may have come loose. • Check if the electrical wall outlet is of proper voltage. • Check if the circuit breaker needs to be reset or if the fuse needs to be replaced. -
Page 26: Problems With Clothes
English Problems with clothes: • Clothes are too wrinkled: This is due to improper sorting, overloading and washing in too hot water repeatedly. Avoid overloading and resort your load. Do not mix heavy clothes such as work clothes with light clothes such as blouses, light shirts and delicate items. -
Page 27: Technical Specification
English TECHNICAl SPECIFICATION 9900178 ETL LISTED CONFORMS TO UL STD. UL2157 CERTIFIED TO CSA STD. CSA - C22.2 NO. 169... -
Page 28: Warranty
Any service charges not specifically After one year from the original retail identified as normal such as normal purchase date, Haier will provide a part at service area or hours. no cost, as indicated below, to replace said Damage to clothing. - Page 29 English...
- Page 30 IMPORTANT Do Not Return This Product To The Store If you have a problem with this product, please contact the "Haier Customer Satisfaction Center" at 1-877-337-3639. DATED PROOF OF PURCHASE REQUIRED FOR WARRANTY SERVICE IMPORTANT Ne pas Réexpédier ce Produit au Magasin Pour tout problème concernant ce produit, veuillez contacter le service des...