Table of Contents
Quick Links
1
Preliminary notes
Thank you for selecting our CD/DVD car radio SilverCrest CDV-710. In order for you to utilize
this device and all its options, we recommend that you read the corresponding instructions in
this manual before the initial use of the device, even if you're familiar with handling electronic
devices. Please pay particular attention to the chapter "Important safety instructions" on page 7.
Store this manual in a safe location for future reference. If you sell or transfer this device, please
be sure to pass along these instructions as well.
2
Copyright
The contents of this manual may not be reproduced, copied or otherwise duplicated in
electronic, mechanical, magnetic, optical, chemical, manual, or any other form without the
written permission of our company, nor may it be stored in a search engine, nor translated into
another language.
1
Table of Contents

Related Manuals for Silvercrest CDV-710


Summary of Contents for Silvercrest CDV-710
-
Page 1: Preliminary Notes
Preliminary notes Thank you for selecting our CD/DVD car radio SilverCrest CDV-710. In order for you to utilize this device and all its options, we recommend that you read the corresponding instructions in this manual before the initial use of the device, even if you’re familiar with handling electronic devices. -
Page 2: Declaration
Declaration The descriptions and features in this manual only serve as general information and do not represent a guarantee. In order to offer you a product of the highest quality, we reserve the right to make possible improvements or changes without prior notification. For all product descriptions and user instructions, the German version is the ultimately valid reference in the event of possible deviations in other languages. -
Page 3: Table Of Contents
Table of contents Preliminary notes ......................1 Copyright ......................... 1 Declaration ........................2 Manufacturer information....................2 Table of contents ......................3 Important safety instructions..................7 Scope of delivery ......................11 Installation ........................13 Installing the device Connecting the antenna Supply voltage Speakers Removal Operating unit ....................... - Page 4 Activation........................33 12.1 Insertion of the operating unit 12.2 Removal of the operating unit (theft protection) Basic functions ......................34 13.1 Turning on/off 13.2 Changing the volume 13.3 Muting the speakers Radio (tuner) mode ....................... 36 14.1 Selection of the radio station 14.2 Selection of the wavelength range 14.3...
- Page 5 15.6 Repeating tracks (Repeat) 15.7 Intro 15.8 Playing tracks in random sequence (Random) SD/MMC operation ......................47 16.1 Inserting / removing SD/MMC 16.2 Selecting SD/MMC as a program source Playing back MP3/WMA/OGG files ................49 Displaying images......................50 18.1 Slide show 18.2 Rotating an image 18.3...
- Page 6 DVD device settings...................... 60 22.1 General settings 22.2 Audio settings 22.3 Video settings 22.4 Preferred settings 22.5 Password settings 22.6 Exiting the settings Factory default settings (“RESET“)................68 Remote control......................69 24.1 Remote control (normal) 24.2 Remote control (Dual Zone) 24.3 Changing the battery 24.4...
-
Page 7: Important Safety Instructions
Important safety instructions Please read and strictly observe the following instructions! Never open the case of the car radio; it does not contain any serviceable parts! If the case is open, there is a risk of fatality due to electric shock. Do not give your car radio and especially the accessories to children. - Page 8 Don’t flip the monitor open by hand. This could damage the mechanics. The TFT colour monitor consists of glass and liquid crystals. Don’t put any excessive pressure on the monitor, since otherwise it might scratch, break, or sustain other damages. In addition, the image quality might be impaired. Don’t touch the monitor surface with hard objects and only clean it with a soft, dry cloth and special TFT cleaner.
- Page 9 Secure the installed cables with insulating tape, cable ties, or cable clamps. To protect the cables from damage, use insulating tape when guiding them past metal components. Place and secure all cables in such a manner that they are not in the vicinity of movable parts, such as e.g.
- Page 10 Dirt or condensed moisture on the lens of the CD/DVD drive may impede and even prevent the playback of data carriers. In general, the playback of self-burned data carriers is possible, but it depends on the used software and the settings made with it, so that there may be problems during playback in individual cases.
-
Page 11: Scope Of Delivery
Scope of delivery 1. CDV-710 CD/DVD Car radio Monitor closed 2. Case for the operating unit Monitor open 3. Installation frame 4. Disassembly key, installation material... - Page 12 5. Remote control 6. Remote control (dual zone) 7. ISO connector set 8. User manual Note: The design and technical data are subject to change without any notification. Illustrations are not true to scale.
-
Page 13: Installation
Installation 8.1 Installing the device Note: Please observe the following safety instructions for the connection of the device: Read the entire installation section before connecting the device. Disconnect the negative pole of the vehicle battery for the duration of the installation. Observe the safety instructions by the vehicle manufacturer during this task. - Page 14 Illustr. 8.2 Illustr. 8.1 Illustr. 8.0 Then remove the installation frame from the device with the aid of the disassembly key, by sliding the disassembly keys into the provided openings on the right and left side of the device, as described in illustr. 8.1. Make sure that the protrusion on the disassembly key points away from the device during the insertion (illustr.
- Page 15 Connector pin assignment ISO connector plug (also see illustr. 8.3 number Contact Plug A Plug B (speaker connections) Rear right (+) – violet Reverse light / orange Rear right (-) – violet / black Front right (+) – grey Battery 12V (+) / yellow Front right (-) –...
- Page 16 Illustr. 8.3 Illustr. 8.4 1 Antenna connection Optical audio output 2 AUX input – right + left (brown) Connector plug for ISO adapter cable set Drive disconnection of the video signal 3 Output rear – right + left (grey) (brown) 4 Camera input (black) Subwoofer output (black) 5 Video output rear (black)
-
Page 17: Connecting The Antenna
Caution: The device is distinguished by a high degree of output. During operation, this results in a strong heat generation. Therefore no cables or other parts may adjoin the device. If their insulation melts, there is the risk of a short circuit or fire. Note: The connection 8.3 shown in illustr. -
Page 18: Speakers
A5 (blue): +12V: switching voltage output (max. 0.5 A). When the device is turned on, the switching voltage adjoins contact A5 and serves to retract or extract an automatic antenna and as operational voltage for antenna amplifiers. A7 (red): Connection for +12V trigger voltage. Connect to terminal # 15 of the vehicle. If contacts A4 and A7 are switched, the device will “forget”... -
Page 19: Removal
Illustr. 8.5 Illustr. 8.6 Illustr. 8.7 8.5 Removal Turn off the device. Remove the operating unit and place it into the case. Clamp off the negative pole of the vehicle battery for the duration of the disassembly. First remove the front frame of the device by inserting a flat object (e.g. -
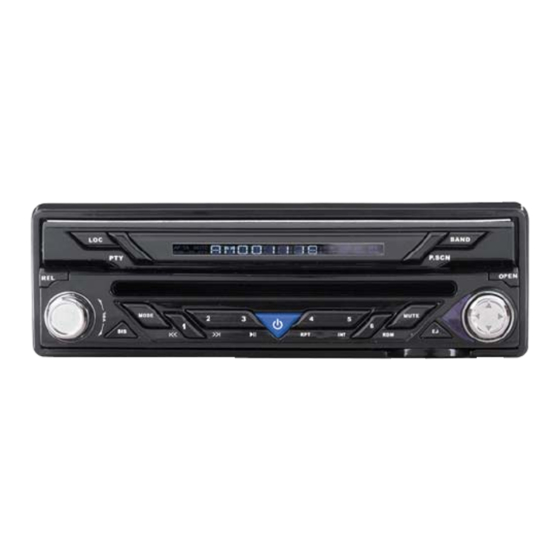
Page 20: Operating Unit
Operating unit 9.1 Front view (closed) Button to remove the operating unit - TP button to turn the traffic alert function on/off - Volume control dial (turned) - Settings dial for menu level 1 – VOL, - Button to activate the loudness function BAS, TRE, BAL, FAD (if pressed for less (pressed longer than three seconds) than two seconds) - Page 21 - Station selection button 2 (radio mode) 5-Way multifunction button for the menu - Previous track (data carrier mode) navigation to the right, left, up, down, and confirm (pressed) - Station selection button 3 (radio mode) - Next track (data carrier mode) BAND –...
-
Page 22: Front View (Monitor Open)
9.2 Front view (monitor open) 9.3 Front view (with detached operating unit) Button to change the distance of the monitor to the installation slot 7” TFT monitor (touch sensitive) Button to set the slant of the monitor (TILT) BAND – Button to switch the frequency Contacts for the operating unit band as well as the button memory FM1 - PLEASE DON’T TOUCH!! -
Page 23: Operation Of The Monitor
10 Operation of the monitor Open the monitor by briefly pressing the “OPEN” button . Now the monitor is opened automatically and fixed in the flipped-open position. The monitor can be closed again by pressing the “OPEN” button again. If the monitor doesn’t close as a result, it may not be in the correct position. Then there will be the error message “ERROR –... -
Page 24: Areas Sensitive To Touch (Touch Screen)
10.2 Areas sensitive to touch (touch screen) The screen has features that are sensitive to the touch (touch screen). This makes it possible to control many functions by touching the screen. In an open position there are always two menus available. First the main menu and, in addition, the menu for the second playback level (dual zone). - Page 25 For the playback of audio, video or image data, there is also another, non-visible menu available. When touching the right edge of the screen in the area of the marked surface, the playback will jump to the next track. When touching the left edge of the screen in the area of the marked surface, the playback will jump to the previous track.
-
Page 26: Display
11 Display 11.1 Display when the monitor is closed Display (entire view) when the monitor is closed The display of the device can show the following messages during the operation: The loudspeakers have been The LOUDNESS function has been MUTE LOUD muted activated... -
Page 27: Display When The Monitor Is Open
11.2 Display when the monitor is open To open the monitor, please press button . To call up the monitor menu, please press the “OSD button” . When the monitor is open, the following setting options and functions are available: Setting of the playback source Menu entry Function... - Page 28 Second playback level (dual zone) The device has a second playback level (dual zone). This makes it possible to address a second playback medium. For example: listening to the radio on the front seats and watching a DVD on the back seats. Several combination options are available here. Setting up the second playback level Menu entry Function...
- Page 29 Setup menu Menu entry Function AUDIO Switches to the submenu for audio settings VIDEO Switches to the submenu for video settings SYSTEM Switches to the submenu for system settings Switches to the submenu for RDS settings CALIBRATION Switches to the submenu for the orientation of the touch screen The TV function is on a grey surface and not available.
- Page 30 Audio menu Menu entry Function BASS Setting the bass levels from -7 to +7 TREBLE Setting the treble levels from -7 to BALANCE Setting the left and right speaker ratio from L-8 to R-8. FADER Setting the playback ratio between the front and rear from F-8 to R-8.
- Page 31 Video menu Menu entry Function BRIGHT Setting the screen brightness from 0 to 40 CONTRAST Setting the screen contrast levels from 0 to 40 COLOR Setting the screen colour values from 0 to 40 SHARP Setting screen playback sharpness from 0 to 6 SCREEN Setting the side ratio during the playback.
- Page 32 RDS Menu Menu entry Function Turning alternative frequency function on and off. REGION Turning the function for regional programs on and off. Turning the traffic alert function on and off. Turning the EON function on and off. Turning the PTY function on and off. TA VOL Setting the volume of the traffic alerts.
-
Page 33: Activation
System menu Menu entry Function BEEP Turning the button sounds on and off. TILT The TILT function makes it possible to set the position of the monitor. With AUTO, the monitor is retracted when device turned off. With MANUAL, the monitor remains open when the device is turned off. -
Page 34: Removal Of The Operating Unit (Theft Protection)
then press it against the casing until it audibly snaps into place. Now you can turn on the device. If the device was turned on when the operating unit was removed, it will automatically turn on with the last setting (radio, CD, SD/MMC, AUX IN) as soon as the operating unit is inserted again. -
Page 35: Changing The Volume
13.2 Changing the volume The volume of the device can be changed with the round control dial . The current volume of the device will be indicated on the display in the process. The volume scale ranges from 0 – 45. Note: When the car radio is turned off, the volume is only stored if it falls below the level of the “S.VOLUME”... -
Page 36: Radio (Tuner) Mode
14 Radio (tuner) mode 14.1 Selection of the radio station Turn on the SilverCrest CDV-710 CD/DVD car radio with the on/off button . If the device was turned off while it was in RADIO mode, the last selected station will be heard. If the device is set to an operation with one of the different data carriers, please press the “MODE”... -
Page 37: Searching For A Radio Station With The Scanner
Note: After selecting a range, the station last selected in this range will be heard. When the monitor is open, the “BAND” button on the screen is also available for the selection of the wavelength range. 14.3 Searching for a radio station with the scanner To set the stations, select the desired wave band with the “BAND”... -
Page 38: Storing A Station With The Station Buttons
14.5 Storing a station with the station buttons With the station buttons “1”, “2”, “3”, “4”, “5”, and “6” you can preset six programming spaces each on each level of the wave band (e.g. “FM 1“, “FM 2”, or “FM 3”). To store the station, select the corresponding station with the station search or manually. -
Page 39: Checking Stored Stations
14.8 Checking stored stations For this function, the stations stored under the station buttons of a particular wave length are scanned for about five seconds. In order to begin checking, briefly press the “P.SCAN” button . The station positions “1” - “6” will begin flashing on the display in sequence and the corresponding stations will be scanned. -
Page 40: Stmo Function
14.10 STMO function The “STMO” function enables you to switch back and forth between mono and stereo playback. This is especially useful when the stereo signal of the selected radio station doesn’t carry an ideal strength. In order to activate the “STMO” function, please press the screen button “STMO” once briefly. -
Page 41: Alternative Frequencies ("Af")
When the monitor is open, the display will jump to the RDS submenu and switch the function on or off. If there is no entry for approx. ten seconds, the device returns to the radio display and store the changes that were made. Note: •... - Page 42 Note: • The “AF” function is only displayed for broadcast stations that broadcast an “AF” signal. The “AF” message flashes when the “AF” function is activated but no “AF” signal is available. • If an RDS (radio data system) station is being received that is broadcast by several broadcast stations with different frequencies, the device automatically switches to the frequency that can be received most clearly.
-
Page 43: Regional Programs ("Reg")
ON" or "REG-OFF" appears in the display. 15 CD/DVD mode The SilverCrest CDV-710 CD/DVD car radio supports the formats DVD, DVD-R, DVD-RW, DVD+R, DVD+RW, DVD-R DL, DVD+R DL, CD, CD-R, CD-RW, VCD, SVCD, MP3, WMA, OGG Vorbis and JPG image CD. The minimum bitrate of WMA and MP3 files are at 32 kbps and for OGG files at 45 kbps. -
Page 44: Selecting A Cd/Dvd As The Program Source
• Copy-protected CDs do not correspond to the specifications of audio CDs (CD-DA), don’t carry the respective logo, and can therefore cause playback errors. • If a selected function is unavailable, a hand symbol will appear in the upper left of the display. -
Page 45: Playback / Pause / Stop
is now being played back. To eject the CD/DVD, press the “EJ” button again and remove the ejected data carrier. When the monitor is open, the screen menu is also available to you for the ejection of the data carrier. Caution: •... -
Page 46: Fast Forward And Rewind
the display. When the monitor is open, the screen menu is also available to you for these functions. 15.5 Fast forward and rewind To fast forward, briefly press the button once. Then the playback speed is increased to 2x. If button is pressed once more, the speed is doubled again. -
Page 47: Playing Tracks In Random Sequence (Random)
15.8 Playing tracks in random sequence (Random) For random playback, press the button during the playback until the abbreviation “RDM“ appears on the display. The device begins to play a randomly selected track. If the RDM button is pressed during the playback of a track, this track will be played again from the beginning. All other tracks will also be played back in random sequence. -
Page 48: Selecting Sd/Mmc As A Program Source
will remain in the STOP mode of the CD/DVD playback. Never use force when inserting and removing an SD/MMC card; this could damage the device as well as the card. Also avoid direct skin contact with the contacts on the card to prevent contact problems. -
Page 49: Playing Back Mp3/Wma/Ogg Files
17 Playing back MP3/WMA/OGG files In addition to audio CDs, the device can also play back music files in the MP3, WMA and OGG Vorbis formats. Insert a corresponding data carrier into the device and select this as the playback source. To get to the desired folder or the desired track, please use the five-way multifunction button to navigate. -
Page 50: Displaying Images
18 Displaying images This function allows you to display images on the screen. You can use this function for CD/DVD data carriers as well as for a SD/MMC memory card. The navigation of this function generally functions just as during the playback of MP3, WMA and OGG Vorbis files. 18.1 Slide show To display the images in a slide show, change to the corresponding data carrier by pressing the “MODE”... -
Page 51: Thumbnail View
Now you can start the playback. Set the volume of the playback device to a medium level and subsequently regulate the volume with your SilverCrest CDV-710. If the playback source of the SilverCrest CDV-710 has not been set to AUX yet, please press the “MODE” button... -
Page 52: Menu Settings Level 1
20 Menu settings level 1 By briefly pressing the volume control dial once or several times, the functions of menu level 1, volume control, bass setting, treble setting, and the speaker balance between the left and right as well as front and rear speaker groups can be selected and set. 20.1 Changing the bass settings (BASS) Pressing the control dial twice will result in reaching the bass settings. -
Page 53: Changing The Volume Ratio (Balance)
20.3 Changing the volume ratio (BALANCE) After pressing the control dial three times, the settings for the ratio between the speakers connected on the right and left can be reached (BALANCE). The message “BAL” appears on the display along with the settings for the volume ratio between the right and left speaker group (e.g. -
Page 54: Changing The Volume Distribution (Fader)
20.4 Changing the volume distribution (FADER) After pressing the control dial four times, the settings for the speaker distribution between the front and rear speaker group (FADER) will be reached. The message “FAD” will appear on the display along with the set volume ratio between the front and rear speaker group (e.g. -
Page 55: Menu Level
21 Menu level 2 You can reach menu level 2 by pressing the control dial for approx. two seconds. The individual menu items can be reached by repeatedly pressing the control dial. At menu level 2, the functions “LOC” (distance setting for station search), “LOUD” (sound setting), “ST-MO”... -
Page 56: Loud Function For The Tone Setting – Loudness
21.2 LOUD function for the tone setting – loudness The “LOUD” function makes it possible to emphasize low and high frequencies through the push of a button in order to increase sound perception in an adjustment to the respective volume. To activate the “LOUD”... -
Page 57: Ct Function To Set The Time Of Day
The setting is saved either when the desired value is confirmed by pressing the control dial through automatic memory (don’t change anything on the device for approx. five seconds). If you confirm the selection by pressing the control dial , you will reach the next possible setting. If you use the automatic memory, the device will return to the standard display. -
Page 58: Tavol Function To Set The Volume For Traffic Announcements
21.5 TAVOL function to set the volume for traffic announcements The “TAVOL” function enables an adjustment of the volume of traffic announcements according to individual preferences. To change the device’s volume for traffic announcements, press the control dial until menu level 2 is reached. -
Page 59: Eon For The Automatic Station Switch For Traffic Announcements
21.6 EON for the automatic station switch for traffic announcements The “EON” function is an additional RDS service. If the current program doesn’t offer any traffic announcements, EON automatically switches to the traffic announcements on another program. After the end of the announcement, the device switches back to the previously heard station. The readiness for traffic announcements “TA”... -
Page 60: D/Z For The Settings Of The Second Playback Level (Dual Zone)
21.7 D/Z for the settings of the second playback level (DUAL ZONE) The device has a second playback level (dual zone). This makes it possible to address a second playback medium. For example: listening to the radio on the front seats and watching a DVD on the back seats (this requires a second monitor). -
Page 61: General Settings
22.1 General settings 4:3 Letterbox 16:9 4:3 Pan scan 16:9 Wide Menu entry Function TV format Here you can adjust the output format for the DVD playback according to your preferences. Viewing angle This function is indicated in the device menu but not supported by the device. indicator OSD language This menu item allows you to set the language of this menu. -
Page 62: Audio Settings
22.2 Audio settings Menu entry Function Analog audio Here you can set the format in which the DVD sound should be played back. settings STEREO = analog stereo signal RIGHT / LEFT = Dolby Pro Logic stereo signal (2 channel sound) SURROUND = Virtual surround sound If STEREO has been switched on, “STR“... - Page 63 LPCM (linear PCM) OUTPUT allows you to select either the audio CD standard (48K) or the DVD standard (96K). Dolby digital Through this menu you can adjust the behaviour of the Dolby function settings according to your own preferences and determine the desired type of output. Stereo = stereo sound, R-mono and L-mono each play back the sound only through the selected channel.
-
Page 64: Video Settings
22.3 Video settings Menu entry Function Colour settings This function enables you to adjust the colour settings of the DVD playback according to your preferences (possible levels are listed in brackets) Sharpness This serves to set the sharpness of the image (high / medium / low). Brightness This serves to set the brightness of the image (- 20 to + 20). -
Page 65: Preferred Settings
22.4 Preferred settings Menu entry Function TV format This setting enables the selection of the appropriate TV standard. PAL is the customary standard in Europe. NTSC is the customary standard in the US and Japan. Only select the MULTI option if your TV can play back both formats. - Page 66 Subtitles This enables the selection of the desired subtitles. If the subtitles selected here are not available on the inserted data carrier, the first subtitles that are found will be played back. Menu language This enables the selection of the desired menu language. If the language selected here is not available on the inserted data carrier, the first language that is found will be played back.
-
Page 67: Password Settings
22.5 Password settings Menu entry Function Password protection This function serves to protect the selected settings. The factory default password is 136900. Password With this function you have the option changing factory default password. Old password Enter the old password here. New password Enter the new password here. -
Page 68: Exiting The Settings
Note: If you have forgotten your changed password, you can set a new one at any time by entering the factory default password 136900. 22.6 Exiting the settings To exit the settings menu again, please navigate to the last item in the bar on top. -
Page 69: Remote Control (Normal)
24 Remote control 24.1 Remote control (normal) The buttons of the remote control fulfil the same functions as the buttons with the same names on the device. Special functions are described in detail in the table below. Button Function Switches the audio channel of the current DVD to another AUDIO playback language (if available). -
Page 70: Remote Control (Dual Zone)
24.2 Remote control (Dual Zone) The buttons of the remote control fulfil the same functions as the buttons with the same names on the device. Special functions are described in detail in the table below. Button Function MODE Switches the playback source. Switches the audio channel of the current DVD to another AUDIO playback language (if available). -
Page 71: Changing The Battery
24.3 Changing the battery Remote control To change the battery, the battery compartment can be pulled out towards the front. Now replace the old battery with a new one of the same type (CR 2025). Please pay attention to the polarity ("+ pole" to the top) when you insert the battery. Please only touch the battery on the edge, since there might be contact problems otherwise. -
Page 72: Disposal Of The Battery
24.4 Disposal of the battery Please consider that you as an end consumer are obligated to return discarded batteries that are hazardous waste to a distributor or a redemption site intended for this purpose by a public waste management facility. 25 Product information 25.1 General information General... -
Page 73: Technical Specifications
25.2 Technical specifications UKW RADIO Frequency range: 87.5 – 108.0 MHz Usable sensitivity (S/N): 10 dBμ Minimum reception level for station 20-30 dBμV search: Distortion: 0.5% Stereo channel separation (1 KHz): 30 dB Antenna impedance: 75 Ω Signal/noise ratio: 60 dB MW RADIO Frequency range: 522 - 1620 kHz... - Page 74 AUX IN Distortion: 0.5% Frequency range (± 3 dB): 20 Hz – 20 KHz Audio input level: 1 Vrms VIDEO Normal video input level: 1.0±0.2V (CVBS) Video input impedance: 75 Ω Video output impedance: 75 Ω Video output level: 1.0 ± 0.2 V (for normal video input level) TFT Monitor Video standard: PAL/NTSC...
- Page 75 Environment Temperature (operation): -20° to +60° (fan installed for internal cooling) Storage temperature: -30° to +80° Humidity (operation): 45% to 80% RH Humidity (storage): 30% to 90% RH DVD, DVD-R, DVD-RW, DVD+R, DVD+RW, DVD-R Supported formats DL, DVD+R DL, CD, CD-R, CDRW, VCD, SVCD, MP3, WMA, OGG Vorbis and JPG data carriers.
-
Page 76: Disposal
26 Disposal Please consider that your electronic entertainment device is subject to the European guideline 2002/96/EC for the reduction of electronic waste. You are therefore not permitted to dispose of your device in your household waste. You can receive information regarding the disposal of old devices at the municipal administration, the waste disposal administration and the store where you purchased this product. -
Page 77: Troubleshooting
27 Troubleshooting If an error occurs, please consider these instructions before you have the device repaired. If you are unable to solve a problem despite these instructions, please consult the hotline. Don’t try repairing the device yourself under any circumstances. In that event the device would lose its warranty. - Page 78 Problem Cause Solution The radio hasn’t been Please check if all cables have been attached connected correctly. correctly. The device temperature is too The device doesn’t Reduce the volume of the device. high. retain the stored Contacts 4 and 7 haven’t been stations Contact your vehicle manufacturer or a connected properly or the...
- Page 79 Problem Cause Solution Change your location to achieve better Bad radio reception Reception conditions are bad. reception. The radio reception is choppy or The AF function is activated. Deactivate the AF function. frequently interrupted. The radio only The REG function is activated. Deactivate the REG function.