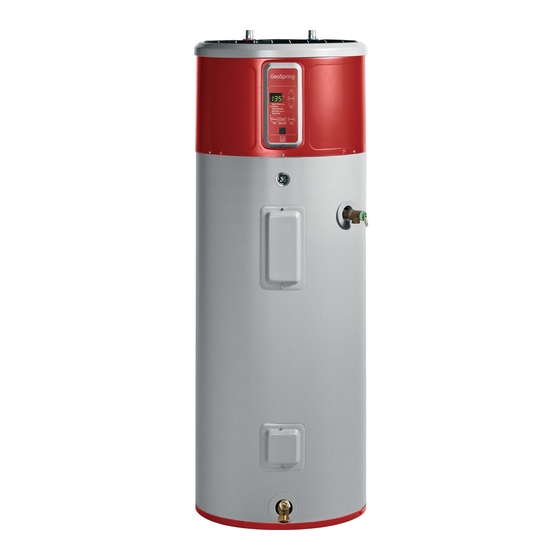
GE Appliances Geospring GEH50DEEDXX Owner's Manual And Installation Instructions
Hybrid electric residential water heater
Hide thumbs
Also See for Appliances Geospring GEH50DEEDXX:
- Owner's manual & installation instructions (50 pages)
Table of Contents
Available languages
Available languages
Quick Links
GEAppliances.com
-(:3
rY
L)
L_
U
Iii
-(:3
L_
"p..
0
I,.9
...2-4
Operating Instructions
Control Panel ..........................................
5
Powering Unit .........................................
6
Temperature Setting ............................ 7
OpemtionQl Modes ...............................
8
9
Appliance Cornrnunicotion
Module (ACM).......................................
10
.................... 1 1, 12
.........13-18
Troubleshooting
Tips ...............19-21
Consumer Support ........................... 72
*ENERGY STAR @
labeled product
ENERGY S TAR
As an ENERGY STAR ® partner, GE has
determined that this product meets
the ENERGY STAR ® guidelines for
energy efficiency.
Write the model and serial
numbers
here:
Model #
Serial #
You can find them on the rating label
on the front side of your water heater.
G EH50D EEDXX
Chauffe-eau
rGsidentiel hybride 61ectrique
La section
frangaise commence
_ la page 25
Calentadores
de agua
residencieles
elGctricos hibridos
La secci6n en espafiol empieza en la p6gina 49
49-50281-2 02-12 GE
Chapters
Table of Contents

Related Manuals for GE Appliances Geospring GEH50DEEDXX


Summary of Contents for GE Appliances Geospring GEH50DEEDXX
-
Page 1: Table Of Contents
*ENERGY STAR @ La secci6n en espafiol empieza en la p6gina 49 ENERGY S TAR "p.. As an ENERGY STAR ® partner, GE has determined that this product meets the ENERGY STAR ® guidelines for energy efficiency. Write the model and serial I,.9... - Page 2 IMPORTANT SAFETY INFORIV/AT/ON. READ ALL INSTRUCTIONS BEFORE USING. A WARNING! For your safety, the information in this manual must be followed to minimize the risk of fire or explosion, electric shock, or to prevent property damage, personal injury, or loss of life. Be sure to read and understand the entire Owner's Manual before attempting to install or operate this water heater.
-
Page 3: Important Safety Information
IMPORTANT SAFETY INFORMATION. READ ALL INSTRUCTIONS BEFORE USING. GEAppliances.com A CAUTION! Risk of Fire - Hydrogen gas can be produced in a hot water system served by this water heater that has not been used for a long period of time (generally two weeks or more). HYDROGEN GAS IS EXTREMELY F LAIVIIVIABLE!! To dissipate such gas and to reduce risk of injury, it is recommended that the hot water faucet be opened for several minutes at the kitchen sink before... - Page 4 IMPORTANT SAFETY INFORMATION. READ ALL INSTRUCTIONS BEFORE USING. Safety Precautions A WARNING: A. Do turn off power to water heater if NOTE:Flammable vapors may be drawn If the water heater has been it has been subjected to overheating, by air currents from surrounding areas subJectedto flood, fire, or physical to the water heater.
- Page 5 the controls. About GEAppliances.com DAYS -31 HEAT PUMP IONLVl OHYBRID OHIGH DEMAND _ELECTRIC IFAN om _,VACATION EA_U Hold to Hold for Hold to Override Reset °F/°C PS-Power Saver Co_ n trol_ s Filter Reset Display The filter is dirty and requires cleaning when the Red light is illuminated.
-
Page 6: Temperature Setting
Turning on the water heater. There is no power button for this unit. Once the water heater is wired and power is supplied, it will be on. The display will show the current water temperature setting. Current operating mode for the water heater is illuminated. - Page 7 About the water temperature setting. GEAppliances.com Temperature setpoint: Risk of Scalding Reminder: Safety,energy conservation and hot water capacity Water temperatures above 125°F152°C) c an cause are factors to be considered when selecting the severe burns or death from scalding. Be sure to read water temperature setting of the water heater.
- Page 8 Operational Modes. Vacation This water heater defaults to the Hybrid operating mode. Available modes are listed below and can This feature is used when you will be away from be selected using the MODE button. the home for an extended period of time and hot water is not needed.
-
Page 9: Frequently A Sked Questions (Faq)
Frequently Asked Questions. GEApplionces.com Filten Operation: O:Why istherea filter? O:Whycan I hearthe unitrun? A:in Hybridand Heat Pump(only)theunit movesair A:Inthe mostenergy-efficient m odes,HeatPump(only), throughthe system. T hefilter protectsthe unitfrom dirt. Hybrid,and HighDemand/Boost, the method used to heatthe water usesa fan that can be heardwhile A cleanair filter improvesefficiency. -
Page 10: Module (Acm)
Appliance RJ45 If your local utility company is utilizing ACM technology, ACM connector. Use only with designated GE Appliance the ACM module will receive the signals sent from your Accessories. Connection to computers and accessories utility company. -
Page 11: Care And Cleaning
Care and cleaning. GEAppliances.com Routine Preventive Maintenance A DANGER: Risk o fScald-Before Periodic Inspection (once a year): manually operating the relief valve, make It is further recommended that a periodic inspection certain no one will be exposed to the danger of of the operating controls, heating elements and coming in contact with the hot water released wiring should be made by service personnel... - Page 12 Care and cleaning of the water heater. Cleaning the Filter In the Hybrid, Heat Pump (only)and High Demand/ After the clean filter has been reinstalled, press and Boost modes, the heater moves air through the hold the FILTERbutton. If a heating cycle is on when the filter fault is reset, it will continue in electric mode system and out the back of the unit.
-
Page 13: Installation Instructions
Installation Water Heater Instructions Model GEHSODEED×× The location chosen for the water heater must take into LOCATION (CONT.) consideration the following: WATER HEATER SIZING INFORMATION - READ BEFORE INSTALLING: LOCAL INSTALLATION REGULATIONS For existing home replacements: This water heater must be installed in accordance with these instructions, local codes, utility codes, •... - Page 14 Installation Instructions LOCATION (CONT.) MATERIALS NEEDED FOR INSTALLATION Catch Pan Installation 1/2" Rigid PVC Routeto opendrain.Line droin pipe shouldbe at least 3/4'" (os required) 1/2"MNPT PVC PVCGlue (1.g cm) ID and pitched Connector for properdrainage. A--Diameter of water heater plus2" (5.1cm)min. B--Maximum 2"...
- Page 15 Installation Instructions WATER SUPPLY CONNECTIONS RELIEF VALVE Referto the illustrationbelow for suggestedtypical installation. A WARNING: Risk o u,,it o o og -The The installation of unions or flexible copper connectors is recommended on the hot and cold water connections so that pressure rating of the relief valve must not exceed 150 the water heater may be easilydisconnected for servicingif PSI(1.03 kPa),the maximum working pressure of the...
- Page 16 Installation Instructions TO FILL THE WATER HEATER ELECTRICAL CONNECTIONS A WARNING: Risk o fUnit A separate branch circuit with copper conductors, overcurrent D amage- protective device and suitable disconnecting means must be tank must be full of water before heater is turned on. The provided by a qualified electrician.
- Page 17 Installation Instructions The manufacturer's warranty does not cover any NOTE: This guide recommends minimum branch circuit sizing based on the National Electric Code. damage or defect caused by installation, attachment Refer to wiring diagrams in this manual for field wiring or use of any type of energy-saving or other connections.
- Page 18 Installation Instructions INSTALLATION CHECKLIST 1. Tank location: - Does room size require Iouvered door or similar ventilation? 10' x 10' x 7' (700 cu. ft.) or 240 square inches (0.15 m2) air-flow urea needed. - Buck of unit away from wall by 7 inches (17.5 cm), and sides have at least 7 inches (17.5 cm) clearance. - Front of unit is free and clear.
- Page 19 Troubleshooting... GEAppliances.com Save time and money! Review the chart below first and you may not need to call for service. efore you call for service ..Possible Causes Whet To Do Water heater makes A fan is used to move air •...
- Page 20 (]node rod. A qu(]lified servicer or plumber should do this repl(]cement. Use of (] non-GE (]pproved (]node rod, or oper(]ting the w(]ter he(]ter without (] GE (]pproved (]node rod will VOID the w(]rr(]nty. • Check mode of unit. unit is not making...
- Page 21 Fault codes. GEApp,i°nces.com Fault Code Displayed Condition Action T4 Not Rising Call service Discharge Ternp Not Stable Call service Evaporator Not Frost Free Call service Superheat Too Low Call service Discharge Temperature Above Limit Call service Electronic Expansion Valve Out of Range Call service T2 Tank Temperature Sensor Failure Call service...
- Page 22 GE Hybrid Water Heater Warranty. All warranty service provided by our Authorized Servicer Network. Staple your receipt here. To schedule service, call 888.4GE.HEWH (888.443.4394). Please Proof of the original purchase have serial number and model number available when calling for date is needed to obtain service.
- Page 23 Notes. GEApplionces.com...
- Page 24 Notes.
- Page 25 Importontes consignes de s_curit6 ......... 26-28 Consignes d'utilisation Panneau de commandes ..... 2 9 Unit6 d'Qlimentation ......30 R6gtQge de la temp6rQture ..3 1 Modes de fonctionnement ...32 Foire oux questions (FAQ)..... 3 3 Module de communicQtion I'QppQreil (ACM)) ......34 Entretien et nettoyage ..35, 36...
- Page 26 INFORMATION IMPORTANTE SUR LA SECURITE. LISEZ TOUTES LES INSTRUCTIONS AVANT L'UTILISATION. VERTISSEMENT! Pour votre s6curit6, vous devez suivre les instructions contenues dans ce manuel pour r6duire les risques d'incendie ou d'explosion, d'61ectrocution ou pour pr@enir les dommages mat@iels,les blessures ou la mort. Assurez-vous de lire et de comprendre tout le manuel de I'utilisateur Grant de tenter d'installer ou de faire fonctionner ce chauffe-eau.
- Page 27 www.electromenagersge.ca AAVERTISSEFIENT! Risque d'incendie-L' essence ainsi que d'autres substances et liquides inflammables (adh6sifs, solvants, etc.) et les 6manations qu'ils produisant sont extr_mement dangereux. NE PAS manipuler, utiliser ou entreposer de I'essence ou d'autres substances inflammables ou combustibles pros d'un chauffe-eau. L'arc 61ectrique 6 I'int6rieur de la commande du chauffe-eau peut allumer ces 6manations.
- Page 28 INFORMATION IMPORTANTE SUR LA SECURITE. LISEZ TOUTES LES INSTRUCTIONS AVANT L'UTILISATION. AVERTISSEMENT Precautions de s_curit_ Si le chauffe-eau a _t_ soumis A. Coupez I'alimentation au chauffe-eau si REMARQUE : Des vapeurs inflammables une inondation, un incendie celui-ci a 6t6 soumis 6 une surchauffe, provenant des zones environnantes des dommages materiels,...
- Page 29 Au sujet des commandes. DAYS _HEAT PUMP/oNLY/ OHYBRID OHIGH DEMAND _ELECTRIC/FANom :VACATION VE._ Hold for Hold to Hold to Override °F/°C PS-Power Saver Reset Commandes R_initialisation du filtre Affichage Le filtre est sale et n6cessite un nettoyage Iorsque le t6moin rouge est allum6. Le Modes de fonctionnement filtre est situ6 sur le dessus du chauffe-eau.
- Page 30 Mise en marche du chauffe-eau. Cet appareil n'a pas d'interrupteur. Une fois le chauffe-eau install_ et I'alimentation _lectrique branch_e, il sera allum_. L'_cran affichera le r_glage de la temperature d'eau. Le mode de fonctionnement en cours pour le chauffe-eau est allum6.
- Page 31 Etats-Unis est r6gl6 0 135°F (57°C).Les 6conomies les br01ures>> ci-dessous pour d_terminer la d'6nergie potentielles du chauffe-eau hybride temperature de I'eau appropri_e pour votre GE GeoSpring sont bas6es sur un r6glage de la domicile. temperature (_135°F (57°C). La temperature de Robinets m61angeurs : I'eau peut donc ¢tre augment6e du point r6gl6 en...
- Page 32 Modes op .rationnels Ce chauffe-eau revient par d6fout au mode Mode E'lectrique (Ventilateur _teint)/ Standard (Ventilateur _teing de fonctionnement hybride. Les diff6rents modes sont donn6s ci-dessous et peuvent _tre Ce mode utilise uniquement les 616ments s61ectionn6s grace (3la touche MODE. chauffants sup6rieurs et inf6rieurs pour chauffer I'eau.
- Page 33 Foire oux questions. Www.e/ectrornenagersge.ca Filtre: Q:Qu'est-ce que le ModeElectrique (Ventilateur 6 teint)/ Standard(Ventilateur 6 teint) Q:Pourquoi y a-t-il unfiltre? A:LemodeElectrique (Ventilateur eteint)/Standard A:EnmodeHybrideetThermopompe (uniquement), (Ventilateur e teint)utiliseuniquementlesresistances I'appareil f ait circulerde I'airdansle systeme. L efiltre pour chaufferI'eau.Celapermet de chaufferI'eau protegeI'appareil c ontre la salete.Unfiltre 6 air propre plusrapidementqu'enmodeHybride, m ais accroTt am61iore I'efficacitedu chauffe-eau.
-
Page 34
• <
> (indique que le plus faible coot 6nergatique est uniquement qu'avec des accessoires d'61ectromanagers disponible) GE. La connexion a des ordinateurs et autres accessoires peuvent endommager le produit. • < > (indique un coot 6nergatique croissant) Lorsque I'appareil fonctionne aux coots 6nergatiques •... - Page 35 Entretien et nettoyage. Www.electromenagersge. Entretien pr_ventif A DANGER: an): Inspection p_riodique (une lois par Risque de br6lure- De plus,il est recornmand6de faire effectuer une Avant d'utiliser la soupape de s_curit_, assurez- vous que personne ne sera expos_ _ I'eau inspectionp6riodiquedes commandes,des616ments chaude d_gag_e par cette soupape.
- Page 36 Entretien et nettoyage du chauffe-eau. Nettoyage du filtre Dans les modes Hybride (uniquement), Apr_s avoir remis le filtre propre en place, appuyez Thermopompe et Demande 61ev6e, l e chauffe-eau sur le bouton FILTER (filtre) et maintenez-le appuy6 d6place I'air dans le syst_me et le fait ressortir a pendant :3secondes.
- Page 37 Instructions Chauffe-eau d°installation Mod IeGEH50DEED×× L'emplacement choisi pour le chauffe-eau dolt prendre en EMPLACEMENT (SUITE} consid@ation los _l_ments suivants: INFORMATIONS RELATIVES AU DIMENSIONNEMENT DU CHAUFFE-EAU - LIRE RI_GLEMENTS MUNICIPAU× RELATIFS AU× AVANT L'INSTALLATION INSTALLATIONS Pour le remplacement de syst_mes domestiques existants: Ce chauffe-eau dolt _tre install_ conform_ment 5 cos instructions, * Vous remplacez un chauffe-eau existant ? Si votre...
- Page 38 Instructions d'installation EQUIPEMENTS REQUIS POUR EMPLACEMENT (SUITE) L'INSTALLATION Installation d'un bac de r_cu :)_ration d'eau Tuyaude vidangevers unebonded'@acuation tuyau de vidange Lediam_tre internedu rigide en PVC tuyau dolt @red'au moins d'V_po _ po(1,9 cm)avecune (si n_cessaire) Connecteur en Colle 6 PVC inclinaisonappropri6pour MNPT PVCd'I/2 po unevidangead6quate.
- Page 39 Instructions d'instollotion RACCORDEMENT A L'ALIMENTATION SOUPAPE DE SECURITE EN EAU ,& AVERTISSEMENT: Risque Reportez-vous a I'itiustration c i-dessous p ourunesuggestion d'installation dommage pour I'appareil - La pression nominale de la typique.L'installation d e raccords ou de connecteurs f lexibles en cuivreest soupape de se'curit_ ne dolt pas d_passer 150 Ib/po 211003 kPa)0 recommand@e sur lesraccords d'eauchaudeetd'eaufroide,de mani@e la pression de fonctionnement ma×imale du chauffe-eau...
- Page 40 Instructions d'installation REMPLISSAGE DU CHAUFFE-EAU RACCORDEMENTS I LECTRIQUES A AVERTISSEMENT: Uncircuit de d_rivation distinct avec des conducteurs en cuivre, Risque un dispositif de protection contre lessurtensions et des moyens dommage pour I'appareil - Le r_servoir dolt _tre plein appropri_s pour d6connecter lechauffe-eau doivent _tre fournis par d'eau avant de mettre le chauffe-eau en marche.
- Page 41 Instructions d'installation La garantie du fabricant ne couvre pas les dommages REMARQUE : Ce guide recommonde un circuit d_rivation minimal bas_ sur le Code national ou ddauts caus6s par I'installation, le branchement I'_lectricit_. ou I'utilisation de tout dispositifs d'6conomie d'6nergie ou d'autres dispositifs non autoris6s (autres que Reportez-vous eux sch_mes...
- Page 42 Instructions d'installation LISTE DE VITRIFICATION D'INSTALLATION 1. Emplacement du r6servoir: - La-taille de la piece n6cessite-t-elle des portes _ persiennes ou une ventilation similaire ? lOpi x lOpi x 7pi (700 pi]) ou 240 pouces carr6s (0,15 m _)de surface de ventilation n6cessaire. - Eloignez I'appareil du mur de 7 po (17,5cm.)et d6gagez les parois d'au moins 7 po (17,5cm.) - Le devant de I'appareil est libre et d6gag&...
- Page 43 D pa n n a g e... Www.electromenagersge.ca Avont d'oppeler 6 un technicien... I_conomisez du temps et de I'argent ! Consultez d'obord le tableau ci-dessous pour peut-_tre #viter de faire appel (_un technicien. Causes Possibles Solution Le chauffe-eau Un ventiloteur est utilis_ •...
- Page 44 (1.888.443.4394) pour savoir o_ ocheter cette anode de remplocement. Un r6porateur quolifi6 ou un plombier doit effectuer ce remplocement. L'utilisotion d'une tige d'onode non approuv6e par GE,ou I'utilisation du chouffe-eou sons une tige d'onode opprouv6e par GE ANNULEIo gorontie. V@ifiez le mode de fonctionnement.
- Page 45 Codes d 'erre ur. Www.electromenagersge.ca Code d'erreur Condition Action affich_ T4 n'augmente pas Appelez un technicien Temp. sortie instable Appelez un technicien Evaporateur givr6 Appelez un technicien Surchauffe trop faible Appelez un technicien Temp6rature de sortie au dessus de la limite Appelez un technicien D6tendeur 61ectronique hors des Appelez un technicien...
- Page 46 Etats-Unis.Si le produit est install@ dans une r@gion oO ne setrouve aucun r@parateurautoris@GE,vous devrez peut-@tre assumer les frais de transport ou apporter exp@dier l e produit _ un centre de service autoris@ GE.EnAlaska,cette garantie exclut le coot d'exp@dition ou les appels de service _ votre site.
- Page 47 Notes. Www.electromenogersge.co...
- Page 48 Internet au site www.electromenagersge.ca 2/4heures parjour, tousles jours de I'ann6e. Servicede rdparations 1.800.561.3344 Service de r6parations GE est tout pr@s de vous. Pour faire r6parer votre 61ectrom6nagerGE,il suffit de nous t616phoner. Studio de conception rdaliste Sur demande, GEpeut fournir une brochure sur I'am6nagement d'une cuisine pour les personnes 6 mobilit6 r6duite.
- Page 49 Informaci6n Importante Seguridad ........ 50-52 Instrucciones de Funcionamiento Panel de Control ......... Unidad de Corriente ......54 Configuraci6n deTemperatura ..55 Modos de Funcionamiento .... 5 6 Preguntas Frecuentes (FAQ)..5 7 M6dulo de Comunicaci6n del Electrodom_stico (ACM)..... 5 8 Cuidado y Limpieza ....S9, 60 Instrucciones de Instalaci6n 61-66...
-
Page 50: Seguridad
INFORMACION IMPORTANTE DESEGURIDAD. LEATODASLASINSTRUCCIONES ANTESDE USAR. AiADVERTENCIA! Para su seguridad, siga las instrucciones de este manual a fin de minimizar riesgos de incendio o explosi6n, descargas el6ctricas, o para evitar daflos en su propiedad, lesiones personales o la muerte. Aseg0rese de leer y entender el Manual del Propietario en su totalidad antes de intentar instalar o usar este calentador de agua. - Page 51 INFORMACION IMPORTANTE DESEGURIDAD. LEATODASLASINSTRUCCIONES ANTESDE USAR. GEAppliances.com A iPRECAUCION! Riesgo de incendio - Se puede producir gas hidr6geno en un sistema de agua caliente abastecido por este calentador de agua, el cual fue usado par un per[ado de tiempo prolongado (generalmente dos semanas o m6s). iELGAS HIDROGENOES EXTREMADAMENTE INFLAMABLE! Para disipar dicho gas y reducir el riesgo de lesiones, se recomienda que el grifo de agua caliente quede abierto durante varios minutos en el lavabo de la cocina, antes de usar cualquier artefacto el6ctrico conectado al sistema de agua caliente.
- Page 52 INFORMACION IMPORTANTE DESEGURIDAD. LEATODASLASINSTRUCCIONES ANTESDE USAR. Precauciones de Seguridad AADVERTENCIA: Apague el suministro de energia del NOTA:PodrSn ser emitidos vapores A° Apogue el suministro de energio calentador de agua si 6ste sufri6 inflamables por Corrientes de aire en del calentador de agua si _ste 5reas circundantes al calentador de un sobrecalentamiento, incendio, sufri6 dafios fisicos o una...
- Page 53 Acerca de los controles. GEApplionces.com DAYS _HFAT PUMP IONLYI eHYBmD OHIGH DEMAND _ELECTRIC (FAN OFF} _VACATION Hold to Hold for Hold to Override Reset °F/°C PS-Power Saver Controles Reinicio del Filtro Pantalla El filtro est6 sucio y requiere una limpieza Modos de Funcionamiento cuando la luz Roja est6 iluminada.
- Page 54 Encendidodel calentador de agua. Esta unidad no cuenta con un bot6n de encendido. Una vez que el calentador de agua es enchufado y haya suministro de corriente, estar6 encendido. La pantalla mostrar6 la configuraci6n actual de la temperatura del agua. El modo de funcionamiento actual del calentador de agua aparecer6 iluminado.
- Page 55 Acercade la configuruciSnde la temperuturu del agua. GEApp/iances.com Posici6n de Ajuste de Temperature: Recordatorio de Riesgo de Quemaduras: Lastemperaturas con agua superioresa los 125° F pueden La seguridad, la conservaci6n de la energia y la capacidad det agua caliente son factores qua se deben considerar ocasionar quemaduras graves o la muerte pot quemaduras.
-
Page 56: Modos De Funcionamiento
Modos de Funcionamiento. Este calentador de agua funciona par defecto en Modo El_ctrico con ventilador apagado/ el modo de funcionamiento Hibrido. Los modos Est6ndar con ventilador apagado disponibles figuran a continuaci6n y pueden ser Este modo utiliza s61o los elementos de resistencia seleccionados usando el bot6n MODE (Modo). - Page 57 PregLi ntcis FrecLlelltes. GEApplio,ces.corn Filtro:: P:?Porque hayun filtro? Fundonamiento: El losmodosHfbridoy Bombade Calentamiento P:_Porque puedoescucharla unidadfuncionar? (solamente), la unidad mueveaire a travesdel sistema. R:Enlosmodosde mayoreficienciade la energfa, H eat Elfiltro protegela unidadde la suciedad.Elfiltro de aire Pump(only)(Bomba de Calentamiento solamente), y limpiomejorael rendimiento.
-
Page 58: Electrodom_Stico (Acm)
Heat Pump (only)(Bomba del Artefacta Inteligente de GE, el cual puecte ser actquirido en de Calentamiento solamente) y la temperatura del agua forma aparte. Comuniquese con su servicio local o visite www. -
Page 59: Cuidado Y Limpieza
Cuidado y limpieza. GEAppliances.com Rutina de Mantenimiento Preventivo (una vez pot aho): Inspecci6n Peri6dica PELIGRO:Riesgo quemaduras- Incluso se recomienda una inspecci6n peri6dica de los Antes de utilizar manualmente la vSIvula de alivio, controles de funcionamiento, elementos de calentamiento y cableado por parte de personal calificado del servicio aseg_rese de que nadie est_ expuesto al peligro de t6cnico en reparaciones del artefacto el6ctrico. - Page 60 Cuidado y limpieza del calentador de agua. Limpieza del Filtro En los modos Hybrid (Hfbrido),Heat Pump (only)(Bomba Una vez que el filtro limpio fue reinstalado, mantenga de Calentamiento solamente) y High Demand/Boost presionado el bot6n FILTER(FiltroL Si el ciclo de (Alta Demanda/Incrementar), el calentador mueve aire a calentamiento esta activado cuando se reinicia el filtro, se continuara en el modo el@ctricohasta finalizar el ciclo.
- Page 61 Calentador de Agua JInstrucciones de Instalaci6n Modelo GEHSODEED×× UBICACI6N (CONT.) AI elegir la ubicaci6n del calentador de agua se deber6 tener en cuenta Io siguiente: INFORMACI6N DEL TAMANO DEL CALENTADOR DE AGUA - LEA ANTES DE INSTALAR: REGULACIONES DE INSTALACION LOCALES Pare reemplazos en viviendas existentes:...
-
Page 62: Instrucciones De Instalaci6N
Instrucciones de Instalaci6n UBICAClON (CONT.) MATERIALES NECESARIOS PARA LA INSTALAClON Instalaci6n de la Bandeja de Recolecci6n Dirijahacia un drenaje abierto. Lalinea deberiaser Tuberia de de por Iomenos%" (1.9cm. drenaje rigida de de di_metroy estarinclinad 1/2" (segLin se Conector de Pegamento para requiera) MNPT PVCde _/_"... - Page 63 Instrucciones de Instalaci6n CONE×IONES DEL SUMINISTRO DE AGUA V, ,LVULA DE ALIVIO Para conocer la instalaci6n t[pica sugerida, consulte la ilustraci6n que A ADVERTENCIA: aparece a continuaci6n. Se recomienda la instalaci6n de uniones Riesgo de daSo o coned:ores de cobre flexible en lasconexionesde agua caliente sobre launidad - Elindice d e presi6n d e lav61vula d e y if[a, de modo que el calentador de agua pueda ser facilmente alivio no debe superar los150PSI 11.03 k Pal, l am6×ima...
- Page 64 Instrucciones de Instalaci6n CONE×IONES ELI_CTRICAS PARA LLENAR EL CALENTADOR DE AGUA Unelectricista calificado deber6 instalar un circuito derivado A ADVERTENCIA: Rip,go do o individualcon conductores de cobre,un dispositivo para la protecci6n de sobrecarga y un medio adecuado de desconexi6n. sobre la unidad - El tanque debe estarlleno de agua antes de encender elcalentador.
- Page 65 Instrucciones de Instalaci6n La garantfa del fabricante no cubre ningOn dar_o o defecto NOTA: En esta guia se recomienda el tama_o minimo ocasionado por la instalaci6n, adhesi6n o uso de ningLin del circuito derivado en base al C6digo Nacional tipo de ahorro de energfa u otros dispositivos no aprobados de Electricidad.
- Page 66 Instrucciones de Instalaci6n LISTA DE CONTROL DE LA INSTALACI6N 1. Ubicaci6n del Tanque: - LRequiere el tamato de la habitaci6n una puerta de celosia o un tipo de ventilaci6n similar? Se necesita un 6rea de flujo de aire de 10"x 10" x 7" (700 pies c0bicos) o 240 pulgadas cuadradas (0.15 m2). - Parte trasera de la unidad alejada de la pared 7 pulgadas (17.5 cm.), y los costados por Io menos a una distancia de 7 pulgadas (17.5 cm.).
-
Page 67: Problemas
Soluci6n de Problemas... GEAppliances.co Antes de solicitar el servicio t6cnico... iAhorre tiempo y dinero! Lea primero el cuadro que aparece a continuaci6n y es posible que no necesite solicitar reparaciones... Causas Posibles Qu_ Hacer El calentador de agua Se est6 usando un ventilador •... - Page 68 Soluci6n de Problemas... Causas Posibles Ou_ Hacer El agua est6 La configuraci6n de la • Consulte la secci6n Acerca de la Configuraci6n de la demasiado caliente temperatura del agua es Temperatura del Agua. demasiado alta. I"Kl-_.,/_Uk.,l_/l_l: Para su seguridad, NO intente reparar cableados el6ctricos, controles, elementos de calentamiento u otros dispositivos de seguridad.
- Page 69 Para informaci6n sabre c6mo adquirir este reemplazo de la varilla del 6nodo, comun[quese a GE al L888.4GE.HEWH (1.888.44:3.4394). Personal calificado del servicio t6cnico o un plomero deber[an realizar este reemplazo. El usa de una varilla de 6nodo no aprobada...
- Page 70 EE.UU. S i el producto se encuentra en un 5rea donde no se encuentra disponible un ProveedorAutorizado del Servicio T6cnico de GE,usted ser5 responsable par el costa de un viaje o se podr5 requerir que traiga el producto a una Ubicaci6n del Servicio T6cnico de GEAutorizado para recibir el servicio.
- Page 71 Programe una reparaci6n GEAppliances.corn El servicio experto de reparaci6n de GE est6 s61o a un paso de su hogan Programe su reparaci6n en un horario conveniente para usted Ilamando al 888.4GE.HEWH (888.443.4394) en horario normal de trabajo. Real Life Design Studio (Disehopara la vida real) GEAppliunces.com...
- Page 72 Contact Us GEAppliunces.corn If you are not satisfied with the service you receive from GE,contact us on our Website with all the details including your phone number, or write to: General Manager, Customer Relations GEAppliances,Appliance Park...