Table of Contents
Available languages
Available languages
®
Catalog
Number
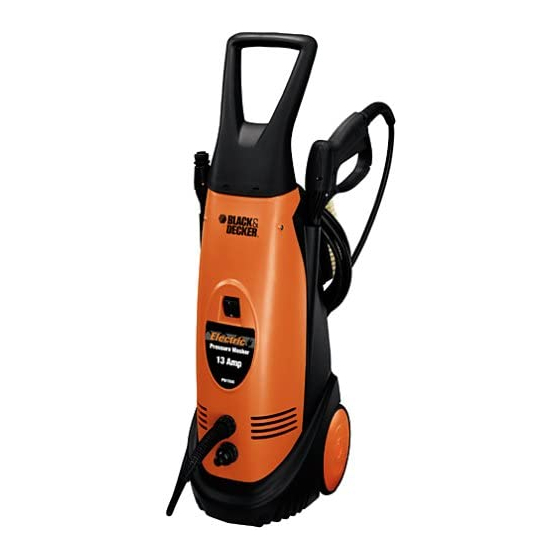
PW1500
INSTRUCTION MANUAL
IF YOU SHOULD EXPERIENCE A PROBLEM
WITH YOUR BLACK & DECKER PRODUCT,
CALL 1-800-544-6986
IN MOSTCASES,ABLACK& DEOKI3:_ R EPRESENTATIVE C AN RESOLVE YOUR PROBLEMOVER
THE PHONE.IFYOU HAVEASUGGESTIONOR COMMI_, GIVE USAC, A U_.YOUR FEEDBACKIS
VITALTO BLACK& DECI"_R.
SAVE THIS MANUAL
FOR FUTURE
REFERENCE.
VEA EL ESPAI(,IOL EN LA CONTRAPORTADA.
INSTRUCTIVO DE OPERACI6N,
CENTROS .DESERVICIO
Y POLIZA DE GARANTIA. ADVERTENCIA:
LEASE ESTE
INSTRUCTIVO ANTES DE USAR EL PRODUCTO.
Table of Contents

Related Manuals for Black & Decker PW1500


Summary of Contents for Black & Decker PW1500
- Page 1 ® Catalog Number PW1500 INSTRUCTION MANUAL IF YOU SHOULD EXPERIENCE A PROBLEM WITH YOUR BLACK & DECKER PRODUCT, CALL 1-800-544-6986 IN MOSTCASES,ABLACK& DEOKI3:_ R EPRESENTATIVE C AN RESOLVE YOUR PROBLEMOVER THE PHONE.IFYOU HAVEASUGGESTIONOR COMMI_, GIVE USAC, A U_.YOUR FEEDBACKIS VITALTO BLACK& DECI"_R. SAVE THIS MANUAL FOR FUTURE REFERENCE.
- Page 2 stopped e ven ifonly forafewmoments. Z_WARNING: When using thisproduct, basic p recautions should always b e 6.Keep clear o fnozzle. Never direct h igh followed, including thefollowing: pressure spray atanyperson, animal or self. 1.Read andunderstand allinstructions before u sing theproduct. 7.Donotusepressure that e xceeds the operating pressure ofanyoftheparts 2.Toreduce t heriskofinjury, close...
- Page 3 water s upply a sitwillsignificantly reduce thelifeofthepump. 21.Never store thepressure washer outdoors orwhere itcould f reeze. The pump w illbeseriously damaged. This pressure washer is provided with a 22.Discharge residual pressure by Ground Fault Circuit Interrupter (GFCI) pressing thetrigger u ntil n omore water built into the plug of the power supply comes o utofthenozzle.
- Page 4 Water outlet (OUTLET) until the two parts are locked as shown BIB1 Water inlet with filter (INLET) in Figure 3. High pressure turbo wand D. Adjustable fan wand Wheels Revolving brush Fixed brush H/HI/H2 Gun with safety catch/hose assemoty Power supply cord with GFCI Detergent applicator Nozzle cleaning tool On/off switch...
- Page 5 Garden h ose NOTE: Before cleaning any surface, an inconspicuous area should be cleaned to test spray pattern and distance for maximum cleaning results. If painted surfaces are peeling or chipping, use extreme caution as pressure washer may remove the loose paint from the surface. Figure 6- Connect theremaining portion The PW1500 Pressure Washer is oftheadapter (M1) t othe water ( INLET)
- Page 6 Figure 11-Turn onthepressure washer damage andallows f orcleaning large bydepressing thetophalf o ftheswitch surface a reas q uickly. (L)marked 'T'.The unit w illrunforafew seconds asitbuilds uppressure, then wilt shut o ff.Itwilt r unondemand asthegun trigger i sdepressed. Turn offthepressure washer bydepressing thelower h alf o f theswitch marked "0".
- Page 7 (J)and fillwithdetergent. • Ammonia products 2.)Replace top. • Acid-based products 3.)Insert gunwand (H)intodetergent These chemicals wilt harm the unit and applicator (J)until i tclicks f irmly into will damage the surface being cleaned. 3lace a sshown i nFigure F. • ROTATING BRUSH 1.) Insert the rotating brush (F) into the gun wand (H) by pushing and rotating until the two parts are locked as shown in...
- Page 8 98121-00 Pressure Wash Revised ii/\i/24k!)mB 2 :00 Page 5. Disconnect the garden hose from the water inlet. Remove the fan wand (D) from the 6. Disconnect the high pressure hose gun wand (H) as shown in Figure J. from the high pressure outlet and drain hose.
- Page 9 repair, orgenuine factory r eplacement parts, contact theBlack &Decker location nearest you. Tofindyour l ocal s ervice l ocation, refer totheyellow page directory under "Tools--Electric" or call: 1 -800-544-6986. Black & Decker (U.S.) I nc. w arrants this product fortwoyears against anydefects inmaterial orworkmanship.
- Page 10 TROUBLESHOOTING GUIDE Cause Symptom Solution Motor does not start. Unit not plugged in. Plug in power cord. On/Off switch is in the Off Turn switch to the "On" position. )osition. Wand trigger not being Squeeze trigger with switch in squeezed. "ON"...
- Page 11 TROUBLESHOOTING GUIDE - continued Cause Solution Symptom Contact B&D Customer Service Spray wand or Broken O-ring. extension leaks. Representative at 1-800-544-6986. Pump is excessively Pump is sucking air. Check that hoses and fittings are air noisy. tight. Turn off machine and purge pump by squeezing trigger gun until a steady flow of water emerges from the nozzle.
- Page 12 598121-00 Pressure Wash Revised ii/24_!9m3 2:01 Page MANUEL D'UTILISATION <[m...
- Page 13 598121-00 Pressure Wash Revised ii/24_!9m3 2:01 Page _<_ _AVERTISSEMENT : Lorsqu'on utilise appareil de protection respiratoire et des ce produit, on doit s'assurer de suivre les vetements de protection lorsqu'on utitise directives indiquees ci-dessous, y compris l'appareit ou qu'on en effectue t'entretien. les consignes de securit6 suivantes: 5.
- Page 14 598121-00 Pressure Wash Revised ii/24_!)m3 2:01 Page _<_ regulierement t'equipement et faire reparer electricien qualifie en cas de doute quant & la directive de mise & ta terre. On ne ou remplacer immediatement tes pieces usees ou endommagees, le cas echeant. doit jamais tenter de modifier cette fiche;...
-
Page 15
598121-00 Pressure Wash Revised ii/24_0m3 2:01 Page _<_ A. Sortie d'eau (<
>) Figure 3 - Introduire le tube raltonge eventail (D) dans te tube rallonge du BIB1. Arrivee d'eau et fittre (< >) pistolet (H) en le poussant et en le C. - Page 16 598121-00 Pressure Wash Revised ii/24_!9m3 2:01 Page _<_ tuyau REMARQUE : Avant de proceder au nettoyage d'une surface quelconque, nettoyer d'abord une surface moins visible afin de verifier le jet de pulverisation et de determiner ta distance requise pour obtenir tes meitteurs resultats possibles. Si on prevoit nettoyer une surface sur taquelle Figure 6 - Raccorder t'autre extremit6 de la peinture s'ecaitte, on doit faire preuve...
- Page 17 598121-00 Pressure Wash Revised ii/24_0m3 2:01 Page _<_ nettoyer plus profondement dans des Figure 11 - Pour mettre te nettoyeur & endroits plus concentres. Pour obtenir un pression sous tension, appuyer sur la jet en eventait (plus large), tourner ta partie superieure de l'interrupteur buse vers ta gauche.
- Page 18 598121-00 Pressure Wash Revised ii/24_0m3 2:01 Page _<_ de s'assurer de metanger tes bonnes • de produit au phosphate trisodique, quantites de savon et de detergents • de produit d'ammonium, Pour utitiser l'applicateur • de produit & base d'acide 1) devisser te capuchon superieur (J) et Ces produits chimiques endommagent remptir l'applicateur de detergent;...
- Page 19 598121-00 Pressure Wash Revised ii/24_!9m3 2:01 Page _<_ 2. Fermer le robinet. 3. Rel&cher ta pression residuelle en appuyant sur ta g&chette jusqu'& ce que l'eau arr6te de s'ecouler du bec pulverisateur reglable. • Degager le tube raltonge eventail (D) 4.
- Page 20 98121-00 Pressure Wash Revised ll/24k!gm3\i/_2:01 Page droits variant d'un territoire & t'autre. Toute question dolt _tre adressee au Black & Decker dispose d'un reseau gerant du centre Black & Decker te plus comptet compose de centres de service pres. Ce produit n'est pas destine a un et de centres autorises situes partout en usage commercial.
- Page 21 598121-00 Pressure Wash Revised ii/24_!9m3 2:01 Page _<_ GUIDE DE DEPANNAGE Solution Probl_me Cause Le moteur Re Brancher le cordon d'alimentation. L'appareil n'est pas branche. demarre pas. L'interrupteur marche-arret Mettre l'interrupteur & ta position de est & la position d'arret. marche (<<...
- Page 22 598121-00 Pressure Wash Revised ii/24_!9m3 2:01 Page Kp _ GUIDE DE DEPANNAGE Probl_me Cause Solution I1n'y a aucun Le detergent est trop N'utitiser que des detergents formules detergent, epais. 3our les nettoyeurs a pression. Le fittre du tube d'aspiration Passer le fittre sous l'eau chaude pour de l'applicateur y enlever tousles debris.
- Page 23 98121-00 Pressure Wash Revised ll/24k!gm3,\i/_ 2 :01 Page MANUAL DE INSTRUCCIONES
- Page 24 98121-00 Pressure Wash Revised ll/24k!)m3\i/_2:01 Page z_ ADVERTENClA: Tome siempre las utitiza el producto o le hace mantenimiento. precauciones de rigor al usar este producto, inclu_endo to siguiente: 5. Mantenga siempre el cerrojo de 1. Lea todas las instrucciones antes de seguridad del gatitto en la posici6n de usar el producto.
- Page 25 mientras tamaquina esta prendida o tomacorriente adecuado por un funcionando. electricista competente. No use ningQn 19.Siempre sujete tapistola y tavarilta tipo de adaptador con este producto. firmemente cuando p one enmarcha y opere lamaquina. z_ ADVERTENClA: A fin de reducir el 20.Eltavador a presi6n n oesta riesgo de electrocuci6n, mantenga todas...
- Page 26 Salida de agua (SALIDA) Figura 3 - Inserte la varitla con patr6n de BIB1. Entrada de agua con filtro (ENTRADA) abanico (D) en la pistola (H), empujando C. Turbovarilta de alta presi6n y girando hasta que tas dos partes queden entrelazadas segQn Io ilustra la D.
- Page 27 Manguera dejar NOTA: Antes de timpiar cualquier superficie y a fin de maximizar el resultado, se debe limpiar un &rea que pase desapercibida para hacer una prueba de distancia y del patr6n de rociado. Si las superficies pintadas se est&n escamando o agrietando, tenga mucho cuidado, ya que Figura 6 - Conecte taporci6n r estante el lavador a presi6n puede remover la...
- Page 28 Figure 11- Ponga e nmarcha e ltavador mas ancho, gire ta boquitta de ta varilla a presi6n o primiendo tamitad superior en sentido antihorario. La anchura del delinterruptor (L)marcado patr6n de abanico reduce el riesgo de "r'. La unidad dafio a la superficie y permite timpiar funcionara por unos pocos segundos a grandes areas de la misma rapidamente.
- Page 29 Para usar e laplicador: • Productos de fosfato tris6dico 1.)Desenrosque tatapa delapticador (J) • Productos de amoniaco y ttene con detergente. • Productos de acido-base 2.)Reponga latapa. Estos quimicos son daSinos para la unidad 3.)Inserte t avaritta d epistola ( H) enel y la superficie que se esta limpiando.
- Page 30 • Quite lavaritta d eabanico (D)deta varitta d epistola ( H)segQn s eilustra e n laFigura J. 1.Oprima e linterruptor deapagado y desenchufe elcable deltomacorriente. 2.Cierre e lagua delgrifo. 3.Descargue lapresi6n r esidual oprimiendo elgatitto h asta quenosalga mas agua delaboquitta ajustable. 4.Enganche elcerrojo d eseguridad de lapistola.
- Page 31 Loscentros deservicio B lack & Decker o asistencia para obtener unaccesorio, centros autorizados seanuncian bajo favor l tamar a:1-800-544-6986. "Herramientas - Electricas" enlas z_,DVERTENCIA: Puede s erpeligroso paginas amarittas delaguiatelef6nica. usar c ualquier accesorio no Esta garantia n oaplica a losaccesorios. recomendado con este lavador a presi6n.
- Page 32 PARA REPARACION YSERVICIO DESUS HERRAMIENTAS ELECTRICAS FAVOR DE DIRIGIRSE ALCENTRO DE SERVICIO MAS CERCANO CULIACAN Av. Nicolas Bravo #1063 Sur (56 77) 12 42 10 GAUDALAJARA Av. La Paz #1770 (33 38) 26 69 78 LEON Polara #32 (47 77) 13 14 56 MEXICO Sonora #134 Hiprodromo Condesa (55 55) 53 99 79...
- Page 33 GUIA DE SOLUCION DE PROBLEMAS Sintoma Causa 13olucibn Et motor no arranca. La unidad no esta Enchufar el cable de electricidad. enchufada. Turn switch to the "On" position. Et Interruptor Poner Interruptor en la posici6n de prende/apaga esta en la "Prendido"...
- Page 34 GUIA DE SOLUCION DE PROBLEMAS Causa Sintoma Solucibn El filtro del tubo de Haga correr el agua caliente a traves No hay detergente. succi6n de detergente del filtro para quitar los residuos. esta obstruido. El tubo de succi6n de Elimine ta obstrucci6n o reemplace el detergente esta dafiado IJ tubo de succi6n de detergente.
- Page 35 Form No.598121-00 NOV-03 Printed i nItaly...