Table of Contents
Available languages
Available languages
Chapters
Table of Contents

Related Manuals for Emerson LD195EM8 7


Summary of Contents for Emerson LD195EM8 7
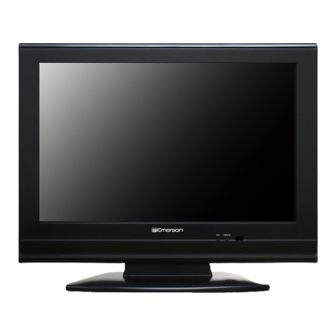
- Page 1 EMERSON AND THE G-CLEF LOGO ARE REGISTERED TRADEMARKS OF EMERSON RADIO CORP., PARSIPPANY, NEW JERSEY, U.S.A. 19” Digital LCD TV built-in DVD Player LD195EM8 7 LD195EM8 2 LD195EM8 TO RECEIVE DIGITAL/ANALOG SIGNAL, YOU MUST CONNECT ANTENNA. Owner’s Manual © 2008 Funai Electric Co., Ltd.
-
Page 2: Precautions
NTRODUCTION The model and serial numbers of this unit may be found on the cabinet. You should record and retain those numbers for future reference. Precautions WARNING: TO REDUCE THE RISK OF FIRE OR ELECTRIC SHOCK, DO NOT EXPOSE THIS APPARATUS TO RAIN OR MOISTURE. - Page 3 This apparatus should not be placed in a built-in installation such as a bookcase or rack unless proper ventilation is provided. Make sure to leave a space of 2.8 inches (7cm) or more around this apparatus. Disconnect the mains plug to shut off when find trouble or not in use. The mains plug shall remain readily operable. CAUTION: Danger of explosion if battery is incorrectly replaced.
-
Page 4: Introduction
NTRODUCTION Supplied Accessories owner’s manual (1EMN23240A) • If you need to replace these accessories, please refer to the part No. with the illustrations and call our toll free customer support line found on the cover of this manual. • Depending on your antenna system, you may need different types of combiners (mixers) or separators (splitters). Contact your local electronics store for these items. -
Page 5: Features
Features • DTV/TV/CATV - You can use your remote control to select channels which are broadcast in digital format and conventional analog format. Also, cable subscribers can access their cable TV channels. • Information Display (DTV only) - You can display the title, contents and other information of the current DTV program on the TV screen. -
Page 6: Table Of Contents
NTRODUCTION Contents INTRODUCTION Precautions ............2 Supplied Accessories . -
Page 7: Buttons On The Remote Control
Buttons on the Remote Control POWER (p. 13) Press to turn the unit on and off. MUTE (p. 15) Press to turn the sound on and off. SLEEP (p. 16) Press to activate the sleep timer. Number buttons (p. 15) •... -
Page 8: Control Panel
NTRODUCTION Control Panel Rear Panel VIDEO 2 COMPONENT AUDIO VIDEO 1 AUDIO S-VIDEO VIDEO COAXIAL 1. POWER (p. 13) Press to turn the unit on and off. 2. INPUT SELECT (p. 15) side of the unit Press to switch the input modes. 3. -
Page 9: Preparation
REPARATION Cables not included. Please purchase the necessary cables at your local store. Basic Connection This section describes how to connect the unit to an antenna, cable/satellite box, etc. Note: • Be sure your antenna or other device is connected properly before plugging in the power cord. [Antenna Connection] Connect the RF coaxial cable on your home outlet to the antenna input jack of this unit. -
Page 10: External Device Connection
REPARATION Cables not included. Please purchase the necessary cables at your local store. External Device Connection [Component Video Connection] RCA component video connection offers better picture quality for video devices connected to the unit. Use an RCA component video cable to connect the unit to external video devices equipped with component video output jacks. - Page 11 Cables not included. Please purchase the necessary cables at your local store. [Video Connection] RCA video connection offers standard picture quality for video devices connected to the unit. Use an RCA video cable to connect the unit to external video devices equipped with video output jack. If you connect to the unit’s video input jack, connect an RCA audio cable to the audio L/R jacks of VIDEO1.
- Page 12 REPARATION Cables not included. Please purchase the necessary cables at your local store. [PC Connection] This unit is equipped with a PC input jack. If you connect this unit to your PC, you can use this unit as a computer monitor. e.g.) VGA cable should be with ferrite core.
-
Page 13: Tv Functions
NITIAL SETTING These operations are accessible by remote control. Some may also be accessible by controls on the main unit. Initial Setup This section will guide you through the unit’s initial setting which includes selecting a language for your on-screen menu and auto channel scan, which automatically scans and memorizes viewable channels. -
Page 14: Auto Channel Scan
NITIAL SETTING BACK LIGHT You can set the desired brightness mode. (Refer to “Back Light Setting” on page 24.) COLOR TEMP. You can adjust color temperature. (Refer to “Color Temperature” on page 24.) DTVCC In addition to the basic closed caption described on page 21, DTV has its own closed caption called DTVCC. -
Page 15: Watching Tv
ATCHING TV Channel Selection Select channels by using [CH. K / L] or [the Number buttons]. Use [CH. K / L] or [the Number buttons] to select the memorized channels. Using [the Number buttons] - When selecting analog channel 12 - When selecting digital channel 12-1 •... -
Page 16: Switching Audio Mode
ATCHING TV Switching Audio Mode This section describes how to switch the audio in the analog mode and how to switch the audio language in the digital mode. While receiving an MTS broadcast, press [AUDIO ] repeatedly to cycle through the available audio channel. MAIN : Outputs main-audio : Outputs second audio program MONO : Outputs mono-audio... -
Page 17: Screen Information
Screen Information You can display the currently selected channel or other information such as the audio mode on the TV screen. In the analog mode, the current channel number is displayed. Press [DISPLAY ]. • The current channel number is displayed at the top- right corner of the TV screen. -
Page 18: Tv Screen Display Mode
ATCHING TV TV Screen Display Mode 3-5 types of display modes can be selected when the unit receives 4:3 or 16:9 video signal or an external device is connected to the unit. There are 3 types of display modes according to PC input signals. Press [SCREEN MODE ] repeatedly to switch the TV aspect ratio. - Page 19 For PC input signal Type of display 640 x 480 800 x 600 1,024 x 768 Display a vertically stretched picture without distorting the aspect ratio. The black bars appear on the left and right sides of the screen. Type of display 848 x 480 1,280 x 720 1,280 x 768...
-
Page 20: Optional Setting
PTIONAL SETTING Channel Add/Delete The channel add/delete function lets you add the channel that was not added by auto channel scan due to the reception status at the initial setting. You can also delete the unnecessary channels. Press [SETUP] to display the main menu. Use [Cursor K / L] to select “CHANNEL SETUP”, then press [ENTER]. -
Page 21: Picture Adjustment
Picture Adjustment You can adjust brightness, contrast, color, tint and sharpness. Press [PICTURE] to adjust the picture quality. Use [Cursor K / L] to select the picture quality type you want to adjust. BRIGHTNESS CONTRAST COLOR SHARPNESS Use [Cursor s / B] to adjust the quality. Cursor s BRIGHTNESS to decrease brightness... -
Page 22: Dtv Closed Caption
PTIONAL SETTING Press [SETUP] to exit. Note: • To show the closed caption on your TV screen, broadcast signal must contain the closed caption data. • Not all TV programs and commercials have the closed caption or all types of the closed caption. •... -
Page 23: Dtvcc Style
DTVCC Style You can change the DTVCC style such as font, color or size, etc. Press [SETUP] to display the main menu. Use [Cursor K / L] to select “DTVCC“, then press [ENTER]. e.g.) digital TV mode - TV SETUP - CHANNEL SETUP V-CHIP SETUP LANGUAGE... -
Page 24: Back Light Setting
PTIONAL SETTING Back Light Setting You can set the desired brightness mode. Press [SETUP] to display the main menu. Use [Cursor K / L] to select “BACK LIGHT”, then press [ENTER] repeatedly to change the setting. e.g.) digital TV mode - TV SETUP - CHANNEL SETUP V-CHIP SETUP... -
Page 25: V-Chip
V-chip V-chip reads the ratings for programs, then denies access to the programs which exceed the rating level you set. With this function, you can block certain programming inappropriate for children. Press [SETUP] to display the main menu. Use [Cursor K / L] to select “V-CHIP SETUP“, then press [ENTER]. - Page 26 PTIONAL SETTING To Set the Sub Ratings As for TV-Y7, TV-PG, TV-14 or TV-MA, you can further set the sub ratings to block specific elements of programming. To set the sub ratings, follow the steps below. Use [Cursor K / L ] to select the desired main rating, then press [ENTER] twice to show its sub ratings.
- Page 27 C. Change Password C. Change Password Although the default code “0000” is supplied with the unit, you can set your own password. Use [Cursor K / L] to select “CHANGE PASSWORD”, then press [ENTER]. e.g.) digital TV mode - V - CHIP SETUP - TV RATING MPAA RATING CANADIAN ENGLISH RATING...
-
Page 28: Pc Settings
PTIONAL SETTING PC Settings This function lets you adjust the PC screen position, clock and phase during PC input. Press [SETUP] to display the main menu. Use [Cursor K / L] to select “PC SETTING”, then press [ENTER]. e.g.) PC mode - TV SETUP - CHANNEL SETUP V-CHIP SETUP... -
Page 29: Dvd Functions
PERATING DVD Playable Media Media Type DVD-VIDEO DVD-RW Logo Recorded Signal Media Size Unplayable Media NEVER play back the following discs. Otherwise, malfunction may result! 3 inch (8 cm) disc, DVD-RAM, DVD-audio, CD-i, photo CD, video CD, DVD with region codes other than 1 or ALL, DTS-CD, DVD-ROM for personal computers, CD-ROM for personal computers, the discs with labels, scratches, stains, blemishes, etc., HD DVD, Blu-ray Disc, CD-RW/-R with MP3 files. -
Page 30: Playback
PERATING DVD Playback Before you begin: Turn on the amplifi er and any other device which is connected to this unit. Make sure the external audio receiver (not included) are set to the correct input mode. Press [POWER] to turn on the unit. Insert the disc with label side facing forward. -
Page 31: Slow Forward / Slow Reverse
Slow Forward / Slow Reverse Press and hold [REV / h ] or [FWD / g ] repeatedly during the pause mode to select the desired forward or reverse speed. To continue playback, press [PLAY B]. Note: • Slow forward / slow reverse speed varies with disc. Approximate speed is 1(1/16x), 2(1/8x) and 3(1/2x). -
Page 32: Search Functions
PERATING DVD Search Functions Chapter / Title / Track Search Chapter / Title / Track Search You can select chapters, titles or tracks on the disc. During playback, press [MODE] repeatedly until “ “ / “ “ appears. • If you want to perform the title search, use [Cursor K / L] repeatedly until “... -
Page 33: Repeat Playback
Repeat Playback You can repeat playback chapters, titles or tracks on a disc. During playback, press [MODE] repeatedly until “ “ appears. Use [Cursor K / L] to change the repeat mode. (repeat off) CHAPTER (current chapter repeat) TITLE (current title repeat) (repeat off) TRACK (current track repeat) -
Page 34: Programmed Playback
PERATING DVD Programmed Playback You may determine the order in which tracks will be played back. In stop mode, press [MODE] repeatedly until the “PROGRAM” menu appears. PROGRAM ENTER PLAY CLEAR Use [Cursor K / L] to select a desired track, then press [ENTER] to store. -
Page 35: On-Screen Display
On-screen Display You can check the information about the current disc by pressing [DISPLAY ] on the remote control. appears only when multi- angle is available on the DVD current playback status 11/16 0:00:00 - 0:03:30 remaining time of the current chapter elapsed time of the current chapter... -
Page 36: Special Settings
PERATING DVD Special Settings Subtitle Language Subtitle Language This unit allows you to select a subtitle language (if available) during DVD playback. During playback, press [MODE] repeatedly until “ “ appears. Use [Cursor K / L] repeatedly until your desired language appears. - Page 37 Black Level Setting Black Level Setting Adjust the black level to make the dark areas of the TV picture brighter. During playback, press [MODE] repeatedly until “ “ appears. OFF (BLACK LEVEL) Use [Cursor K / L] to adjust the black level. ON (BLACK LEVEL) ON : Makes the dark areas brighter.
- Page 38 PERATING DVD Marker Setup Marker Setup This feature allows you to assign a specifi c point on a disc to be called back later. To set a marker During playback, press [MODE] repeatedly until “ ”/“ ” appears. e.g.) DVD _ _ /12 (SEARCH) Use [Cursor K / L ] repeatedly until marker search menu appears.
-
Page 39: Dvd Setting
VD SETTING Settings are only effective when the unit is in DVD mode and any discs should not be played back. DVD Language Setting You can change the desired language when playing back the disc. In stop mode, press [SETUP] to display “TV SETUP”. --- TV SETUP --- LANGUAGE BACK LIGHT... -
Page 40: Dvd Audio Setting
VD SETTING DVD Audio Setting Choose the appropriate audio settings for your device. It only aff ects during the playback of DVD. In stop mode, press [SETUP] to display “TV SETUP”. --- TV SETUP --- LANGUAGE BACK LIGHT COLOR TEMP. DVD SETUP Use [Cursor K / L ] to select “DVD SETUP”, then press [ENTER]. -
Page 41: Parental Setting
Parental Setting Parental setting prevents your children from viewing inappropriate materials (password protected). Playback will stop if the ratings exceed the levels you set. To set the parental level In stop mode, press [SETUP] to display “TV SETUP”. --- TV SETUP --- LANGUAGE BACK LIGHT COLOR TEMP. -
Page 42: Others
VD SETTING Others You can change the other functions. To set ANGLE ICON, AUTO POWER OFF or PROGRESSIVE In stop mode, press [SETUP] to display “TV SETUP”. --- TV SETUP --- LANGUAGE BACK LIGHT COLOR TEMP. DVD SETUP Use [Cursor K / L ] to select “DVD SETUP”, then press [ENTER]. -
Page 43: Reset To The Default Setting
Reset to the Default Setting You can reset all the settings except for the parental setting and on-screen language. In stop mode, press [SETUP] to display “TV SETUP”. --- TV SETUP --- LANGUAGE BACK LIGHT COLOR TEMP. DVD SETUP Use [Cursor K / L ] to select “DVD SETUP”, then press [ENTER]. -
Page 44: Troubleshooting
ROUBLESHOOTING Troubleshooting Guide If the unit does not perform properly when operated as instructed in this Owner’s Manual, check the following chart and all connections once before calling for service. Symptom No power No picture or sound No color Sound OK, picture poor Ghosts, lines or streaks in picture Different color marks on TV... -
Page 45: Faq
Question My remote control does not work. What should I do? How come the Initial setup appears every time I turn on this unit? Why I cannot watch some of TV programs? How come there is no image from the connected external devices? Whenever I entered channel number, it changes automatically. -
Page 46: Glossary
NFORMATION Glossary ATSC Acronym that stands for Advanced Television Systems Committee and the name of the digital broadcasting standards. Aspect Ratio The width of a TV screen relative to its height. Conventional TVs are 4:3 (in other words, the TV screen is almost square); widescreen models are 16:9 (the TV screen is almost twice as wide as its height). -
Page 47: Cable Channel Designations
Cable Channel Designations If you subscribe to cable TV, the channels are displayed as 1-135. Cable companies often designate channels with letters or letter-number combinations. Please check with your local cable company. The following is a chart of common cable channel designations. CATV channel TV Display CATV channel... -
Page 48: Limited Warranty
FUNAI CORP. will repair this product, free of charge in the USA in the event of defect in materials or workmanship as follows: DURATION: PARTS: FUNAI CORP. will provide parts to replace defective parts without charge for one (1) year from the date of original retail purchase. - Page 49 EMERSON Y EL LOGOTIPO G-CLEF SON MARCAS REGISTRADAS DE EMERSON RADIO CORP., PARSIPPANY, NEW JERSEY, EE.UU. Televisor Digital con pantalla LCD de 19" y Reproductor DVD Incorporado LD195EM8 7 LD195EM8 2 LD195EM8 PARA RECIBIR LA SEÑAL DIGITAL/ ANALÓGICA, DEBE CONECTAR LA ANTENA.
-
Page 50: Precauciones
NTRODUCCIÓN El modelo y el número de serie de esta unidad se pueden encontrar en la caja. Deberá anotar y guardar el modelo y el número de serie para consultarlos, si los necesita, en el futuro. Precauciones ADVERTENCIA: PARA REDUCIR EL RIESGO DE QUE SE PRODUZCA UN INCENDIO O SE RECIBA UNA DESCARGA ELÉCTRICA, NO EXPONGA ESTE APARATO A LA LLUVIA NI A LA HUMEDAD. - Page 51 Este aparato no deberá colocarse en una instalación empotrada como, por ejemplo, una librería o estantería, a menos que disponga de una ventilación apropiada. Asegúrese de dejar un espacio libre de unos 2,8 pulgadas (7cm) alrededor de este aparato. Desconecte la clavija de alimentación de la toma de corriente cuando busque un problema o no utilice el aparato. La clavija de la alimentación deberá...
-
Page 52: Accesorios Suministrados
NTRODUCCIÓN Accesorios Suministrados manual del usuario (1EMN23240A) • Si necesita cambiar estos accesorios, consulte el número de pieza que aparece junto a las ilustraciones y llame a nuestro teléfono de atención al cliente, que encontrará en la portada de este manual. •... -
Page 53: Características
Características • DTV/TV/CATV - Puede utilizar su mando a distancia para seleccionar canales emitidos en formato digital y formato analógico convencional. Además, los suscriptores de cable pueden acceder a sus canales de televisión por cable. • Visualización de Información (solamente DTV) - Puede visualizar el título, el contenido y otra información del actual programa DTV en la pantalla del televisor. - Page 54 NTRODUCCIÓN Indice INTRODUCCIÓN Precauciones ........... . . 2 Accesorios Suministrados .
-
Page 55: Botones En El Mando A Distancia
Botones en el Mando a Distancia POWER (p. 13) Presione para activar y desactivar la unidad. MUTE (p. 15) Presione para activar y desactivar el sonido. SLEEP (p. 16) Presione para activar el temporizador de apagado. Botones numéricos (p. 15) •... -
Page 56: Panel De Control
NTRODUCCIÓN Panel de Control Panel Trasero VIDEO 2 COMPONENT AUDIO VIDEO 1 AUDIO S-VIDEO VIDEO COAXIAL 1. POWER (p. 13) Presione para activar y desactivar la unidad. 2. INPUT SELECT (p. 15) parte lado de la unidad Presione para cambiar los modos de entrada. 3. -
Page 57: Preparación
REPARACIÓN Cables no incluidos. Deberá adquirir los cables necesarios en su establecimiento local. Conexión Básica En esta sección se describe cómo conectar la unidad a una antena, caja de cable/satélite, etc. Nota: • Asegúrese de que su antena u otra dispositivo está conectada correctamente antes de enchufar el cable de alimentación. [Conexión de Antena] Conecte el cable coaxial RF de su toma de corriente a la toma de entrada de antena de esta unidad. -
Page 58: Conexión De Dispositivo Externo
REPARACIÓN Cables no incluidos. Deberá adquirir los cables necesarios en su establecimiento local. Conexión de Dispositivo Externo [Conexión de Vídeo en Componentes] La conexión de vídeo en componentes RCA ofrece una mejor calidad de imagen para dispositivos de vídeo conectados a la unidad. - Page 59 Cables no incluidos. Deberá adquirir los cables necesarios en su establecimiento local. [Conexión de Vídeo] La conexión de vídeo RCA ofrece una calidad normal de imagen para dispositivos de vídeo conectados a la unidad. Utilice un cable de vídeo RCA para conectar la unidad a dispositivos de vídeo externos equipados con toma de salida de vídeo.
- Page 60 REPARACIÓN Cables no incluidos. Deberá adquirir los cables necesarios en su establecimiento local. [Conexion de PC] Esta unidad está equipado con una toma de entrada de PC. Si conecta la unidad a su ordenador, puede utilizarlo como monitor. p. ej.) El cable VGA debe tener el núcleo de ferrita.
-
Page 61: Funciones Del Tv
JUSTE INICIAL Se puede acceder a estas operaciones mediante el mando a distancia. Algunas también pueden ser accesibles mediante los mandos de la unidad principal. Configuración Inicial Esta sección le guiará a través del ajuste inicial de la unidad, que incluye la selección de un idioma para sus menús de pantalla y la exploración automática de canales, que explora y memoriza automáticamente los canales visibles. -
Page 62: Exploración Automática De Canales
JUSTE INICIAL LUZ DE FONDO Puede ajustar el modo de brillo deseado. (Consulte “Ajuste de Luz de Fondo” en página 24.) TENPE. DE COLOR Puede ajustar la temperatura de color. (Consulte “Temperatura de Color” en página 24.) DTVCC Además de los subtítulos básicos descritos en la página 21, DTV tiene sus propios subtítulos denominados DTVCC. -
Page 63: Para Ver La Televisión
ARA VER LA TELEVISIÓN Selección de Canal Seleccione los canales utilizando [CH. K / L] o [los botones numéricos]. Utilice [CH. K / L] o [los botones numéricos] para seleccionar los canales memorizados Utilizando [los botones numéricos] - Cuando seleccione el canal analógico 12 - Cuando seleccione el canal digital 12-1 •... -
Page 64: Para Cambiar El Modo De Audio
ARA VER LA TELEVISIÓN Para Cambiar el Modo de Audio En esta sección se describe cómo cambiar el audio en el modo analógico y cómo cambiar el idioma de audio en el modo digital. Durante la recepción de una emisión MTS, presione [AUDIO ] repetidamente para recorrer los canales de audio disponibles. -
Page 65: Información De Pantalla
Información de Pantalla Puede visualizar el canal actualmente seleccionado u otra información, por ejemplo el modo de audio, en la pantalla del televisor. En el modo analógico se visualiza el número del canal actual. Presione [DISPLAY ]. • Se muestra el número del canal actual en la esquina superior derecha de la pantalla del televisor. -
Page 66: Modo De Visualización De Pantalla Del Televisor
ARA VER LA TELEVISIÓN Modo de Visualización de Pantalla del Televisor Se pueden seleccionar entre 3 - 5 modos de visualización cuando la unidad recibe una señal de video de 4:3 o 16:9 o se conecta un dispositivo externo a la unidad. Hay 3 tipos de modos de visualización según las señales de entrada de la PC. - Page 67 Para señal de entrada PC Tipo de pantalla Resolución 640 x 480 800 x 600 1,024 x 768 Visualización de una imagen que se extiende verticalmente sin distorsionar la proporción de aspecto. Las barras negras aparecen a la derecha y a la izquierda de la pantalla.
-
Page 68: Ajuste Opcional
JUSTE OPCIONAL Agregar/Borrar Canales La función de agregar/borrar canales le permite agregar el canal que no se haya agregar mediante la exploración automática de canales debido al estado de la recepción en el ajuste inicial. También puede eliminar los canales innecesarios. Presione [SETUP] para visualizar el menú... -
Page 69: Ajuste De Imagen
Ajuste de Imagen Puede ajustar el brillo, el contraste, el color, el matiz y la nitidez. Presione [PICTURE] para ajustar el menú principal. Utilice [Cursor K / L] para seleccionar el tipo de calidad de imagen que desea ajustar. CONTRASTE Utilice [Cursor s / B] para ajustar la calidad. -
Page 70: Subtítulos En Dtv
JUSTE OPCIONAL Presione [SETUP] para salir. Nota: • Para mostrar los subtítulos en la pantalla de su televisor, la señal de emisión debe contener los datos de los subtítulos. • No todos los programas y anuncios de TV contienen subtítulos o todo tipo de subtítulos. •... -
Page 71: Estilo Dtvcc
Estilo DTVCC Puede cambiar el estilo DTVCC, por ejemplo fuente, color o tamaño, etc. Presione [SETUP] para visualizar el menú principal. Utilice [Cursor K / L] para seleccionar “DTVCC”, y luego presione [ENTER]. p. ej.) modo TV digital - INSTALACIÓN TV - AJUSTE DE CANAL AJUSTE DE V-CHIP IDIOMA... -
Page 72: Ajuste De Luz De Fondo
JUSTE OPCIONAL Ajuste de Luz de Fondo Puede ajustar el modo de brillo deseado. Presione [SETUP] para visualizar el menú principal. Utilice [Cursor K / L] para seleccionar “LUZ DE FONDO”, y luego presione [ENTER] repetidamente para cambiar el ajuste. p. -
Page 73: V-Chip
V-chip V-chip lee las clases de los programas, y niega el acceso a los programas que exceden el nivel de clasifi cación establecido. Con esta función, puede bloquear determinados programas inapropiados para niños. Presione [SETUP] para visualizar el menú principal. Utilice [Cursor K / L] para seleccionar “AJUSTE DE V-CHIP”, y luego presione [ENTER]. - Page 74 JUSTE OPCIONAL Para Ajustar las Subcategorías En lo referente a TV-Y7, TV-PG, TV-14 ó TV-MA, puede seguir ajustando las subcategorías para bloquear elementos específicos de la programación. Para ajustar las subcategorías, siga los pasos indicados. Utilice [Cursor K / L ] para seleccionar la clasificación principal deseada, y luego presione [ENTER] dos veces para mostrar sus subcategorías.
- Page 75 C. Cambiar Contraseña C. Cambiar Contraseña Aunque el código predeterminado “0000” viene incorporado con la unidad, usted puede ajustar su propia contraseña. Utilice [Cursor K / L] para seleccionar “CAMBIAR CÓDIGO”, y luego presione [ENTER]. p. ej.) modo TV digital - AJUSTE DE V-CHIP - CLASE DE TV CLASE DE MPAA...
-
Page 76: Ajustes De Pc
JUSTE OPCIONAL Ajustes de PC Esta función le permite ajustar la posición de la pantalla del ordenador, el reloj y la fase durante la entrada PC. Presione [SETUP] para visualizar el menú principal. Utilice [Cursor K / L] para seleccionar “REGLAGE DU PC”, y luego presione [ENTER]. -
Page 77: Funciones Del Dvd
TILIZACIÓN DEL DVD Medios que se Pueden Reproducir Tipo de Medio DVD-VIDEO DVD-RW Logotipo Señal Grabada Tamaño de los medios Medios que no se Pueden Reproducir NUNCA reproduzca los discos siguientes. ¡De lo contrario podrán producirse fallas en el funcionamiento! Disco de 3 pulg. -
Page 78: Reproducción
TILIZACIÓN DEL DVD Reproducción Antes de empezar: Encienda el amplifi cador y cualquier otro equipo que esté conectado a esta unidad. Asegúrese de que el receptor de audio externo (no incluido) está ajustado en el modo de entrada correcto. Presione [POWER] para encender la unidad. Inserte el disco con el lado de la etiqueta hacia arriba. -
Page 79: Avance Lento / Retroceso Lento
Avance Lento / Retroceso Lento Mantenga presionado [REV / h ] o [FWD / g ] repetidamente durante el modo de pausa para seleccionar la velocidad de avance o retroceso deseado. Para continuar con la reproducción, presione [PLAY B]. Nota: •... -
Page 80: Funciones De Búsqueda
TILIZACIÓN DEL DVD Funciones de Búsqueda Búsqueda de Capítulos / Títulos / Pistas Búsqueda de Capítulos / Títulos / Pistas Puede seleccionar capítulos, títulos o pistas del disco. Presione [MODE] repetidamente durante la reproducción hasta que aparezca “ • Si desea realizar la búsqueda de títulos, utilice [Cursor K / L] repetidamente hasta que aparezca “... -
Page 81: Repetición De Reproducción
Repetición de Reproducción Puede repetir la reproducción de capítulos, títulos o pistas de un disco. Presione [MODE] repetidamente durante la reproducción hasta que aparezca “ OFF (REPETICIÓN) Utilice [Cursor K / L] para cambiar el modo de repetición. (repetición desactivada) CAPÍTULO (repetición del capítulo actual) TÍTULO (repetición del título actual) -
Page 82: Reproducción Programada
TILIZACIÓN DEL DVD Reproducción Programada Puede determinar el orden de la reproducción de las pistas. Presione [MODE] repetidamente en el modo de parada hasta que aparezca el menú “PROGRAMA”. PROGRAMA ENTER PLAY CLEAR Utilice [Cursor K / L] para seleccionar una pista deseada, y luego presione [ENTER] para guardarla. -
Page 83: Visualización En Pantalla
Visualización en Pantalla Presionando [DISPLAY ] en el mando a distancia puede verificar la información relacionada con el disco actual. aparece solamente cuando múltiples ángulos están disponibles en el DVD. estado de reproducción actual 11/16 0:00:00 - 0:03:30 tiempo restante del capítulo actual tiempo transcurrido del capítulo actual... -
Page 84: Ajustes Especiales
TILIZACIÓN DEL DVD Ajustes Especiales Idioma de Subtítulos Idioma de Subtítulos Esta unidad le permite seleccionar un idioma de subtítulos (si está disponible) durante la reproducción de DVD. Presione [MODE] repetidamente durante la reproducción hasta que aparezca “ Utilice [Cursor K / L] repetidamente hasta que aparezca su idioma deseado. - Page 85 Ajuste del Nivel del Negro Ajuste del Nivel del Negro Ajuste el nivel del negro para hacer que las áreas oscuras de la imagen del televisor tengan más brillo. Presione [MODE] repetidamente durante la reproducción hasta que aparezca “ OFF (NIVEL DEL NEGRO) Utilice [Cursor K / L] para ajustar el nivel del negro.
- Page 86 TILIZACIÓN DEL DVD Puesta de Marcador Puesta de Marcador Esta característica le permite poner un punto específi co en un disco que será llamado posteriormente. Para poner un marcador Presione [MODE] repetidamente durante la reproducción hasta que aparezca “ p. ej.) DVD _ _ /12 (BÚSQUEDA) Utilice [Cursor K / L ] repetidamente hasta que aparezca el menú...
-
Page 87: Ajuste De Dvd
JUSTE DE DVD Los ajustes sólo son eficaces cuando la unidad está en el modo DVD y no se reproduce ningún disco. Ajuste de Idioma en DVD Puede cambiar el idioma deseado para reproducir el disco. En el modo de parada, presione [SETUP] para mostrar el menú... -
Page 88: Ajuste De Audio De Dvd
JUSTE DE DVD Ajuste de Audio de DVD Elija el ajuste de audio apropiado para su dispositivo. Éste sólo se aplicará durante la reproducción de discos DVD. Presione [SETUP] en el modo de parada para visualizar “INSTALACIÓN TV”. --- INSTALACIÓN TV --- IDIOMA LUZ DE FONDO TENPE. -
Page 89: Ajuste Paterno
Ajuste Paterno El ajuste paterno impide que sus hijos puedan ver programas que no sean apropiados para ellos (Protección mediante contraseña). La reproducción se detiene si la califi cación excede los niveles que usted ha establecido. Para ajustar el nivel paterno Presione [SETUP] en el modo de parada para visualizar “INSTALACIÓN TV”. -
Page 90: Otros
JUSTE DE DVD Otros Puede cambiar otras funciones. Para ajustar ICONO DE ÁNGULO, AUTO APAGATO o PROGRESIVO Presione [SETUP] en el modo de parada para visualizar “INSTALACIÓN TV”. --- INSTALACIÓN TV --- IDIOMA LUZ DE FONDO TENPE. DE COLOR [NORMAL] INSTALACIÓN DVD Utilice [Cursor K / L ] para seleccionar “INSTALACIÓN DVD”, y luego presione [ENTER]. -
Page 91: Reposición De Los Ajustes Predeterminados
Reposición de los Ajustes Predeterminados Puede reponer todos los ajustes, a excepción del ajuste paterno y el idioma de pantalla. Presione [SETUP] en el modo de parada para visualizar “INSTALACIÓN TV”. --- INSTALACIÓN TV --- IDIOMA LUZ DE FONDO TENPE. DE COLOR [NORMAL] INSTALACIÓN DVD Utilice [Cursor K / L ] para seleccionar “INSTALACIÓN DVD”, y luego presione [ENTER]. -
Page 92: Solución De Problemas
OLUCIÓN DE PROBLEMAS Guía de Solución de Problemas Si la unidad no funciona correctamente cuando se siguen las instrucciones de este manual del usuario, compruebe la siguiente tabla antes de llamar al servicio técnico. Síntoma No hay corriente No hay imagen ni sonido No hay color Sonido correcto, imagen deficiente... -
Page 93: Preguntas Frecuentes
Preguntas Frecuentes Pregunta Mi control remoto no funciona. ¿Qué debo hacer? ¿Por qué aparece la configuración inicial cada vez que enciendo esta unidad? ¿Por qué no puedo ver algunos programas de televisión? ¿Por qué no veo las imágenes de los dispositivos externos conectados? Cada vez que selecciono un número de canal, éste se cambia automáticamente. -
Page 94: Información
NFORMACIÓN Glosario ATSC Acrónimo de “Advanced Television Systems ” (Comité de sistemas avanzados de televisión) y el nombre de unas normas de emisión digital. Código de Región Las regiones asocian los discos y los reproductores con áreas concretas del mundo. Esta unidad sólo reproduce discos que tengan códigos regionales compatibles. -
Page 95: Denominaciones De Canales De Cable
Denominaciones de Canales de Cable Si se suscribe a la televisión por cable, los canales se muestran como 1-135. Las empresas de cable a menudo denominan los canales con letras o combinaciones de letra-número. Compruebe este detalle con su empresa local de cable. La tabla siguiente incluye las denominaciones de canal de cable habituales. -
Page 96: Garantía Limitada
FUNAI CORP. reparará este producto, de forma gratuita en Estados Unidos, en caso de defecto de materiales o fabricación, del modo siguiente: DURACIÓN: PIEZAS: FUNAI CORP. suministrará piezas de repuesto de las piezas defectuosas de forma gratuita durante un (1) año desde la fecha de compra minorista original. Determinadas piezas y el efecto de persistencia de la imagen en la pantalla LCD están excluidas de esta garantía.