Electrolux EWX 127410 W User Manual
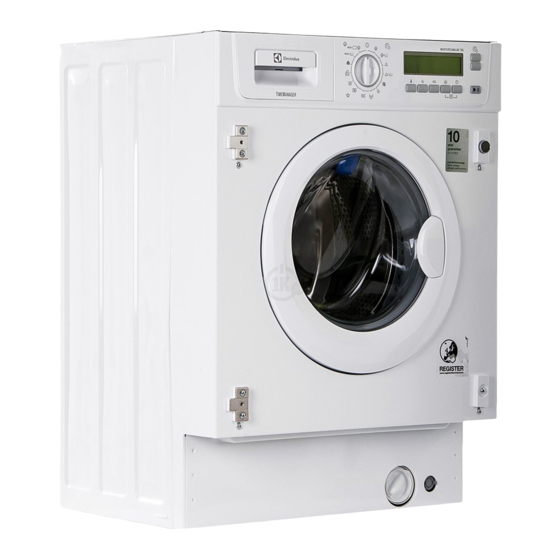
Fully integrated washer dryer with 7kg wash load and 4kg drying load (1200rpm).
Hide thumbs
Also See for EWX 127410 W:
- User manual (36 pages) ,
- User manual (80 pages) ,
- User manual (40 pages)

Related Manuals for Electrolux EWX 127410 W


Summary of Contents for Electrolux EWX 127410 W
- Page 1 ..................... EWX 127410 W EN WASHER DRYER USER MANUAL EWX 147410 W...
-
Page 2: Table Of Contents
2 electrolux Electrolux. Thinking of you. Share more of our thinking at www.electrolux.com CONTENTS Safety information Washing programmes Product description Drying Programmes Control panel Care and cleaning First use What to do if… Personalisation Technical data Daily use Consumption values... - Page 3 3 may cause injury or serious malfunction- wired bras must NOT be machine wash- ing. Contact your local Service Centre. Always insist on genuine spare parts. • Garments which have been in contact with volatile petroleum products should INSTALLATION not be machine washed.
-
Page 4: Product Description
4 electrolux • Keep all detergents in a safe place out of children’s reach. • Make sure that children or pets do not climb into the drum. To prevent children and pets becoming trapped inside the drum the machine incorporates a special feature. -
Page 5: Control Panel
5 DETERGENT DISPENSER DRAWER Compartment for detergent used for prewash and soak phase or for stain re- mover used during the stain action phase (if available). The prewash and soak detergent is added at the beginning of the wash pro- gramme. - Page 6 6 electrolux TABLE OF SYMBOLS = Cold Wash = Door locked = No Spin = Child Lock └ ┘ = Rinse Hold PROGRAMME SELECTOR DIAL time you want appears on the display ac- cording to the fabrics (cottons or synthetics) It allows you to switch the appliance on/off you have to dry.
- Page 7 7 DISPLAY The display shows the following informa- of the display for a few seconds and the tion: integrated red light of button 8 start flash- 7.1: ing. • Duration of the selected programme • End of programme After selecting a programme, the duration...
-
Page 8: First Use
8 electrolux of soiling automatically proposed by the 7.4: Child safety lock (see «Child Safe- machine. ty Lock» paragraph). FIRST USE • Ensure that the electrical and water at the highest temperature without connections comply with the installa- any laundry in the machine, to re- tion instructions. - Page 9 9 must not exceed the «MAX» mark in the SELECT THE TEMPERATURE BY drawer). Close the drawer gently. PRESSING BUTTON 2 By selecting a programme, the appliance proposes automatically a default tempera- ture. Press this button repeatedly to increase or...
- Page 10 10 electrolux 2. Select the delay start by pressing the Soil Level Icon Type of fabric button 6. Daily For daily soiled 3. Press button 8: items – the machine starts its hourly count- Light For slightly soiled down. items –...
-
Page 11: Use - Drying
11 After a few minutes the pilot light 9 goes water must be emptied out before opening out and it is possible to open the door. the door. If this pilot light remains lit, this means that Before you empty out the water, the drum... -
Page 12: Use - Washing & Drying
12 electrolux 6. At the end of the programme, the buz- 8. Remove the laundry from the drum. zer sounds. Three blinking «0.00» zeros Note! appear on the display. The different type of cottons (towelling, During the last minutes of the drying... -
Page 13: Helpful Hints And Tips
13 To prevent the lint in your clothes, it is rec- • To clean the filter. ommended: • Perform one or more rinse cycles to • To do not wash dark fabrics after you wash the drum between the washing and washed and dried light colored fabrics drying of fabrics with different colors. -
Page 14: Drying Hints
14 electrolux • powder detergents for delicate fabrics gree of soiling and hardness of the water (60°C max) and woollens used. • liquid detergents, preferably for low tem- Follow the product manufacturers’ instruc- perature wash programmes (60°C max) tions on quantities to use. -
Page 15: Washing Programmes
15 GARMENT LABELS The average drying time for a timed drying are indicated in the «Drying programmes» For drying, follow the indications given on chapter. The experience will help you to dry the manufacturer’s labels: your laundry in a more suitable way, ac- •... - Page 16 16 electrolux Deter- Programme - Maximum and Minimum Temperature gent - Cycle Description - Maximum Spin Speed - Maxi- Options Com- mum Fabrics Load - Type of Laundry part- ment Easy Iron SPIN 60° - 30° NO SPIN Main wash - Rinses...
-
Page 17: Drying Programmes
17 Deter- Programme - Maximum and Minimum Temperature gent - Cycle Description - Maximum Spin Speed - Maxi- Options Com- mum Fabrics Load - Type of Laundry part- ment Wool SPIN 40° - 30° NO SPIN Main wash - Rinses... -
Page 18: Care And Cleaning
18 electrolux Suggested Degree of Drying Type of Fabric Max Load Spin Speed drying time in Mins 150-170 1400 100-110 Cotton and linen 4 kg 65-75 Suitable for items to put (bathrobes, bath 3 kg away without ironing 160-180 towels, etc) 1.5 kg... -
Page 19: Drain Pump
19 2. Run a washing cycle without any wash- ing to clean off any cleaning agent resi- dues. Programme: Short Cotton Programme at maximum temperature and add ap- prox. 1/4 measuring cup of detergent. DOOR SEAL Check from time to time the door seal and eliminate eventual possible objects that could be trapped in the fold. - Page 20 20 electrolux 3. Place a container close to the pump to 6. Remove foreign bodies and fluff from collect any spillage. the filter seat and from the pump impel- 4. Release the emergency emptying hose ler. (B), place it in the container and re-...
-
Page 21: What To Do If
21 has finished the cycle, and is empty. When 8. Turn on the water tap. refitting the pump cover, ensure it is se- FROST PRECAUTIONS curely retightened so as to stop leaks and young children being able to remove it. - Page 22 22 electrolux gramme. If after all checks, the problem persists, contact your local Service Centre. Problem Possible cause/Solution The door has not been closed. E40 • Close the door firmly. The plug is not properly inserted in the power socket.
- Page 23 23 Problem Possible cause/Solution Too little detergent or unsuitable detergent has been used. • Increase the detergent quantity or use another one. Stubborn stains have not been treated prior to washing. Unsatisfactory washing re- • Use commercial products to treat the stubborn stains.
-
Page 24: Technical Data
24 electrolux Problem Possible cause/Solution The fabrics washed in the previous cycle released fluff of a differ- ent color (refer to “Fluff in the garments” in chapter “Use - Washing & Drying”). • The drying phase helps to eliminate some fluff. -
Page 25: Consumption Values
25 CONSUMPTION VALUES Programme Energy consumption Water consumption Programme duration (KWh) (litres) (Minutes) White Cottons 90° Cottons 60° 1.35 Cotton Energy Saving 1.05 For the duration of the programmes, Programme 60° please refer to the Cottons 40° 0.85 display on the con- trol panel. - Page 26 26 electrolux 4. Slide out the relevant plastic spacers. Accurate levelling prevents vibration, noise and displacement of the machine during operation. Caution! Never place cardboard, wood or similar materials under the machine to compensate for any unevenness in the floor. After having levelled the appliance, tighten the lock nuts.
- Page 27 27 2. Connect the hose with the angled con- water tap off and refer to your Service Cen- nection to the machine. Do not place tre to replace the hose. the inlet hose downwards. Angle the hose to the left or right depending on the position of your water tap.
- Page 28 28 electrolux Place the drain hose into your standpipe, an air break between the drain hose and which should have an internal diameter of standpipe. approximately 38 mm thus ensuring there is 38 mm (½”) standpipe diameter When discharging into a standpipe ensure than 90 cm (35.4'') and no less than 60 cm...
- Page 29 29 Use the plastic “U - Piece” supplied. Loop 2. Onto a sink outlet spigot. If the outlet spigot has not been used be- fore, remove any blanking plug that may be in place. Important! Before connecting up the...
-
Page 30: Electrical Connection
30 electrolux SHOWER SINK TOILET BATH BIDET WASHING MACHINE DISHWASHER RAINWATER ‘RUN-OFF’ FOUL DRAIN SURFACE WATER FOUL SEWERS DRAINS & SEWERS SEWAGE TREATMENT UNTREATED WORKS DISCHARGE TREATED DISCHRGE RIVER RIVER ELECTRICAL CONNECTION Information on the electrical connection is Warning! The appliance is supplied given on the rating plate on the inner edge with a 13amp plug fitted. -
Page 31: Building In
31 Should the appliance power supply The power supply cable must be cable need to be replaced, this easily accessible after installing the MUST be carried out by a Service machine. Centre. BUILDING IN OVERVIEW - thickness 16-22 mm... - Page 32 32 electrolux To align the door perfectly it is necessary to Fig. 7 loosen the screw, adjust the door and tight- en the screw A again (Fig. 5). Warning! Do not remove the screw B (Fig. 5). Fig. 5 Recommendations regarding the con-...
-
Page 33: Environment Concerns
33 With the appliance installed adjust all four feet ensuring the machine is stable, and a clearance of approximately 5 mm is left be- tween the top of the machine and the un- derside of the worktop. A final check for stability should be carried... - Page 34 34 electrolux >PE<=polyethylene tergent, water and time (the environment >PS<=polystyrene is protected too!). >PP<=polypropylene • The machine works more economically if This means that they can be recycled by it is fully loaded. disposing of them properly in appropriate • With adequate pre-treatment, stains and collection containers.
- Page 35 35...
- Page 36 132926420-A-152012...