Table of Contents
Table of Contents

Related Manuals for HP FB040AA


Summary of Contents for HP FB040AA
- Page 1 HP iPAQ Product Guide...
- Page 2 Development Company, L.P. under license. All other product names mentioned herein may be trademarks of their respective companies. Hewlett-Packard Company shall not be liable for technical or editorial errors or omissions contained herein. The information is provided “as is” without warranty of any kind and is subject to change without notice.
-
Page 3: Table Of Contents
Table of contents 1 Register your HP iPAQ 2 Box contents 3 Components Front panel components ........................3 Top and bottom panel components ...................... 4 Left and right side components ......................5 Back panel components ........................5 4 Set up your HP iPAQ Step 1: Remove the battery cover ...................... - Page 4 Open and close programs ........................16 Set alarms and clocks ........................17 Display the clock in title bar ........................ 17 Adjust the speed for scrolling through items in a list ................17 6 Connections WLAN ..............................18 WLAN terms ........................18 Automatically connect to a WLAN network ................
- Page 5 E-mail a picture ..........................31 View a slideshow ..........................32 8 Messaging Understand messages ........................33 Types of folders ..........................33 Synchronize e-mail ..........................34 Set up messaging accounts ....................... 34 Set up e-mail using Exchange server ................34 Internet e-mail ........................35 Receive attachments ......................
- Page 6 11 Applications HP applications ..........................47 HP Help and Support ......................47 HP iPAQ Setup Assistant ....................47 HP Asset Viewer ........................ 48 Certificate Enroller ......................48 Manage certificates ......................49 HP iPAQ Tips ........................49 HP iPAQ QuickStart Tour ....................49 HP iPAQ Zip ........................
- Page 7 Copy files ............................60 Migrate data from Palm Desktop to Microsoft Windows Mobile 6.0 ........... 60 Wireless synchronization cost saving tips ..................61 Troubleshoot synchronization issues ....................61 15 Tasks Set start and due dates for a task ...................... 64 Show start and due dates in the task list ....................
- Page 8 Korean Notice ............................. 80 18 Safety information General Precautions ........................... 81 Safety Precautions for Power Cords and Accessories ............... 82 Safety Precautions for Battery Packs ....................82 Safety Precautions for Docking Devices .................... 83 Safety Precautions for Products with Wireless Devices ..............83 Safety Precautions for Products with Modems, Telecommunications or Local Area Network Accessories ............................
- Page 9 Register your HP iPAQ You need to register your HP iPAQ with Hewlett-Packard to be able to: ● Access support and services, and get the most out of your HP products. ● Manage your profile. ● Sign up for free support alerts, driver notices, and personalized newsletters.
-
Page 10: Box Contents
Box contents This illustration depicts the items that come in the box with your HP iPAQ. NOTE: Box contents might vary by model. HP iPAQ Stylus 2200 mAh Li-Ion removable/rechargeable battery Getting Started CD with additional software HP iPAQ documentation AC adapter HP 24-pin cable Slip case... -
Page 11: Components
Components NOTE: Not all models or features are available in all countries/regions. Front panel components Component Function Power Key Press and hold to switch your HP iPAQ on or off. ● Power/Wireless LEDs Solid amber – Battery charging ● Flashing green and Solid green – One or more notifications received ●... -
Page 12: Top And Bottom Panel Components
Component Function Application Key 4 Press to launch the Calendar. Press and hold to launch the Contacts list. Light Sensor Use to detect environment light change and adjust backlight setting automatically in a small range by the current backlight setting. (10) Audio Receiver Use to listen during VoIP calls. -
Page 13: Left And Right Side Components
Left and right side components Component Function Stylus Use to select elements on the screen and enter information. Reset Button Press to reset your HP iPAQ. Voice Recorder Button Use to launch the Voice Recorder application. Back panel components Component Function Back Speaker Use the speaker to listen to audio. - Page 14 Component Function Bluetooth Antenna Detects and radiates Bluetooth signals. WLAN Antenna Detects WLAN hotspots. Chapter 3 Components...
-
Page 15: Set Up Your Hp Ipaq
Set up your HP iPAQ Step 1: Remove the battery cover Slide the cover down and away from the HP iPAQ. Step 2: Install the battery and replace the battery cover Align the battery connectors on the battery with the housing pins in the battery compartment and insert the battery. -
Page 16: Step 3: Charge The Battery
Place the battery cover down and slide up until it locks into place. Step 3: Charge the battery CAUTION: To avoid damaging your HP iPAQ or the AC adapter, make sure all connectors are properly aligned before connecting. The battery provides power for your HP iPAQ to operate. It takes approximately 2–4 hours to fully charge the battery for the first time. -
Page 17: Protect Your Hp Ipaq With A Password
Protect your HP iPAQ with a password You can secure the data on your HP iPAQ by setting a password. Each time you turn on your HP iPAQ, you will be prompted to enter the password. To set a password: Tap Start >... -
Page 18: Find The Serial And Model Number
Find the serial and model number Locate the serial and model numbers before contacting HP Customer Support, particularly if you are calling for in-warranty support. View the serial number and model ID by tapping Start > Programs > HP Help and Support > Serial and Model Number. -
Page 19: Learn The Basics
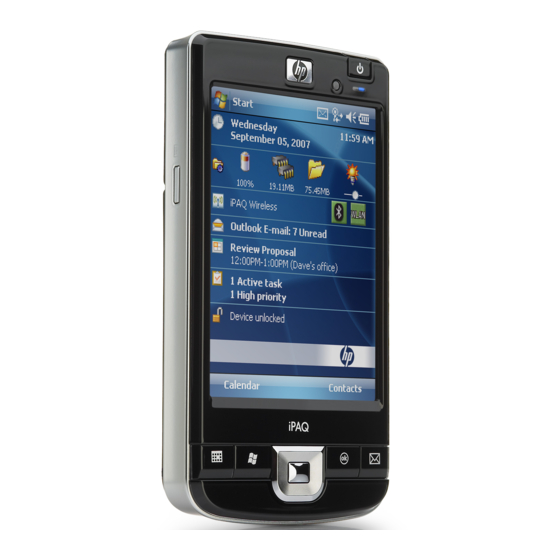
Learn the basics Get started with your HP iPAQ by learning basic functions such as knowing the Today screen, entering text, and synchronizing data. The Today screen The Today screen displays the date and time and provides a quick status of the remaining battery capacity and upcoming appointments. -
Page 20: Battery Saving Tips
You can change the TodayPanel Lite icons to compact mode, which allows more space on the Today screen. You can also change the memory and storage settings to display as percentages instead of file sizes. To change the TodayPanel Lite icons to compact mode: Tap the (TodayPanel Lite) icon >... -
Page 21: Enter Text
NOTE: When your HP iPAQ is locked, you can still receive e-mail notifications and see appointment reminders. To lock your HP iPAQ: On the Today screen, tap Device unlocked. To unlock your HP iPAQ: On the Today screen, tap Unlock, and then on the Unlock screen, tap Unlock again. Now, your HP iPAQ is unlocked and ready for use. -
Page 22: Enter Owner Information
Enter owner information Enter your personal information, such as your name and address, so that the HP iPAQ can be returned to you if it is lost. Tap Start > Settings > Personal > Owner Information. On the Identification tab, enter your personal information. TIP: You can edit the owner information directly from the Today screen. -
Page 23: Change The Regional Settings
To change the device name: Tap Start > Settings > System > About > Device ID tab. Enter a name. The device name must begin with a letter, consist of letters from A to Z and numbers from 0 to 9, and should not contain spaces. Change the regional settings The style in which numbers, currency, dates, and times are displayed is specified in regional settings. -
Page 24: Change Power Management Settings
Change power management settings To change power management settings: Tap Start > Settings > System > Power. Tap Advanced and select the length of time the HP iPAQ should remain on when using battery power or external power. Dim or adjust brightness of the backlight You can set the backlight to dim after a specified amount of time has elapsed. -
Page 25: Set Alarms And Clocks
In most cases, selecting x or ok will close an application but will not stop the application from running in memory. However, you can close it manually. Tap Start > Settings > System > Memory > Running Programs. From the Running Programs list, tap the program you want to close, and then tap Stop. Set alarms and clocks To set alarm on your HP iPAQ: Tap Start >... -
Page 26: Connections
Connections You can use your HP iPAQ to connect to and exchange information with other handheld devices, your computer, various network types, or the Internet. Following are the ways to get connected: ● WLAN ● Bluetooth You can access these connection types by tapping Start > Settings > Connections. WLAN With wireless access, you do not need to use cables to connect your HP iPAQ to the Internet. -
Page 27: Automatically Connect To A Wlan Network
Term Definition Hotspots Public or private areas where you can access WLAN service. These wireless connections can be located, for example, at a library, cyber cafe, hotel, airport lounge, or convention center. This service can be free or sometimes requires a fee. Infrastructure This connection mode uses wireless access points to connect to networks. -
Page 28: Find An Ip Address
Find an IP address To find an IP address: Tap the (iPAQ Wireless) icon. Tap the (WLAN) icon to turn on WLAN, and then tap the WLAN tab. Connect to a network automatically or manually by tapping Start > Settings > Connections > HP iPAQ Wireless >... -
Page 29: Bluetooth Terms
Bluetooth terms It is recommended that you become familiar with the following terms as you begin to use Bluetooth technology. Term Definition Authentication Verification of a numeric passkey before a connection or activity can be completed. Authorization Approval of a connection, access, or activity before it can be completed. Bonding (Paired devices) Creating a trusted connection between your device and another. -
Page 30: Connect To A Computer Via Bluetooth
NOTE: Ensure both your HP iPAQ and the cell phone are turned on, discoverable, and within close range. To establish a connection between your HP iPAQ and a cell phone using Bluetooth Phone Manager: Tap Start > BT Phone Manager. If using the application for the first time, tap Yes to set up a pairing with a Bluetooth phone. -
Page 31: Create, End, And Accept A Bluetooth Partnership
● Personal Area Network (PAN) ● Serial Port Profile (SPP) ● Service Discovery Protocol (SDP) Create, end, and accept a Bluetooth partnership You can exchange information between your HP iPAQ and another device that has Bluetooth capabilities. For this, you will have to first create a Bluetooth partnership between the two devices. NOTE: To exchange information between two Bluetooth enabled devices, make sure Bluetooth is turned on both devices. -
Page 32: Rename A Bluetooth Partnership
Rename a Bluetooth partnership To rename a Bluetooth partnership: Tap Start > Settings > Connections > Bluetooth. Tap Bluetooth Manager. On the My Shortcuts tab, tap and hold the partnership you want to rename, and then tap Rename. Enter a new name for the partnership. Tap ok. -
Page 33: Connect To A Bluetooth Headset
To remove a paired relationship between devices: Tap the (iPAQ Wireless) icon. Make sure that Bluetooth is already on. If not, turn on Bluetooth. Tap Bluetooth > Bluetooth Connections > Menu > Paired devices. Tap a device name. Tap Remove. Tap Yes to remove the pairing. -
Page 34: Authorization To Access Services
Authorization to access services If you choose to require authorization to access services, you have to authorize each connection. Your HP iPAQ always asks you if the connection should be permitted. Tap the (iPAQ Wireless) icon. Tap the Bluetooth tab, and then tap the (Bluetooth) icon to turn Bluetooth on. -
Page 35: Bluetooth Stack 2.0/Edr
Bluetooth Stack 2.0/EDR A2DP (Advanced Audio Distribution Profile) technology allows users to send CD quality stereo music from one device to another using Bluetooth wireless technology. A2DP is one of the modes available for Bluetooth technology. NOTE: Even though the Bluetooth Stereo Headphones support A2DP profile, the user's iPAQ model and OS should be compatible with A2DP in order for the user to use this feature. -
Page 36: Set Up A Wireless Access Point (Wap) Gateway
To set up proxy server settings: Tap Start > Settings > Connections > Connections. If a proxy server has not been set up, tap Set up my proxy server, else tap Edit my proxy server. Select the This network connects to the Internet and This network uses a proxy server to connect to the Internet check boxes. -
Page 37: Set Up A Vpn Server Connection
To connect to a network, tap Start > Settings > Connections > Connections > Advanced > Select Networks. Select My ISP to connect to the Internet through an ISP or select My Work Network to connect to a company network. Select My Work Network if the network requires a proxy server. If you need to change or create a new network management name, tap Edit…... -
Page 38: End A Connection
End a connection It can be useful to end a connection when you are done using it. This frees resources on your HP iPAQ and can save connection charges. ● When connected via a modem or VPN, tap Connections > Disconnect. ●... -
Page 39: Hp Photosmart Mobile
HP Photosmart Mobile HP Photosmart Mobile You can use HP Photosmart Mobile to: ● View pictures stored on your HP iPAQ or a storage card. ● Add voice or text notes to pictures. ● Print pictures. ● View a slideshow. ●... -
Page 40: View A Slideshow
Enter the required e-mail address or use Contacts by tapping Menu > Add Recipient…. Enter other required information, such as an e-mail title and message. Tap Send. NOTE: To send the e-mail immediately, you need to either enable WLAN on your HP iPAQ or connect the device to a computer for synchronization with the Exchange Server. -
Page 41: Messaging
Messaging Understand messages To send and receive e-mail messages from an e-mail account, you need to connect to the Internet or your corporate network, depending on the account. You can send and receive: ● Outlook e-mail ● Internet e-mail through an ISP You can also access e-mail from work using a VPN connection. -
Page 42: Synchronize E-Mail
The way a folder looks varies by type: ● If you use an Outlook e-mail account, e-mail messages in the Inbox folder in Outlook are synchronized automatically with your HP iPAQ. You can choose to synchronize additional folders by designating them for synchronization. The folders you create and the messages you move are mirrored on the e-mail server. -
Page 43: Internet E-Mail
Enter the User name, Password, and Domain on the Edit Server Settings screen. Select the check box for the items you want to synchronize, and then tap Finish. Internet e-mail Create a new POP3 or IMAP4 account You must set up an e-mail account that you have with an ISP or an account that you access using a VPN server connection (typically a work account) before you can send and receive e-mail. - Page 44 Setting Description Use separate settings Select this if your outgoing e-mail server requires a different user name and password than the ones you entered before. Outgoing server settings Configure these settings to ensure that your outgoing e-mail messages are delivered. User name Enter your user name for the outgoing e-mail server.
-
Page 45: Receive Attachments
Delete an account To delete an account: Tap Start > Programs > Messaging. Tap Menu > Options. Tap and hold the account name, and then tap Delete. Receive attachments An attachment sent with an e-mail message or downloaded from the server is displayed below the subject of the message. -
Page 46: Receive Meeting Requests
Receive meeting requests If you receive your e-mail messages through any synchronization software, you can receive meeting requests. When connecting directly to an e-mail server, the server must be running Microsoft Exchange Server version 5.5 or later for you to receive meeting requests. See Synchronization software on page 60 for more information. -
Page 47: Reply To Or Forward A Message
Enter your message. To quickly add common messages, tap Menu > My Text, and then tap a required message. To check the spelling, tap Menu > Spell Check. Tap Send. TIP: To set the priority, tap Menu > Message Options… NOTE: If you are working offline, e-mail messages are moved to the Outbox folder and are sent the next time you connect. -
Page 48: Install An Online Address Book
The messages on your device and e-mail server are synchronized. New messages are downloaded to the device Inbox folder, messages in the device Outbox folder are sent, and messages that have been deleted from the server are removed from the device Inbox folder. TIP: To read the entire message, tap Menu >... -
Page 49: Sign In And Out Of Messenger
● Invite others for a chat conversation. ● Block certain contacts from seeing your status or sending you messages. To use MSN Messenger, you need a Microsoft.NET Passport account unless you already have a Hotmail account. To set up a Microsoft.NET Passport account, go to http://www.passport.net. After you have an account, you can use your HP iPAQ MSN Messenger feature. -
Page 50: Calendar
Calendar Access calendar Use Calendar to schedule appointments, including meetings and other events. You can display appointments for the day on the Today screen. To access Calendar, tap Start > Calendar. Change the display of the work week You can customize your calendar for a work week to start on Sunday or Monday. You can schedule your calendar for a five to seven-day week. -
Page 51: Update An Appointment
Update an appointment To update an appointment on your calendar: Tap Start > Calendar. Tap the appointment, and then tap Menu > Edit to make your changes. Tap ok. Cancel an appointment When you delete an appointment in calendar on your HP iPAQ, it is also deleted on your computer the next time you synchronize. -
Page 52: 10 Contacts
10 Contacts Create a contact To create a contact: Tap Start > Programs > Contacts. Tap New and enter the contact information. Tap ok. NOTE: If your contact list has been filtered by a category when you create a contact, that category is automatically assigned to the new contact. -
Page 53: Find A Contact
Tap Menu > Edit. Change the contact information as needed, and then tap ok. NOTE: The displayed category is automatically assigned to the new contact. Find a contact To find a contact: On the Today screen, tap Contacts or Start > Programs > Contacts. If you are not in the Name view, tap Menu >... -
Page 54: Use The Contact List
Tap Menu > Edit. Tap Menu > Remove Picture. Use the contact list There are several ways to use and customize the contact list. Here are a few tips on how to make it work for you. On the Today screen, tap Contacts or Start > Programs > Contacts. In the contact list, do any of the following: ●... -
Page 55: 11 Applications
11 Applications HP applications HP Help and Support The HP Help and Support application increases visibility, accessibility, and usability of the existing help, support, learning content, and tools. To access HP Help and Support: Tap Start > HP Help and Support. To view additional information, tap the appropriate HTML links. -
Page 56: Hp Asset Viewer
● E-mail – E-mail settings describe the configuration required to connect to and check your Internet e-mail accounts. ● Exchange Server – Exchange Server is used to access e-mail, calendars, contacts, tasks, and other mailbox contents while on the go. You can set up Outlook on your HP iPAQ to synchronize directly with your organization's Exchange Server. -
Page 57: Manage Certificates
To access Certificate Enroller: Tap Start > Settings > System > HP CertEnroller. Use the on-screen keyboard to enter server name, user name, and password. Tap ok to save the settings. NOTE: Tap Retrieve to initiate the transaction of downloading the certificate from the server. Once the certificate is retrieved, tap Menu >... -
Page 58: Hp Ipaq File Store
Tap to open a file you want to view. This file will open as a Read Only document. Tap Menu, and then tap the following commands to perform the respective functions: ● Extract all…: Extract all the files at the same time to the user directory. ●... -
Page 59: Additional Features Of Wm6.0 Over Wm5.0
HP 24-pin connector also provides the following: ● Fast charging capabilities ● USB host functionality on your HP iPAQ Additional features of WM6.0 over WM5.0 This section has been designed to summarize the changes between the previous version and the current version. -
Page 60: Clear The Now Playing List
NOTE: Protected files are digital media files that are secured with a license to prevent unauthorized use or playback. Licenses are created and managed by using the DRM technology. To learn more about Windows Media DRM 10, protected files, and other features, refer to the on-screen help by tapping Start >... -
Page 61: Excel Mobile
Excel Mobile You can create and edit workbooks and templates on your HP iPAQ with Excel Mobile. With Excel Mobile, you can: ● View, edit, and create charts and graphics, which can be embedded as objects in a worksheet or placed on a separate worksheet. -
Page 62: Pdf Viewer
PDF viewer The ClearVue PDF application lets you view any PDF document on your HP iPAQ. To access this application: Tap Start > Programs > ClearVue PDF. Tap File > Open… > to open a PDF. Tap Zoom to select the required option for better viewing. Tap File >... -
Page 63: Internet Explorer
Internet Explorer Use Internet Explorer to view and download Web pages as well as browse Web sites through synchronization or when connected to the Internet. Before connecting to the Internet, setting up a wireless connection or network card, you need to obtain the following: ●... -
Page 64: 12 Notes
12 Notes Write a note To write a note: Tap Start > Programs > Notes. Tap New. Write your text on the screen. Tap ok to return to the note list. To select the handwritten text, tap and hold next to the writing. As soon as dots appear and before they form a complete circle, quickly drag across the writing. - Page 65 NOTE: If recording in an open note, an icon displays in the note. If creating a stand-alone recording, an icon displays in the note list. Also, you can create a voice note in Photosmart Mobile and attach the note to a picture. Create a voice note...
-
Page 66: Storage Cards
13 Storage cards Storage cards Use optional storage cards for: ● Expanding the memory of your HP iPAQ ● Adding functionality You can use SD cards or CF cards for additional data storage. The micro SD and mini SD cards can also be used with an SD adapter in your HP iPAQ. - Page 67 To view content of a storage card: Tap Start > Programs > File Explorer. Navigate to select the SD Card folder to see a list of files and folders. If the HP iPAQ does not recognize your storage card, try the following: ●...
-
Page 68: 14 Synchronization
14 Synchronization Synchronization software If your computer is running Windows XP or an earlier version, synchronization settings are managed through Microsoft ActiveSync. Microsoft ActiveSync 4.5 is available on the Getting Started CD. You can also visit http://www.microsoft.com/windowsmobile for more information or to download Microsoft ActiveSync. -
Page 69: Wireless Synchronization Cost Saving Tips
To migrate data from Palm Desktop to Windows Mobile 6.0: Ensure that you have Microsoft Outlook 98 or higher installed on your computer. Insert the Companion CD that came with your Palm unit into your computer's CD-ROM drive. From the Discover Your Handheld screen, select Install Microsoft Conduits. Alternatively, you can reinstall the Palm Desktop software. - Page 70 ● ActiveSync is searching for a connection but cannot establish one. (The green icon on your computer continues to spin.) ● Synchronization has been established between your HP iPAQ and computer but connection has dropped. (The green icon on your computer stops spinning and grays out.) ●...
- Page 71 ● Restart your computer and HP iPAQ and reconnect your iPAQ to your computer. ● Uninstall ActiveSync or WMDC from your computer, and then reinstall it. ◦ To uninstall ActiveSync from your computer, click Start > Control Panel > Add or Remove Programs >...
-
Page 72: 15 Tasks
15 Tasks Set start and due dates for a task To set start and due dates for a task: Tap Start > Programs > Tasks. Tap the task you want to set start and due dates for. Tap Edit and do one or both of the following: ●... - Page 73 To mark an open task as completed: Tap Edit. In the Status box, tap Completed. Mark a task as completed...
-
Page 74: 16 Product Specifications
16 Product specifications System specifications NOTE: Not all models described are available in all countries/regions. For more information on specifications for your particular model, on your HP iPAQ, tap Start > Settings > System > AssetViewer. System Feature Description Processor Monahans LV 624 Operating System Microsoft®... -
Page 75: Operation Environment
Operation environment Metric Temperature Operating 23° to 113° F –5° to 45° C Non-operating –4° to 140° F –20° to 60° C Relative Humidity Operating 30 % to 85 % 30 % to 85 % Non-operating 30 % to 90 % 30 % to 90 % Maximum Altitude Operating... -
Page 76: 17 Regulatory Notices
17 Regulatory notices Federal Communications Commission Notice This equipment has been tested and found to comply with the limits for a Class B digital device, pursuant to Part 15 of the FCC Rules. These limits are designed to provide reasonable protection against harmful interference in a residential installation. -
Page 77: Declaration Of Conformity For Products Marked With The Fcc Logo (United States Only)
This device must accept any interference received, including interference that may cause undesired operation. If you have questions about the product that are not related to this declaration, write to Hewlett-Packard Company P. O. Box 692000, Mail Stop 530113 Houston, TX 77269–2000 or call 1–800–HP–INVENT (1–800–474–6836) - Page 78 *If applicable, a notified body number is used. Refer to the regulatory label provided on this product. Hewlett-Packard GmbH, HQ-TRE, Herrenberger Strasse 140, D-71034 Böblingen, Germany The telecommunications functionality of this product may be used in the following EU and EFTA...
-
Page 79: Products With 2.4-Ghz Wireless Lan Devices
Products with 2.4–GHz Wireless LAN Devices France L'utilisation de cet equipement (2.4GHz Wireless LAN) est soumise a certaines restrictions: Cet equipement peut être utilisé a l'interieur d'un batiment en utilisant toutes les frequences de 2400 a 2483.5MHz (Chaîne 1-13). Pour une utilisation en environement exterieur, les frequences comprises entre 2400-2454 MHz (Chaîne 1-9) peuvent être utilisé. -
Page 80: Disposal Of Waste Equipment By Users In Private Household
Disposal of Waste Equipment by Users in Private Household Disposal of Waste Equipment by Users in Private Household in the European Union This symbol on the product or on its packaging indicates that this product must not be disposed of with your other household waste. Instead, it is your responsibility to dispose of your waste equipment by handing it over to a designated collection point for the recycling of waste electrical and electronic equipment. - Page 81 Seadmete jäätmete kõrvaldamine eramajapidamistes Euroopa Liidus See tootel või selle pakendil olev sümbol näitab, et kõnealust toodet ei tohi koos teiste majapidamisjäätmetega kõrvaldada. Teie kohus on oma seadmete jäätmed kõrvaldada, viies need elektri- ja elektroonikaseadmete jäätmete ringlussevõtmiseks selleks ettenähtud kogumispunkti. Seadmete jäätmete eraldi kogumine ja ringlussevõtmine kõrvaldamise ajal aitab kaitsta loodusvarasid ning tagada, et ringlussevõtmine toimub viisil, mis kaitseb inimeste tervist ning keskkonda.
- Page 82 lejtezése az Európai Unió területén A készüléken, illetve a készülék csomagolásán látható azonos szimbólum annak jelzésére szolgál, hogy a készülék a selejtezés során az egyéb lyre szállítani az elektromos és elektronikai készülékek újrahasznosítása céljából. A hulladékká vált termékek környezetre és emberi egészségre nézve biztonságos illetékes önkormányzattól, az illetékes szem ételtakarító...
- Page 83 Šis simbolis ant gaminio arba jo pa atliekoms perdirbti. Atskirai surenkam Disposal of Waste Equipment by Users in Private Household...
- Page 84 Chapter 17 Regulatory notices...
- Page 85 Bortskaffande av avfallsprodukter från användare i privathushåll inom Europeiska Unionen Om den här symbolen visas på produkten eller förpackningen betyder det att produkten inte får slängas på samma ställe som hushållssopor. I stället är det ditt ansvar att bortskaffa avfallet genom att överlämna det till ett uppsamlingsställe avsett för återvinning av avfall från elektriska och elektroniska produkter.
-
Page 86: Equipment Warning
Avrupa Birliği'nde Hurda Donanımların Özel Konutlardaki Kullanıcılar Tarafından Elden Çıkarılması Tento Ürünün veya ambalajının üzerinde ki bu simge, bu ürünün diğer ev atıklarıyla birlikte elden çıkarılma ması gerektiğini belirtir. Hurda donanımınızın elektrikli ve elektronik hurda donanımları geri dönüştürmek için belirlenmiş toplama merkezlerine teslim edilmesi, sizin sorumluluğunuzdadır. -
Page 87: Airline Travel Notice
● For your own safety, before using headsets or earphones, always reset the volume. Some headphones are louder than other headphones, even if the volume control setting is the same. ● Changing the default audio or equalizer settings might lead to higher volume and should only be done with caution. -
Page 88: Japanese Notice
Japanese Notice Wireless LAN 802.11b Devices Wireless LAN 802.11g Devices Bluetooth Devices Taiwan DGT Notice Korean Notice Chapter 17 Regulatory notices... -
Page 89: 18 Safety Information
18 Safety information To reduce the risk of bodily injury, electric shock, fire, and damage to the equipment, observe the safety precautions in this document. General Precautions Heed service markings: Except as explained elsewhere in your product documentation, do not service your product yourself. -
Page 90: Safety Precautions For Power Cords And Accessories
Safety Precautions for Power Cords and Accessories WARNING! To reduce the risk of electric shock, fire, or damage to the equipment, do not attempt to power the product with a voltage converter kit sold for appliances. Use the correct external power source: A product should be operated only from the type of power source indicated on the electrical ratings label. -
Page 91: Safety Precautions For Docking Devices
Handle battery packs carefully: Replace a battery pack only with a battery pack approved for this product. For information about removing a battery pack, refer to your product documentation. When a battery pack has reached the end of its useful life, do not dispose of the battery pack in general household waste. -
Page 92: Cdrh Regulations
If your product is equipped with laser products, it complies with appropriate safety standards, including IEC 60825. With specific regard to the laser, the equipment complies with laser product performance standards set by government agencies for Class 1 laser products. It does not emit hazardous light; the beam is totally enclosed during all modes of customer operation and maintenance. -
Page 93: 19 Frequently Asked Questions
19 Frequently asked questions I am having trouble turning on my HP iPAQ. What should I Your HP iPAQ appears to have problems with the battery. Please perform the following checks: ● Is the battery charged? ● Is the battery properly installed? I have trouble connecting to the Internet. -
Page 94: I Am Unable To Use The Activesync Feature. What Should I Do
I am unable to use the ActiveSync feature. What should I To be able to use the ActiveSync feature, upgrade your computer to the latest version of ActiveSync. It is recommended to use ActiveSync 4.5 or a higher version. Visit https://www.microsoft.com/ windowsmobile/activesync/default.mspx for the latest versions. -
Page 95: 20 Guidelines For Care And Maintenance
20 Guidelines for care and maintenance It is recommended that you follow certain guidelines to prevent possible damage to your HP iPAQ and to keep it in a good condition. Using your HP iPAQ ● Avoid using your HP iPAQ in dusty and extremely high or low temperature environments. ●... -
Page 96: 21 Accessories For Hp Ipaq
21 Accessories for HP iPAQ ● Use original HP batteries and chargers to charge your HP iPAQ. ● Do not use your HP iPAQ battery and charger for other purposes. Use any the following accessories to enhance your HP iPAQ experience: ●...