Quick Links
LED Décor
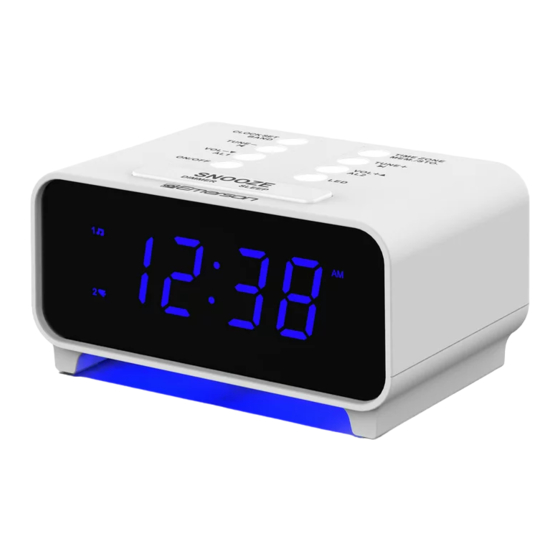
CKS1500
To browse the SPANISH Owner's Manual online, please visit
https://www.emersonradio.com/documents/
1.) Read these instructions.
2.) Keep these instructions.
3.) Heed all warnings.
4.) Follow all instructions.
5.) Do not use this apparatus near water.
6.) Clean only with dry cloth.
7.) Do not block any ventilation openings. Install in accordance with the manufacturer's instructions.
8.) Do not install near any heat sources such as radiators, heat registers, stoves, or other apparatus
(including amplifiers) that produce heat.
9.) Do not defeat the safety purpose of the polarized or grounding-type plug. A polarized plug has two
blades with one wider than the other. A grounding type plug has two blades and a third grounding
prong. The wide blade or the third prong is provided for your safety. If the provided plug does not
fit into your outlet, consult an electrician for replacement of the obsolete outlet.
10.) Protect the power cord from being walked on or pinched particularly at plugs, convenience
receptacles, and the point where they exit from the apparatus.
11.) Only use attachments / accessories specified by the manufacturer.
12.) Unplug this apparatus during lightning storms or when unused for long periods of time.
13.) Refer all servicing to qualified service personnel. Servicing is required when the apparatus has
been damaged in any way, such as power-supply cord or plug is damaged, liquid has been spilled
or objects have fallen into the apparatus, the apparatus has been exposed to rain or moisture,
does not operate normally, or has been dropped.
14.) Use only with the cart, stand, tripod, bracket, or table specified by the manufacturer, or
sold with the apparatus. When a cart is used, use caution when moving the
cart/apparatus combination to avoid injury from tip-over.
15.) The apparatus shall not be exposed to dripping or splashing and that no
objects filled with liquids, such as vases, shall be placed on apparatus.
16.) Mains plug is used as disconnect device and it should remain readily
operable during intended use. In order to disconnect the apparatus from the
mains completely, the mains plug should be disconnected from the mains
socket outlet completely.
17.) Battery shall not be exposed to excessive heat such as sunshine, fire or the like.
CAUTION:
Danger of explosion if battery is incorrectly replaced. Replace only with the
same or equivalent type.
PRÉCAUTION: Danger d'explosion si les piles sont remplacées de facon incorrect. Remplacer
les piles seulement par le méme type de pile ou l'équivalent.
Remove any descriptive labels,stickers or protective films on the front or top
of the cabinet,if any.
the antenna wire
The antenna wire
Front Panel
1
AM
2
kHz
3
MHz
4
Top Panel
12
11
10
9
Rear Panel
21
12.) CLOCK SET / BAND select button
13.) TIME ZONE/ MEM./ STO. button
14.) TUNE+
button
15.) VOL+▲ / AL2 button
16.) LED button
5.) AM Indicator ('On'=AM,'Off'=PM)
6.) KHz (AM Radio) Indicator.
17.) SNOOZE/DIMMER/SLEEP Button
18.) Back Up Battery Compartment
7.) MHz (FM Radio) Indicator.
8
19.) Speaker
9.) ON/OFF button
20.) FM antenna
10.) VOL-▼ / AL1 button
21.) AC adapter (Back Cabinet).
11.) TUNE-
button
press and hold
until the
display'Flashes'
Release
Checking the Current Year-Date-Day of Week-Time Settings
Press briefly the CLOCK SET button repeatedly to see the cycle of
year, date, day of week and time. To restore time display mode,
leave it idle for few secs.
Setting the Year
the CLOCK SET button until the Year 'Flashes',
Press the TUNE-
or TUNE+
button to
adjust the Year;
5
6
Setting the Date
7
Press the CLOCK SET button again and release, the Date 'Flashes';
Press the TUNE-
or TUNE+
button to
8
adjust the Month;
Press the CLOCK SET button again and
5
release, the Date 'Flashes';
6
Press the TUNE-
or TUNE+
button to adjust the Date;
Setting the Time
7
Press the CLOCK SET button again and release, the Hour 'Flashes';
Press the TUNE-
or TUNE+
button to adjust the Hour
8
(where AM indicator 'On' is AM, 'Off' is PM);
9
Press the CLOCK SET button again and release, the
Minutes 'Flashes';
Press the TUNE-
or TUNE+
button to adjust the Minutes
13
10
Press the CLOCK SET button again, or leave it idle for few
11
seconds, to store all new settings and restore it to time display mode.
14
Note:Time zone and clock settings can only be adjusted in Standby mode,where the
AM/FM Radio is disabled(i.e.the indicators of kHz and MHz are'Off')
15
16
17
IMPORTANT NOTES
Turn Daylight Saving Function Off / On (in standby mode only)
18
Daylight Saving Time is NOT observed in Hawaii, American Samoa,
Guam, Puerto Rico, the Virgin Islands and in, most of Arizona, with
19
exception of the Navajo Indian Reservation in Arizona. If you do not
want the clock to adjust itself automatically according to Daylight
Saving Time, you can disable it by pressing and holding the TUNE+
20
(DST start date) or TUNE- (DST end date) button for 5 secs, the
display will show DST start or end date accordingly, which means
the auto Daylight Saving Time has been enabled (`On' by default).
Press either the TUNE+ or TUNE- button to toggle between 'OFF'
or 'On' DST setting. Leave it idle for a few seconds to save your
DST setting and resume to clock mode.
TUNE-
TUNE+
the button;
tens of

Related Manuals for Emerson SmartSet CKS1500


Summary of Contents for Emerson SmartSet CKS1500
- Page 1 PRÉCAUTION: Danger d’explosion si les piles sont remplacées de facon incorrect. Remplacer les piles seulement par le méme type de pile ou l’équivalent. Remove any descriptive labels,stickers or protective films on the front or top of the cabinet,if any. the antenna wire The antenna wire press and hold until the...
- Page 2 Adjusting The Wake Up Time and Alarm Week Mode (1 or 2 IMPORTANT:Alarm settings can only be adjusted in Standby mode. Press the AL1 (AL2) button repeatedly to turn the or 2 lndicator On. 2) Press and hold the AL1 (AL2) button until the display blinks and changes from the current time to the Alarm1 or Alarm2 wake up time.