Table of Contents
Available languages
Available languages
Quick Links
Thank you for purchasing a Panasonic product.
This document explains how to install the glass break sensor properly.
For details about how to use the system, refer to the User's Guide
(page 16).
Please read this document before using the unit and save it for future
reference.
For assistance, please visit our Support page:
www.panasonic.ca/english/support
In order to use this device:
R Download the latest version of the [Home Network] app.
R Update your hub to the latest firmware version (version 5.55 or later).
For more information, refer to the User's Guide (page 16).
Printed in China
PNQX7289YA_(en-en)_0907_ver.200.pdf
Model No.
1
Installation Guide
Home Network System
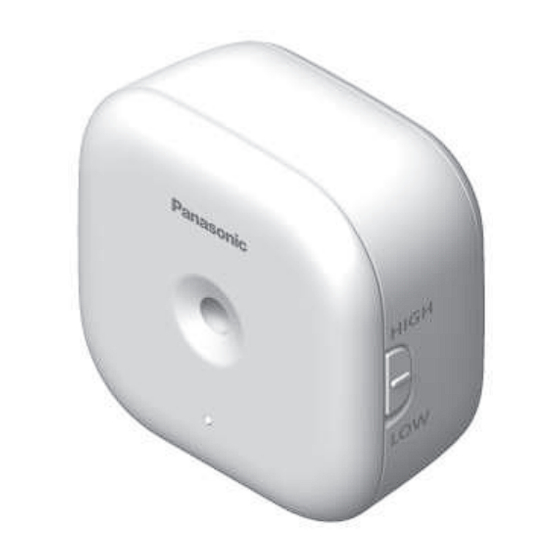
Glass Break Sensor
KX-HNS104C
2015/09/07
16:13:53
Chapters
Table of Contents

Related Manuals for Panasonic KX-HNS104C


Summary of Contents for Panasonic KX-HNS104C
- Page 1 Home Network System Glass Break Sensor KX-HNS104C Model No. Thank you for purchasing a Panasonic product. This document explains how to install the glass break sensor properly. For details about how to use the system, refer to the User’s Guide (page 16).
-
Page 2: Table Of Contents
Table of Contents Introduction Accessory information ....3 Important Information Disclaimer ........4 About this system ......4 For your safety ......4 Important safety instructions ..5 For best performance ....5 Other information .......6 Setup Part names and functions ..8 LED indicator ......8 Setup overview ......8 Inserting the batteries ....9 Registering the sensor ....9 Confirming the usage area ..10... -
Page 3: Introduction
R Microsoft, Windows, and Internet Explorer are either registered trademarks or trademarks of Microsoft Corporation in the United States and/or other countries. R All other trademarks identified herein are the property of their respective owners. For assistance, visit www.panasonic.ca/english/support PNQX7289YA_(en-en)_0907_ver.200.pdf 2015/09/07... -
Page 4: Important Information
Power connection the case of broken glass. Panasonic makes no representations or R Use only the power source marked warranties that it will at all times, or on the product. -
Page 5: Important Safety Instructions
R Keep out of the reach of small Hub location/avoiding noise children. There is a risk of The hub and other compatible swallowing. If the battery is Panasonic devices use radio waves to swallowed, seek medical attention communicate with each other. immediately. R For maximum coverage and... -
Page 6: Other Information
Do not install the sensor near doors. European Union. If you wish to discard R Do not place screens or shielding these items, please contact your local (such as sound blocking curtains) between the glass and sensor. This For assistance, visit www.panasonic.ca/english/support PNQX7289YA_(en-en)_0907_ver.200.pdf 2015/09/07 16:13:55... - Page 7 Important Information authorities or dealer and ask for the correct method of disposal. Note for the battery removal procedure Refer to “Inserting the batteries” on page 9. For assistance, visit www.panasonic.ca/english/support PNQX7289YA_(en-en)_0907_ver.200.pdf 2015/09/07 16:13:55...
-
Page 8: Setup
After confirming the sensor’s status, we recommend turning the LED Installation indicator off by pressing M N again Install the sensor in the desired as soon as possible, otherwise battery location. life may be reduced. For assistance, visit www.panasonic.ca/english/support PNQX7289YA_(en-en)_0907_ver.200.pdf 2015/09/07 16:13:55... -
Page 9: Inserting The Batteries
For more information, refer to the User’s Guide (page 16). Registering the sensor This procedure is not required for devices that were included as part of a bundle. For assistance, visit www.panasonic.ca/english/support PNQX7289YA_(en-en)_0907_ver.200.pdf 2015/09/07 16:13:55... -
Page 10: Confirming The Usage Area
For more may cause deformation, malfunction, or information, refer to the User’s Guide operational failure. (page 16). R In direct sunlight R Areas exposed to grease or steam, such as kitchens For assistance, visit www.panasonic.ca/english/support PNQX7289YA_(en-en)_0907_ver.200.pdf 2015/09/07 16:13:55... - Page 11 R Near magnetic fields (such as near microwaves and magnets) R Areas subject to extreme temperature changes, such as next to air conditioners R Near devices that emit strong radio waves, such as mobile phones For assistance, visit www.panasonic.ca/english/support PNQX7289YA_(en-en)_0907_ver.200.pdf 2015/09/07 16:13:55...
-
Page 12: Information About Sensor Features
Maximum: 6 mm features in these situations. (1/4 inch) R Panasonic takes no responsibility for any injury or damage caused by the In compliance with UL 639. use of the sensor. Sealed insulating glass types are... - Page 13 Horizontal range: approx. 120° Max. distance: approx. 4.6 m (15 feet) when set to MHIGHN, or approx. 2.3 m (7.5 feet) when set to MLOWN Glass inside detectable area Glass outside detectable area For assistance, visit www.panasonic.ca/english/support PNQX7289YA_(en-en)_0907_ver.200.pdf 2015/09/07 16:13:55...
-
Page 14: Wall Mounting
R Place the rear cover with “UP” window. mark facing upwards. R Install the sensor such that there are no obstacles between the sensor and the window that may block the sound of glass breaking. For assistance, visit www.panasonic.ca/english/support PNQX7289YA_(en-en)_0907_ver.200.pdf 2015/09/07 16:13:55... - Page 15 4 tabs on the wall mounting adaptor, and then push down the sensor. Using the wall mounting adaptor Remove the rear cover by pressing the upper sides of the cover (A) and then sliding it down (B). For assistance, visit www.panasonic.ca/english/support PNQX7289YA_(en-en)_0907_ver.200.pdf 2015/09/07 16:13:55...
-
Page 16: Appendix
(such as a lamp), etc. www.panasonic.net/pcc/support/tel/ (Appropriate device required.) homenetwork/manual/ – Telephone alert You can configure the system to call a preprogrammed phone number when the sensor is triggered. For assistance, visit www.panasonic.ca/english/support PNQX7289YA_(en-en)_0907_ver.200.pdf 2015/09/07 16:13:55... -
Page 17: Specifications
´ 2 13/32 inches) R Mass (weight) – With the rear cover attached: Approx. 69 g (0.15 lb), excluding the batteries – With the wall mounting adaptor attached: Approx. 76 g (0.17 lb), excluding the batteries For assistance, visit www.panasonic.ca/english/support PNQX7289YA_(en-en)_0907_ver.200.pdf 2015/09/07 16:13:55... -
Page 18: Industry Canada Notices And Other Information
20 cm (8 inches) or more between product and all person’s body. This product may not be collocated or operated in conjunction with any other antenna or transmitter. For assistance, visit www.panasonic.ca/english/support PNQX7289YA_(en-en)_0907_ver.200.pdf 2015/09/07 16:13:55... -
Page 19: Warranty
PANASONIC PRODUCT - LIMITED WARRANTY Panasonic Canada Inc. warrants this product to be free from defects in material and workmanship under normal use and for a period as stated below from the date of original purchase agrees to, at its option either (a) repair your product with new or refurbished parts, (b) replace it with a new or a refurbished equivalent value product, or (c) refund your purchase price. - Page 20 IF YOU SHIP THE PRODUCT TO A SERVICENTRE Carefully pack and send prepaid, adequately insured and preferably in the original carton. Include details of the defect claimed, and proof of date of original purchase. For assistance, visit www.panasonic.ca/english/support PNQX7289YA_(en-en)_0907_ver.200.pdf 2015/09/07...
- Page 21 Notes PNQX7289YA_(en-en)_0907_ver.200.pdf 2015/09/07 16:13:55...
- Page 22 Serial No. Date of purchase (found inside the battery compartment) Name and address of dealer Attach your purchase receipt here. 5770 Ambler Drive, Mississauga, Ontario L4W 2T3 © Panasonic System Networks Co., Ltd. 2015 PNQX7289YA_(en-en)_0907_ver.200.pdf 2015/09/07 16:13:55...
- Page 23 Capteur de bris de verre KX-HNS104C Modèle Nous vous remercions d’avoir arrêté votre choix sur un appareil Panasonic. La présente notice explique comment installer le capteur de bris de verre de la manière appropriée. Pour de plus amples renseignements sur le fonctionnement de ce système, se reporter au Guide d’utilisation (p.
- Page 24 Sommaire Introduction Accessoires ........3 Informations importantes Avis de non-responsabilité ....4 À propos de ce système ....4 Pour votre sécurité ......4 Importantes mesures de sécurité ..........5 Pour un rendement optimal .....5 Autres informations ......6 Configuration Pièces et fonctions ......8 Indicateur à diode ......8 Mise en route - Survol .....8 Mise en place des piles ....9 Enregistrement du capteur ....10...
-
Page 25: Introduction
R Microsoft, Windows et Internet Explorer sont des marques commerciales déposées ou des marques commerciales de Microsoft Corporation aux États-Unis et/ou dans d’autres pays. R Toutes les autres marques de commerce identifiées aux présentes appartiennent à leurs propriétaires respectifs. Pour obtenir de l’aide, veuillez visiter notre page www.panasonic.ca/french/support PNQX7289YA_(fr_fr)_0907_ver.200.pdf 2015/09/07 16:15:28... -
Page 26: Informations Importantes
Afin d’éviter tout risque de blessure ou perte protégés contre l’énergie émise par des de vie/propriété, lire cette section sources externes d’énergie RF. Les attentivement avant d’utiliser l’appareil afin fonctions DECT fonctionnent entre Pour obtenir de l’aide, veuillez visiter notre page www.panasonic.ca/french/support PNQX7289YA_(fr_fr)_0907_ver.200.pdf 2015/09/07 16:15:28... -
Page 27: Importantes Mesures De Sécurité
; centre de service agréé. – de manière qu’il n’est pas orienté dans la direction d’émetteurs Pour obtenir de l’aide, veuillez visiter notre page www.panasonic.ca/french/support PNQX7289YA_(fr_fr)_0907_ver.200.pdf 2015/09/07 16:15:28... -
Page 28: Autres Informations
à exemple) entre la vitre et le capteur. prendre. Cela peut empêcher la détection du son de bris de verre par le capteur. Pour obtenir de l’aide, veuillez visiter notre page www.panasonic.ca/french/support PNQX7289YA_(fr_fr)_0907_ver.200.pdf 2015/09/07 16:15:28... - Page 29 Informations importantes Remarque sur la marche à suivre pour le retrait de la pile Consulter “Mise en place des piles” à la p. 9. Pour obtenir de l’aide, veuillez visiter notre page www.panasonic.ca/french/support PNQX7289YA_(fr_fr)_0907_ver.200.pdf 2015/09/07 16:15:29...
-
Page 30: Configuration
N dès que possible, faute la présente notice en vue d’assurer de quoi la durée de vie de la pile pourrait que l’emplacement choisi permettra un être réduite. fonctionnement approprié du système. Pour obtenir de l’aide, veuillez visiter notre page www.panasonic.ca/french/support PNQX7289YA_(fr_fr)_0907_ver.200.pdf 2015/09/07 16:15:29... -
Page 31: Mise En Place Des Piles
R Vérifier les polarités ( Retirer le couvercle arrière en appuyant sur les côtés supérieurs du couvercle (A) et en le glissant vers le bas (B). Mettre les piles en place. Pour obtenir de l’aide, veuillez visiter notre page www.panasonic.ca/french/support PNQX7289YA_(fr_fr)_0907_ver.200.pdf 2015/09/07 16:15:29... -
Page 32: Enregistrement Du Capteur
Enregistrement du R En cas d’échec de l’enregistrement, le capteur hub émet plusieurs bips brefs. L’enregistrement n’est pas nécessaire si les dispositifs sont partie d’un même sys- tème. Pour obtenir de l’aide, veuillez visiter notre page www.panasonic.ca/french/support PNQX7289YA_(fr_fr)_0907_ver.200.pdf 2015/09/07 16:15:29... -
Page 33: Vérification De L'emplacement
R En plein soleil R Endroits exposés à des matières grasses ou à la vapeur tels qu’une cuisine Pour obtenir de l’aide, veuillez visiter notre page www.panasonic.ca/french/support PNQX7289YA_(fr_fr)_0907_ver.200.pdf 2015/09/07 16:15:29... - Page 34 (p.ex. four à micro-ondes et aimants) R Endroits soumis à de brusques changements de température comme à proximité d’un climatiseur R À proximité d’appareils émettant de puissantes ondes radio tels que téléphones mobiles Pour obtenir de l’aide, veuillez visiter notre page www.panasonic.ca/french/support PNQX7289YA_(fr_fr)_0907_ver.200.pdf 2015/09/07 16:15:29...
-
Page 35: À Propos Des Fonctionnalités Du Capteur
MWi-Fi SETUPN du hub. Une fois le problème résolu (capteur rapproché du hub, piles remplacées, etc.), l’alerte sonore n’est plus émise. Pour obtenir de l’aide, veuillez visiter notre page www.panasonic.ca/french/support PNQX7289YA_(fr_fr)_0907_ver.200.pdf 2015/09/07 16:15:29... - Page 36 2,3 m (7,5 pi) lorsque le réglage MLOWN est sélectionné Verre à l’intérieur de la zone de détection Verre à l’extérieur de la zone de détection Pour obtenir de l’aide, veuillez visiter notre page www.panasonic.ca/french/support PNQX7289YA_(fr_fr)_0907_ver.200.pdf 2015/09/07 16:15:29...
-
Page 37: Installation Murale
Fixer le couvercle arrière au mur avec la fenêtre pouvant bloquer le son du bris les vis ( de verre. R Placer le couvercle arrière avec la marque “UP” orientée vers le haut. Pour obtenir de l’aide, veuillez visiter notre page www.panasonic.ca/french/support PNQX7289YA_(fr_fr)_0907_ver.200.pdf 2015/09/07 16:15:29... - Page 38 Montage avec l’adaptateur Retirer le couvercle arrière en appuyant sur les côtés supérieurs du couvercle (A) et en le glissant vers le bas (B). Pour obtenir de l’aide, veuillez visiter notre page www.panasonic.ca/french/support PNQX7289YA_(fr_fr)_0907_ver.200.pdf 2015/09/07 16:15:29...
-
Page 39: Annexe
(Dispositif approprié requis.) – Alerte téléphonique Il est possible de configurer le système de manière à lancer la composition d’un numéro de téléphone préprogrammé sur déclenchement du capteur. Pour obtenir de l’aide, veuillez visiter notre page www.panasonic.ca/french/support PNQX7289YA_(fr_fr)_0907_ver.200.pdf 2015/09/07 16:15:29... -
Page 40: Spécifications
Environ 76 g (0,17 lb), sans les piles Lorsque la température ambiante est d’environ 25 °C (77 °F). Lorsque le capteur est déclenché une fois par mois et que la température ambiante est d’environ Pour obtenir de l’aide, veuillez visiter notre page www.panasonic.ca/french/support PNQX7289YA_(fr_fr)_0907_ver.200.pdf 2015/09/07 16:15:29... -
Page 41: Avis D'industrie Canada Et Autres Informations
20 cm (8 po) ou plus de toute personne. L Cet appareil ne doit pas être installé ni opéré de concert avec aucune autre antenne ni aucun autre émetteur. Pour obtenir de l’aide, veuillez visiter notre page www.panasonic.ca/french/support PNQX7289YA_(fr_fr)_0907_ver.200.pdf 2015/09/07 16:15:29... -
Page 42: Garantie
La présente garantie n’est fournie qu’à l’acheteur original d’un des produits de marque Panasonic indiqués plus haut, ou à la personne l’ayant reçu en cadeau, vendu par un détaillant Panasonic agréé au Canada et utilisé au Canada. Le produit ne doit pas avoir été “vendu tel quel” et doit avoir été livré à l’état neuf dans son emballage d’origine. - Page 43 Emballez soigneusement, de préférence dans son carton d’origine, et expédiez, franco de port, suffisamment assuré. Accompagnez le tout d’une description de la défectuosité présumée et d’une pièce justificative de la date d’achat original. Pour obtenir de l’aide, veuillez visiter notre page www.panasonic.ca/french/support PNQX7289YA_(fr_fr)_0907_ver.200.pdf 2015/09/07...
- Page 44 Nº de série Date d’achat (apposé à l’intérieur du logement des piles) Nom et adresse du détaillant Joindre votre reçu d’achat ici. 5770 Ambler Drive, Mississauga, Ontario L4W 2T3 © Panasonic System Networks Co., Ltd. 2015 PNQX7289YA_(fr_fr)_0907_ver.200.pdf 2015/09/07 16:15:29...