- 1 PARTS AND FEATURES
- 2 FOOD PROCESSOR SAFETY
- 3 IMPORTANT SAFEGUARDS
-
4
USING THE FOOD PROCESSOR
- 4.1 ACCESSORIES SELECTION GUIDE
- 4.2 BEFORE FIRST USE
- 4.3 ASSEMBLING THE FOOD PROCESSOR
- 4.4 INSTALLING THE MULTIPURPOSE BLADE
- 4.5 INSTALLING THE REVERSIBLE SLICING/SHREDDING DISC
- 4.6 OPERATING THE FOOD PROCESSOR
- 4.7 USING THE 2-IN-1 FEED TUBE
- 4.8 REMOVING PROCESSED FOODS
- 4.9 USING THE MULTIPURPOSE BLADE
- 4.10 USING THE REVERSIBLE SLICING/SHREDDING DISC
- 5 TIPS FOR GREAT RESULTS
- 6 Care and Cleaning
- 7 TROUBLESHOOTING
- 8 Documents / Resources
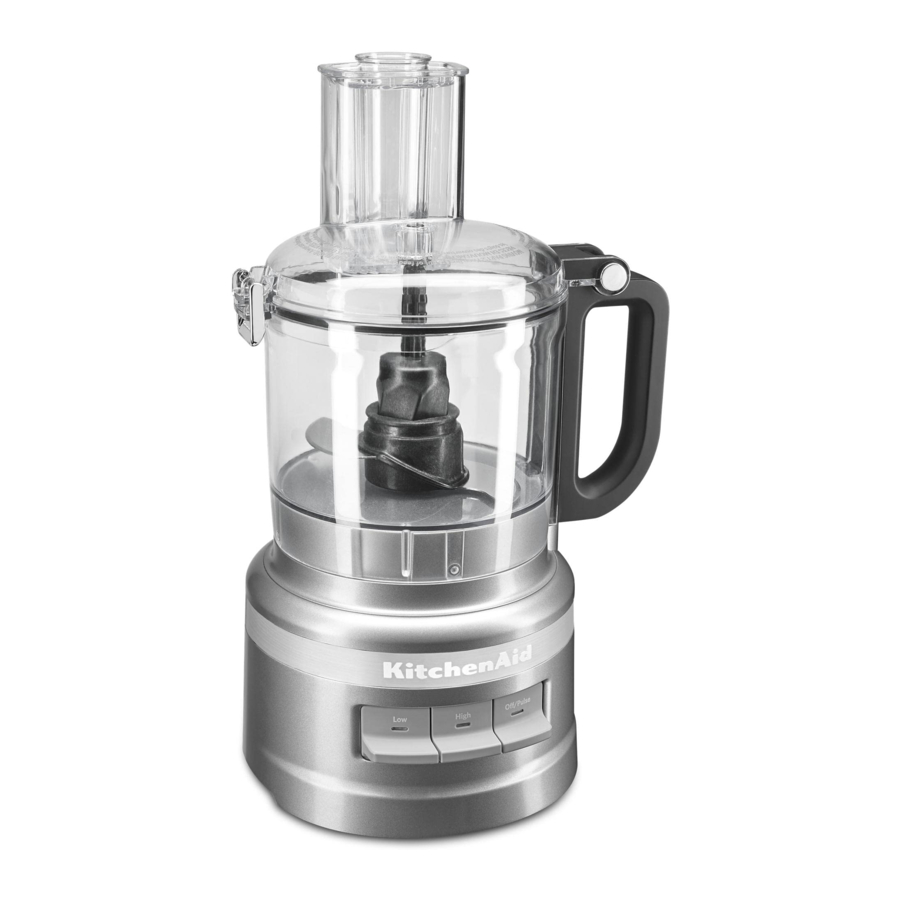
PARTS AND FEATURES
PARTS AND ACCESSORIES

FOOD PROCESSOR SAFETY
Your safety and the safety of others are very important.
We have provided many important safety messages in this manual and on your appliance. Always read and obey all safety messages.
 This is the safety alert symbol.
This symbol alerts you to potential hazards that can kill or hurt you and others.
All safety messages will follow the safety alert symbol and either the word "DANGER" "WARNING." These words mean:

You can be killed or seriously injured if you don't immediately follow instructions.

You can be killed or seriously injured if you don't follow instructions.
All safety messages will tell you what the potential hazard is, tell you how to reduce the chance of injury, and tell you what can happen if the instructions are not followed.
State of California Proposition 65 Warnings:
This product contains one or more chemicals known to the State of California to cause cancer.
This product contains one or more chemicals known to the State of California to cause birth defects or other reproductive harm.
IMPORTANT SAFEGUARDS
When using electrical appliances, basic safety precautions should always be followed, including the following:
![shock hazard]() To protect against risk of electrical shock, do not put Food Processor in water or other liquid.
To protect against risk of electrical shock, do not put Food Processor in water or other liquid.![shock hazard]()
![burn hazard]() The use of attachments not recommended or sold by KitchenAid may cause fire, electric shock, or injury.
The use of attachments not recommended or sold by KitchenAid may cause fire, electric shock, or injury.
 The use of attachments not recommended or sold by KitchenAid may cause fire, electric shock, or injury.
SAVE THESE INSTRUCTIONS
This product is designed for household use only.
ELECTRICAL REQUIREMENTS
Voltage: 120 VAC
Frequency: 60 Hz
NOTE: This Food Processor is equipped with a polarized plug (one blade is wider than the other).
 To reduce the risk of electrical shock, this plug will fit in a polarized outlet only one way. If the plug does not fit fully in the outlet, reverse the plug. If it still does not fit, contact a qualified electrician. Do not modify the plug in any way.
USING THE FOOD PROCESSOR
ACCESSORIES SELECTION GUIDE
| ACTION | SETTING | FOOD | ACCESSORY |
| Chop | Low or Pulse | Cheese Chocolate Fruits Fresh herbs Nuts Tofu Vegetables | Multipurpose stainless steel blade |
| Mince or Purée | High or Pulse | ||
| Mix | Low | Pasta Sauce Pesto Salsa Sauces Batters | |
| Knead | High or Pulse | Doughs | |
| Slice | Low | Fruit (soft) Potatoes Tomatoes Vegetables (soft) | Reversible slicing/shredding disc (slicing side) |
| High | Cheese Chocolate Fruits (hard) Vegetables (hard) | ||
| Shred (fine to medium) | Low | Potatoes Vegetables (soft) | Reversible slicing/shredding disc (shredding side) |
| High | Cabbage Cheese Chocolate Fruits (hard) Vegetables (hard) |
FOR DETAILED INFORMATION ON USING THE FOOD PROCESSOR
Visit www.kitchenaid.com/quickstart for additional instructions with videos, inspiring recipes, and tips on how to use your Food Processor.
BEFORE FIRST USE
Before using your Food Processor for the first time, wash all parts and accessories either by hand or in the dishwasher (see the "Cleaning the Food Processor" section). Your Food Processor is designed so that all accessories may be stored inside the work bowl.
- Lift up the lid latch to unlock the cover. Tilt the work bowl cover back and lift it straight up so that the lid hinge pulls out of the handle hinge.

- Remove all parts and accessories from the work bowl, and lift the food pusher out of the feed tube.


ASSEMBLING THE FOOD PROCESSOR

Place the Food Processor on a dry, level countertop with the controls facing forward. Do not plug in the Food Processor until it is completely assembled.
- Place the work bowl on the base, aligning the handle with the raised button on the right side of the base. The bowl will click into place and should be flush against the base when properly aligned.
![]()
- Place the drive adapter in the work bowl, lowering it onto the drive pin.
![]()


NOTE: For ease of assembly, install the desired blade or disc before attaching the work bowl cover.
- To attach the work bowl cover, hook the lid hinge into the handle hinge on the work bowl and close the cover.

- Once the work bowl cover is closed, push the lid hinge down into the locked position.


INSTALLING THE MULTIPURPOSE BLADE
- Place the blade on the drive adapter. Rotate the blade so it falls down to the base of the adapter.
![]()
- Install the work bowl cover, and be sure the lid latch is pushed down to the locked position.


INSTALLING THE REVERSIBLE SLICING/SHREDDING DISC
- To slice: Turn the disc so that the raised slicing blade is facing up.
To shred: Turn the disc so that the small, raised shredding blades are facing up.

The disc can be placed in two different positions: level with the top of the bowl for processing, and lower, inside of the bowl, for storage.
NOTE: While the disc will operate in storage position, it will not perform as well. Make sure the disc is level with the top of the bowl for best performance.

- Hold the disc by its center hub and lower it onto the drive adapter, aligning the mark on the center hub of the disc to the matching mark on the adapter. When properly placed, the disc should be level with the top of the bowl. If the disc falls to the storage position, lift it out, turn it 90°, and lower it again.

- Install the work bowl cover, and be sure the lid latch is pushed down to the locked position.


OPERATING THE FOOD PROCESSOR

Rotating Blade Hazard
Always use food pusher.
Keep ngers out of openings. Keep away from children.
Failure to do so can result in amputation or cuts.
Before operating the Food Processor, be sure the work bowl, blades/disc and work bowl cover are properly assembled on the base (see the "Assembling the Food Processor" section).
- To turn on, press LOW or HIGH. The Food Processor will run continuously and the indicator light will glow.
To turn off, press LOW or HIGH again, or press OFF/PULSE.

- To use the Pulse function:
Press OFF/PULSE for short bursts, or press and hold for longer bursts. The Pulse function runs at high speed only. The Food Processor will turn off when the Off/Pulse button is released.

- When finished, press the OFF/PULSE button. The indicator light will go out and the blade or disc will slow to a stop.

- Wait until the blade or disc comes to a complete stop before removing the work bowl cover. Be sure to turn off the Food Processor before removing the work bowl cover, or before unplugging the Food Processor.


USING THE 2-IN-1 FEED TUBE
The 2-in-1 feed tube features a 2-piece food pusher. To slice or shred small items, insert the 2-piece food pusher into the feed tube.
Use the small feed tube and pusher to process small or slender items, like single carrots or celery stalks.
To slowly drizzle oil into ingredients, just fill the small pusher with the desired amount of oil. A small hole in the bottom of the pusher will drizzle the oil at a constant rate.

REMOVING PROCESSED FOODS
- Turn the Food Processor off:
Press the OFF/PULSE button and unplug the Food Processor before disassembling.
![]()
- Lift the lid latch to unlock the work bowl cover, then lift cover to remove.

- If using the disc, remove it before removing the bowl. Holding the disc by the center hub, lift it straight up.
![]()
- Remove the drive adapter and multipurpose blade, if using. The blade will stay in place on the drive adapter when you remove the adapter.
![]()
- Lift the work bowl off of the base to remove food from the bowl with a spatula.
![]()


USING THE MULTIPURPOSE BLADE

To chop fresh fruits or vegetables:
Peel, core, and/or remove seeds. For more consistent results, cut food in 1 to 1½inch (2.5-3.75 cm) pieces. Process food to desired size, using Pulse or Low speed. Scrape sides of bowl, if necessary.
To puree cooked fruits and vegetables (except potatoes):
Add 1/4 cup (60 mL) liquid from recipe per cup (235 mL) of food. Process food, using short pulses, until finely chopped. Then process continuously until reaching desired texture. Scrape sides of bowl, if necessary.
To prepare mashed potatoes:
Shred hot cooked potatoes using the shredding disc. Exchange shredding disc for multipurpose blade. Add softened butter, milk, and seasonings. Pulse three to four times, 2 to 3 seconds each time, until potatoes are smooth and milk is absorbed.
Do not overprocess.
To chop dried (or sticky) fruits:
The food should be cold. Add 1/4 cup (60 mL) flour from recipe per 1/2 cup (120 mL) dried fruit. Process fruit, using short pulses, until reaching desired texture.
To finely chop citrus peel:
With sharp knife, peel colored portion (without white membrane) from citrus. Cut peel in small strips. Process until finely chopped.
To mince garlic or to chop fresh herbs or small quantities of vegetables:
With processor running, add food through the feed tube. Process until chopped. For best results, make sure work bowl and herbs are very dry before chopping.
To chop nuts or make nut butters:
Process up to 3 cups (710 mL) of nuts to desired texture, using short pulses, 1 to 2 seconds each time. For a coarser texture, process smaller batches, pulsing once or twice, 1 to 2 seconds each time. Pulse more often for finer texture. For nut butters, process continuously until smooth. Store in refrigerator.
NOTE: Processing nuts and other hard foods may scratch the surface finish on the inside of the bowl.
To chop cooked or raw meat, poultry, or seafood:
The food should be very cold. Cut in 1-inch (2.5 cm) pieces. Process up to 1 pound (455 g) at a time to desired size, using short pulses, 1 to 2 seconds each time. Scrape sides of bowl, if necessary.
To make bread, cookie, or cracker crumbs:
Break food into 1½ to 2-inch (3.75-5 cm) pieces. Process until fine. For larger pieces, pulse two to three times, 1 to 2 seconds each time. Then process until fine.
To melt chocolate in a recipe:
Combine chocolate and sugar from recipe in work bowl. Process until finely chopped. Heat liquid from recipe. With processor running, pour hot liquid through the feed tube. Process until smooth.
To grate hard cheeses, such as Parmesan and Romano:
Never attempt to process cheese that cannot be pierced with the tip of a sharp knife. You can use the multipurpose blade to grate hard cheeses. Cut cheese in 1-inch (2.5 cm) pieces. Place in work bowl. Process, using short pulses, until coarsely chopped. Process continuously until finely grated. Pieces of cheese can also be added through the feed tube while the processor is running.
USING THE REVERSIBLE SLICING/SHREDDING DISC

Rotating Blade Hazard
Always use food pusher. Keep ngers out of openings.
Keep away from children.
Failure to do so can result in amputation or cuts.
To slice or shred fruits and vegetables that are round, such as onions, apples, and green peppers:
Peel, core, and remove seeds. Cut in halves or quarters to fit feed tube. Position in feed tube. Process using even pressure with the food pusher.
To slice or shred fruits and vegetables that are small, such as strawberries, mushrooms, and radishes:
Position food vertically or horizontally in layers within the feed tube. Fill feed tube in order to keep food positioned properly. Process using even pressure with the food pusher, or use the small feed tube in the two-piece food pusher. Position food vertically in the tube and use the small food pusher to process food.
To slice uncooked meat or poultry, such as stir-fry meats:
Cut or roll food to fit feed tube. Wrap and freeze food until hard to the touch, 30 minutes to 2 hours, depending on thickness of food. Check to be sure you can still pierce food with the tip of a sharp knife. If not, allow to thaw slightly. Process using even pressure with the food pusher.

To slice or shred fruits or vegetables that are long and relatively small in diameter, such as celery, carrots, and bananas:
Cut food to fit feed tube vertically or horizontally, and pack so that the food is supported. It should not be packed so tightly that it cannot move freely. Process using even pressure with the food pusher, or use the small feed tube in the two-piece food pusher. Position food vertically in the tube and use the small food pusher to process food.

TIPS FOR GREAT RESULTS
To slice cooked meat or poultry, including salami, pepperoni, etc.:
Food should be very cold. Cut in pieces to fit feed tube. Process food using firm, even pressure with the food pusher.
To shred spinach and other leaves:
Stack leaves. Roll up and stand up in feed tube. Process using even pressure with the food pusher.


To shred firm and soft cheeses:
Firm cheese should be very cold. For best results with soft cheeses, such as mozzarella, freeze 10 to 15 minutes before processing. Cut to fit feed tube. Process using even pressure with the food pusher.
HELPFUL HINTS
- Sometimes slender foods, such as carrots or celery, fall over in the feed tube, resulting in an uneven slice. To minimize this, cut food in several pieces and pack the feed tube with the food.
For processing small or slender items, the small feed tube in the 2-piece food pusher will prove especially convenient.
![]()
- Your Food Processor is not designed to perform the following functions:

Care and Cleaning
CLEANING THE FOOD PROCESSOR
The BPA-free bowl requires special handling. If you choose to use a dishwasher instead of hand washing, please follow these guidelines.
- Press the OFF/PULSE button, then unplug the Food Processor before cleaning.
![]()
- Wipe the base and cord with a warm, damp cloth. Thoroughly dry with a soft cloth. Do not use abrasive cleaners or scouring pads. Do not immerse base in water or other liquid.
![]()
- All parts are top rack dishwasher safe. Avoid laying the bowl on its side. Thoroughly dry all parts after washing. Use gentle dishwashing cycles such as normal. Avoid high-temperature cycles.


NOTE: If washing the food processor parts by hand, avoid the use of abrasive cleansers or scouring pads. They may scratch or cloud the work bowl and cover.
- You can store up to two blades and two discs as well as the drive adapter inside of the work bowl when the Food Processor is not in use. Wrap the power cord around the cord storage on the bottom of the base, then secure the plug by clipping it to the housing.
![]()

TROUBLESHOOTING
If your Food Processor should malfunction or fail to operate, check the following:
- Is the fuse in the circuit to the Food Processor in working order?
If you have a circuit breaker box, be sure the circuit is closed. - The Food Processor may need to cool to room temperature.
If the speed light turns off and the Off/Pulse light flashes, wait until the Off/Pulse light turns off and retry.
The Food Processor may take from 5 to 15 minutes to cool completely. - The motor may be locked.
If the speed light stays on while the Off/Pulse light flashes, press the Off/Pulse button to reset the motor.
Food Processor not shredding or slicing properly
If the work bowl cover won't close when using the disc:
If the problem is not due to one of the above items, see the "Warranty and service" section.
Do not return the Food Processor to the retailer. Retailers do not provide service.

Documents / Resources
References
Download manual
Here you can download full pdf version of manual, it may contain additional safety instructions, warranty information, FCC rules, etc.
Thank you! Your question has been received!


Need Assistance?
Do you have a question about the KFP0718L that isn't answered in the manual? Leave your question here.