
Related Manuals for Haier HWO60S14EPB4


Summary of Contents for Haier HWO60S14EPB4
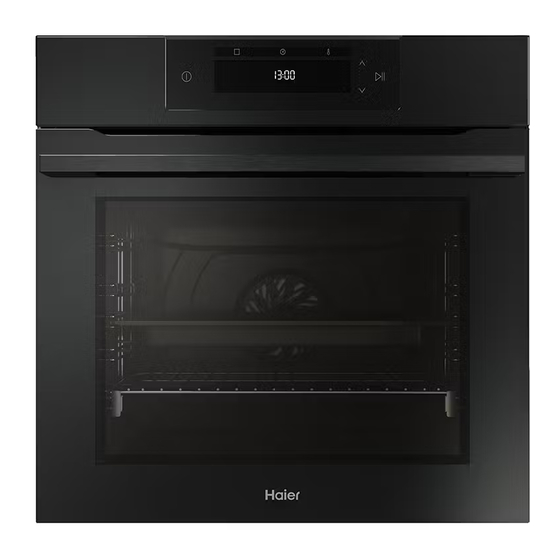
- Page 1 ● HWO60S14EPB4 ● HWO60S14EPX4 USER INSTRUCTIONS OVENS Haier Overseas Electric Appliances Corp. Ltd...
-
Page 2: Table Of Contents
Summary Safety and warnings General instruct ons Product descr pt on Control panel Oven clean ng and ma ntenance Pyrolysis Troubleshooting Installat on EN 02... -
Page 3: Safety And Warnings
SAFETY AND WARNINGS Your oven has been carefully des gned to operate safely dur ng normal cook ng procedures. Please keep the follow ng safety nstruct ons n m nd when you are us ng t: WARNING! Electr cal Shock Hazard Turn the oven off at the wall before replac ng the oven lamp or before carrying out any work or maintenance on it. - Page 4 WARNING! Hot Surface Hazard Access ble parts may become hot when n use. To avo d burns and scalds, be careful not to touch any hot part and keep ch ldren away. Use oven m tts or other protect on when handl ng hot surfaces such as oven shelves or d shes.
- Page 5 SAFETY AND WARNINGS IMPORTANT SAFETY INSTRUCTIONS To reduce the risk of fire, electrical shock, injury to persons or damage when using the oven, follow the important safety instructions listed below: • Read all the instructions before using the oven. Use the oven only for its intended purpose as described in these instructions.
- Page 6 SAFETY AND WARNINGS used by children aged from 8 years and above, and persons with reduced physical, sensory or mental capabilities or lack of experience and knowledge, if they have been given supervision or instruction concerning the use of the appliance in a safe way and they understand the hazards involved.
- Page 7 part of the oven’s cooling system. • Placement of oven shelves: always position shelves in the desired location while the oven is cool (before preheating). If a shelf must be removed while the oven is hot, do not let the oven mitts or potholder contact hot heating elements in the oven or the base of the oven.
- Page 8 cable or special bundle available from the manufacturer or by contacting the customer service department. The type of power cable must be H05V2V2-F. This operation should be carried out by a suitably qualified professional. The earth conductor (yellow- green) must be approximately 10 mm longer than the other conductors.
- Page 9 birds are extremely sensitive to the fumes given off during a self- clean cycle and may die if left in the same room as the oven during such a cycle • During a self-clean cycle, the oven reaches higher temperatures than it does for cooking. Under such conditions, the surfaces may get hotter than usual.
-
Page 10: General Instruct Ons
General Instruct ons We thank you for choos ng one of our products. For the best results w th your oven, you should read th s manual carefully and reta n t for future reference. Before nstall ng the oven, take note of the ser al number so that you can g ve t to customer serv ce staff f any repa rs are requ red. - Page 11 A low l ght around the central ma n sw tch could be present when the oven s off. Th s s a normal behav or. It can be removed just turn ng the plug ups de down or swapp ng the supply term nals. Recommendat ons After each use of the oven, a m n mum of clean ng w ll help keep the oven perfectly clean.
-
Page 12: Product Descr Pt On
Product Descr pt on Overv ew 1. Control Panel 2 Side racks 3. Wire Shelves (x2) 4. Roasting Dish 5. Air Fry Tray 6. Oven Door 7. Serial Number Accessories Roasting dish Wire Shelves For roasting and grilling. Can be placed on a lower Holds baking trays and plates. - Page 13 Telescopic guides Two guide rails which facilitate the cooking status check as they allow easily the extraction and repositioning of trays and grids inside the oven cavity. Softclose Hinges which ensure an automatic soft and smooth movement during the closing phase of the oven door.
-
Page 14: Control Panel
Control panel Functions Time Temperature Navigation buttons On/off Start Pause Please refer to next pages for detailed information on the display areas Symbol Function Description Turning the oven on and off. The first time you turn on the oven, you must set the time, using the navigations buttons (5) to select hours On/off and minutes and the Time button (3) to confirm. - Page 15 Display The display is divided into three areas, accessed by pressing the (2), (3) and (4) keys. The same keys may be used to select the submenu (signalled by the indicator), using the navigation buttons to set functions and parameters FUNCTIONS AREA b1.
- Page 16 The menus in overview MAIN MENU – FUNCTIONS AREA Symbol Function Description Manual This function allows to choose cooking functions, temperature functions and duration. Food In this menu you can access a 4 food cooking categories already categories integrated on your oven. Cleaning This function allows to choose a cleaning system available on your functions...
- Page 17 MAIN MENU – TEMPERATURE AREA Symbol Function Description Press to set the preheating temperature, use the keys to ı Preheating regulate the value. Fast Press twice to set the fast temperature. preheating Manual functions (a1) COOKING MODES Symbol Description Suggestions Bake Both top and bottom heating elements are used.
- Page 18 Symbol Description Suggestions Traditional Bake 160-180°C ** Only the bottom bake element is used. Suitable for crème caramel, puddings and bain marie on one level. level Pastry Plus The bottom heating element is used with the fan circulating the air inside the 170-210°C ** oven.
- Page 19 SPECIAL FUNCTIONS Symbol Description Suggestions Master bake 180-200°C ** The top heating element is used in conjunction with pulsing of the fan to keep food soft inside and crunchy outside. 2° level This function ensures the food remains tender and succulent with minimal surface browing.
- Page 20 Food Serving size/grams (in bold, Cooking time (min)* * Category default setting) after preheat Meat 4/800; 6/1200; 8/1600 50; 52; 55 Fish 4/600; 6/900; 8/1200 36; 38; 40 Bakery 4/600; 6/900; 8/1000 42; 50; 56 Vegetables 4/800; 6/1200; 8/1600 57; 60; 65 ADDITIONAL FUNCTIONS Sym- Description...
-
Page 21: Oven Clean Ng And Ma Ntenance
Oven clean ng and ma ntenance General notes on clean ng The l fecycle of the appl ance can be extended through regular clean ng. Wa t for the oven to cool before carry ng out manual clean ng operat ons. Never use abras ve detergents, steel wool or sharp objects for clean ng, so as to not rreparably damage the enamelled parts. - Page 22 REMOVAL AND CLEANING OF THE GLASS DOOR 1. Open the door 90° and pull the hinge fixing tabs toward the outside of the oven. 2. Put the door at a 45° angle, then pull the door forwards and upwards at the same time to release it. Remove the oven door and place it on a cushioned surface (e.g.
-
Page 23: Pyrolysis
Hydro Easy Clean The Hydro Easy Clean procedure uses steam to help remove remaining fat and food particles from the oven. 1. Pour 300 ml of water into the Hydro Easy Clean container at the bottom of the oven. 2. Select the dedicated function (d1). 4. -
Page 24: Troubleshooting
Waste management and environmental protection This appliance is labelled in SAVING AND RESPECTING THE ENVIRON - accordance with European Di - MENT rective 2012/19/EU regarding Where possible, avoid pre-heating the oven electric and electronic appli- and always try to fill it. Open the oven door as ances (WEEE). -
Page 27: Installat On
Installat on Mounting Under Cooktop The cabinetry should follow the dimensions shown. This allows for sufficient airflow behind the oven and between the oven and cooktop for cooling. If the cabinetry base is fully sealed, an opening(s) should be provided to allow cool air to enter. 600 mm 595 mm Air Entry... - Page 28 - The voltage corresponds to the value given on the rating plate. Model Max Power (W) Frequency (Hz) Voltage (V) Amps (A) HWO60S14EPB4 2400 W 50 / 60 Hz 220 - 240 ~ 10 - 10.9 HWO60S14EPX4 2400 W 50 / 60 Hz 220 - 240 ~ 10 - 10.9...
- Page 29 EN The manufacturer will not be responsible for any inaccuracy resulting from printing or transcript errors contained in this brochure. We reserve the right to carry out modifications to products as required, includ - ing the interests of consumption, without prejudice to the characteristics relating tosafety or function.