
Related Manuals for Haier HWO60S10TPB2


Summary of Contents for Haier HWO60S10TPB2
- Page 1 ● HWO60S10TPB2 ● HWO60S10TPX2 USER INSTRUCTIONS OVENS Haier Overseas Electric Appliances Corp. Ltd...
- Page 2 SAFETY AND WARNINGS Your oven has been carefully designed to operate safely during normal cooking procedures. Please keep the following safety instructions in mind when you are using it: WARNING! Electrical Shock Hazard Turn the oven off at the wall before replacing the oven lamp or before carrying out any work or maintenance on it.
- Page 3 SAFETY AND WARNINGS WARNING! Fire Hazard Do not place aluminium foil, dishes, trays, water or ice on the oven floor during cooking, as doing so will irreversibly damage the enamel; lining the oven with aluminium foil or single use protection available from stores may even cause fire.
- Page 4 SAFETY AND WARNINGS WARNING! Hot Surface Hazard Accessible parts may become hot when in use. To avoid burns and scalds, be careful not to touch any hot part and keep children away. Use oven mitts or other protection when handling hot surfaces such as oven shelves or dishes.
- Page 5 SAFETY AND WARNINGS WARNING! Cut Hazard Take care during installation of the oven - some edges are sharp. Failure to use caution could result in injury or cuts. EN 05...
- Page 6 SAFETY AND WARNINGS IMPORTANT SAFETY INSTRUCTIONS To reduce the risk of fire, electrical shock, injury to persons or damage when using the oven, follow the important safety instructions listed below: • Read all the instructions before using the oven. Use the oven only for its intended purpose as described in these instructions.
- Page 7 SAFETY AND WARNINGS • Household appliances are not intended to be played with by children. • Do not leave children alone. Children should not be left alone or unattended in the area where the appliance is in use. They should never be allowed to sit or stand on any part of the appliance.
- Page 8 SAFETY AND WARNINGS or flame or use a dry chemical or foam type extinguisher. • Use only dry oven mitts or potholders. Moist or damp potholders on hot surfaces could result in burns from steam. Do not let potholders touch hot areas or heating elements. Do not use a towel or a bulky cloth for a potholder.
- Page 9 SAFETY AND WARNINGS • When you place the shelf inside, make sure that the stop is directed upwards and in the back of the cavity. The shelf must be inserted completely into the cavity. • Do not clean the oven seal or use any oven-cleaning products on it.
- Page 10 SAFETY AND WARNINGS • No additional operation/setting is required in order to operate the appliance at the rated frequencies. • lf the power cable is damaged, it should be substituted with a cable or special bundle available from the manufacturer or by contacting the customer service department.
- Page 11 SAFETY AND WARNINGS deposits, using a damp sponge. Do not use detergent. • Do not place towels on the oven during the cleaning cycle • Before starting a self-clean cycle, ensure you move any pet birds to another, closed and well-ventilated room.
-
Page 12: Table Of Contents
Summary General Instructions 1.1 Safety indications 1.2 Electrical safety 1.3 Recommendations 1.4 Waste management 2.1 Overview Product Description 2.2 Accessories 2.3 First use Use of the Oven 3.1 Display description 3.2 Cooking modes Oven Cleaning and Maintenance 4.1 General notes on cleaning 4.2 Maintenance •... -
Page 13: General Instructions
1. General Instructions We thank you for choosing one of our products. For the best results with your oven, you should read this manual carefully and retain it for future reference. Before installing the oven, take note of the serial number so that you can give it to customer service staff if any repairs are required. -
Page 14: Recommendations
1.3 Recommendations After each use of the oven, a minimum of cleaning will help keep the oven perfectly clean. Do not line the oven walls with aluminium foil or single-use protection available from stores. Aluminium foil or any other protection, in direct contact with the hot enamel, risks melting and deteriorating the enamel of the insides. -
Page 15: Product Description
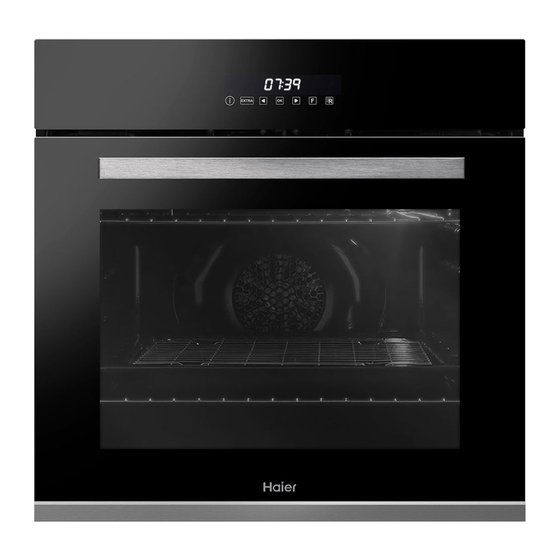
2. Product Description 2.1 Overview 1. Control panel 2. Shelf pos t ons (s ide racks f ncluded) 3. Wire shelves 4. Roasting dish 5. Fan ( f present) 6. Oven door 7. Side rack ( f present: o nly for flat cav ty) 2.2 Accessories (according to the model) Roasting dish Wire shelf... -
Page 16: First Use
Meat probe Rotisserie set (only if present) No pre-heating is required for rotisserie cooking. Measures the nternal temperature of food Cooking with the door closed. The energy dur ng cook ng. Insert nto the hole on the top consumption is 90-95% less than traditional of the cav ty. -
Page 17: Use Of The Oven
3. Use of the Oven 3.1 Display description The oven is switched on and off with this button. ON / OFF EXTRA Cooking Cooking duration Timer If the oven is switched off, the display shows the clock. When the oven is inactive, all the functions are available except the cooking duration and end of cooking. - Page 18 HOW TO FUNCTION HOW TO ACTIVATE WHAT IT DOES WHY IT IS NEEDED DEACTIVATE •To modify cooking before When a cooking programme When the cooking time NB: can only be set with an the set time, press EXTRA terminates , the oven has finished, the oven active cooking programme.
- Page 19 MEAT PROBE (depends on the oven model) If the meat probe is identified, the display shows "PROBE". When a cooking programme is selected, the display shows the default temperature but is never higher than 200°C: the selectable temperature is also limited to 200°C. When the temperature is confirmed, by pressing "Select", the display shows “Ϙ...
-
Page 20: Cooking Modes
3.2 Cooking Modes Function T °C T °C Function (Depends on the oven model) Dial default range LIGHT: Turns on the oven light. DEFROST PLUS: When the dial is set to this position, fan circulates air at room temperature around the frozen food so that it defrosts without the protein content of the food being changed or altered. -
Page 21: Oven Cleaning And Maintenance
4. Oven cleaning and maintenance 4.1 General notes on cleaning The lifecycle of the appliance can be extended through regular cleaning. Wait for the oven to cool before carrying out manual cleaning operations. Never use abrasive detergents, steel wool or sharp objects for cleaning, so as to not irreparably damage the enamelled parts. -
Page 22: Maintenance
Using the pyrolitic cycle: 1- Rotate the function selector to the position " ". On the display, appears the indication " ECO " or " SUP ". The preset time is 90 min, this can be varied from 90 min (Eco mode) to 120 min (Sup mode) via the programmer (setting button "... -
Page 23: Removal And Cleaning Of The Door Glass
REMOVAL AND CLEANING OF THE GLASS DOOR 1. Open the oven door. 2.3.4. Lock the hinges, remove the screws and remove the upper metal cover by pulling it upwards. 5.6. Remove the glass, carefully extracting it from the oven door (NB: in pyrolytic ovens, also remove the second and third glass (if present)). -
Page 24: Changing The Bulb
CHANGING THE BULB 1. Disconnect the oven from the mains supply. 2. Undo the glass cover, unscrew the bulb and replace it with a new bulb of the same type. 3. Once the defective bulb is replaced, replace the glass cover. 5. - Page 26 HWO60S10TPB2 HWO60S10TPX2...
- Page 27 Installation Installation must be done according to instructions by a qualified technician. Manufacturer is not responsible for any damages caused by incorrect installation. The oven can be located high in a column or under a worktop. Before fixing, ensure that the ventilation holes are present as shown below.
- Page 28 (as specified on the rating plate) - The voltage corresponds to the value given on the rating plate. Model Max Power (W) Frequency (Hz) Voltage (V) Amps (A) HWO60S10TPB2 50 / 60 Hz 3400 W 220 - 240 ~ 14.1 - 15.5 HWO60S10TPX2...
- Page 29 Important Installation Instructions Control Panel Moisture Seal Moisture tray must be fitted when installing oven under a worktop. Follow your installation manual for all other aspects of oven installation Clean the top of the oven panel. Not required for ovens in a tower configuration. Fit the moisture tray to the Peal the adhesive layer off the control panel as shown.
- Page 30 The manufacturer will not be responsible for any inaccuracy resulting from printing or transcript errors contained in this brochure. We reserve the right to carry out modifications to products as required, including the interests of consumption, without prejudice to the characteristics relating to safety or function.