
Related Manuals for Honeywell HON-CGW-MBB


Summary of Contents for Honeywell HON-CGW-MBB
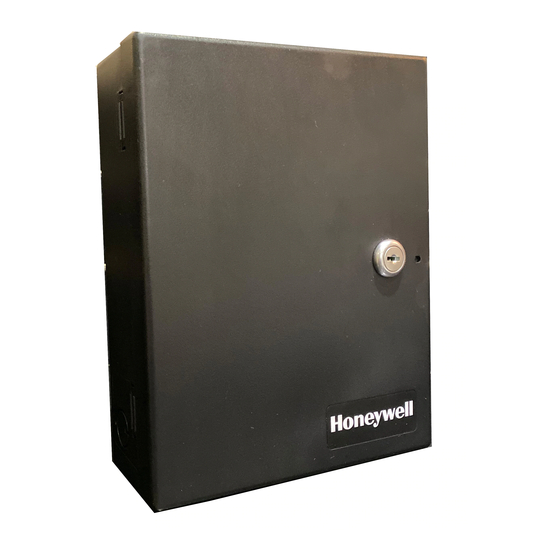
- Page 1 Honeywell Connected Life Safety Services CLSS Gateway HON-CGW-MBB Installation and Users’ Manual P/N:LS10248-000HW-E | REV. F | FEBRUARY/11/2022 ECN: 0002934...
-
Page 2: Table Of Contents
1.7: Warnings and Cautions in This Manual................................13 1.8: The Product Standards.........................................13 1.9: Disclaimer ............................................13 Section 2: Overview ......................................14 2.1: Operation............................................14 2.2: Honeywell Connected Life Safety Services.................................14 2.3: Gateway Board Layout........................................14 2.3.1: Connecting Interfaces.....................................15 2.3.2: LED Indicators ........................................16 2.3.3: Switches on the Gateway Board..................................18 2.4: CLSS Gateway Parts ........................................18... - Page 3 5.2: Verifying the Gateway Connections..................................32 5.3: Panel Brand and Connection Settings ................................. 33 5.3.1: To Change the Connection Settings ................................ 33 5.4: Honeywell CLSS Alarm Transmission Services..............................34 Communication Management ..................................34 5.4.1: Central Station Communication ................................34 5.4.2: Activating the Central Station Communication..........................34 Adding a Central Station to the CLSS Account ............................
- Page 4 Table of Contents 7.16: To Connect with the Modbus Client ................................... 53 7.17: To Configure the Modbus Settings ..................................54 7.18: To Configure the Modbus Client ..................................57 7.19: Modbus Command Support ....................................57 Exception Responses......................................57 Modbus Addressing......................................57 7.20: CLSS Gateway Control Features ..................................
- Page 5 Table of Contents Underwriters Laboratories....................................90 Underwriters Laboratories Canada ................................90 Canada ............................................90 8.3: Compatibility............................................ 91 8.4: System Requirements ........................................91 8.5: System Architecture........................................91 8.5.1: Single Panel Architecture....................................91 8.5.2: NFN Network Architecture.................................... 92 8.6: BACnet Feature Activation......................................94 8.6.1: To Purchase the BACnet Support................................
- Page 6 Table of Contents C.6.4: To Program for Annunciator ..................................122 To Verify the Changes....................................... 122 C.6.5: To Use Panel’s Printer Port Connection .............................. 123 C.7: Gamewell-FCI Panels ........................................ 125 C.7.1: Connection Options...................................... 125 C.7.2: To Use Panel’s Printer Port Connection .............................. 125 C.8: Gent Panels............................................
-
Page 7: Section 1: General Information
The Connected Life Safety Services mobile App may also be referred as the CLSS App • The CLSS Site Manager may also be referred as the Cloud • The term CLSS Gateway may refer to HON-CGW-MBB and CGW-MB, unless otherwise specified 1.2 Information Sources Honeywell offers suitable information sources based on informational requirements. - Page 8 Information Sources General Information Table 1.1: Related Documents List (Continued) Install the Gent Vigilon Installation instructions VIGPLUS-24 or VIGPLUS-72 Vigilon Plus 4/6 Loop Control panel based fire detection and panels alarm system Part Number 4188-110 Product Type: Notifier Panels For This Purpose ... Refer to ...
-
Page 9: Documentation Feedback
June 22, 2020 • Added the Upgrading the Gateway Firmware section. • Updated the Troubleshooting section. August 13, 2020 Added the Honeywell Alarm Transmission Service section. CLSS Gateway - Installation and Users’ Manual | P/N:LS10248-000HW-E | REV. F | FEB/11/2022... - Page 10 • 2.5 Security Recommendations: Added this section • Figure 3.4: Eth1 and Eth0 identified • 4.4 Honeywell CLSS Alarm Transmission Services: Updated for NOC • Appendix C: Removed the Fire-Lite connection procedure • Appendix C: Updated the FireWarden connection section with firmware details and additional notes •...
- Page 11 Revision History General Information Table 1.2: Dates and Changes (Continued) Date Change Details • 7.9 Using Both the CLSS Gateway and the Modbus Gateway: Added this new section • Table 7.3 CLSS-Compatible Equipment List: The Gateways column removed. The Other Products column updated. •...
-
Page 12: Abbreviations Used
Abbreviations Used General Information 1.5 Abbreviations Used Table 1.3: Abbreviations List Abbreviation Description CLSS Connected Life Safety Services DACT Digital Alarm Communicator Transmitter Engineered Systems Distributor Long-Term Evolution The wireless broadband communication standard for mobile devices and data terminals. NOTI-FIRE-NET™ The network interface for NOTIFIER™... -
Page 13: Approvals
Approvals General Information 1.6 Approvals S35608 FCC ID: PV3CGWMB Compliance Statements: This device complies with Part 15 of the FCC Rules. Operation is subject to the following two conditions: 1. This device may not cause harmful interference. 2. This device must accept any interference received, including, an interference that may cause undesired operation. -
Page 14: Warnings And Cautions In This Manual
Warnings and Cautions in This Manual General Information CSFM CSFM ID: 7300-1637:0504 FDNY COA# 2020-TMCOAP-000121-AMND COA# 2020-TMCOAP-000122-AMND 1.7 Warnings and Cautions in This Manual WARNING: THESE INSTRUCTIONS CONTAIN PROCEDURES TO FOLLOW TO AVOID INJURY AND DAMAGE TO EQUIPMENT. IT IS ASSUMED THAT THE USER OF THIS MANUAL HAS BEEN SUITABLY TRAINED AND IS FAMILIAR WITH THE RELEVANT REGULATIONS. -
Page 15: Section 2: Overview
Connection with the CLSS Site Manager facilitates remotely monitoring and managing the fire detection systems. 2.2 Honeywell Connected Life Safety Services The software suite enables remote management of fire detection systems. It monitors the building’s fire system events in real-time and notifies users about the events immediately. -
Page 16: 1: Connecting Interfaces
Gateway Board Layout Overview 2.3.1 Connecting Interfaces uses numbered labels to show the location of the interfaces for connections. Figure 2.1 This manual uses these numbered labels at various places for your convenience. The table below uses these numbered labels to describe the type and usage of the interfaces. -
Page 17: 2: Led Indicators
Gateway Board Layout Overview 2.3.2 LED Indicators The LED indicators on the gateway board use different colors to identify the operational status of the gateway. To know the location of the LED indicators on the gateway board, refer to Figure 2.1, “Printed Circuit Board: Layout” Figure 2.2: The LED Indicators on the Gateway Table 2.2: LED Indicators and Their Messages Power-Indicating LED... - Page 18 Gateway Board Layout Overview Table 2.2: LED Indicators and Their Messages (Continued) Panel Connectivity LED Indicates the connection status of the panel FLASHING SLOW (flashes once per 1 second) The panel is connected with the gateway board. FLASHING FAST (flashes once per 0.2 second) The gateway is fetching the inventory data.
-
Page 19: 3: Switches On The Gateway Board
For alerting whenever the gateway board is removed from the enclosure It is located at the backside of the gateway. 2.4 CLSS Gateway Parts Part Number Description HON-CGW-MBB CLSS Gateway with enclosure CGW-MB CLSS Gateway board CGW-BB CLSS Gateway enclosure 50160636-001 CLSS Gateway kit. -
Page 20: Section 3: Security Recommendations
• Theft or damage to the contents of the system • Capture and modification or deletion of data causing possible liability to the installation Site and Honeywell User Access and Passwords Observe the following good practices: • The password has one numerical, one upper case, one lower case, and one special character whenever any user registers or changes the credentials. -
Page 21: 3: Software And Firmware Updates
System software and firmware updates may be offered from time to time. Ensure that your local representative: • Has the up-to-date contact details, and • Periodically visits the Honeywell web site for up-to-date product information 3.2.4 Viruses and Other Malicious Software Agents Malicious Software include the following: • Viruses •... -
Page 22: Best Practices: Network Security
For Preventing Potential Risks Security Recommendations Best Practices: Network Security Open protocols, unencrypted connections, and unauthenticated sites are risks. Ensure the following: • Required firewalls and VPN connections are in place • The logging systems monitor malicious activity and perform regular audits •... -
Page 23: Section 4: Installation
Section 4: Installation You can use a fixed gateway in the fire detection system. NOTE:This section refers to the fixed gateway P/N: HON-CGW-MBB. For instructions on mounting the portable gateway, P/N: CGW-MB, refer to the NBB-2 installation document LS10250-000NF-E. CAUTION: THE GATEWAY MUST BE INSTALLED INDOORS IN A DRY LOCATION. - Page 24 Wall Mounting the Fixed Gateway Installation 8. Mark and pre-drill the hole for the top mounting bolt (see Figure 4.2). Figure 4.2: Mounting the Backbox 9. Remove the backbox. 10.In the top mounting hole, insert the mounting screw. 11.Tighten the screw, leaving space for hanging the enclosure. 12.Mount the backbox over the top screw and level it.
-
Page 25: Mounting The Portable Gateway
Mounting the Portable Gateway Installation 4.2 Mounting the Portable Gateway Section reserved for future functionality. 4.2.1 Mounting onto the Chassis Section reserved for future functionality. CLSS Gateway - Installation and Users’ Manual | P/N:LS10248-000HW-E | REV. F | FEB/11/2022... -
Page 26: Gateway Board Connection Options
Gateway Board Connection Options Installation 4.3 Gateway Board Connection Options The gateway board can be connected with a cellular module, wireless aerials, the CLSS Site Manager, a configuration computer, a panel, a mobile device, and an external power supply. Figure 4.3 illustrates the connection options at the top side of the gateway board. -
Page 27: 1: Connecting To A Fire Alarm Panel
Gateway Board Connection Options Installation 4.3.1 Connecting to a Fire Alarm Panel To know about supported panel variants, their connection options, and commissioning procedure, refer to the “Connecting to the Panels” on page 105. 4.3.2 Installing a Cellular Module Cellular modules enable value-added alarm transmission services from a protected premises to the CLSS-connected site and to a central receiving station. -
Page 28: Replacing The Sim Card
Gateway Board Connection Options Installation 3. Open the enclosure door. 4. On the top edge of the gateway, plug the cellular module onto the 40-pin expansion slot (see Figure 4.6). WARNING: DO NOT USE THE SCREW ON THE TOP EDGE OF THE CELLULAR MODULE. IT WILL ADVERSELY AFFECT THE RADIO PERFORMANCE. -
Page 29: 3: Installing The External Aerials
Gateway Board Connection Options Installation 6. Find the SIM card holder and slide its door to unlock (see Figure 4.7). Figure 4.7: Unlock or Lock Movement 7. Remove the old SIM card and replace it with the new card. 8. Slide the card holder door back and lock it (see Figure 4.7). -
Page 30: Section 5: Configurations
App Store. 2. Install the App. 3. From the Honeywell on-boarding email, note down the login credentials. 4. On the mobile device, log into the CLSS App. 5. On the App’s dashboard, at the right bottom, tap the More icon (see Figure 5.1). - Page 31 Commissioning the Gateway Configurations Figure 5.1: CLSS App Dashboard 6. Tap Gateway Configuration. 7. Follow the on-screen instructions for mobile connectivity. NOTE: Based on the gateway you are configuring, select either Portable Gateway or Fixed Gateway. 8. Wait for the App to connect with the gateway, the fire alarm panel, Internet, and CLSS Site Manager.
- Page 32 Commissioning the Gateway Configurations Figure 5.2: Building Details Page NOTE: In the Connected Life Safety Services App, the option to enable the control functionality is available for 60 minutes, which can be extended. At the end of 60 minutes, the user will have the option to extend the session. If not extended, the session will expire after 60 minutes and the user must enable a new session of control functionality within the Connected Life Safety Services App.
-
Page 33: Verifying The Gateway Connections
If the LED is indicating differently, refer to Table 2.2 to know the operational status. If necessary, refer to the 6.2, "Troubleshooting" section to fix the problem or contact Honeywell Technical Support. LED Indicator State Meaning Power-Indicating LED Successful power connection ON - The cellular module is installed and receiving power. -
Page 34: Panel Brand And Connection Settings
Panel Brand and Connection Settings Configurations LED Indicator State Meaning Flashing slow The gateway has wireless connection with CLSS Site Manager There is no cellular connection. Flashing slow The LTE radio is transmitting data for the cellular connection. Flashing fast The LTE radio has connectivity issues. -
Page 35: Honeywell Clss Alarm Transmission Services
The CLSS Gateway receives events from a listed Fire Alarm Control Unit and transmits events using cellular, wireless, or Ethernet to Honeywell's Network Operations Center (NOC). All signals from the CLSS Gateway are delivered to Honeywell's NOC, which routes the events to the appropriate central monitoring station over telephone networks, IP networks, or both. -
Page 36: Install A Fixed Gateway At The Site
Honeywell CLSS Alarm Transmission Services Configurations Install a Fixed Gateway at the Site To enable central station communications, a CLSS Gateway must be installed. NOTE: You can skip this procedure if you are activating the central station communication for a CLSS Gateway that is already installed. -
Page 37: Verifying The Central Station Communication Configurations
Honeywell CLSS Alarm Transmission Services Configurations 7. Click on the specific CLSS Gateway of the building. 8. Click on the Connected Gateway activation card inside the selected gateway. 9. Click Configure Now. 10.Select the central station to configure from the central stations list. -
Page 38: Section 6: Post-Installation Activities
Section 6: Post-Installation Activities The system maintenance provider is responsible for the maintenance and upkeep of the CLSS Gateway. The maintenance involves avoiding potential issues, making regular backups, restoring data when required, collecting data for troubleshooting, and other activities. 6.1 Upgrading the Gateway Firmware CLSS Service Manager notifies the gateway administrators when a new firmware is launched. -
Page 39: 2: To Upgrade After Commissioning The Gateway
Upgrading the Gateway Firmware Post-Installation Activities 6. Enter the OC of the gateway in the Add Gateway dialog and click ADD. 7. Wait for the registration to complete. 8. Enter the OC of the gateway in the Search OC field to find the gateway to update. Scroll across to find the gateways to update. -
Page 40: 3: To Locally Upgrade With A Pc
If an LED is indicating differently, refer Table 2.2 to determine the operational status. If necessary, refer to the 6.2, "Troubleshooting" section to fix the problem or contact Honeywell Technical Support. CLSS Gateway - Installation and Users’ Manual | P/N:LS10248-000HW-E | REV. F | FEB/11/2022... -
Page 41: Troubleshooting
6.2 Troubleshooting Issues that may occur during the gateway’s operation can be resolved on your own using the tables below or by contacting Honeywell Technical Support. The issues can be either LED-indicated issues or other issues. 6.2.1 To Troubleshoot LED-Indicated Issues When an LED status indicates issues, refer to the below table to determine their possible fixes. -
Page 42: 2: To Troubleshoot Other Issues
Troubleshooting Post-Installation Activities Table 6.1. LED-Indicated Issues and Possible Fixes (Continued) DL4: CLSS Site Manager LED-Indicated Issues CLSS Site Manager LED Other LEDs’ Status Possible Fixes Status Flashing Green every • DL3 The panel LED is flashing • Associate the gateway board with 0.25 second once per second the user account. - Page 43 8. Wait for the confirmation message. 9. Log in using the default password: Welcome123 There is a need to Contact the Honeywell Tech Support An unusual situation requires reset the gateway for a guided procedure. reverting to factory default settings.
-
Page 44: Section 7: Modbus Communications
Section 7: Modbus Communications The CLSS Gateway can use a third-party client to monitor the nodes inside a Modbus LAN network, and send alarm and event data of these nodes for the CLSS users. NOTE: The Modbus interface provides supplementary data to the third party client. NOTE: The Modbus details in this section are related to the NOTIFIER-UL panel. -
Page 45: 2: Ip Restrictions
Bandwidth Calculation Modbus Communications 7.5.2 IP Restrictions The following restrictions apply: • The CLSS Gateway must have a static IP address. Dynamic Host Configuration Protocol (DHCP) is not supported. • Web access via an HTTP proxy server is not supported. 7.6 Bandwidth Calculation Use the following information to calculate the network bandwidth CLSS Gateway usage requires and how it will impact the network. -
Page 46: System Architecture
System Architecture Modbus Communications 7.7 System Architecture An Internet or Intranet IP network connection is needed for the architectures described here. Figure 7.1: Single Panel Architecture CLSS Gateway - Installation and Users’ Manual | P/N:LS10248-000HW-E | REV. F | FEB/11/2022... - Page 47 System Architecture Modbus Communications Figure 7.2: NFN Network Architecture CLSS Gateway - Installation and Users’ Manual | P/N:LS10248-000HW-E | REV. F | FEB/11/2022...
-
Page 48: 1: Redundancy
System Architecture Modbus Communications 7.7.1 Redundancy A redundant gateway is a second gateway, which communicates with a Modbus client. CAUTION: THE FIRST AND SECOND GATEWAYS MUST HAVE DIFFERENT NODE NUMBERS AND DIFFERENT IP ADDRESSES. Figure 7.3: Redundant CLSS Gateways CLSS Gateway - Installation and Users’ Manual | P/N:LS10248-000HW-E | REV. F | FEB/11/2022... -
Page 49: Replacing The Modbus Gateway (Modbus-Gw)
Replacing the Modbus Gateway (Modbus-GW) Modbus Communications 7.8 Replacing the Modbus Gateway (Modbus-GW) Following changes occur when the CLSS Gateway replaces the Modbus Gateway in the network. NOTE: To know the Modbus Gateway values of the following, refer to the document: LS10015-000NF-E Rev. -
Page 50: Agency Listings And Approvals
Agency Listings and Approvals Modbus Communications 7.10 Agency Listings and Approvals • UL/ULC Listed: S35608 • CSFM: 7300-1637:0504 • FDNY: COA#000121, COA#000122 7.10.1 Agency Restrictions and Limitations • CLSS Gateway is UL 864 and ULC-S527 listed for supplementary use only. 7.11 Standards Compliance ... -
Page 51: Compatible Equipment
Compatible Equipment Modbus Communications 7.12 Compatible Equipment The CLSS Gateway is compatible with the following equipment: Table 7.3: CLSS-Compatible Equipment List Type Equipment Fire Panels • NFS-320 • NFS-640 • NFS2-640 • NFS-3030 • NFS2-3030 • AFP2800 • AFP 3030 •... -
Page 52: Modbus Feature Activation
Modbus Feature Activation Modbus Communications 7.13 Modbus Feature Activation Purchase the required number of Modbus support on CLSS Site Manager and then activate that feature in CLSS App. NOTE: Purchase should be within the number of tokens available. 7.13.1 To Purchase the Modbus Support 1. -
Page 53: 2: To Activate The Modbus Support
Modbus Feature Activation Modbus Communications 7. Scroll down to find Modbus Support in the Features tab. 8. Enter the number of support required in the Modbus Support field. 9. Click PURCHASE. 10.Read the Confirmation message and if acceptable, click CONFIRM. Click CANCEL and repeat the steps from 8 to 10. -
Page 54: Installation And Configurations
Installation and Configurations Modbus Communications 7.14 Installation and Configurations The CLSS Gateway can communicate with the Modbus client in an Ethernet LAN. 7.15 The IP Settings The following information applies to IP settings: • You can use only the eth1 port for connections to Modbus clients. For more details, refer to 7.17 "To Configure the Modbus Settings"... -
Page 55: To Configure The Modbus Settings
To Configure the Modbus Settings Modbus Communications 7.17 To Configure the Modbus Settings 1. On the CLSS Gateway board, find the S6 button. 2. Press the S6 button for a minimum of 6 seconds and then release it. It will switch the gateway to configuration mode. - Page 56 To Configure the Modbus Settings Modbus Communications 12.In the MODBUS GATEWAY SETTING page, provide the required details for the Modbus client. Table 7.4: Settings for Modbus Client Communications Field Description This is an optional security feature. • Enter the authorized client IP address. The gateway only responds to requests from the client at that IP –...
- Page 57 To Configure the Modbus Settings Modbus Communications Table 7.4: Settings for Modbus Client Communications (Continued) Field Description Displays the unit ID that each node uses on the Modbus network. If for any reason the node unit ID needs to be changed, click the value and enter the new Modbus network unit ID number (1-240).
-
Page 58: To Configure The Modbus Client
To Configure the Modbus Client Modbus Communications 7.18 To Configure the Modbus Client 1. Open the Modbus master application you are using. 2. Specify the IP address of Eth1 port of the CLSS Gateway. 3. Specify the port that the Modbus client is using in the Service Port field. 7.19 Modbus Command Support The CLSS Gateway supports the following Modbus commands: •... -
Page 59: 2: Enabling Control
CLSS Gateway Control Features Modbus Communications 7.20.2 Enabling Control CAUTION: UL LISTING ENABLING CONTROL VOIDS THE UL LISTING OF THE CLSS GATEWAY. CLSS gateway control is enabled through a web page-based configuration tool running on the gateway. Enable control as follows: 1. -
Page 60: Analog Values And Trending
Analog Values and Trending Modbus Communications Table 7.7: Zone Commands Command Value Holding Register * Activate and Deactivate work only for output-controlled modules like control and relay. Different panels support different zone types. Refer to Table 7.8, “Zone Command Availability by Panel” for information about zone types supported. -
Page 61: Analog Value Use Cases
Analog Values and Trending Modbus Communications • Upon receiving the initialization confirmation, the client can begin polling the analog points. The client should wait 5 seconds after the initialization request to insure that the CLSS Gateway has had enough time to get the analog values and load the registers. -
Page 62: Register Mapping
Register Mapping Modbus Communications Result: The CLSS Gateway sends back zeros in response to the first request for analog values from the points L1M1 through L1M10. The CLSS Gateway sends back actual values in response to the second request from the client 10 seconds later. The CLSS Gateway continues to poll these devices as long as the client continues to send analog value requests for the points L1M1 through L1M10. - Page 63 Register Mapping Modbus Communications The only possible active event type for zones is Non-Fire Activation (71H). See “CLSS Gateway Active Event Code” on page74. Table 7.9: Point Status Holding Register Bit Definitions Upper Byte Lower Byte 5 4 3 2 1 0 Prealar Troubl Enabl...
-
Page 64: 3: Point Device Type Input Registers
Register Mapping Modbus Communications Table 7.10: Point Status Holding Register Device/Module Addresses (Continued) 405401 405700 L10D1–L10D300 405701 406000 L10M1–L10M300 NOTE: On the AFP-2800, output activation status is not reported to the CLSS Gateway and therefore the bits and event type will always indicate a non-active state. 7.22.3 Point Device Type Input Registers NOTE: If the point is not present in the panel programming, all bits in the byte will contain a value of 1 or FFFFH. -
Page 65: 4: Zones/Panel Circuits Status Holding Registers
Register Mapping Modbus Communications 7.22.4 Zones/Panel Circuits Status Holding Registers Each of the zones/panel circuits status holding registers are divided into an upper and lower byte as described below. • Upper Byte: The upper byte contains general status information about the zone or panel circuit. -
Page 66: 5: Bell Circuits Status Holding Registers
Register Mapping Modbus Communications Table 7.15: Panel Circuits (Continued) 414041–414048 P6.1–P6.8 414049–414056 P7.1–P7.8 414057–414064 P8.1–P8.8 414065–414072 P9.1–P9.8 414073–414080 P10.1–P10.8 414081–414088 P11.1–P11.8 414089–414096 P12.1– P12.8 The maximum panel circuit points by fire panel is described in Table 7.16, “Supported Circuits by Panel”. -
Page 67: 6: Bell Circuits Device Type Input Registers
Register Mapping Modbus Communications Table 7.17: Zones/Panel Circuits Holding Register Bit Definitions Upper Byte Lower Byte Prealarm Trouble InActive Active Enable Disable Fire Block Name Alarm When individual upper byte bits are set to 1, the following definitions apply: Ack Block (Bit 15): All events on this bell circuit, other than fire alarm, are Active Event Type (When acknowledged. -
Page 68: 7: Panel Status Holding Register
Analog Values Input Registers Modbus Communications 7.22.7 Panel Status Holding Register The panel status holding register is divided into an upper and lower byte as described below and in Table 7.21, “Panel Status Holding Register Bit Definitions” representing one register address as shown in Table 7.22, “Panel Status Holding Register Addresses”. -
Page 69: 2: Gateway Information Input Registers
Read Device Identification (0x2B/0x0E) Modbus Communications 7.23.2 Gateway Information Input Registers NOTE: Information/debug values are used by the CLSS Gateway Unit ID only. All other nodes reject reads in this address range. The CLSS Gateway records some status and configuration information for debugging and technical support purposes. -
Page 70: Troubleshooting
Troubleshooting Modbus Communications 7.25 Troubleshooting 7.25.1 What are some basic guidelines when installing a CLSS Gateway? • Polling should be done slowly to start. • Use Modscan ® to debug the system rather than a more complicated client. Verify that registers are being updated as events happen on the NFN network/panel. -
Page 71: 8: Why Do I Get All Zeros When I Read An Analog Value
What is the “Analog Value Polling Time Out”? Modbus Communications • The point from which an analog value is being requested is not a 4–20 mA analog input module. • At least one of the points in the group of points from which an analog value is being requested is not a 4–20 mA analog input module. -
Page 72: 2: Software Configuration
Conversion to Modbus RTU Modbus Communications 7.27.2 Software Configuration Configure the CLSS Gateway as a node in the NFN network with a node number. CAUTION: ENSURE THAT THE NFN NETWORK CONFIGURATIONS ARE UNCHANGED. Refer to the NOTI•FIRE•NET™ Network Systems Interface Manual (P/N 51584) or the High Speed NOTI•FIRE•NET™... -
Page 73: 3: Connecting The Moxa Mgate Mb3180 Interface
Conversion to Modbus RTU Modbus Communications 7.27.3 Connecting the Moxa MGate MB3180 Interface NOTE: The configuration used must have the approval of the AHJ (Authority Having Jurisdiction). 1. Connect the RTU master to the Serial port (RS-232, RS-485, or RS-422) of MB3180. 2. -
Page 74: System Trouble
System Trouble Modbus Communications 7.28 System Trouble For information about system trouble information stored in holding registers, refer to 7.23.1 "Panel and System Troubles Holding Registers". 7.29 Exception Responses If a Modbus master device sends an invalid command or attempts to read an invalid holding register, an exception response is generated. -
Page 75: Clss Gateway Active Event Code
CLSS Gateway Active Event Code Modbus Communications 7.30 CLSS Gateway Active Event Code All events are mapped into Modbus event categories which are stored in the Modbus register. Table 7.30: Event Type Categories Modbus Event Register Value No Active Status (see note) Mass Notification Alarm, High Priority Fire Alarm Security Alarm (Life) -
Page 76: Device Types
Device Types Modbus Communications 7.31 Device Types Device types are organized into the following categories: • Detectors (1–50) - Table 7.31: "Device Type Values – Detectors" • Modules (51–150) - Table 7.32: "Device Type Values – Modules" Table 7.31: Device Type Values – Detectors Device Type Value Device Type... - Page 77 Device Types Modbus Communications Monitor Tracking 0014H Fire Control 0050H Wireless Monitor Tracking 0015H Hazard 0051H Normally Closed Monitor 0016H Wireless Hazard 0052H Wireless Normally Closed 0017H Medical 0053H Monitor Normally Closed Monitor 0018H Wireless Medical 0054H Tracking Wireless Normally Closed 0019H Relay 1002H...
-
Page 78: System Troubles Register Map
System Troubles Register Map Modbus Communications Feedback Tracking 00A1H Auxiliary 1060H Hydrant 00A2H Door Holder 1061H Control 1000H AAM Sounder 1062H Wireless Control 1001H TYPE 5 Control 1063H 7.32 System Troubles Register Map Table 7.33: System Troubles Register Map Register System Trouble Name System Trouble Name GROUND FAULT... - Page 79 System Troubles Register Map Modbus Communications Table 7.33: System Troubles Register Map (Continued) ANNUN.17 NO ANSWER ANNUN.21 NO ANSWER ANNUN.18 TROUBLE ANNUN.22 TROUBLE ANNUN.18 NO ANSWER ANNUN.22 NO ANSWER ANNUN.19 TROUBLE ANNUN.23 TROUBLE 460004 ANNUN.19 NO ANSWER ANNUN.23 NO ANSWER ANNUN.20 TROUBLE ANNUN.24 TROUBLE ANNUN.20 NO ANSWER...
- Page 80 System Troubles Register Map Modbus Communications Table 7.33: System Troubles Register Map (Continued) ANNUN.33 TROUBLE ANNUN.37 TROUBLE ANNUN.33 NO ANSWER ANNUN.37 NO ANSWER ANNUN.34 TROUBLE ANNUN.38 TROUBLE ANNUN.34 NO ANSWER ANNUN.38 NO ANSWER 460008 ANNUN.35 TROUBLE ANNUN.39 TROUBLE ANNUN.35 NO ANSWER ANNUN.39 NO ANSWER ANNUN.36 TROUBLE ANNUN.40 TROUBLE...
- Page 81 System Troubles Register Map Modbus Communications Table 7.33: System Troubles Register Map (Continued) GROUND FAULT LOOP 3 STYLE 6 NEG. LOOP 3 GROUND FAULT LOOP 4 STYLE 6 NEG. LOOP 4 GROUND FAULT LOOP 5 STYLE 6 NEG. LOOP 5 GROUND FAULT LOOP 6 STYLE 6 NEG.
- Page 82 System Troubles Register Map Modbus Communications Table 7.33: System Troubles Register Map (Continued) ANNUN. 65 TROUBLE ANNUN. 69 TROUBLE ANNUN. 65 NO ANSWER ANNUN. 69 NO ANSWER ANNUN. 66 TROUBLE ANNUN. 70 TROUBLE ANNUN. 66 NO ANSWER ANNUN. 70 NO ANSWER 460017 ANNUN.
- Page 83 System Troubles Register Map Modbus Communications Table 7.33: System Troubles Register Map (Continued) ANNUN. 105 TROUBLE ANNUN. 109 TROUBLE ANNUN. 105 NO ANSWER ANNUN. 109 NO ANSWER ANNUN. 106 TROUBLE ANNUN. 110 TROUBLE ANNUN. 106 NO ANSWER ANNUN. 110 NO ANSWER 460022 ANNUN.
- Page 84 System Troubles Register Map Modbus Communications Table 7.33: System Troubles Register Map (Continued) REMOTE DISPLAY 17 TROUBLE REMOTE DISPLAY 21 TROUBLE REMOTE DISPLAY 17 NO ANSWER REMOTE DISPLAY 21 NO ANSWER REMOTE DISPLAY 18 TROUBLE REMOTE DISPLAY 22 TROUBLE REMOTE DISPLAY 18 NO ANSWER REMOTE DISPLAY 22 NO ANSWER 460027 REMOTE DISPLAY 19 TROUBLE...
- Page 85 System Troubles Register Map Modbus Communications Table 7.33: System Troubles Register Map (Continued) Reserved Reserved Reserved Reserved Reserved Reserved Reserved Reserved 460031 Reserved Reserved Reserved Reserved Reserved Reserved Reserved Reserved Reserved NO POWER SUPPLY INST Reserved LOOP 1-2 COMM FAILURE LINK PROTECTOR PRIMARY STATUS LOOP 3-4 COMM FAILURE LINK PROTECTOR SECONDARY...
- Page 86 System Troubles Register Map Modbus Communications Table 7.33: System Troubles Register Map (Continued) TRANSMIT/RECIEVE ERROR ABOVE TOO MANY DEVICES ON LOOP 1 LIMIT ON LOOP 3 TRANSMIT/RECIEVE ERROR ABOVE TOO MANY DEVICES ON LOOP 2 LIMIT ON LOOP 4 TRANSMIT/RECIEVE ERROR ABOVE TOO MANY DEVICES ON LOOP 3 LIMIT ON LOOP 5 TRANSMIT/RECIEVE ERROR ABOVE...
- Page 87 System Troubles Register Map Modbus Communications Table 7.33: System Troubles Register Map (Continued) DAL ADDRESS CONFLICT MAPPING IN PROGRESS LOOP 7 DEVICE SERVICING REQUIRED MAPPING IN PROGRESS LOOP 8 MAPPING IN PROGRESS LOOP 1 MAPPING IN PROGRESS LOOP 9 MAPPING IN PROGRESS LOOP 2 MAPPING IN PROGRESS LOOP 10 460038 MAPPING IN PROGRESS LOOP 3...
- Page 88 System Troubles Register Map Modbus Communications Table 7.33: System Troubles Register Map (Continued) PRIMARY AMP 2 FAIL BACKUP AMP 1 NOT INSTALLED PRIMARY AMP 3 FAIL BACKUP AMP 2 NOT INSTALLED PRIMARY AMP 4 FAIL BACKUP AMP 3 NOT INSTALLED BACKUP AMP 1 FAIL BACKUP AMP 4 NOT INSTALLED 460043...
- Page 89 System Troubles Register Map Modbus Communications Table 7.33: System Troubles Register Map (Continued) AIO Address 5 Comm Loss (LSB is 0 for Battery High (LSB is PMB address 1-5) router, 1-15 for peripheral) Battery Deep-Discharge (LSB is PMB AIO Address 6 Comm Loss (LSB is 0 for address 1-5) router, 1-15 for peripheral) AIO Address 7 Comm Loss (LSB is 0 for...
-
Page 90: Section 8: The Bacnet Feature
Section 8: The BACnet Feature The BACnet feature of the CLSS Gateway provides communications between a network using the BACnet communication protocol and the gateway's FACP(s) in an NFN network or high-speed NFN network. The CLSS Gateway acts like any other node on an NFN network or a high-speed NFN network. -
Page 91: Agency Listings
Agency Listings The BACnet Feature 8.1 Agency Listings NOTE: UL 864, 9 Edition—This system works with products that have been UL 864, 9 Edition listed as well as products that have not received UL 864, 9 Edition certification. Operation of systems that are comprised of equipment that is UL 864, 9 Edition listed together with products that are not UL 864, 9 Edition listed requires the approval of the... -
Page 92: Compatibility
Compatibility The BACnet Feature 8.3 Compatibility Refer to for supported panels and “CLSS Gateway Compatible Node Types” on page 101 annunciators. 8.4 System Requirements The CLSS Gateway can monitor up to fifteen panels, but the combined object count across the monitored panels cannot exceed 15,000 objects. This includes all detectors, monitor modules, control modules, bell circuits, and so on. -
Page 93: 2: Nfn Network Architecture
System Architecture The BACnet Feature 8.5.2 NFN Network Architecture NFN network connection — a NUP connection is made to an NCM or HS-NCM board on the NFN network as the CLSS Gateway Figure 8.2, “Notifier System Example 1- A Single NFN Network”. - Page 94 System Architecture The BACnet Feature IP Network Workstation/ PC Gateway BACnet/IP Client with Workstation Front End CLSS Gateway Workstation/Echelon Gateway HS-NCM W/SF/MF NCM W/F NION Style 4 or 6 Echelon Network Wire NION or Fiber NFN Network NFN Network NION FACP FACP FACP...
-
Page 95: Bacnet Feature Activation
BACnet Feature Activation The BACnet Feature 8.6 BACnet Feature Activation Purchase the required number of BACnet support on CLSS Site Manager and then activate that feature in CLSS App. NOTE: Purchase should be within the number of tokens available. 8.6.1 To Purchase the BACnet Support 1. -
Page 96: 2: To Activate The Bacnet Support
BACnet Feature Activation The BACnet Feature 7. Scroll down to find BACnet Support in the Features tab. 8. Enter the number of support required in the BACnet Support field. 9. Click PURCHASE. 10.Read the Confirmation message and if acceptable, click CONFIRM. Click CANCEL and repeat the steps from 8 to 10. -
Page 97: 3: Standard Object Types Supported-Life Safety Point/Life Safety Zone
BACnet Feature Activation The BACnet Feature 8.6.3 Standard Object Types Supported—Life Safety Point/Life Safety Zone BACnet BACnet Enumeration LifeSafetyState NFN State IssQuiet Normal IssPreAlarm PreAlarm Fire Alarm, Security Alarm (Life/Property), IssAlarm Critical Process Alarm, (Life/Property), Medical Present Emergency Value Security Trouble, Fire Trouble, Non-Fire Trouble, IssFault Fire Device or Zone, Disabled, Non-Fire Device Disabled... -
Page 98: 4: Standard Object Types Supported-Multi-State Input Standard Object Types
BACnet Feature Activation The BACnet Feature BACnet BACnet Enumeration LifeSafetyState NFN State ssUnsilenced Audibles Unsilenced Silence State ssAudiblesSile Audibles Silenced nced BACnet Enumeration NFN State Operation Expected BACnet BACnet Enumeration LifeSafetyState NFN State Maintenance Expected BACnet Event Transition Bit toOffNormal Event Enable toFault % Alarm... - Page 99 BACnet Feature Activation The BACnet Feature BACnet BACnet Event NFN State Enumeration State EsNormal Normal Event State Security Trouble, Fire Trouble, Non-Fire EsFault Trouble, Fire Device Disabled, Non-Fire EsOffNormal All statuses other than normal and fault. BACnet BACnet Enumeration LifeSafetyState NFN State Reliability reNoFaultDetec All statuses other than trouble.
-
Page 100: 5: Supported-Binary Output
BACnet Feature Activation The BACnet Feature 8.6.5 Supported—Binary Output BACnet BACnet NFN State Enumeration LifeSafetyState IssQuiet Normal IssPreAlarm PreAlarm Fire Alarm, Security Alarm (Life/Property), IssAlarm Critical Process Alarm, (Life/Property), Present Value Medical Emergency Security Trouble, Fire Trouble, Non-Fire IssFault Trouble, Fire Device or Zone, Disabled, Non-Fire Device Disabled IssActive Non-Fire Activation... - Page 101 BACnet Feature Activation The BACnet Feature BACnet BACnet NFN State Enumeration LifeSafetyState IsmOff Power-Up State Set if point has been disabled and Mode IsmEnabled subsequently enabled since startup. Fire Device or Zone Disabled, Non-Fire IsmDisabled Device Disabled BACnet BACnet NFN State Enumeration LifeSafetyState Silence State...
-
Page 102: 6: Standard Object Types Supported-Notification Class
CLSS Gateway Compatible Node Types The BACnet Feature 8.6.6 Standard Object Types Supported—Notification Class Write Property/Add List element required for Intrinsic Reporting. Data Link Layer Options: BACnet IP, (Annex J) BACnet IP, (Annex J), Foreign Device ISO 8802-3, Ethernet (Clause 7) ... -
Page 103: 1: Direct Connect Node Type Compatibility
CLSS Gateway Compatible Node Types The BACnet Feature 8.7.1 Direct Connect Node Type Compatibility Refer to “Connecting to the Panels” on page 105 Table 8.1: Table B.1 Panel Communication Connection Table Supported Panel Types AFP-2800 AFP-3030 N16 (INSPIRE) NFS-3030 NFS-3030 NFS-320 NFS-320 NFS-640... -
Page 104: Appendix A: Gateway Operating Conditions
Power Requirements Working voltage range 18V - 30V DC Current For HON-CGW-DACT: 180mA (maximum) For HON-CGW-MBB: 140mA (maximum) NOTE: The power requirement varies with the number of interfaces used. Location Requirements Room Temperature 15 - 27° C (60 - 80° F) Operational Temperature 0°C - 49°C (32°F - 120°F) -
Page 105: Appendix B: Modulations And Power Used
Appendix B: Modulations and Power Used Radio devices operating on the below frequencies should not be installed next to each other. Target Power that Meets Spectrum Mask and EVM Compliance Table B.1: Wireless Power Specifications 2.4 GH z TX Power Specifications IEEE Spec Rate... -
Page 106: Appendix C: Connecting To The Panels
Appendix C: Connecting to the Panels C.1 Gateway Board Connections The gateway board can connect with a cellular module, wireless aerials, the CLSS Site Manager, a configuration computer, a panel, a mobile device, and an external power supply. illustrates the connection options at the top side of the gateway board. Figure C.1 Figure C.1: Gateway Connections - Top Side illustrates the gateway connection options at the bottom side of the gateway... -
Page 107: C.1.1: Connecting To A Fire Alarm Panel
Gateway Board Connections Connecting to the Panels C.1.1 Connecting to a Fire Alarm Panel The panel sends data from all its devices to the connected CLSS Gateway. The data transmission is based on the connection type and the panel compatibility. WARNING: WHILE THE GATEWAY IS WORKING DO NOT REMOVE CONNECTIONS TO THE GATEWAY, CLSS SITE MANAGER, AND THE PANEL. -
Page 108: C.2: Supported Panels
Supported Panels Connecting to the Panels C.2 Supported Panels The CLSS Gateway supports the following panel variants: • AM Series Panels • ESSER Panels • Farenhyt Panels • FireWarden Panels • Gamewell-FCI Panels • Gent Panels • Morley-IAS Panels • NOTIFIER®... - Page 109 AM Series Panels Connecting to the Panels Figure C.3: Wiring Diagram: RS-232 Connection with AM8200 Panel Power Connection Using a power cable, the gateway can connect to the 24V DC power supply module of the AM8200 panel. NOTE: - Use the details given on the power supply module of the panel. - The panel’s power supply to the gateway must be within +24V DC power.
-
Page 110: C.4: Esser Panels
ESSER Panels Connecting to the Panels C.4 ESSER Panels The gateway should have an RS-485 connection with the panel for sending events. If Inventory Synchronization is required, use the RS-232 connection. C.4.1 Connection Options The gateway operates only with the ESSER fire alarm control panels as listed in the table below: Table C.2: ESSER Panel Connection Options Fire Alarm Panel Models... -
Page 111: C.4.3: To Use An Rs-232 Connection
ESSER Panels Connecting to the Panels C.4.3 To Use an RS-232 Connection Using an RS-232 cable, you can connect to the TTY port of the panel's serial interface. 1. On the Gateway Side Connect the RS-232 cable with pre-formed connector to the RS-232 port of the gateway board. - Page 112 ESSER Panels Connecting to the Panels 4. Power Connection Using a power cable, the gateway can connect to the 24V DC power supply module of the FlexES panel. NOTE: Use the details given on the power supply module of the panel. NOTE: The panel’s power supply to the gateway must be within +24V DC power.
-
Page 113: C.4.4: Tools 8000 Settings
ESSER Panels Connecting to the Panels C.4.4 Tools 8000 Settings 1. Select the Serial Interfaces tab in Tools 8000. 2. Go to the Serial Interface 1 section. 3. Select WINMANG from the Device in use list. 4. Go to the Serial Interface 3 section. 5. -
Page 114: To Use An Rs-485 Connection
ESSER Panels Connecting to the Panels • IQ8 Panels To Use an RS-485 Connection Using an RS-485 cable, you can connect to the additional RS-485 module (784871) on the panel's serial interface port. The RS-485 ports in the gateway board are labeled as 3 and 4 in the Figure C.2. - Page 115 ESSER Panels Connecting to the Panels • Connecting to Panel’s TTY Port Using an RS-232 cable, you can connect to the RS-232 port on the panel's serial interface. IQ8 Panel Upto 1000 m Upto 15 m TxD + B Rx + Serial TxD - A Rx -...
-
Page 116: C.4.5: Tools 8000 Settings
ESSER Panels Connecting to the Panels C.4.5 Tools 8000 Settings 1. Double click on Serial Interface in Tools 8000. 2. Select RS-232 from the Type of interface list. 3. Select Remote Access from the Device in use list. 4. Click OK. CLSS Gateway - Installation and Users’... - Page 117 ESSER Panels Connecting to the Panels 5. Power Connection Using a power cable, the gateway can connect to the 12V power supply module of the IQ8 panel. NOTE: Use the details given on the power supply module of the panel. NOTE: Although the gateway is capable of receiving 24V DC power, it can work with the 12V DC power of the IQ8 panel.
-
Page 118: C.5: Farenhyt Panels
Farenhyt Panels Connecting to the Panels C.5 Farenhyt Panels C.5.1 Connection Options The gateway operates only with the Farenhyt fire alarm control panels as listed in the table below: Table C.3: Farenhyt Panel Connection Options Fire Alarm Panel Models RS-485 UART/TTL RS-232 Panel firmware version: 6.05.01... - Page 119 Farenhyt Panels Connecting to the Panels On the Panel Side In the power board of the panel: • Connect the Red wire to the +ve pin. • Connect the Black wire to the -ve pin. Future For panel connection, use only the RS-485 port Figure C.10: Farenhyt Panel: RS-485 Connections CLSS Gateway - Installation and Users’...
-
Page 120: C.5.3: Programming For Annunciator (Ann-Pri)
Farenhyt Panels Connecting to the Panels C.5.3 Programming for Annunciator (ANN-PRI) Programming enables the panel to recognize the CLSS gateway and the annunciator. CAUTION: BEFORE PROGRAMMING, ENSURE THAT THE ANN-PRI COMMUNICATION CABLE IS CONNECTED WITH THE PANEL. C.5.4 To Program for Annunciator Using the keypad on the panel, you select options on the screens. -
Page 121: C.6: Firewarden Panels
FireWarden Panels Connecting to the Panels C.6 FireWarden Panels C.6.1 Connection Options The gateway operates only with the FireWarden fire alarm control panels as listed in the table below: Table C.4: FireWarden Panel Connection Options Fire Alarm Panel Models RS-485 UART/TTL RS-232 FireWarden-50X... - Page 122 FireWarden Panels Connecting to the Panels Figure C.11: FireWarden Panel: RS-485 Connections CLSS Gateway - Installation and Users’ Manual | P/N:LS10248-000HW-E | REV. F | FEB/11/2022...
-
Page 123: C.6.3: Programming For Annunciator (Ann-Pri)
FireWarden Panels Connecting to the Panels C.6.3 Programming for Annunciator (ANN-PRI) Programming enables the panel to recognize the CLSS gateway and the annunciator. CAUTION: BEFORE PROGRAMMING, ENSURE THAT THE ANN-PRI COMMUNICATION CABLE IS CONNECTED WITH THE PANEL. C.6.4 To Program for Annunciator Using the keypad on the panel, you select options on the screens. -
Page 124: C.6.5: To Use Panel's Printer Port Connection
FireWarden Panels Connecting to the Panels C.6.5 To Use Panel’s Printer Port Connection Some FireWarden panels support data transfer through their printer terminal. NOTE: Compatible CLSS Gateway firmware versions: 2.1.11.16 and above 1. On the Gateway Side • Connect the serial cable into the RS-232 port of the gateway. The RS-232 port is labeled as 6 in the Figure C.13. - Page 125 FireWarden Panels Connecting to the Panels Figure C.13: FireWarden Panels: Printer Port Connections CLSS Gateway - Installation and Users’ Manual | P/N:LS10248-000HW-E | REV. F | FEB/11/2022...
-
Page 126: C.7: Gamewell-Fci Panels
Gamewell-FCI Panels Connecting to the Panels C.7 Gamewell-FCI Panels C.7.1 Connection Options Each variant of the Gamewell-FCI panel offers various connection options. The gateway operates only with the Gamewell-FCI fire alarm control panels listed in the table below: Table C.5: Gamewell-FCI Panel Connection Options Fire Alarm Panel Models RS-485 UART/TTL... - Page 127 Gamewell-FCI Panels Connecting to the Panels • Connect the RxD wire to the TB6-4 pin. Power Connection On the Gateway Side Ensure that the power cable is connected with the power port of the gateway. The power port is labeled as 7 in the Figure C.13.
- Page 128 Gamewell-FCI Panels Connecting to the Panels TB6 and RS-232 Connections The pin connections are as below: • S3 Series Panel At the TB3 terminal of the panel, • Connect the +ve wire to the TB3-1 pin. • Connect the -ve wire to the TB3-2 pin. At the TB5 terminal of the panel, •...
- Page 129 Gamewell-FCI Panels Connecting to the Panels Figure C.15: S3 Series: Gateway Connections TB5 and RS-232 Connections The pin connections are as below: CLSS Gateway - Installation and Users’ Manual | P/N:LS10248-000HW-E | REV. F | FEB/11/2022...
-
Page 130: C.8: Gent Panels
Gent Panels Connecting to the Panels C.8 Gent Panels C.8.1 Connection Options The gateway operates only with the Gent fire alarm control panels as listed in the table below: Table C.6: Gent Panel Connection Options Fire Alarm Panel Models RS-485 UART/TTL RS-232 COMPACT-24-N... - Page 131 Gent Panels Connecting to the Panels Figure C.16: COMPACT Panels: RS-232 Connections on the PB6 Terminal 3. Power Connection On the Gateway Side 1. Ensure that the RS-232 cable is connected with the RS-232 port of the gateway. 2. Ensure that the S7 switch next to the RS-232 port is switched towards NUP_IN. Figure C.17: The S7 Switch On the Panel Side At the PB15 terminal of the panel,...
-
Page 132: To Use A Usb Connection
Gent Panels Connecting to the Panels To Use a USB Connection 1. On the Gateway Side Connect the USB-C side of the cable to the USB port of the gateway. The USB port is labeled as 8 in the figure Figure C.2. -
Page 133: C.8.3: Vigilon Series Panels
Gent Panels Connecting to the Panels C.8.3 Vigilon Series Panels For a fixed gateway, we recommend using a UART/TTL connection. If it is not available, use a RS-232 connection. To Use a UART/TTL Connection 1. On the Gateway Side Connect the male UART/TTL cable to the Rx (Red), Gnd (Silver), and Tx (White) UART/TTL terminals of the gateway. - Page 134 Gent Panels Connecting to the Panels 1. On the Gateway Side 1. Connect the RS-232 cable to the RS-232 port of the gateway. The RS-232 port is labeled as 6 in the Figure C.2. 2. On the Panel Side 1. Inside the panel enclosure, find the backplane PCB board. 2.
-
Page 135: To Use A Usb Connection
Gent Panels Connecting to the Panels 3. Power Connection NOTE: The external power supply must be dedicated and not shared with any other devices. NOTE: The panel’s power supply to the gateway must be within +24V DC power. On the Gateway Side 1. -
Page 136: C.9: Morley-Ias Panels
Morley-IAS Panels Connecting to the Panels C.9 Morley-IAS Panels C.9.1 Connection Options The gateway operates only with the Morley-IAS fire alarm control panels listed in the table below: Table C.7: Morley-IAS European Panel Connection Options Fire Alarm Panel Models RS-485 UART/TTL RS-232 Use the serial communication card (P/N: 795-122) on the panel. - Page 137 Morley-IAS Panels Connecting to the Panels For the External Power Supply: On the Gateway Side 1. Connect to the 24V DC external power supply or to the panel’s 24V DC power port. 2. Ensure that the S7 switch next to the RS-232 port is switched towards NUP_OUT. Figure C.22: The S7 Switch On the Panel Side In the SK4 or SK5 terminal,...
-
Page 138: C.10: Notifier® Ul
The NUP port is labeled as 6 in the Figure C.23. 2. On the Panel Side In the NUP socket of the panel: • Stand-alone Panel: Connect the NUP cable. er Onyx Panel Panel HON-CGW-MBB Fire Panel NUP Connec on Black White Green Brown Required Equipment: •... - Page 139 NOTE: For the standard-speed network, each device should have its NCM card on the panel with an available port. Network Media (Wire/Fiber) No er Onyx Panel Panel HON-CGW-MBB Black Standard NCM NUP White Green Connec on J1 Brown...
- Page 140 NOTIFIER® UL Connecting to the Panels Network Media to next Panel/node (Wire/Fiber) HS-NCM er Onyx Panel Panel HON-CGW-MBB Network Media (Wire/Fiber) Required Equipment: HS-NCM HS-NCM • NUP-to-NUP cable er Onyx Panel Panel HON-CGW-MBB • High-Speed NCM card (if no available NUP port)
- Page 141 NOTIFIER® UL Connecting to the Panels • High-speed or standard-speed network of panels: • Connect to the +24V external power source or to the internal power supply of the panel. • To power the HS-NCM or NCM over NUP from the gateway: Find the S7 switch next to the NUP port, and switch it towards NUP_OUT.
-
Page 142: C.11: Notifier® European Panels (En)
NOTIFIER® European Panels (EN) Connecting to the Panels C.11 NOTIFIER® European Panels (EN) C.11.1 Connection Options The gateway operates only with the NOTIFIER fire alarm control panels listed in the table below: Table C.9: NOTIFIER European Panel Connection Options Fire Alarm Panel Models RS-485 UART/TTL (RS-232) - Page 143 NOTIFIER® European Panels (EN) Connecting to the Panels On the Gateway Side 1. Connect to the 24V DC external power supply or to the panel’s 24V DC power port. 2. Ensure that the S7 switch next to the RS-232 port is switched towards NUP_OUT. Figure C.27: The S7 Switch On the Panel Side •...
-
Page 144: C.12: Silent Knight Panels
Silent Knight Panels Connecting to the Panels C.12 Silent Knight Panels C.12.1 Connection Options The gateway operates only with the Silent Knight fire alarm control panels as listed in the table below: Table C.10: Silent Knight Panel Connection Options Fire Alarm Panel Models RS-485 UART/TTL RS-232... - Page 145 Silent Knight Panels Connecting to the Panels Future For panel connection, use only the RS-485 port Figure C.28: Silent Knight Panel: RS-485 Connections CLSS Gateway - Installation and Users’ Manual | P/N:LS10248-000HW-E | REV. F | FEB/11/2022...
-
Page 146: C.12.3: Programming For Annunciator (Ann-Pri)
Silent Knight Panels Connecting to the Panels C.12.3 Programming for Annunciator (ANN-PRI) Programming enables the panel to recognize the CLSS gateway and the annunciator. CAUTION: BEFORE PROGRAMMING, ENSURE THAT THE ANN-PRI COMMUNICATION CABLE IS CONNECTED WITH THE PANEL. C.12.4 To Program for Annunciator Using the keypad on the panel, you select options on the screens. -
Page 147: C.13: Triga Panels
Triga Panels Connecting to the Panels C.13 Triga Panels C.13.1 Connection Options The gateway operates only with the Triga fire alarm control panels as listed in the table below: Table C.11: Triga Panel Connection Options Fire Alarm Panel Models RS-485 UART/TTL RS-232 TR-75R... - Page 148 Triga Panels Connecting to the Panels Future For panel connection, use only the RS-485 port Figure C.29: Triga Panel: RS-485 Connections CLSS Gateway - Installation and Users’ Manual | P/N:LS10248-000HW-E | REV. F | FEB/11/2022...
-
Page 149: C.13.3: Programming For Annunciator (Ann-Pri)
Triga Panels Connecting to the Panels C.13.3 Programming for Annunciator (ANN-PRI) Programming enables the panel to recognize the CLSS gateway and the annunciator. CAUTION: BEFORE PROGRAMMING, ENSURE THAT THE ANN-PRI COMMUNICATION CABLE IS CONNECTED WITH THE PANEL. C.13.4 To Program for Annunciator Using the keypad on the panel, you select options on the screens. -
Page 150: C.14: Vesda® Detectors
VESDA® Detectors Connecting to the Panels C.14 VESDA® Detectors C.14.1 Connection Options The gateway operates with VESDA detectors and sends alarm data to users. Minimum Required Versions For VESDA-E: All VESDA-E detector versions For Android App: 1.0.0.2493 (2493) For iOS App: 0.3.0 (1124) For the CLSS Gateway: 3.0.4.70 C.14.2 To Use an Ethernet Connection Using an Ethernet cable the CLSS Gateway and the VESDA detectors are connected. - Page 151 VESDA® Detectors Connecting to the Panels External Power Supply • On the Gateway Side Connect to the power port of the gateway. Refer to Figure C.2 where the power port on the gateway is labeled as 7. It is the P2 pin on the gateway board.
-
Page 152: Appendix D: Compatible Cellular Modules
Appendix D: Compatible Cellular Modules The cellular modules offer value-added services for mobile devices connected with the CLSS Gateway. Figure D.1: A Cellular Module To know about installing this device onto the gateway, refer to “Installing a Cellular Module” on page D.1 Operation The cellular modules are plug-and-play devices, which receive power from the CLSS Gateway and provide a cellular communication path. -
Page 153: D.2: Supported Modules
Supported Modules Compatible Cellular Modules D.2 Supported Modules Table C.1: Modules and Frequencies Verizon Cellular AT&T Cellular Module EU - Cellular Module Brand Name Module CCM-VZ-HON CCM-ATT-HON CCM-EU Module Name LE910-SV1 LE910B1-NA LE910-EU1 Model North America North America Europe Supported Regions Frequency Details •... - Page 154 12 Clintonville Rd 140 Waterside Rd Northford, CT 06472 Leicester LE5 1TN, UK (203) 484-7161 +44 (0) 203 4091779...