Table of Contents
Quick Links
Projector
CP-CX250
User's Manual (detailed)
Operating Guide
Thank you for purchasing this projector.
WARNING
product ..Be.sure.to.read."Safety Guide".fi . rst ..After.reading.them,.store.them.in.a.
safe.place.for.future.reference .
About.this.manual
Various.symbols.are.used.in.this.manual ..The.meanings.of.these.symbols.are.
described.below ..
WARNING
CAUTION
NOTICE
NOTE
•.The.information.in.this.manual.is.subject.to.change.without.notice .
•.The.illustrations.in.this.manual.are.for.illustrative.purposes ..They.may.differ.
slightly.from.your.projector .
•.The.manufacturer.assumes.no.responsibility.for.any.errors.that.may.appear.in.
this.manual .
•.The.reproduction,.transfer.or.copy.of.all.or.any.part.of.this.document.is.not.
permitted.without.express.written.consent .
Trademark acknowledgment
®
•.. M ac
.is.a.registered.trademark.of.Apple.Inc .
®
•.. W indows
,.DirectDraw
in.the.U .S ..and/or.other.countries .
•.. V ESA.and.DDC.are.trademarks.of.the.Video.Electronics.Standard.Association .
TM
•.Blu-ray.Disc
.and.Blu-ray
All.other.trademarks.are.the.properties.of.their.respective.owners .
►Before.using.this.product,.please.read.all.manuals.for.this.
This.symbol.indicates.information.that,.if.ignored,.could.possibly.
result.in.personal.injury.or.even.death.due.to.incorrect.handling .
This.symbol.indicates.information.that,.if.ignored,.could.possibly.
result.in.personal.injury.or.physical.damage.due.to.incorrect.
handling .
This.entry.notices.of.fear.of.causing.trouble .
Please.refer.to.the.pages.written.following.this.symbol .
®
.and.Direct3D
TM
.are.trademarks.of.Blu-ray.Disc.Association .
®
.are.registered.trademarks.of.Microsoft.Corporation.
1
Table of Contents

Related Manuals for Hitachi CP-CX250


Summary of Contents for Hitachi CP-CX250
- Page 1 Projector CP-CX250 User's Manual (detailed) Operating Guide Thank you for purchasing this projector. WARNING ►Before.using.this.product,.please.read.all.manuals.for.this. product ..Be.sure.to.read.“Safety Guide”.fi . rst ..After.reading.them,.store.them.in.a. safe.place.for.future.reference . About.this.manual Various.symbols.are.used.in.this.manual ..The.meanings.of.these.symbols.are. described.below .. WARNING This.symbol.indicates.information.that,.if.ignored,.could.possibly. result.in.personal.injury.or.even.death.due.to.incorrect.handling . CAUTION This.symbol.indicates.information.that,.if.ignored,.could.possibly. result.in.personal.injury.or.physical.damage.due.to.incorrect. handling . NOTICE This.entry.notices.of.fear.of.causing.trouble .
-
Page 2: Table Of Contents
Contents Introduction . . . . . . . . . . . . . . . 3 SETUP menu . . . . . . . . . . . . . . 42 Features. -
Page 3: Introduction
Introduction Introduction Features The.projector.provides.you.with.the.broad.use.by.the.following.features . ü..T he.unique.optics.system.produces.a.large.projected.image.in.a.short. distance,.which.provides.you.with.various.ways.of.use . ü..T he.double.layer.filter.system.is.expected.to.function.longer.and.offers.you. less.maintenance.frequency . Checking the contents of package Please.see.the.Contents of package.section.in.the.User’s Manual (concise). which.is.a.book ..Your.projector.should.come.with.the.items.shown.there ..Require. of.your.dealer.immediately.if.any.items.are.missing . NOTE •.Keep.the.original.packing.materials,.for.future.reshipment ..Be.sure. to.use.the.original.packing.materials.when.moving.the.projector ..Use.special. caution.for.the.lens . -
Page 4: Fastening.the.lens.cover
Introduction Fastening the lens cover Strap.hole Lens.cover Strap.slit To.avoid.losing.the.cover,.please.fasten.the.lens. cover.to.the.projector.using.the.included.strap . Fasten.the.strap.to.the.strap.hole.as.shown. in.the.fi . gure.for.step.1 ..Please.note.that.the. knot.on.the.strap.is.used.to.fasten.it.to.the. lens.cover.in.step.2 . Put.the.strap.end.into.the.slit.of.the.lens. cover.with.the.knot.on.the.side.of.the.lens .. Strap Make.sure.that.the.strap.is.inserted.to.the. end.of.the.slit . Insert.the.upper.tab.(1.part).of.the.lens.cover. between.the.upper.case.and.lens.as.shown. Lens Upper.case in.the.fi . gure.for.step.3 ..Then,.fi . t.the.right/left. tabs.(2.parts).to.attach.the.lens.cover . CAUTION ►Do.not.hang.the. lens.cover.in.front.of.the.lens.when.the. -
Page 5: Part.names
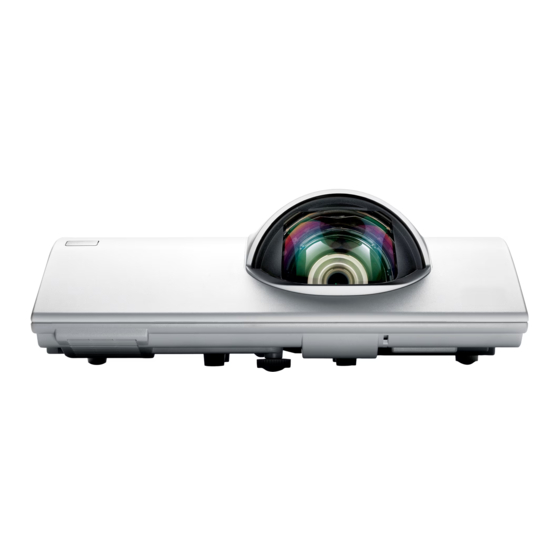
Introduction Part names Projector HOT! (1).Control.panel.(6) (2).. L amp.cover.(66) The.lamp.unit.is.inside . (3).Remote.sensor.(16) (4).Lens.(70) (5).. A C.(AC.inlet).(15) HOT! (6).Ports.(6) (7).Exhaust.vent (13) (8).Speaker.(13, 20, 46) (12) (9).Elevator.feet.(x.2).(23) (11) (10).Spacer.(23) (11).Security.slot.(15) (12).Security.bar.(15) (10) (13).Strap.hole.(4) (14).FOCUS.ring.(23) (15).. F ilter.cover.(68) (14) The.air.fi . lter.and.intake. vent.are.inside . (16).Intake.vents (16) (15) - Page 6 Introduction Part names (continued) Control panel (1).STANDBY/ON.button.(18) (2).INPUT.button.(20) (3).POWER.indicator.(18, 73) (4).TEMP.indicator.(73) (5).LAMP.indicator.(73) (6).. M ENU./.Cursor.button.(28) Ports (10 ~ 14) (1) USB TYPE B port (2) AUDIO IN (L,R).ports (3).. A UDIO OUT (L,R).ports (4).COMPUTER IN1.port. (5).COMPUTER IN2/MONITOR OUT.port.. (6).CONTROL.port (7).VIDEO.port (8).S-VIDEO.port.
- Page 7 Introduction Part names (continued) Remote control (10) (1).VIDEO.button.(21). (2).COMPUTER.button.(21) VIDEO COMPUTER MY SOURCE/ DOC.CAMERA (3).SEARCH.button.(22) ASPECT AUTO SEARCH BLANK (16) (12) (4).STANDBY/ON.button.(18) FREEZE MAGNIFY PAGE VOLUME (14) (5).ASPECT.button.(22) DOWN (11) (6).AUTO.button.(24) MY BUTTON KEYSTONE MUTE (19) (13) (7).BLANK.button.(27) (17) (15) (8).MAGNIFY.-.ON.button.(26) (20) (18)
-
Page 8: Setting Up
Setting up Setting.up Install.the.projector.according.to.the.environment.and.manner.the.projector.will.be. used.in . Arrangement Refer.to.table.T-1.and.fi . gures.F-1.and.F-2.at.the.end.of.User’s.Manual.(concise).to.determine. the.screen.size.and.projection.distance . The.values.shown.in.the.table.are.calculated.for.a.full.size.screen . ..V..Screen.size.(vertical)..H..Screen.size.(horizontal)..Projection.distance.(±8%)..,.b ..Screen.height.(±8%) •.. F or.the.case.of.installation.in.a.special.state.such.as.ceiling.mount,.the.specifi . ed. mounting.accessories.and.service.may.be.required ..Before.installing.the.projector,. consult.your.dealer.about.your.installation . • . T he.screen.position.may.shift.after.installation.if.the.projector.is.suspended.from.the. ceiling.or.other.location.due.to.the.fl . exibility.of.the.plastic.projector.body ..If.readjustment.is. necessary,.consult.with.your.dealer.or.service.personnel . • . T he.projected.image.position.and/or.focus.may.change.during.warm-up.(approx ..30. minutes.after.the.lamp.is.turned.on).or.when.the.ambient.conditions.change ..Readjust. - Page 9 Setting up Arrangement (continued) WARNING ►Place.the.projector.in.a.cool.place,.and.ensure.that.there.is. suffi . cient.ventilation ..The.high.temperature.of.the.projector.could.cause.fi . re,. burns.and/or.malfunction.of.the.projector . •.. D o.not.stop-up,.block.or.otherwise.cover.the.projector's.vents . •.. K eep.a.space.of.30.cm.or.more.between.the.sides.of.the.projector.and.other. objects.such.as.walls . •.Do.not.place.or.attach.anything.that.would.block.the.lens.or.vent.holes . •.Do.not.place.the.projector.on.metallic.thing.or.anything.weak.in.heat . •.. D o.not.place.the.projector.on.carpet,.cushions.or.bedding . •.. D o.not.place.the.projector.in.direct.sunlight.or.near.hot.objects.such.as.heaters .. Do.not.place.the.projector.where.the.air.from.an.air.conditioner.or.similar.unit. will.blow.on.it.directly . •.. D o.not.place.anything.near.the.projector.lens.or.vents,.or.on.top.of.the.projector . •..
-
Page 10: Connecting.with.your.devices
Setting up Arrangement (continued) NOTE •.The.projector.may.make.a.rattling.sound.when.tilted,.moved.or. shaken,.since.a.fl . ap.to.control.the.air.fl . ow.inside.of.the.projector.has.moved ..Be. aware.that.this.is.not.a.failure.or.malfunction . •.The.incoming.light.to.the.screen.from.the.projector.has.a.large.angle ..While. the.white.image.is.on.the.screen,.you.may.see.it.with.colors,.but.this.is.because. of.the.type.of.the.screen.used.or.the.angles.viewed,.and.it.is.not.a.malfunction . •.When.the.ambient.temperature.is.around.35.to.40°C,.the.brightness.of.the. lamp.is.reduced.automatically . Connecting with your devices Before.connecting.the.projector.to.a.device,.consult.the.manual.of.the.device.to. confi . rm.that.the.device.is.suitable.for.connecting.with.this.projector.and.prepare. the.required.accessories,.such.as.a.cable.in.accord.with.the.signal.of.the.device .. Consult.your.dealer.when.the.required.accessory.did.not.come.with.the.product.or. the.accessory.is.damaged . After. making. sure. that. the. device. and. projector. are. turned. off,. connect. them. following.the.instructions.below . - Page 11 Setting up Connecting with your devices (continued) About Plug-and-Play capability •.Plug-and-Play.is.a.system.composed.of.a.computer,.its.operating.system. and.peripheral.equipment.(i .e ..display.devices) ..This.projector.is.VESA.DDC. 2B.compatible ..Plug-and-Play.can.be.used.by.connecting.this.projector.to.a. computer.that.is.VESA.DDC.(display.data.channel).compatible . -.. T ake.advantage.of.this.feature.by.connecting.a.computer.cable.to.the. COMPUTER IN1.port.(DDC.2B.compatible) ..Plug-and-Play.may.not.work. properly.if.any.other.type.of.connection.is.attempted . -.. P lease.use.the.standard.drivers.in.your.computer.as.this.projector.is.a.Plug-and- Play.monitor . •.. W hen.AUTO. is. selected. for. the. COMPUTER IN1. or. COMPUTER IN2. port. in. COMPUTER.
- Page 12 Setting up Connecting with your devices (continued) NOTE •.Before.connecting.the.projector.to.a.computer,.consult.the.computer’s. manual.and.check.the.compatibility.of.the.signal.level,.the.synchronization. methods.and.the.display.resolution.output.to.the.projector .. -.. S ome.signal.may.need.an.adapter.to.input.this.projector . -.. S ome.computers.have.multiple.screen.display.modes.that.may.include.some. signals.which.are.not.supported.by.this.projector . -.. A lthough.the.projector.can.display.signals.with.resolution.up.to.UXGA.. (1600X1200),.the.signal.will.be.converted.to.the.projector’s.panel.resolution. before.being.displayed ..The.best.display.performance.will.be.achieved.if.the. resolutions.of.the.input.signal.and.the.projector.panel.are.identical . •.. I f.you.connect.this.projector.to.a.notebook.computer,.you.need.to.output.the. display.to.an.external.monitor,.or.output.simultaneously.to.the.internal.display. and.an.external.monitor ..Consult.the.computer's.manual.for.the.setting . •.. D epending.on.the.input.signal,.the.automatic.adjustment.function.of.this. projector.may.take.some.time.and.not.function.correctly .. -..
- Page 13 Setting up Connecting with your devices (continued) Speakers Monitor (with an amplifier) RGB IN (continued.on.next.page)
- Page 14 Setting up Connecting with your devices (continued) AUDIO COMPONENT VCR/DVD/Blu-ray VIDEO S-VIDEO Cb/Pb Cr/Pr Disc player...
-
Page 15: Connecting.to.a.power.supply
Setting up Connecting to a power supply Put.the.connector.of.the.power.cord.into.the. AC.(AC.inlet).of.the.projector . Firmly.plug.the.power.cord’s.plug.into.the. outlet ..In.a.couple.of.seconds.after.the. power.supply.connection,.the.POWER. indicator.will.light.up.in.steady.orange . Power.cord Please.remember.that.when.the.DIRECT.POWER. ON.function.activated.(53),.the.connection.of.the. power.supply.make.the.projector.turn.on . WARNING ►Please.use.extra.caution.when.connecting.the.power.cord,.as. incorrect.or.faulty.connections.may.result.in.fi . re.and/or.electrical.shock . •.Do.not.touch.the.power.cord.with.a.wet.hand . •.Only.use.the.power.cord.that.came.with.the.projector ..If.it.is.damaged,.consult. your.dealer.to.get.a.new.one ..Never.modify.the.power.cord .. •.Only.plug.the.power.cord.into.an.outlet.whose.voltage.is.matched.to.the.power. cord ..The.power.outlet.should.be.close.to.the.projector.and.easily.accessible .. Remove.the.power.cord.for.complete.separation . •.Do.not.distribute.the.power.supply.to.multiple.devices ..Doing.so.may.overload the.outlet.and.connectors,.loosen.the.connection,.or.result.in.fi . -
Page 16: Remote Control
Remote control Remote.control Installing the batteries Please.insert.the.batteries.into.the.remote.control.before.using.it ..If.the.remote.control. starts.to.malfunction,.try.to.replace.the.batteries ..If.you.will.not.use.the.remote.control.for. long.period,.remove.the.batteries.from.the.remote.control.and.store.them.in.a.safe.place . Holding.the.hook.part.of.the.battery. cover,.remove.it . Align.and.insert.the.two.AA.batteries. (HITACHI MAXELL, Part No.LR6 or R6P). according.to.their.plus.and.minus.terminals.as.indicated.in.the.remote.control . Replace.the.battery.cover.in.the.direction.of.the.arrow.and.snap.it.back.into.place . WARNING ►Always.handle.the.batteries.with.care.and.use.them.only.as. directed ..Improper.use.may.result.in.battery.explosion,.cracking.or.leakage,. which.could.result.in.fi . re,.injury.and/or.pollution.of.the.surrounding.environment . •.Be.sure.to.use.only.the.batteries.specifi . ed ..Do.not.use.batteries.of.different. types.at.the.same.time ..Do.not.mix.a.new.battery.with.used.one .. -
Page 17: Changing.the.frequency.of.remote.control.signal
Remote control Changing the frequency of remote control signal VIDEO COMPUTER MY SOURCE/ DOC.CAMERA The.accessory.remote.control.has.the.two.choices.on.signal. ASPECT AUTO SEARCH BLANK frequency.Mode.1:NORMAL.and.Mode.2:HIGH ..If.the.remote.control. MAGNIFY FREEZE PAGE VOLUME + does.not.function.properly,.attempt.to.change.the.signal.frequency . DOWN ー In.order.to.set.the.Mode,.please.keep.pressing.the.combination.of. MY BUTTON KEYSTONE MUTE two.buttons.listed.below.simultaneously.for.about.3.seconds . POSITION MENU (1).Set.to.Mode.1:NORMAL ..VOLUME - and.RESET.buttons. (2).Set.to.Mode.2:HIGH . -
Page 18: Power On/Off
Power on/off Power.on/off Turning on the power STANDBY/ON.button Make.sure.that.the.power.cord.is.firmly. and.correctly.connected.to.the.projector. and.the.outlet . POWER.indicator Make.sure.that.the.POWER.indicator.is. steady.orange.(73) ..Then,.remove.the. lens.cover . Press.the.STANDBY/ON button.on.the. MY SOURCE/ VIDEO COMPUTER DOC.CAMERA projector.or.the.remote.control ..The. ASPECT AUTO SEARCH BLANK MAGNIFY PAGE VOLUME FREEZE + projection.lamp.will.light.up.and.the. DOWN ー MY BUTTON KEYSTONE MUTE POWER.indicator.will.begin.blinking.in. -
Page 19: Turning.off.the.power
Power on/off Turning on the power (continued) WARNING..►A.strong.light.is.emitted.when.the.projector’s.power.is.on ..Do. not.look.into.the.lens.of.the.projector.or.look.inside.of.the.projector.through.any. of.the.projector’s.openings . ►Do.not.touch.around.the.lamp.cover.and.the.exhaust.vent.during.use.or.just. after.use,.since.it.is.too.hot . Turning off the power Press.STANDBY/ON.button.on.the.projector.or.on.the.remote.control . The.message.“Power.off?”.will.appear.on.the.screen.for.about.5.seconds . Press.the.STANDBY/ON.button.again.while.the.message.appears . The.projector.lamp.will.go.off,.and.the.POWER.indicator.will.begin.blinking. in.orange ..Then.the.POWER.indicator.will.stop.blinking.and.light.in.steady. orange.when.the.lamp.cooling.is.complete.(73) . Attach.the.lens.cover,.after.the.POWER.indicator.turns.in.steady.orange . Do.not.turn.the.projector.on.for.about.10.minutes.or.more.after.turning.it.off .. Also,.do.not.turn.the.projector.off.shortly.after.turning.it.on ..Such.operations.might. cause.the.lamp.to.malfunction.or.shorten.the.lifetime.of.some.parts.including.the.lamp . WARNING ►Do.not.touch.around.the.lamp.cover.and.the.exhaust.vents. during.use.or.just.after.use,.since.it.is.too.hot . -
Page 20: Operating
Operating Operating VOLUME +/-.button Adjusting the volume VIDEO COMPUTER MY SOURCE/ DOC.CAMERA Use.the.VOLUME +/VOLUME -.buttons.to.adjust.the.volume . ASPECT AUTO SEARCH BLANK A.dialog.will.appear.on.the.screen.to.aid.you.in.adjusting.the. MAGNIFY FREEZE PAGE VOLUME + volume ..If.you.do.not.do.anything,.the.dialog.will.automatically. DOWN ー disappear.after.about.ten.seconds . MY BUTTON KEYSTONE MUTE ●.. W hen. .is.selected.for.current.picture.input.port,.the.volume.adjustment.is. disabled ..Please.see.AUDIO.SOURCE.item.of.AUDIO.menu.(46) . - Page 21 Operating Selecting an input signal (continued) Press.COMPUTER.button.on.the.remote.control .. COMPUTER.button Each.time.you.press.the.button,.the.projector.switches.its. input.port.from.the.current.port.as.below . VIDEO COMPUTER MY SOURCE/ COMPUTER DOC.CAMERA ..COMPUTER.IN1....COMPUTER.IN2..COMPUTER.IN1....COMPUTER.IN1....COMPUTER.IN1....COMPUTER.IN1....COMPUTER.IN1..ASPECT AUTO SEARCH BLANK FREEZE MAGNIFY PAGE VOLUME + DOWN ー ●.. W hile.ON.is.selected.for.AUTO.SEARCH.item.in.OPTION. MY BUTTON KEYSTONE MUTE menu,.the.projector.will.keep.checking.every.port.sequentially.
-
Page 22: Searching.an.input.signal
Operating Searching an input signal Press.SEARCH.button.on.the.remote.control . SEARCH.button The.projector.will.start.to.check.its.input.ports.as.below.in. order.to.fi . nd.any.input.signals . VIDEO COMPUTER MY SOURCE/ COMPUTER DOC.CAMERA DOC.CAMERA When.an.input.is.detected,.the.projector.will.stop.searching. ASPECT AUTO SEARCH SEARCH BLANK and.display.the.image ..If.no.signal.is.found,.the.projector.will. MAGNIFY FREEZE PAGE VOLUME + return.to.the.state.selected.before.the.operation . DOWN ー MY BUTTON KEYSTONE MUTE ....COMPUTER.IN1..COMPUTER.IN2.. -
Page 23: Adjusting.the.projector's.elevator
Operating Adjusting the projector's elevator The.projector.has.Front.foot.for.inclinations.and.Rear.foot.for.horizontals ..A.spacer. is. installed. on. the. Rear. elevator. foot. at. the. time. of. shipment,. and. the. projector. is. ready. for. use .. If. necessary,. detach. the. spacer,. and. the. elevator. feet. can. be. manually.twisted.to.make.more.precise.adjustments . 0~2°... -
Page 24: Using.the.automatic.adjustment.feature
Operating Using the automatic adjustment feature AUTO.button Press.AUTO.button.on.the.remote.control .. Pressing.this.button.performs.the.following . VIDEO COMPUTER MY SOURCE/ COMPUTER .. F or a computer signal DOC.CAMERA The.vertical.position,.the.horizontal.position.and.the.horizontal. ASPECT AUTO AUTO SEARCH BLANK MAGNIFY FREEZE PAGE VOLUME phase.will.be.automatically.adjusted .. + Make.sure.that.the.application.window.is.set.to.its.maximum.size. DOWN ー prior.to.attempting.to.use.this.feature ..A.dark.picture.may.still.be. MY BUTTON KEYSTONE MUTE... -
Page 25: Correcting.the.keystone.distortions
Operating Correcting the keystone distortions KEYSTONE.button Press.the.KEYSTONE.button.on.the.remote.control .. VIDEO COMPUTER MY SOURCE/ A.dialog.will.appear.on.the.screen.to.aid.you.in.correcting.the. DOC.CAMERA distortion . ASPECT AUTO SEARCH BLANK MAGNIFY FREEZE PAGE VOLUME + Use.the.◄/►.cursor.buttons.for.adjustment . DOWN ー To.close.the.dialog.and.complete.this.operation,.press.the. MY BUTTON KEYSTONE MUTE KEYSTONE.button.again ..Even.if.you.do.not.do.anything,.the. dialog.will.automatically.disappear.after.about.ten.seconds . MENU POSITION ENTER ●.. -
Page 26: Using.the.magnify.feature
Operating Using the magnify feature Press.the.MAGNIFY ON.button.on.the.remote.control .. MAGNIFY ON/OFF.button The.picture.will.be.magnifi . ed,.and.the.MAGNIFY.dialog.will. appear.on.the.screen ..When.the.MAGNIFY ON.button.is. pressed.for.the.fi . rst.time.after.the.projector.is.turned.on,.the. VIDEO COMPUTER MY SOURCE/ COMPUTER DOC.CAMERA picture.will.be.zoomed.by.1 .5.times ..On.the.dialog,.triangle. ASPECT AUTO AUTO SEARCH BLANK FREEZE FREEZE MAGNIFY MAGNIFY MAGNIFY PAGE VOLUME marks.to.show.each.direction.will.be.displayed . -
Page 27: Temporarily.freezing.the.screen
Operating Temporarily freezing the screen FREEZE.button Press.the.FREEZE.button.on.the.remote.control .. The.“FREEZE”.indication.will.appear.on.the.screen.(however,. the.indication.will.not.appear.when.the.OFF.is.selected.for. VIDEO COMPUTER MY SOURCE/ MY SOURCE/ DOC.CAMERA DOC.CAMERA the.MESSAGE.item.in.the.SCREEN.menu.(49)),.and.the. ASPECT AUTO AUTO SEARCH BLANK projector.will.go.into.the.FREEZE.mode,.which.the.picture.is. MAGNIFY FREEZE FREEZE PAGE VOLUME + frozen . DOWN ー To.exit.the.FREEZE.mode.and.restore.the.screen.to.normal,. MY BUTTON KEYSTONE MUTE press.the.FREEZE.button.again .. -
Page 28: Using.the.menu.function
Operating Using the menu function This.projector.has.the.following.menus:. PICTURE,.IMAGE,.INPUT,.SETUP,.AUDIO,.SCREEN,.OPTION,.SECURITY.and. MY SOURCE/ VIDEO COMPUTER DOC.CAMERA EASY.MENU .. EASY.MENU.consists.of.functions.often.used,.and.the.other.menus.are.classifi . ed. ASPECT AUTO SEARCH BLANK into.each.purpose.and.brought.together.as.the.ADVANCED.MENU . MAGNIFY PAGE VOLUME FREEZE Each.of.these.menus.is.operated.using.the.same.methods ..While.the.projector. + is.displaying.any.menu,.the.MENU.button.on.the.projector.works.as.the.cursor. DOWN ー buttons ..The.basic.operations.of.these.menus.are.as.follows . MY BUTTON KEYSTONE MUTE ENTER.button MENU.button FOCUS... - Page 29 Operating Using the menu function (continued) To.close.the.MENU,.press.the.MENU.button.on.the.remote.control.again.or. select.EXIT.and.press.the.◄.cursor.button.or.ENTER.button ..Even.if.you. do.not.do.anything,.the.dialog.will.automatically.disappear.after.about.30. seconds . ●.. I f.you.want.to.move.the.menu.position,.use.the.cursor.buttons.after.pressing.the. POSITION.button . ●.. S ome.functions.cannot.be.performed.when.a.certain.input.port.is.selected,.or. when.a.certain.input.signal.is.displayed . ●.. W hen.you.want.to.reset.the.operation,.press.RESET.button.on.the.remote. control.during.the.operation ..Note.that.some.items.(ex ..LANGUAGE,.VOLUME). cannot.be.reset . ●.. I n.the.ADVANCED.MENU,.when.you.want.to.return.to.the.previous.display,. press.the.◄.cursor.button.or.ESC.button.on.the.remote.control . Indication in OSD (On Screen Display) The.meanings.of.the.general.words.on.the.OSD.are.as.follows .
-
Page 30: Easy Menu
EASY MENU EASY.MENU From.the.EASY.MENU,.items.shown.in.the.table. below.can.be.performed . Select.an.item.using.the.▲/▼.cursor.buttons ..Then. perform.it.according.to.the.following.table . Item Description Using.the.◄/►.buttons.switches.the.mode.for.aspect.ratio . ASPECT See.the.ASPECT.item.in.IMAGE.menu.(35) . Using.the.◄/►.cursor.buttons.adjusts.the.magnifi . cation.ratio . Small.ó.Large See.the.D-ZOOM.item.in.the.SETUP.menu.(42) . D-ZOOM •.The.on-screen.menu.might.be.displayed.outside.of.the.image. display.area.depending.on.the.adjustment.value.of.the.ASPECT,. D-ZOOM.and. .KEYSTONE ..Changing.the.values.of.ASPECT,. D-ZOOM.and. .KEYSTONE.may.fi . x.the.symptom . Using.the.◄/►.buttons.corrects.the.vertical.keystone.distortion . KEYSTONE . KEYSTONE.item.in.SETUP.menu.(42) . See.the. - Page 31 EASY MENU Item Description Using.the.◄/►.buttons.changes.the.eco.mode.setting . See.the.ECO.MODE.item.in.SETUP.menu.(43) . ECO MODE •.When.the.ambient.temperature.is.around.35.to.40°C,.the. brightness.of.the.lamp.is.reduced.automatically . Pressing.the.►.button.displays.the.INSTALLATION.dialog . INSTALLATION See.the.INSTALLATION.item.in.SETUP.menu.(44) . Performing.this.item.resets.all.of.the.EASY.MENU.items.except.the. FILTER.TIME.and.LANGUAGE . RESET A.dialog.is.displayed.for.confirmation ..Selecting.the.OK.using.the.►. button.performs.resetting . The.usage.time.of.the.air.filter.is.shown.in.the.menu . Performing.this.item.resets.the.filter.time.which.counts.usage.time. of.the.air.filter . FILTER TIME A.dialog.is.displayed.for.confirmation ..Selecting.the.OK.using.the.►. button.performs.resetting .. See.the.FILTER.TIME.item.in.OPTION.menu.(55) . Using.the.◄/►.buttons.changes.the.display.language .. LANGUAGE See.the.LANGUAGE.item.in.SCREEN.menu.(47) .
-
Page 32: Picture Menu
PICTURE menu PICTURE.menu From.the.PICTURE.menu,.items.shown.in.the.table. below.can.be.performed .. Select.an.item.using.the.▲/▼.cursor.buttons,.and.press. the.►.cursor.button.or.ENTER.button.to.execute.the. item ..Then.perform.it.according.to.the.following.table . Item Description Using.the.◄/►.buttons.adjusts.the.brightness . BRIGHTNESS Dark.ó.Light Using.the.◄/►.buttons.adjusts.the.contrast . CONTRAST Weak.ó.Strong Using.the.▲/▼.buttons.switches.the.gamma.mode . To adjust CUSTOM Selecting.a.mode.whose.name.includes.CUSTOM.and.then. pressing.the.►.button.or.the.ENTER.button.displays. a.dialog.to.aid.you.in.adjusting.the.mode . This.function.is.useful.when.you.want.to. change.the.brightness.of.particular.tones . Choose.an.item.using.the.◄/►.buttons,. and.adjust.the.level.using.the.▲/▼.buttons . You.can.display.a.test.pattern.for.checking.the.effect.of.your. adjustment.by.pressing.the.ENTER button . Each.time.you.press.the.ENTER.button,.the. - Page 33 PICTURE menu Item Description Using.the.▲/▼.buttons.switches.the.color.temperature.mode . To adjust CUSTOM Selecting.a.mode.whose.name.includes. CUSTOM.and.then.pressing.the.►.button. or.the.ENTER.button.displays.a.dialog. to.aid.you.in.adjusting.the.OFFSET.and. GAIN.of.the.selected.mode . OFFSET.adjustments.change.the.color.intensity.on.the.whole.tones. of.the.test.pattern . GAIN.adjustments.mainly.affect.color.intensity.on.the.brighter.tones. of.the.test.pattern . COLOR TEMP Choose.an.item.using.the.◄/►.buttons,.and.adjust.the.level.using. the.▲/▼.buttons .. You.can.display.a.test.pattern.for.checking.the.effect.of.your. adjustment.by.pressing.the.ENTER.button .. Each.time.you.press.the.ENTER.button,.the.pattern.changes.as.below . No.pattern..Gray.scale.of.9.steps..Ramp.ï.Gray.scale.of.15.steps ..•.Lines.or.other.noise.might.appear.on.the.screen. when.this.function.is.operated,.but.it.is.not.a. malfunction . Using.the.◄/►.buttons.adjusts.the.strength.of.whole.color . Weak.ó.Strong COLOR •.This.item.can.be.selected.only.for.a.video,.s-video.and.component.
- Page 34 PICTURE menu Item Description Using.the.◄/►.buttons.adjusts.the.sharpness . Weak.ó.Strong SHARPNESS •.There.may.be.some.noise.and/or.the.screen.may.fl . icker.for.a. moment.when.an.adjustment.is.made ..This.is.not.a.malfunction . This.projector.has.4.memories.for.adjustment.data.(for.all.the.items. of.the.PICTURE.menu) . Selecting.a.function.using.the.▲/▼.buttons.and.pressing.the.►.or. ENTER.button.performs.each.function . SAVE-1.ó.SAVE-2.ó.SAVE-3.ó.SAVE-4 LOAD-4.óLOAD-3.ó.LOAD-2.ó.LOAD-1 SAVE-1,.SAVE-2,.SAVE-3,.SAVE-4 Performing.a.SAVE.function.saves.the.current.adjustment.data.into. the.memory.linked.in.the.number.included.in.the.function’s.name .. •.Remember.that.the.current.data.being.stored.of.a.memory.will.be. lost.by.saving.new.data.into.the.memory . MY MEMORY LOAD-1,.LOAD-2,.LOAD-3,.LOAD-4 Performing.a.LOAD.function.loads.the.data.from.the.memory.linked. in.the.number.included.in.the.function’s.name,.and.adjusts.the. picture.automatically.depending.on.the.data .. •.The.LOAD.functions.whose.linked.memory.has.no.data.are. skipped . •.Remember.that.the.current.adjusted.condition.will.be.lost.by. loading.data ..If.you.want.to.keep.the.current.adjustment,.please.
-
Page 35: Image Menu
IMAGE menu IMAGE.menu From.the.IMAGE.menu,.items.shown.in.the.table. below.can.be.performed . Select.an.item.using.the.▲/▼.cursor.buttons,.and. press.the.►.cursor.button.or.ENTER.button.to. execute.the.item ..Then.perform.it.according.to.the. following.table . Item Description Using.the.▲/▼.buttons.switches.the.mode.for.aspect.ratio . For a computer signal NORMAL.ó.4:3.ó.16:9.ó.16:10.ó.NATIVE ..For a video signal, s-video signal or component video signal ASPECT 4:3.ó.16:9.ó.16:10.ó.14:9.ó.NATIVE ..When there is no signal .4:3.(fixed) •.The.NORMAL.mode.keeps.the.original.aspect.ratio.of.the.signal . - Page 36 IMAGE menu Item Description Using.the.◄/►.buttons.adjusts.the.vertical.position . Down.ó.Up •.Over-adjusting.the.vertical.position.may.cause.noise.to.appear.on. the.screen ..If.this.occurs,.please.reset.the.vertical.position.to.the. V POSITION default.setting ..Pressing.the.RESET.button.when.the.V.POSITION. is.selected.will.reset.the.V.POSITION.to.the.default.setting . •.When.this.function.is.performed.on.a.video.signal.or.an.s-video. signal,.the.range.of.this.adjustment.depends.on.OVER.SCAN.(35). setting ..It.is.not.possible.to.adjust.when.OVER.SCAN.is.set.to.10 . Using.the.◄/►.buttons.adjusts.the.horizontal.position . Right.ó.Left. •.Over-adjusting.the.horizontal.position.may.cause.noise.to.appear.on. the.screen ..If.this.occurs,.please.reset.the.horizontal.position.to.the. H POSITION default.setting ..Pressing.the.RESET.button.when.the.H.POSITION.is. selected.will.reset.the.H.POSITION.to.the.default.setting . •.When.this.function.is.performed.on.a.video.signal.or.an.s-video. signal,.the.range.of.this.adjustment.depends.on.OVER.SCAN.(35). setting ..It.is.not.possible.to.adjust.when.OVER.SCAN.is.set.to.10 . (continued.on.next.page)
- Page 37 IMAGE menu Item Description Using.the.◄/►.buttons.adjusts.the.horizontal.phase.to.eliminate.flicker . Right.ó.Left H PHASE •.This.item.can.be.selected.only.for.a.computer.signal.or.a. component.video.signal .. Using.the.◄/►.buttons.adjusts.the.horizontal.size . Small.ó.Large •.When.this.adjustment.is.excessive,.the.picture.may.not.be. displayed.correctly ..In.such.a.case,.please.reset.the.adjustment. H SIZE by.pressing.the.RESET.button.on.the.remote.control.during.this. operation . •.Images.might.appear.degraded.when.this.function.is.operated,.but. it.is.not.a.malfunction . Selecting.this.item.performs.the.automatic.adjustment.feature . For a computer signal The.vertical.position,.the.horizontal.position.and.the.horizontal. phase.will.be.automatically.adjusted ... Make.sure.that.the.application.window.is.set.to.its.maximum.size. prior.to.attempting.to.use.this.feature ..A.dark.picture.may.still.be. incorrectly.adjusted ..Use.a.bright.picture.when.adjusting . For a video signal and s-video signal The.video.format.best.suited.for.the.respective.input.signal.will.
-
Page 38: Input Menu
INPUT menu INPUT.menu From.the.INPUT.menu,.items.shown.in.the.table. below.can.be.performed . Select.an.item.using.the.▲/▼.cursor.buttons,.and. press.the.►.cursor.button.or.ENTER.button.to. execute.the.item ..Then.perform.it.according.to.the. following.table . Item Description Using.the.▲/▼.buttons.switches.the.progress.mode . TV.ó.FILM.ó.OFF •.This.function.works.only.for.a.video.signal,.s-video.signal,.component. video.signal.([email protected]@50.or.1080i@50/60) . PROGRESSIVE •.When.TV.or.FILM.is.selected,.the.screen.image.will.be.sharp .. FILM.adapts.to.the.2-3.Pull-Down.conversion.system ..But.these. may.cause.a.certain.defect.(for.example,.jagged.line).of.the.picture. for.a.quick.moving.object ..In.such.a.case,.please.select.OFF,.even. though.the.screen.image.may.lose.sharpness . Using.the.▲/▼.buttons.switches.the.noise.reduction.mode . HIGH.ó.MID.ó.LOW VIDEO NR •.This.function.works.only.for.a.video.signal,.s-video.signal,.compo- nent.video.signal.([email protected]@50.or.1080i@50/60) .. Using.the.▲/▼.buttons.switches.the.mode.for.color.space . AUTO.ó.RGB.ó.SMPTE240.ó.REC709.ó.REC601 .. - Page 39 INPUT menu Item Description The.video.format.for.S-VIDEO.port.and.VIDEO.port.can.be.set . (1).. U se.the.▲/▼.buttons.to. select.the.input.port . (2).. U sing.the.◄/►.buttons. switches.the.mode.for.video. format . AUTO..ó..NTSC..ó..PAL..ó..SECAM VIDEO FORMAT ..N-PAL.ó.M-PAL.ó.NTSC4 .43..N-PAL..N-PAL..N-PAL. •.This.item.is.performed.only.for.a.video.signal.from.the.VIDEO.port. or.the.S-VIDEO.port . •.The.AUTO.mode.automatically.selects.the.optimum.mode . •.The.AUTO.operation.may.not.work.well.for.some.signals ..If.the. picture.becomes.unstable.(e .g ..an.irregular.picture,.lack.of.color),. please.select.the.mode.according.to.the.input.signal . (continued.on.next.page)
-
Page 40: Omputer In
INPUT menu Item Description The.computer.input.signal.type.for.COMPUTER IN1.and.IN2.ports. can.be.set . (1).. U se.the.▲/▼.buttons.to.select.the.COMPUTER IN.port.to.be.set . (2).. U se.the.◄/►.buttons.to.select. the.computer.input.signal.type ..(COMPUTER.IN1) ..AUTO.ó.SYNC.ON.G.OFF COMPUTER IN ..(COMPUTER.IN2) AUTO.ó.SYNC.ON.G.OFF.ó.MONITOR.OUT •.Selecting.the.AUTO.mode.allows.you.to.input.a.sync.on.G.signal. or.component.video.signal.from.the.port.(11) .. •.In.the.AUTO.mode,.the.picture.may.be.distorted.with.certain. input.signals ..In.such.a.case,.remove.the.signal.connector.so.that. no.signal.is.received.and.select.the.SYNC.ON.G.OFF,.and.then. reconnect.the.signal . Set.the.frame.lock.function.on/off.for.each.port . (1).. U se.the.▲/▼.buttons.to.select. the.input.ports . (2).. - Page 41 INPUT menu Item Description The.resolution.for.the.COMPUTER IN1.and.COMPUTER IN2.input. signals.can.be.set.on.this.projector . (1).. I n.the.INPUT.menu.select.the.RESOLUTION.using.the.▲/▼. buttons.and.press.the.►.button .. The.RESOLUTION.menu.will.be.. displayed . (2).. I n.the.RESOLUTION.menu.select.the. resolution.you.wish.to.display.using. the.▲/▼.buttons ... Selecting.AUTO.will.set.a.resolution. appropriate.to.the.input.signal . (3).. P ressing.the.►.or.ENTER.button.when. selecting.a.STANDARD.resolution.will. automatically.adjust.the.horizontal.and. STANDARD.. vertical.positions,.clock.phase.and. ↓ horizontal.size . The.INPUT_INFORMATION.dialog.will.be. displayed . (4).. T o.set.a.custom.resolution.use.the.▲/▼.buttons.to.select. the.CUSTOM.and.the.RESOLUTION_CUSTOM.box.will.be.
-
Page 42: Setup Menu
SETUP menu SETUP.menu From.the.SETUP.menu,.items.shown.in.the.table. below.can.be.performed . Select.an.item.using.the.▲/▼.cursor.buttons,.and. press.the.►.cursor.button.or.ENTER.button.to. execute.the.item ..Then.perform.it.according.to.the. following.table . Item Description Using.the.◄/►.cursor.buttons.adjusts.the.magnification.ratio . Small.ó.Large •.The.on-screen.menu.might.be.displayed.outside.of.the.image. D-ZOOM display.area.depending.on.the.adjustment.value.of.the.ASPECT,. D-ZOOM.and. .KEYSTONE ..Changing.the.values.of.ASPECT,. D-ZOOM.and. .KEYSTONE.may.fix.the.symptom . Using.the.◄/►/▲/▼.cursor.buttons.adjusts.the.picture.position . D-SHIFT •.The.D-SHIFT.adjustment.values.are.not.valid.when.the.D-ZOOM. is.set.to.256.(full.screen) .. Using.the.▲/▼.cursor.buttons.selects.the.vertical.picture.position . TOP.ó.MID.ó.BOTTOM The.PICTURE.POSITION.is.not.changed.if.any.of.the.following. cases.apply . •.The.ASPECT.is.set.to.4:3 . •.The.input.signal.has.an.aspect.ratio.of.4:3.or.vertically.larger.than. - Page 43 SETUP menu Item Description Using.the.▲/▼.buttons.turns.on/off.the.AUTO.ECO.MODE . ON.ó.OFF •.When.ON.is.selected,.the.projector.will.always.be.set.to.Eco.mode. AUTO ECO MODE at.start-up.regardless.of.the.ECO.MODE.(43).setting ..An.OSD. message.“AUTO.ECO.MODE”.will.be.displayed.for.tens.of.seconds. when.the.projector.starts.with.this.function.activated . Using.the.▲/▼.buttons.switches.the.ECO.MODE ..NORMAL.ó.ECO.ó.INTELLIGENT.ECO.ó.SAVER •.When.the.ECO.is.selected,.acoustic.noise.and.screen.brightness. are.reduced . •.When.INTELLIGENT.ECO.is.selected,.the.brightness.of.the. lamp.changes.according.to.the.level.of.the.input.signal ..The.lamp. becomes.brighter.when.the.input.signal.level.is.high.and.darker. when.the.level.is.low ..If.dark.images.are.projected.continuously,.the. brightness.of.the.lamp.may.increase.to.maintain.its.performance . ECO MODE •.When.SAVER.is.selected,.you.can.select.the.time.within.1.to.30. min ..for.SAVER.MODE.using.the.►.button ..If.the.image.signal.level. doesn’t.change.more.than.the.period.set,.the.lamp.brightness.is. reduced.and.electric.power.consumption.decreased ..If.the.image. signal.level.changes.or.any.buttons.are.operated,.the.lamp.will. brighten.again ..If.dark.images.are.projected.continuously,.the.
- Page 44 SETUP menu Item Description Pressing.the.►button.displays.the.dialog.for.changing.the. INSTALLATION.setting . INSTALLATION Use.the.▲/▼.buttons.to.select.the.desired.setting.on.the. INSTALLATION.dialog . Using.▲/▼.buttons.switches.the.standby.mode.setting.between. NORMAL.and.SAVING .. NORMAL.ó.SAVING When.SAVING.is.selected,.the.power.consumption.in.the.standby. mode.is.lowered.with.some.functional.restriction.as.below: •.When.SAVING.is.selected,.the.RS-232C.communication.control. except.the.function.to.turn.the.projector.on.is.disabled .. •.When.SAVING.is.selected,.STANDBY.setting.of.AUDIO.SOURCE. STANDBY MODE (46).is.invalid,.no.signal.is.output.from.AUDIO OUT.port.and.no. sound.from.a.built-in.speaker . •.When.SAVING.is.selected,.STANDBY.setting.of.MONITOR.OUT. is.invalid,.and.no.signal.is.output.from.MONITOR OUT.port.in.the. standby.mode . •.The.USB.connection.is.disabled.while.the.projector.is.in.standby mode.if.the.STANDBY.MODE.item.in.the.SETUP.menu.of.the projector.is.set.to.SAVING . (continued.on.next.page)
- Page 45 SETUP menu Item Description While. the. image. signal. from. the. input. port. chosen. in. step. (1). is. projected,.the.image.signal.from.the.input.port.selected.in.step.(2).is. output.to.MONITOR OUT.port . (1).Choose.a.picture.input.port.using.▲/▼.buttons . Choose.STANDBY.to.select.the.picture.. output.in.the.standby.mode .. (2).. B y.using.◄/►.buttons,.select COMPUTER IN.port.for.OFF.to.disable the.MONITOR OUT.port.for.the.input.port MONITOR OUT or.standby.mode.chosen.in.the.step.(1) . •.If.you.have.changed.the.setting.of.STANDBY,.it.applies.only.to the.current.standby.mode,.NORMAL.or.SAVING,.selected.under STANDBY.MODE,.without.changing.the.setting.of.the.other.mode . The.factory.settings.are.as.follows: -.COMPUTER IN1.for.the.NORMAL.mode.of.STANDBY.MODE -.OFF.for.the.SAVING.mode.of.STANDBY.MODE...
-
Page 46: Audio Menu
AUDIO menu AUDIO.menu From.the.AUDIO.menu,.items.shown.in.the.table.below. can.be.performed ..Select.an.item.using.the.▲/▼.cursor. buttons,.and.press.the.►.cursor.button.or.the.ENTER. button.to.execute.the.item ..Then.perform.it.according.to. the.following.table . Item Description Using.the.◄/►.buttons.adjusts.the.volume . VOLUME Low.ó.High Using.the.▲/▼.buttons.turns.on/off.the.built-in.speaker . SPEAKER ON.ó.OFF When.OFF.is.selected,.the.built-in.speaker.does.not.work . While.the.image.signal.from.the.input.port.chosen.in.step.(1).is projected,.the.audio.signal.from.the.input.port.selected.in.step (2).is.output.to.both.the.AUDIO OUT.port.and.built-in.speaker.of this.projector ..However,.the.built-in.speaker.does.not.work.when SPEAKER.is.set.to.OFF . (1).. C hoose.a.picture.input.port.using.the ▲/▼.buttons .. Choose.STANDBY.to.select.the.sound. output.in.the.standby.mode . (2).. S elect.an.audio.input.port.or.the.mute. icon.using.the.◄/►.buttons . -
Page 47: Screen Menu
SCREEN menu SCREEN.menu From.the.SCREEN.menu,.items.shown.in.the.table. below.can.be.performed . Select.an.item.using.the.▲/▼.cursor.buttons,.and. press.the.►.cursor.button.or.ENTER.button.to. execute.the.item ..Then.perform.it.according.to.the. following.table . Item Description Using.the.▲/▼/◄/►.buttons.switches.the.OSD.(On.Screen. Display).language . ENGLISH.ó.FRANÇAIS.ó.DEUTSCH.ó..ESPAÑOL LANGUAGE ..(shown.in.the.LANGUAGE.dialog) Press.the.ENTER.or.INPUT.button.to.save.the.language.setting . Using.the.▲/▼/◄/►.buttons.adjusts.the.menu.position . MENU POSITION To.quit.the.operation,.press.the.MENU.button.on.the.remote.control. or.keep.no.operation.for.about.10.seconds . Using.the.▲/▼.buttons.switches.the.mode.for.the.blank.screen . The.blank.screen.is.a.screen.for.the.temporarily.blanking.feature (27) ..It.is.displayed.by.pressing.the.BLANK.button.on.the.remote. control . MyScreen.ó.ORIGINAL.ó.BLUE.ó.WHITE.ó.BLACK BLANK ..MyScreen.:.. - Page 48 SCREEN menu Item Description Using.the.▲/▼.buttons.switches.the.mode.for.the.start-up.screen . The.start-up.screen.is.a.screen.displayed.when.no.signal.or.an. unsuitable.signal.is.detected . MyScreen.ó.ORIGINAL.ó.OFF ..MyScreen.:.. S creen.can.be.registered.by.the.MyScreen.item.(48) . ORIGINAL.:.. S creen.preset.as.the.standard.screen . START UP OFF.:.. P lain.black.screen . •.To.avoid.remaining.as.an.afterimage,.the.MyScreen.or.ORIGINAL. screen.will.change.to.the.BLANK.screen.(above).after.several. minutes ..If.also.the.BLANK.screen.is.the.MyScreen.or.ORIGINAL,. the.plain.black.screen.is.instead.used . •.When.the.ON.is.selected.to.the.MyScreen.PASSWORD.item.in. the.SECURITY.menu.(61),.the.START.UP.is.fixed.to.MyScreen . This.item.allows.you.to.capture.an.image.for.use.as.a.MyScreen. image.which.can.be.used.as.the.BLANK.screen.and.START.UP. screen ..Display.the.image.you.want.to.capture.before.executing.the. following.procedure . Selecting.this.item.displays.a.dialog.
- Page 49 SCREEN menu Item Description Using.the.▲/▼.buttons.turns.on/off.the.MyScreen.lock.function . ON.ó.OFF When.the.ON.is.selected,.the.item.MyScreen.is.locked ..Use.this. MyScreen Lock function.for.protecting.the.current.MyScreen . •.This.function.cannot.be.selected.when.the.ON.is.selected.to.the. MyScreen.PASSWORD.item.in.SECURITY.menu.(61) . Using.the.▲/▼.buttons.turns.on/off.the.message.function . ON.ó.OFF When.the.ON.is.selected,.the.following.message.function.works . “AUTO.IN.PROGRESS”.while.automatically.adjusting “NO.INPUT.IS.DETECTED” “SYNC.IS.OUT.OF.RANGE” “INVALID.SCAN.FREQ .” “NOT.AVAILABLE” “Searching… .”.while.searching.for.the.input “Detecting… .”.while.an.input.signal.is.detected “AUTO.ECO.MODE”.while.starting.up.with.AUTO.ECO.MODE. MESSAGE The.indication.of.the.input.signal.displayed.by.changing. The.indication.of.the.aspect.ratio.displayed.by.changing The.indication.of.the.PICTURE.MODE.displayed.by.changing The.indication.of.the.MY.MEMORY.displayed.by.changing The.indication.of.“FREEZE”.and.“II”.while.freezing.the.screen.by. pressing.the.FREEZE.button . The.indication.of.the.TEMPLATE.displayed.by.changing .
- Page 50 SCREEN menu Item Description Each.input.port.for.this.projector.can.have.a.name.applied.to.it . (1).. U se.the.▲/▼.buttons.on.the.SCREEN.menu.to.select.SOURCE. NAME.and.press.the.►.or.ENTER.button ... The.SOURCE.NAME.menu.will.be.displayed . (2).. U se.the.▲/▼.buttons.on.the.SOURCE. NAME.menu.to.select.the.port.to.be. named.and.press.the.►.button ..The. SOURCE.NAME.dialog.will.be.displayed . Right.side.of.the.menu.is.blank.until.a. name.is.specified . (3).. S elect.an.icon.you.would.like.to.assign.to.. the.port.in.the.SOURCE.NAME.dialog ... SOURCE NAME The.name.assigned.to.the.port.will.also.be.. automatically.switched.according.to.your.. icon.selection ..Press.the.ENTER.or.INPUT button.to.determine.your.icon.selection . (4).. S elect.a.number.you.would.like.to.assign.. to.the.port.along.with.the.icon ..You.can..
- Page 51 SCREEN menu Item Description (6).. T he.current.name.will.be.displayed.on. the.first.line ..Use.the.▲/▼/◄/►.buttons. and.the.ENTER.or.INPUT.button.to. select.and.enter.characters ..To.erase.1. character,.press.the.RESET.button.or. press.the.◄.and.INPUT.button.at.the. same.time ..Also.if.you.move.the.cursor.to. DELETE.or.ALL.CLEAR.on.screen.and. press.the.ENTER.or.INPUT.button,.1. character.or.all.characters.will.be.erased .. The.name.can.be.a.maximum.of.16. characters . SOURCE NAME (Continued) (7).. T o.change.an.already.inserted.character,. press.the.▲.button.to.move.the.cursor.to. the.first.line,.and.use.the.◄/►.buttons.to. move.the.cursor.on.the.character.to.be. changed .. After.pressing.the ENTER.or.INPUT.button,.the.character.is. selected ...Then,.follow.the.same.procedure.as.described.at.the. item.(6).above . (8)..
- Page 52 SCREEN menu Item Description The.C .C ..is.the.function.that.displays.a. transcript.or.dialog.of.the.audio.portion.of. a.video,.files.or.other.presentation.or.other. relevant.sounds ..It.is.required.to.have.NTSC. [email protected]. video.source.supporting.C .C ..feature.to. utilize.this.function . It.may.not.work.properly,.depending.on.equipment.or.signal.source .. In.this.case,.please.turn.off.the.Closed.Caption . DISPLAY Select.Closed.Caption.DISPLAY.setting.from.following.options.using. ▲/▼.buttons . AUTO.ó.ON.ó.OFF. AUTO.:.. C losed.Caption.automatically.displays.when.the.volume. is.muted . ON.:.Closed.Caption.is.on . OFF.:.Closed.Caption.is.off . •.The.caption.is.not.displayed.when.the.OSD.menu.is.active . •.The.Closed.Caption.is.the.function.to.display.the.dialog,. narration,.and./.or.sound.effects.of.a.television.program.or.other. video.sources ..The.Closed.Caption.availability.is.depending.upon. C.C.
-
Page 53: Option Menu
OPTION menu OPTION.menu From.the.OPTION.menu,.items.shown.in.the.table. below.can.be.performed . Select.an.item.using.the.▲/▼.cursor.buttons,.and. press.the.►.cursor.button.or.ENTER.button.to.execute. the.item,.except.for.the.items.LAMP.TIME.and.FILTER. TIME ..Then.perform.it.according.to.the.following.table . Item Description Using.the.▲/▼.buttons.turns.on/off.the.automatic.signal.search. function . ON.ó.OFF When.the.ON.is.selected,.detecting.no.signal.automatically.cycles. AUTO SEARCH through.input.ports.in.the.following.order ..The.search.is.started.from. the.current.port ..Then.when.an.input.is.found,.the.projector.will.stop. searching.and.display.the.image ....COMPUTER.IN1..COMPUTER.IN2......VIDEO..ï..S-VIDEO. Using.the.▲/▼.buttons.turns.on/off.the.DIRECT.POWER.ON. function . ON.ó.OFF When.set.to.ON,.the.lamp.in.projector.will.be.automatically.turned.on. without.the.usual.procedure.(18),.only.when.the.projector.is.supplied. DIRECT POWER with.the.power.after.the.power.was.cut.while.the.lamp.was.on . •.This.function.does.not.work.as.long.as.the.power.has.been. supplied.to.the.projector.while.the.lamp.is.off . -
Page 54: Uto Power Off
OPTION menu Item Description Using.the.▲/▼.buttons.adjusts.the.time.to.count.down.to. automatically.turn.the.projector.off . Long.(max ..99.minutes).ó.Short.(min ..0.minute.=.DISABLE) When.the.time.is.set.to.0,.the.projector.is.not.turned.off.automatically . AUTO POWER When.the.time.is.set.to.1.to.99,.and.when.the.passed.time.with.no- signal.or.an.unsuitable.signal.reaches.at.the.set.time,.the.projector. lamp.will.be.turned.off .. If.one.of.the.projector's.buttons.or.the.remote.control.buttons. is.pressed.or.one.of.the.commands.(except.get.commands).is. transmitted.to.the.CONTROL.port.during.the.corresponding.time,. projector.will.not.be.turned.off . Please.refer.to.the.section.“Turning.off.the.power” (19) . (continued.on.next.page) - Page 55 OPTION menu Item Description The.lamp.time.is.the.usage.time.of.the.lamp,.counted.after.the.last. resetting ..It.is.shown.in.the.OPTION.menu . Pressing.the.RESET.button.on.the.remote.control.or.the.►.button. of.the.projector.displays.a.dialog .. To.reset.the.lamp.time,.select.the.OK.using.the.►.button . LAMP TIME CANCEL..OK •.Please.reset.the.lamp.time.only.when.you.have.replaced.the.lamp,. for.a.suitable.indication.about.the.lamp . •.For.the.lamp.replacement,.see.the.section."Replacing.the.lamp".(66) . The.filter.time.is.the.usage.time.of.the.air.filter,.counted.after.the.last. resetting ..It.is.shown.in.the.OPTION.menu . Pressing.the.RESET.button.on.the.remote.control.or.the.►.button. of.the.projector.displays.a.dialog .. To.reset.the.filter.time,.select.the.OK.using.the.►.button . FILTER TIME CANCEL..OK •.Please.reset.the.filter.time.only.when.you.have.cleaned.or.replaced. the.air.filter,.for.a.suitable.indication.about.the.air.filter . •.For.the.air.filter.cleaning,.see.the.section.“Cleaning.and.replacing. the.air.filter”.(68, 69) . (continued.on.next.page)
- Page 56 OPTION menu Item Description This.item.is.to.assign.one.of.the.following.functions.to.MY BUTTON 1/2.on.the.remote.control.(7) . (1). . Use.the.▲/▼.buttons.on.the.MY.BUTTON.menu.to.select.a.MY. BUTTON.-.(1/2).and.press.the.►.or.ENTER.button.to.display.the. MY.BUTTON.setup.dialog .. (2). . Then.using.the.▲/▼/◄/►.buttons.sets.one.of.the.following. functions.to.the.chosen.button ..Press.the.ENTER.or.INPUT button.to.save.the.setting . •.COMPUTER.IN1:.Selects.the.input.from.COMPUTER IN1 port . •.COMPUTER.IN2:.Selects.the.input.from.COMPUTER IN2 port . •.S-VIDEO:.Selects.the.input.from.S-VIDEO port . •.VIDEO:.Selects.the.input.from.VIDEO port . MY BUTTON •.. I NFORMATION:.Displays.SYSTEM_INFORMATION.or.. INPUT_INFORMATION.(60) •..
- Page 57 OPTION menu Item Description •.PICTURE.MODE:.Changes.the.PICTURE.MODE.(30) . •.. F ILTER.RESET:.Displays.the.fi . lter.time.reset.confi . rmation.dialogue.(55) . •.. T EMPLATE:.Makes.the.template.pattern.selected.to.the. TEMPLATE.item.(51).appear.or.disappear . •.. A V.MUTE:.Turns.the.picture.and.audio.on/off . •.. D -ZOOM:.Turns.the.D-ZOOM.mode.on/off ..When.the.D-ZOOM. mode.is.on,.use.the.◄/►.cursor.buttons.to.adjust.the.magnifi . cation. MY BUTTON ratio . (Continued) •.. D -SHIFT:.Turns.the.D-SHIFT.mode.on/off ..When.the.D-SHIFT. mode.is.on,.use.the.▲/▼/◄/►.cursor.buttons.to.move.the. magnifying.area .
- Page 58 OPTION menu Item Description Selecting.this.item.displays.the.SERVICE. menu . Select.an.item.using.the.▲/▼.buttons,.and. press.the.►.button.or.the.ENTER.button. on.the.remote.control.to.execute.the.item . ALTITUDE Using.the.▲/▼.buttons.switches.the.rotation.speed.of.the.cooling. fans ..If.the.projector.is.used.at.an.altitude.of.about.1600.m.or.higher,. select.HIGH ..Otherwise,.select.NORMAL ..Note.that.the.projector.is. noisier.when.the.HIGH.is.selected . HIGH.ó.NORMAL AUTO ADJUST Using.the.▲/▼.buttons.to.select.one.of.the.mode ..When.the. DISABLE.is.selected,.the.automatic.adjustment.feature.is.disabled . FINE.ó.FAST.ó.DISABLE FINE:.Finer.tuning.including.H .SIZE.adjustment . FAST:.. F aster.tuning,.setting.H .SIZE.to.prearranged.data.for.the. input.signal . •.Depending.on.conditions,.such.as.input.image,.signal.cable.to. the.projector,.environment.around.the.projector,.etc .,.the.automatic. SERVICE adjustment.may.not.work.correctly ...In.such.a.case,.please.
- Page 59 OPTION menu Item Description KEY LOCK (1).. U se.the.▲/▼.buttons.to.select.CONTROL.PANEL.or.REMOTE. CONTROL . (2).Use.the.◄/►.buttons.to.turn.the.key.lock.function.on/off . When.ON.is.selected,.all.buttons.on.the.projector.or.remote.control except.the.STANDBY/ON are.locked . •.Please.use.this.function.to.prevent.tampering.or.accidental. operation .. •.It.is.not.possible.to.set.both.CONTROL.PANEL.and.REMOTE. CONTROL.to.ON . SERVICE REMOTE FREQ. (continued) (1). . Use.the.▲/▼.button.to.change.the.projector's.remote.sensor. frequency.setting.(17) . 1:NORMAL.ó.2:HIGH (2). . Use.the.◄/►.button.to.change.the. projector's.remote.sensor.on.or.off . ON.ó.OFF The.factory.default.setting.is.for.both.1:NORMAL.and.2:HIGH.to.be. on ..If.the.remote.control.does.not.function.correctly,.disable.either.of.
- Page 60 OPTION menu Item Description INFORMATION Selecting.this.item.displays.a.dialog.titled.“INPUT_INFORMATION” .. It.shows.the.information.about.the.current.input . •.The.“FRAME.LOCK”.message.on.the.dialog.means.the.frame.lock. function.is.working .. SERVICE •.This.item.can't.be.selected.for.no.signal.and.sync.out . (continued) •.When.the.MY.TEXT.DISPLAY.is.set.to.ON,.the.MY.TEXT.is. displayed.together.with.the.input.information.in.the.INPUT_ INFORMATION.box.(65) . FACTORY RESET Selecting.OK.using.the.►.button.performs.this.function ..By.this. function,.all.the.items.in.all.of.menus.will.collectively.return.to.the. initial.setting ..Note.that.the.items.LAMP.TIME,.FILTER.TIME,. LANGUAGE,.FILTER.MESSAGE.and.SECURITY.settings.are.not. reset . CANCEL..OK Be.sure.to.set.ALTITUDE.after.resetting.all.the.settings.(58) .
-
Page 61: Security Menu
SECURITY menu SECURITY.menu This.projector.is.equipped.with.security.functions . From.the.SECURITY.menu,.items.shown.in.the.table. below.can.be.performed . To.use.SECURITY.menu:.User.registration.is.required. before.using.the.security.functions . Enter to the SECURITY menu 1 ... P ress.the.►.button ..The.ENTER.PASSWORD.box.will.be.displayed ... 2 ... U se.the.▲/▼/◄/►.buttons.to.enter.the.registered.password ..The. factory.default.password.is.as.follows .. 7420 (below) This.password.can.be.changed. ..Move.the.cursor.to. the.right.side.of.the.ENTER.PASSWORD.box.and.press.the.►. button.to.display.the.SECURITY.menu . •.It.is.strongly.recommended.the.factory.default.password.to.be. changed.as.soon.as.possible . •.If.an.incorrect.password.is.input,.the.ENTER.PASSWORD.box. will.be.displayed.again ..If.incorrect.password.is.input.3.times,.the. - Page 62 SECURITY menu Item Description The.MyScreen.PASSWORD.function.can.be.used.to.prohibit.access.to.the. MyScreen.function.and.prevent.the.currently.registered.MyScreen.image. from.being.overwritten . 1 Turning on the MyScreen PASSWORD 1-1.. U se.the.▲/▼.buttons.on.the.SECURITY.menu.to. select.MyScreen.PASSWORD.and.press.the.►. button.to.display.the.MyScreen.PASSWORD.on/ off.menu . 1-2.. U se.the.▲/▼.buttons.on.the.MyScreen. PASSWORD.on/off.menu.to.select.ON .. The.ENTER.NEW.PASSWORD.box.(small). will.be.displayed . ENTER.NEW.PASSWORD. 1-3.. U se.the.▲/▼/◄/►.buttons.to.enter.the. box.(small) password ..Move.the.cursor.to.the.right.side. of.the.ENTER.NEW.PASSWORD.box.(small). and.press.the.►.button.to.display.the.NEW. PASSWORD.AGAIN.box,.enter.the.same. PASSWORD.again . 1-4..
- Page 63 SECURITY menu Item Description PIN.LOCK.is.a.function.which.prevents.the.projector.from.being.used.unless. a.registered.Code.is.input . 1 Turning on the PIN LOCK 1-1.. U se.the.▲/▼.buttons.on.the.SECURITY.menu. to.select.PIN.LOCK.and.press.the.►.button.or. the.ENTER.button.to.display.the.PIN.LOCK.on/off. menu . 1-2.. U se.the.▲/▼.buttons.on.the.PIN.LOCK.on/ off.menu.to.select.ON.and.the.Enter.PIN. Code.box.will.be.displayed .. 1-3.. I nput.a.4.part.PIN.code.using.the.▲/▼/◄/►,. COMPUTER.or.INPUT.button .. The.PIN.Code.again.box.will.appear ..Reenter. the.same.PIN.code ..This.will.complete.the.PIN. code.registration . •. If.there.is.no.key.input.for.about.55.seconds.. while.the.Enter.PIN.Code.box.or.the.PIN.Code.again.box.is.displayed,. the.menu.will.close ..If.necessary,.repeat.the.process.from.1-1 .
-
Page 64: Y Text Password
SECURITY menu Item Description The.MY.TEXT.PASSWORD.function.can.prevent.the.MY.TEXT.from.being. overwritten ..When.the.password.is.set.for.the.MY.TEXT; •.The.MY.TEXT.DISPLAY.menu.will.be.unavailable,.which.can.prohibit. changing.the.DISPLAY.setting . •.The.MY.TEXT.WRITING.menu.will.be.unavailable,.which.can.prevent.the. MY.TEXT.from.being.overwritten . 1 Turning on the MY TEXT PASSWORD 1-1.. U se.the.▲/▼.buttons.on.the.SECURITY.menu.to. select.the.MY.TEXT.PASSWORD.and.press.the. ►.button.to.display.the.MY.TEXT.PASSWORD. on/off.menu . 1-2.. U se.the.▲/▼.buttons.on.the.MY.TEXT. PASSWORD.on/off.menu.to.select.ON ..The. ENTER.NEW.PASSWORD.box.(small).will. be.displayed . 1-3.. U se.the.▲/▼/◄/►.buttons.to.enter.the. ENTER.NEW.PASSWORD. . box.(small) password ..Move.the.cursor.to.the.right.side. -
Page 65: Y Text Display
SECURITY menu Item Description (1).. U se.the.▲/▼.buttons.on.the.SECURITY.menu.to. select.the.MY.TEXT.DISPLAY.and.press.the.►.or. ENTER.button.to.display.the.MY.TEXT.DISPLAY. on/off.menu . (2).. U se.the.▲/▼.buttons.on.the.MY.TEXT.DISPLAY.on/off.menu.to.select. on.or.off . ON.ó.OFF MY TEXT When.it.is.set.ON,.the.MY.TEXT.will.be.displayed. DISPLAY on.the.START.UP.screen.and.the.INPUT_ INFORMATION.when.the.INFORMATION.on.the. SERVICE.menu.is.chosen . •.This.function.is.available.only.when.the.MY.TEXT. PASSWORD.function.is.set.to.the.OFF . (1).. U se.the.▲/▼.buttons.on.the. SECURITY.menu.to.select.the.MY. TEXT.WRITING.and.press.the.►. button ..The.MY.TEXT.WRITING.dialog. will.be.displayed . (2).. T he.current.MY.TEXT.will.be.displayed. on.the.first.3.lines ..If.not.yet.written,.the. -
Page 66: Maintenence
Maintenance Maintenance. Replacing the lamp A.lamp.has.fi . nite.product.life ..Using.the.lamp.for.long.periods.of.time.could.cause. the.pictures.darker.or.the.color.tone.poor ..Note.that.each.lamp.has.a.different. lifetime,.and.some.may.burst.or.burn.out.soon.after.you.start.using.them . Preparation.of.a.new.lamp.and.early.replacement.are.recommended ..To.prepare. a.new.lamp,.make.contact.with.your.dealer.and.tell.the.lamp.type.number . Lamp.cover Type number : DT01511 Replacing the lamp Turn.the.projector.off,.and.unplug.the.power.cord .. Allow.the.projector.to.cool.for.at.least.45.minutes . Prepare.a.new.lamp ..If.the.projector.is.mounted.on. a.ceiling,.or.if.the.lamp.has.broken,.also.ask.the. dealer.to.replace.the.lamp . In case of replacement by yourself, follow the following procedure. Loosen.the.screw.(marked.by.arrow).of.the.lamp. - Page 67 Maintenance Replacing the lamp (continued) Lamp warning HIGH TEMPERATURE HIGH PRESSURE HIGH VOLTAGE WARNING ►The.projector.uses.a.high-pressure.mercury.glass.lamp ..The.lamp. can.break.with.a.loud.bang,.or.burn.out,.if.jolted.or.scratched,.handled.while.hot,.or. worn.over.time ..Note.that.each.lamp.has.a.different.lifetime,.and.some.may.burst.or. burn.out.soon.after.you.start.using.them ..In.addition,.if.the.bulb.bursts,.it.is.possible. for.shards.of.glass.to.fl . y.into.the.lamp.housing,.and.for.gas.containing.mercury.and. dust.containing.fi . ne.particles.of.glass.to.escape.from.the.projector’s.vent.holes . ►About disposal of a lamp:.This.product.contains.a.mercury.lamp;.do.not.put. it.in.a.trash ..Dispose.of.it.in.accordance.with.environmental.laws . •.For.lamp.recycling,.go.to.www .lamprecycle .org.(in.the.US) . •.For.product.disposal,.consult.your.local.government.agency.
-
Page 68: Cleaning.and.replacing.the.air.filter
Maintenance Cleaning and replacing the air fi lter The.air.fi . lter.unit.of.this.projector.consists.of.a.fi . lter.cover,.two.kinds.of.fi . lters,.and. a.fi . lter.frame ..The.new.double.large.fi . lters.system.is.expected.to.function.longer .. However,.please.check.and.clean.it.periodically.to.keep.ventilation.needed.for. normal.operation.of.the.projector . When.the.indicators.or.a.message.prompts.you.to.clean.the.air.fi . lter,.comply.with. it.as.soon.as.possible ..Replace.the.fi . lters.when.they.are.damaged.or.too.soiled .. To.prepare.new.fi . lters,.make.contact.with.your.dealer.and.tell.the.following.type. number . Type number : UX37191.(Filter.set) When.you.replace.the.lamp,.please.replace.the.air.fi . - Page 69 Maintenance Cleaning and replacing the air fi lter (continued) Turn.the.projector.on.and.reset.the.fi . lter.time.using.the.FILTER.TIME.item.in. the.EASY.MENU . (1).Press.the.MENU.button.to.display.a.menu .. (2).. P oint.at.the.FILTER.TIME.using.the.▼/▲.button,.then.press.the.►.button .. A.dialog.will.appear . (3).. P ress.the.►.button.to.select.“OK”.on.the.dialog ..It.performs.resetting.the. fi . lter.time . WARNING ►Before.taking.care.of.the.air.fi . lter,.make.sure.the.power.cable. is.not.plugged.in,.then.allow.the.projector.to.cool.suffi . ciently ..Taking.care.of.the. air.fi . lter.in.a.high.temperature.state.of.the.projector.could.cause.an.electric.shock,. a.burn.or.malfunction.to.the.projector .
-
Page 70: Other.care
Maintenance Other care Inside of the projector In.order.to.ensure.the.safe.use.of.your.projector,.please.have.it.cleaned.and. inspected.by.your.dealer.about.once.every.year . Caring for the lens •.. I f.the.lens.is.fl . awed,.soiled.or.fogged,.it.can.cause.deterioration.in.display.quality . Handle.the.projector.carefully.to.prevent.the.lens.from.being.scratched.or.soiled . •.. I f.the.lens.is.soiled.or.fogged,.please.take.care.of.the.lens.by.following.steps. below . Turn.the.projector.off,.and.unplug.the.power.cord ..Allow.the.projector.to.cool. suffi . ciently . After.making.sure.that.the.projector.is.cool.adequately,.lightly.wipe.the.lens with.a.commercially.available.lens-cleaning.wipe ..Do.not.touch.the.lens. directly.with.your.hand . Caring for the cabinet and remote control Incorrect.care.could.have.adverse.infl . -
Page 71: Troubleshooting
Troubleshooting Troubleshooting If.an.abnormal.operation.should.occur,.stop.using.the.projector.immediately . WARNING ►Never.use.the.projector.if.abnormal.operations.such.as.smoke,. strange.odor,.excessive.sound,.damaged.casing.or.elements.or.cables,.penetration. of.liquids.or.foreign.matter,.etc ..should.occur ..In.such.cases,.immediately.disconnect. the.power.plug.from.the.power.outlet ..After.making.sure.that.the.smoke.or.odor.has. stopped,.contact.to.your.dealer.or.service.company . Otherwise.if.a.problem.occurs.with.the.projector,.the.following.checks.and.measures.are. recommended.before.requesting.repair . If.this.does.not.resolve.the.problem,.please.contact.your.dealer.or.service.company ..They. will.tell.you.what.warranty.condition.is.applied . Related messages When.some.message.appears,.check.and.cope.with.it.according.to.the.following.table .. Although.these.messages.will.be.automatically.disappeared.around.several.minutes,.it.will. be.reappeared.every.time.the.power.is.turned.on . Message Description There is no input signal. Please.confi . rm.the.signal.input.connection,.and.the.status. of.the.signal.source . The COMPUTER IN2/MONITOR OUT port is selected as the picture input source even if MONITOR OUT is selected for COMPUTER IN2 (54) . - Page 72 Troubleshooting Related messages (continued) Message Description The horizontal or vertical frequency of the input signal is not within the specified range. Please.confirm.the.specs.for.your.projector.or.the.signal. source.specs . An improper signal is input. Please.confirm.the.specs.for.your.projector.or.the.signal. source.specs . The internal temperature is rising. Please.turn.the.power.off,.and.allow.the.projector.to.cool. down.at.least.20.minutes ..After.having.confirmed.the. following.items,.please.turn.the.power.ON.again ..
-
Page 73: Regarding.the.indicator.lamps
Troubleshooting Regarding the indicator lamps When.operation.of.the.LAMP,.TEMP and POWER.indicators.differs.from.usual,. check.and.cope.with.it.according.to.the.following.table . POWER LAMP TEMP Description indicator indicator indicator The projector is in a standby state. Lighting Turned Turned Please.refer.to.the.section.“Power.on/off” . In.Orange Blinking Turned Turned The projector is warming up. Green Please.wait . Lighting Turned Turned... - Page 74 Troubleshooting Regarding the indicator lamps (continued) POWER LAMP TEMP Description indicator indicator indicator There is a possibility that the interior portion has become heated. Please.turn.the.power.off,.and.allow.the.projector.to.cool.down.at.least. 20.minutes ..After.the.projector.has.sufficiently.cooled.down,.please.make. Blinking confirmation.of.the.following.items,.and.then.turn.the.power.on.again . •.Is.there.blockage.of.the.air.passage.aperture? Turned Lighting •.Is.the.air.filter.dirty? In.Red Lighting •.Does.the.peripheral.temperature.exceed.40°C? In.Red •.Is.the.projector.used.at.an.altitude.of.about.1600.m.or. higher?.If.the.projector.is.used.at.an.altitude.of.about. 1600.m.or.higher,.set.ALTITUDE.of.the.SERVICE.item.
-
Page 75: Resetting.all.settings
Troubleshooting Resetting all settings When.it.is.hard.to.correct.some.wrong.settings,.the.FACTORY.RESET.function.of. SERVICE.item.in.OPTION.menu.(60).can.reset.all.settings.(except.settings.such. as.LANGUAGE,.LAMP.TIME,.FILTER.TIME,.FILTER.MESSAGE.and.SECURITY). to.the.factory.default ..Be.sure.to.set.ALTITUDE.after.resetting.all.the.settings(58) .. Phenomena that may be easy to be mistaken for machine defects About.the.phenomenon.confused.with.a.machine.defect,.check.and.cope.with.it. according.to.the.following.table . Reference Phenomenon Cases not involving a machine defect page The electrical power cord is not plugged in. Correctly.connect.the.power.cord . - Page 76 Troubleshooting Phenomena that may be easy to be mistaken for machine defects (continued) Reference Phenomenon Cases not involving a machine defect page The signal cables are not correctly connected. 10.~.14 Correctly.connect.the.audio.cables . The MUTE function is working. Restore.the.sound.pressing.MUTE.or.VOLUME +/-.button. on.the.remote.control . Sound.does.not.
- Page 77 Troubleshooting Phenomena that may be easy to be mistaken for machine defects (continued) Reference Phenomenon Cases not involving a machine defect page The signal cables are not correctly connected. 10.~.14 Correctly.connect.the.connection.cables . The brightness is adjusted to an extremely low level. Adjust.BRIGHTNESS.to.a.higher.level.using.the.menu.function .
- Page 78 Troubleshooting Phenomena that may be easy to be mistaken for machine defects (continued) Reference Phenomenon Cases not involving a machine defect page The FREEZE function is working. Video.screen display.freezes . Press.FREEZE.button.to.restore.the.screen.to.normal . Color settings are not correctly adjusted. Colors.have.a 33,.38 Perform.picture.adjustments.by.changing.the.COLOR.TEMP,.COLOR,.
- Page 79 Troubleshooting Phenomena that may be easy to be mistaken for machine defects (continued) Reference Phenomenon Cases not involving a machine defect page The SAVING function is working. RS-232C.does. not.work . Select.NORMAL.for.STANDBY.MODE.item.in.the.SETUP.menu . NOTE •.Although.bright.spots.or.dark.spots.may.appear.on.the.screen,.this. is.a.unique.characteristic.of.liquid.crystal.displays,.and.it.does.not.constitute.or. imply.a.machine.defect .
-
Page 80: Specifications
Specifications Specifications Please.see.the.Specifications.in.the.User’s Manual (concise).which.is.a.book . End User License Agreement for the Projector Software •.Software.in.the.projector.consists.of.the.plural.number.of.independent.software. modules.and.there.exist.our.copyright.or/and.third.party.copyrights.for.each.of. such.software.modules . •.Be.sure.to.read.“End.User.License.Agreement.for.the.Projector.Software”.which. is.separated.document ..(in.the.CD)