
Related Manuals for LG STYLER S3WERB


Summary of Contents for LG STYLER S3WERB
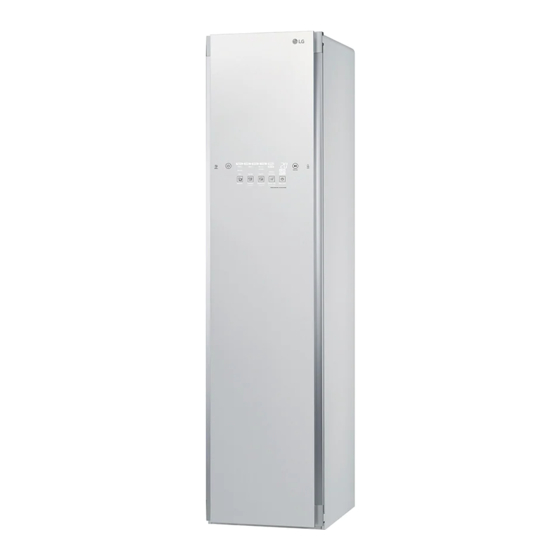
- Page 1 OWNER’S MANUAL STYLER Read this owner’s manual thoroughly before operating the appliance and keep it handy for reference at all times. S3RERB www.lg.com MFL66101219...
-
Page 2: Table Of Contents
TABLE OF CONTENTS TABLE OF CONTENTS Checking the Water Tanks IMPORTANT SAFETY INSTRUCTIONS Loading the Styler Safety Instructions for Installation Hangers Safety Instructions for Connecting Electricity Using the Moving Hanger Basic Safety Precautions Pants Hanger or Pants Crease Care Grounding Instructions Shelf Control Panel PRODUCT FEATURES... -
Page 3: Important Safety Instructions
Check with an authorized LG user-repair instructions that you understand service center for use under other special and have the skills to carry out. Failure to circumstances. -
Page 4: Safety Instructions For Connecting Electricity
Failure y Contact LG or a qualified repair person to follow these instructions can create an immediately to repair or replace all electric shock hazard and/or a fire hazard. - Page 5 IMPORTANT SAFETY INSTRUCTIONS IMPORTANT SAFETY INSTRUCTIONS READ ALL INSTRUCTIONS BEFORE USING THE APPLIANCE. WARNING To reduce the risk of fire or explosion, electric shock, property damage, injury to persons or death when using this appliance, follow basic safety precautions, including the following: •...
-
Page 6: Grounding Instructions
IMPORTANT SAFETY INSTRUCTIONS WARNING To reduce the risk of fire or explosion, electric shock, property damage, injury to persons or death when using this appliance, follow basic safety precautions, including the following: • Do not open door during operation. The •... -
Page 7: Product Features
PRODUCT FEATURES PRODUCT FEATURES REMOVE ODORS Use the Styler's Refresh cycle to quickly and easily remove odors from clothes. Control Lock REFRESH CLOTHING OR ADD AN AROMA Infuse items with the aroma from your favorite dryer fabric softener sheets to keep clothes and accessories looking, feeling, and smelling refreshed. -
Page 8: Product Overview
PRODUCT OVERVIEW PRODUCT OVERVIEW PARTS interior light hooks for Pants Crease Care moving hanger interior light Pants Crease Care shelf holder door* shelf aroma filter steam nozzle hot air circulation vent water water supply tank drain tank drip tray * The door swing can be reversed by the installer to fit the installation location. -
Page 9: Accessories
If the fit is too loose, it may result in vibration, noise, and damage to clothing. NOTE y Contact the store where the product was purchased or LG customer service at 1-800-243-0000 (1-888-542-2623 in Canada) if any accessories are damaged or missing. Accessories can be purchased separately online at http://www.lg.com/us y For your safety and for extended product life, use only authorized components. -
Page 10: The Moving Hanger
Pants Crease Care feature. This cycle can • Clothing should be securely fastened, with be downloaded using the LG Smart Styler zippers and buttons closed, so that it does not app and used as the Downloaded cycle. For fall off the moving hanger during the cycle. -
Page 11: The Shelf
PRODUCT OVERVIEW THE SHELF CHOOSING STYLER FEATURES Use the shelf when styling clothes or other items item how to style it that are difficult to hang or that may be damaged by hang drying. suit coat, blazer moving hanger coat, jacket (short) moving hanger moving hanger coat (long) -
Page 12: Installation
INSTALLATION INSTALLATION INSTALLATION OVERVIEW Please read the following installation instructions first after purchasing this product or transporting it to another location. Check and choose the Level the Styler Reverse the door swing proper location (if needed) 100–130V only Connect to grounded outlet PRODUCT SPECIFICATIONS The appearance and specifications listed in this manual may vary due to constant product improvements. -
Page 13: Unpacking The Styler
INSTALLATION UNPACKING THE STYLER • Remove tape and any temporary labels from the Styler before using. Do not remove any warning labels, the model WARNING and serial number label, or the Tech Sheet that y Use two or more people to move and is located under the front of the Styler. -
Page 14: Installation Location Requirements
INSTALLATION INSTALLATION LOCATION REQUIREMENTS WARNING Read all installation instructions completely before installing and operating the Styler. It is important to review this entire manual before installing and using the Styler. The installation requires: y A grounded electrical outlet located within y A sturdy floor to support the total appliance 2 ft. - Page 15 INSTALLATION Recommended Installation Spacing The following clearances are recommended for the Styler. Although the Styler has been tested for clearances of 1 inch (3 cm) on the sides and rear, recommended clearances should be considered for the following reasons: y Additional space should be considered for ease of installation and servicing.
-
Page 16: Leveling The Styler
INSTALLATION LEVELING THE STYLER WARNING WARNING y The Styler is heavy. Use two or more people if installing the rear leveling feet. y To reduce the risk of injury to persons, Failure to do so can result in back injury or adhere to all industry recommended other injury. -
Page 17: Reversing The Door
Keep fingers and hands out from under the LG Customer Information Center at the spikes when setting the unit in place to 1-800-243-0000 (USA) or 1-888-542-2623 avoid personal injury or product damage. -
Page 18: Installing The Anti-Tip Device
INSTALLATION ASSEMBLING THE DRIP TRAY 3 Place the adhesive side of the non-skid pad on the floor. Before using the Styler, insert the drip tray onto This side up the bottom of the cabinet. Adhesive side 1 Hold the tray so the arrow and letter on Remove the front of the tray face up. backing 2 Insert one side of the tray first, then 4 Recheck the Styler's levelness. -
Page 19: Operation
Unpack accessories. Unpack the shelf and hangers. For instructions on installing or using accessories, see Loading the Styler, pages 25-28. Accessories can be purchased separately from the LG Customer Information Center. Call 1-800-243-0000 (USA) or 1-888-542-2623 (Canada). Assemble the drip tray. -
Page 20: Using The Styler
OPERATION USING THE STYLER 1 PREPARE ITEMS • Wash clothes first, if needed. • No heat-sensitive items or items that can be damaged by exposure to water. See Choosing Styler-Safe Clothing, page 21. • Place items on hangers or the shelf. •... -
Page 21: Sorting Loads
OPERATION SORTING LOADS Grouping Similar Items • For best fabric care results, always treat fabrics Fabric Care Labels with similar care requirements together. Most articles of clothing feature fabric care labels • Different fabrics have different care that include instructions for proper care. Below requirements, and some fabrics cannot be are some of the symbols that are relevant to treated in certain Styler cycles or should be... -
Page 22: Fabric Care Guide
OPERATION FABRIC CARE GUIDE = yes § = check label Refresh cycle Gentle Control Lock Control Lock Control Lock Sanitary fabric clothes comments cycle removing removing cycle wrinkles odors towels, socks, Wrinkles may underwear, remain in 100% jeans, cotton fabrics. cotton ... - Page 23 OPERATION FABRIC CARE GUIDE (CONTINUED) = yes § = check label Refresh cycle Gentle Control Lock Control Lock Control Lock Sanitary fabric clothes comments cycle removing removing cycle wrinkles odors suit lining, acetate blouses, neckties, pajamas thermal underwear,...
-
Page 24: Checking The Filters Before Every Load
OPERATION CHECKING THE FILTERS BEFORE EVERY LOAD Checking the Lint Filter Changing the Aroma Sheet Always make sure the lint filter is clean before Use a dryer fabric softener sheet to add a refreshing starting a new load; a clogged lint filter will aroma to items. -
Page 25: Checking The Water Tanks
OPERATION CHECKING THE WATER TANKS LOADING THE STYLER Check the water in the water tanks before use. CAUTION The water supply tank must be filled with water before using the Styler. The Styler does not work y Check all pockets to make sure that they without water. -
Page 26: Hangers
OPERATION Hangers Using the Moving Hanger The hangers that come with the Styler are for 1 Insert hangers into slots and pull down to use with the Styler only. Any plastic or metal secure the hook snugly. hanger that has a hook less than 5/32 in. (4 mm) Hooks should fit down in the slots snugly to thick and hooks snugly into the indentations in prevent noise, vibration, or damage to items the moving hanger can be used in the Styler. - Page 27 OPERATION hook Opening and Closing the Pants Hanger Using the Pants Crease Care hanger blades 1 Open the Pants Crease Care by pressing on 1 To open, fold the hook down toward the the icon on the side. hanger blades to unlock and separate the blades. hook hanger hook blades hanger blades 2 Once pants are inserted, bring the blades together and rotate the hook up and away from the blades to lock them in place. 2 Hang the pants hanger on the hook above the Pants Crease Care that best fits the length of the pants being pressed. Hanging Pants On the Pants Hanger If the pants are longer, use the higher hooks to keep the pants from hitting the floor of the 1 Remove all objects from pants pockets and...
-
Page 28: Shelf
OPERATION Shelf • Hang the shelf on the shelf holder when treating long clothes such as coats or dresses. Use the shelf for clothes and items that cannot be placed on hangers. Do not stack items on the shelf. For best drying performance, use the shelf for a single item or smaller items with space between. -
Page 29: Control Panel
This portion of the display shows which stage of Place an NFC-equipped smart phone over this the styling cycle is currently underway (Preparing, icon to use the LG Smart Styler application using Heating, Steaming, Drying, or Sanitizing). NFC (Near Field Communication) tags. See Using Tag On, page 35. - Page 30 The default Downloaded cycle is the Ready to Go cycle. Download a new cycle in this position using the LG Smart Styler application on an NFC- equipped smart phone. See Downloading Styler Cycles, page Press and hold for three seconds to activate the Smart Diagnosis™...
-
Page 31: Cycle Guide
OPERATION CYCLE GUIDE Cycle Processes Est. Cycle Setting Clothing / Fabric Type time in Prepare Heat Steam Sanitize Hr.: Min. suit, coat, school uniform, Normal scarf, wool, knitwear, outdoor/ performance clothing, towels, underwear, t-shirts, socks, jeans, Light ... -
Page 32: Choosing A Cycle
OPERATION CHOOSING A CYCLE Special Care Night Care Styler cycles are designed to fit a variety of The Night Care cycle is a special extended situations. Select the cycle and setting that best Sanitary Heavy cycle. It runs the Sanitary Heavy match the load contents and desired results for cycle and then dries periodically every hour for an maximum performance and fabric care. -
Page 33: Cycle Settings And Options
This is normal. • Download and use the LG Smart Styler app on a smart phone to confirm the current • The moving hanger will move even when only downloaded cycle or to download another the shelf is being used. -
Page 34: Special Functions
2 A tone sounds to confirm the change. * Smart Diagnosis™ Use this function with the LG Smart Styler application on a smart phone or when contacting the LG service center to help diagnose problems with the Styler. See Using Smart Diagnosis™, page 44. -
Page 35: Smart Features Tag On
Using the Tag On Function Using Tag On with Apps 1 Look for the Tag On icon next to the Start/ Touch an LG Styler’s Tag On logo with an NFC- Pause button on the control panel. equipped smart phone, and the LG Smart Styler apps use the Tag On function. LG Smart Styler... -
Page 36: Downloading Styler Cycles
SMART FEATURES Downloading Styler Cycles LG Smart Styler’s Smart Download Cycle app allows you to download a cycle for later use. The cycle is available at the Downloaded cycle position on the control panel until another cycle is downloaded. 1 Install the LG Smart 2 Select the Smart Download 3 Click through the NFC info. -
Page 37: Maintenance Regular Cleaning
MAINTENANCE MAINTENANCE Cleaning the Lint Filter Always remove the lint from the filter after every REGULAR CLEANING cycle. See Checking the Lint Filter, page 22. WARNING If the lint filter has become very dirty or clogged, wash the lint filter in warm, soapy water and To reduce the risk of fire, electric shock, or allow to dry thoroughly before reinstalling. - Page 38 MAINTENANCE 3 Make sure the drainage nozzle connected to the water drain tank and the water supply hole connected to the water supply tank are not clogged. Drainage nozzle Water supply hole 4 Allow the outsides of the tanks to dry completely before reinstalling the tanks.
-
Page 39: Troubleshooting
MAINTENANCE TROUBLESHOOTING FAQS: FREQUENTLY ASKED QUESTIONS What are aroma sheets and how do I use them? You can use your favorite brand of dryer fabric softener sheets in the aroma filter to infuse items with a refreshing aroma. The sheets will not soften garments or reduce static. To use the aroma filter, add a softener sheet before running a cycle. -
Page 40: Before Calling For Service
MAINTENANCE BEFORE CALLING FOR SERVICE Your appliance is equipped with an automatic error-monitoring system to detect and diagnose problems at an early stage. If your appliance does not function properly or does not function at all, check the following before you call for service. Operation Problem Possible Cause... - Page 41 MAINTENANCE Operation Problem Possible Cause Solutions Control panel won’t Control panel or button has dirt Dirt or foreign objects on the control panel respond on it will interfere with the operation of the buttons. Clean the control panel. Control panel is locked Disable the Control Lock function.
-
Page 42: Error Codes
MAINTENANCE Performance Problem Possible Cause Solutions Wrinkles at back of Item too large for hanger or Use the right size hanger for the item neck after cycle fabric too delicate so the fabric won't bunch up and cause wrinkles. Some fabrics are delicate and will bunch around the hanger no matter what you do. -
Page 43: Smart Diagnosis
Should you experience any problems with your appliance, it has the capability of transmitting data to your smart phone using the LG Smart Styler application or via your telephone to the LG Customer Information Center. Smart Diagnosis™ cannot be activated unless your appliance is turned on by pressing the Power button. If your appliance is unable to turn on, then troubleshooting must be done without using Smart Diagnosis™. -
Page 44: Warranty
(90) days, whichever is longer. Please retain dated receipt or delivery ticket as evidence of the Date of Purchase for proof of warranty (you may be required to submit a copy to LG or authorized representative). - Page 45 LG Canada will at its option repair or replace the Product upon receipt of proof of original retail purchase. This warranty is valid only to the original retail purchaser of the product and applies only to a Product distributed in Canada by LG Canada or an authorized Canadian distributor thereof.
- Page 46 LG Customer Information Center For inquiries or comments, visit www.lg.com or call: 1-800-243-0000 USA, Consumer User 1-888-865-3026 USA, Commercial User 1-888-542-2623 CANADA Register your product Online! www.lg.com...