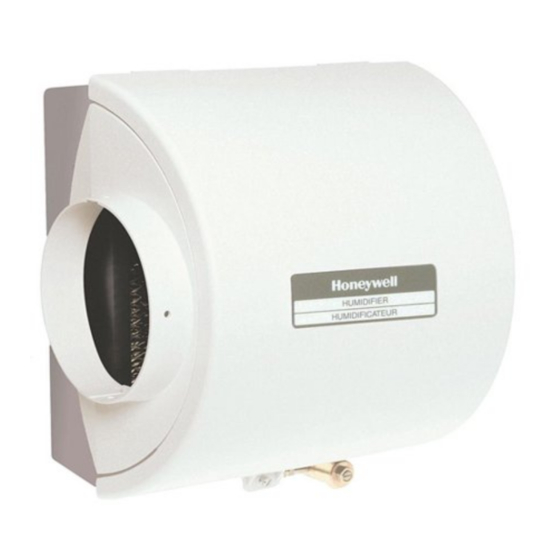
Honeywell HE260 Manual
Humidifier and installation kit
Hide thumbs
Also See for HE260:
- Installation manual & owner's manual (60 pages) ,
- Installation manual and owner's manual (41 pages) ,
- Installation instructions & owner's manual (25 pages)
Table of Contents
Available languages
Available languages
Quick Links
HE220, HE260 Humidifier and
Installation Kit
WELCOME
To the comfortable world of humidified air. When you use
your Honeywell humidifier, notice that your skin is not as
dry, and that your scratchy throat and irritated nasal
passages that aggravate allergies and asthma are
steadily improving.
You have also taken the first step in reducing the zapping
you create when you walk on your carpet and then touch
your TV, computer, metal door knob or your pet. Your
furniture and woodwork are also benefitting from the
difference that humidified air makes.
Congratulations! You have just made a great investment
in improving the comfort of your home.
APPLICATION
This kit contains your new Honeywell HE220 or HE260
Humidifier, H8908 Humidistat and all the accessories
required for installation.
INSTALLATION
Preparing for the Installation
Be sure to identify all the required (Table 1) accessories
(included) and make sure the appropriate tools are
available before beginning the installation.
INSTALLATION INSTRUCTIONS
Required Accessories (Included)
Table 1. Required Accessories.
Quantity
Accessory (Item Quantity)
Humidifier Parts and Accessories
3 ft
Bypass ducting including:
(0.93m)
6 in. (155 mm) diameter flexible duct
Starter collar
Summer shut-off damper
Duct tape
20 ft
18 gauge, two-strand thermostat wire
(6.2m)
20 ft
1/4 in. (6.35 mm) OD feed water tubing
(6.2m)
10 ft
1/2 in (12.7 mm) ID drain tubing
(3.1m)
1 bag
Connecting and mounting hardware:
Wire nuts (4)
No. 8 sheet metal screws (18)
Drain tube clamp
Feed tube mounting clamps (6)
Brass inserts (2)
Plastic compression rings (2)
1
H8908 Humidistat
1 bag
Saddle Valve Assembly:
Saddle valve and top clamp (1)
Threaded bottom clamp (1)
Bolts (2)
Rubber gasket (1)
Brass insert (1)
Plastic bushing (1)
69-2516EF-01
Table of Contents

Related Manuals for Honeywell HE260


Summary of Contents for Honeywell HE260
- Page 1 Required Accessories (Included) To the comfortable world of humidified air. When you use Table 1. Required Accessories. your Honeywell humidifier, notice that your skin is not as dry, and that your scratchy throat and irritated nasal Quantity Accessory (Item Quantity) passages that aggravate allergies and asthma are steadily improving.
- Page 2 • If you do not have a drain available, we recommend Locate humidifier where ambient temperature is that you install the Honeywell Whole House Drum or between 32°F (0°C) and 160°F (71°C). Disk Humidifier. Make sure that the 10 ft (3.1m) of...
-
Page 3: Installing The Humidifier
HE220, HE260 HUMIDIFIER AND INSTALLATION KIT WATER FEED NOZZLE ALTERNATE LOCATION HUMIDIFIER PAD ASSEMBLY RETURN RETURN FRAME 6 in. (152 mm) HUMIDIFIER 15 in. (381 mm) MINIMUM HOUSING MINIMUM COVER WATER BEST FEED TUBE LOCATION SIDEWALL RETURN AIR DUCT M12831 Fig. -
Page 4: Connecting The Plumbing
HE220, HE260 HUMIDIFIER AND INSTALLATION KIT 6 IN. ROUND TEMPLATE HUMIDIFIER PORT STARTING PLAIN COLLAR HOLE M20172 M20785 Fig. 5. Cutting bypass opening. Fig. 7. Connecting bypass ducting. 11. Assemble the summer shutoff damper into the 15. Seal the duct connections with duct tape (not starter collar. - Page 5 HE220, HE260 HUMIDIFIER AND INSTALLATION KIT BRASS COMPRESSION NUT PLASTIC COMPRESSION RING BRASS INSERT M20176 Fig. 8. Installing feed tubing. 4. Use 1/4-in. (6mm) OD tubing and connect the sad- dle valve to the inlet side of the solenoid valve on M27300 the humidifier (See Fig.
-
Page 6: Installing The Humidistat
HE220, HE260 HUMIDIFIER AND INSTALLATION KIT WIRING IMPORTANT With low-speed airflow or variable speed sys- tems it is recommended to run tubing to both the supply and return ducts. CAUTION Hazardous Voltage. Can cause personal injury or equipment damage. Disconnect power supply before installing or INSIDE servicing equipment. -
Page 7: Testing Humidifier Operation
Temperature is: Setting: -20°F (-29°C) How Your Humidifier Works -10°F (-23°C) Your Honeywell humidifier uses the principle that vapor (evaporated water) is created when warm air blows over a 0°F (-18°C) water-soaked area. As the vapor circulates, the relative humidity rises. -
Page 8: Maintaining Your Humidifier
• When leaving on vacation, turn off the humidifier water supply and your humidistat. Use the following procedure to clean your Honeywell • When you return, turn on the humidifier water supply humidifier. and reset your humidistat. -
Page 9: Troubleshooting Your Humidifier
HE220, HE260 HUMIDIFIER AND INSTALLATION KIT TROUBLESHOOTING YOUR HUMIDIFIER Table 3. Troubleshooting Humidifier. Problem What to look for What to do Water leakage Leaking joints. Shut off water. Tighten connections. Brass tubing inserts Verify that brass tubing inserts are used. -
Page 10: Limited One-Year Warranty
This warranty does not cover removal or reinstallation costs. This warranty shall not apply if it is shown by Honeywell that the defect or malfunction was caused by damage which occurred while the product was in the possession of a consumer. -
Page 11: Installation
(10 pi) Cette trousse comprend un humidificateur HE220 ou 1 sac Quincaillerie de raccordement et de fixation : HE260 et un humidostat H8908 de Honeywell ainsi que Serre-fils (4) tous les accessoires nécessaires à l'installation. Vis à tôle n 8 (18) Bride de tuyau de vidange Brides de fixation du tuyau d'arrivée d'eau... - Page 12 HUMIDIFICATEURS HE220 ET HE260 ET TROUSSE D'INSTALLATION — Installez l'humidificateur au moins 78 mm Quantité Accessoires (3 po) au-dessus du boîtier de l'appareil de chauffage afin de laisser un espace suf-fisant Pressostat d'air et accessoires pour le montage de l'électrovanne et du tuyau de vidange.
- Page 13 HUMIDIFICATEURS HE220 ET HE260 ET TROUSSE D'INSTALLATION GICLEUR COUVERCLE D'ARRIVÉE D'EAU AUTRE EMPLACEMENT ENSEMBLE ÉCRAN ÉVAPORATEUR D'HUMIDIFICATEUR REPRIS REPRIS AU MOINS CADRE AU MOINS 152 mm (6 po) 381 mm (15 po) BOÎTIER DE L'HUMIDIFICATEUR MEILLEUR EMPLACEMENT TUBE D'ARRIVÉE D'EAU...
- Page 14 HUMIDIFICATEURS HE220 ET HE260 ET TROUSSE D'INSTALLATION 10. Découpez soigneusement une ouverture pour le 12. Enlevez la pellicule sur l'adhésif en mousse. collet de raccordement de 155 mm (6 po). Con- Placez le collet de raccordement autour de l'ouver- sultez la Fig. 5. À l'aide d'une perceuse ou d'un ture.
- Page 15 HUMIDIFICATEURS HE220 ET HE260 ET TROUSSE D'INSTALLATION REMARQUE : Le robinet-vanne à étrier n'est pas conçu 1. Coupez l'alimentation électrique du TrueSTEAM pour servir de régulateur de débit d'eau. Il doit avant l'installation. être soit ouvert, soit fermé. 2. Installez le pressostat à la verticale, de façon à ce que les connecteurs à...
- Page 16 HUMIDIFICATEURS HE220 ET HE260 ET TROUSSE D'INSTALLATION 4. Percez un trou d'un diamètre de 3/4 po dans le con- 7. Connectez les fils basse tension aux conducteurs et duit à moins de 3,05 m du pressostat, afin que la remettez le boîtier du H8908. Consultez la Fig. 14.
-
Page 17: Vérification Du Fonctionnement De L'humidificateur
HUMIDIFICATEURS HE220 ET HE260 ET TROUSSE D'INSTALLATION IMPORTANT Le ventilateur de l'appareil de chauffage doit être en marche pour que l'humidificateur fonctionne. RACCORDEZ LE FIL DE L'ADAPTATEUR À LA BORNE DE TrueSTEAM C 3. Assurez-vous que l'eau s'écoule du tuyau de vidange. -
Page 18: Entretien De L'humidificateur
HUMIDIFICATEURS HE220 ET HE260 ET TROUSSE D'INSTALLATION 14. Replacez le gicleur sur le plateau. Tableau 5. Réglage de l'humidostat. 15. Remettez le plateau sur le cadre. Température extérieure Réglage recommandé 16. Mettez l’ensemble écran évaporateur d’humidifica- -29 ºC (-20 ºF) teur dans le boîtier de l’humidificateur en appuyant... -
Page 19: Dépannage De L'humidificateur
HUMIDIFICATEURS HE220 ET HE260 ET TROUSSE D'INSTALLATION 1. Mettez en marche l'humidificateur et ouvrez REMARQUE : Le ventilateur de l'appareil de chauffage l'arrivée d'eau. doit être en marche pour que l'humidifica- 2. Réglez l'humidostat à la valeur la plus élevée et teur fonctionne. - Page 20 GARANTIE LIMITÉE DE UN AN Honeywell garantit que ce produit, à l’exception de l’écran évaporateur de l’humidificateur, est exempt de tout vice de fabrication ou de matière dans la mesure où il en est fait une utilisation et un entretien convenables et ce, pour une période de un an à...