Table of Contents
Available languages
Available languages
Quick Links
产品中有毒有害物质或元素的名称及含量
部件名称
铅 (Pb)
汞 (Hg)
实装基板
×
○
外壳
×
○
显示屏
×
○
光学组件
×
○
附属品
×
○
○ ︰ 表示该有毒有害物质在该部件所有均质材料中的含量均在 SJ/T11363-2006 标准
规定的限量要求以下。
× ︰ 表示该有毒有害物质至少在该部件的某一均质材料中的含量超出 SJ/T11363-
2006 标准规定的限量要求。
Sony Corporation
CBK-VF02
(SYM/CN)
4-547-747-12(1)
使用环境条件: 温度 0 ℃ 到 40 ℃
湿度 20% 到 80%
有毒有害物质或元素
六价铬
多溴联苯
多溴二苯醚
镉 (Cd)
(Cr (VI))
(PBB)
(PBDE)
○
○
○
○
○
○
○
○
○
×
○
○
○
○
○
Printed in China
LCD COLOR VIEWFINDER
CBK-VF02
○
○
○
○
○
W14-2
このオペレーションマニュアルには、事故を防ぐための重要な注意事項と製品の取り扱いか
たを示してあります。このオペレーションマニュアルをよくお読みのうえ、製品を安全にお
使いください。お読みになったあとは、いつでも見られるところに必ず保管してください。
OPERATION MANUAL
[Japanese/English/French/German/Italian/Spanish/Chinese/Russian/Kazakh]
2014.08
1st Edition (Revised 1)
© 2014
電気製品は、安全のための注意事項を守らないと、
火災や人身事故になることがあります。
Chapters
Table of Contents

Related Manuals for Sony CBK-VF02


Summary of Contents for Sony CBK-VF02
- Page 1 LCD COLOR VIEWFINDER 产品中有毒有害物质或元素的名称及含量 CBK-VF02 使用环境条件: 温度 0 ℃ 到 40 ℃ 湿度 20% 到 80% 有毒有害物质或元素 部件名称 六价铬 多溴联苯 多溴二苯醚 铅 (Pb) 汞 (Hg) 镉 (Cd) (Cr (VI)) (PBB) (PBDE) 实装基板 × ○ ○ ○ ○ ○ 外壳 ×...
- Page 2 日本語 安全のために 電気製品は、 安全のための注意事項を守らないと、 火災や感電 警告表示の意味 などにより死亡や大けがなど人身事故につながることがあり、 オペレーションマニュアルお 危険です。 よび製品では、次のような表 事故を防ぐために次のことを必ずお守りください。 示をしています。表示の内容 をよく理解してから本文をお 安全のための注意事項を守る 読みください。 4 ページの注意事項をよくお読みください。 定期点検をする この表示の注意事項を守らな いと、感電やその他の事故に 長期間安全に使用していただくために、 定期点検を実施するこ よりけがをしたり周辺の物品 とをおすすめします。 点検の内容や費用については、 ソニーの に損害を与えたりすることが サービス担当者または営業担当者にご相談ください。 あります。 故障したら使用を中止する 注意を促す記号 ソニーのサービス担当者、 または営業担当者にご連絡ください。 万一、異常が起きたら 異常な音、におい、煙が出たら 行為を禁止する記号 1 カメラの電源を切る。 2 接続コードを抜く。 3 ソニーのサービス担当者、または営業担当者に修理を依頼...
-
Page 3: Table Of Contents
目次 注意 ...................... 4 概要 ....................5 使用上のご注意 ................5 各部の名称と働き ................6 カメラに取り付ける ................. 8 位置を調整する ................8 角度を調整する ................9 視度と画面を調整する ..............9 VF 筒部/アイピース部を跳ね上げる ..........10 画面や内部( LCD 画面)をクリーニングする ....... 12 仕様 ....................12 目次... - Page 4 注意 分解しない、改造しない ビューファインダーを回 転するときには手や指を 分解したり、改造したりする と、感電の原因となります。 挟まない ビューファインダー内部の調整 ビューファインダーを回転する や点検を行う必要がある場合 とき、本体と VF アームの間に は、必ずソニーのサービス担当 手や指を挟み、けがの原因とな 者にご依頼ください。 ることがあります。 内部に水や異物を入れない 水や異物が入ると火災の原因と なります。 万一、水や異物が入ったとき は、すぐにカメラの電源を切 り、接続コードを抜いて、ソ ニーのサービス担当者または営 業担当者にご相談ください。 油煙、湯気、湿気、ほこ りの多い場所では設置 • 使 用しない 上記のような場所で設置・使用 すると、火災や感電の原因とな ります。 ビューファインダーの接 眼レンズを太陽に向けて 放置しない 太陽光が接眼レンズを通して ビューファインダー内部に焦点 を結び、火災の原因となること があります。 太陽や輝度の高い光源に...
-
Page 5: 使用上のご注意
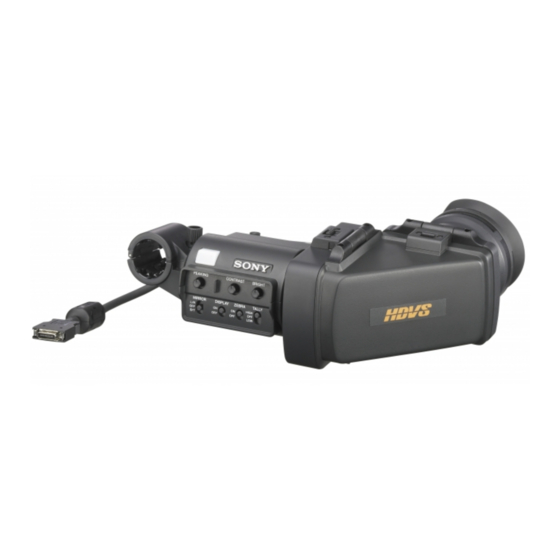
概要 使用上のご注意 CBK-VF02 は、 3.5 型 LCD カラービューファ 使用場所について インダーです。 本機には以下のような特長があります。 気温の低い場所で使用すると、電源投入直 後、動解像度が低下します。 高解像度・広視覚野 高精細 LCD の採用により、水平解像度 500TV 本以上の高解像度を実現しています。 結露について 大画面 LCD 搭載により、アイピースをはず した状態での快適な撮影が可能です。 本機を寒いところから急に暖かいところに 持ち込んだときなど、機器表面や内部に水 安定した画像 滴がつくことがあります。これを結露とい LCD 画面では、画面の明るさが変化しても います。結露が起きたときは電源を切り、 ひずみに影響しないため安定した画像が得 結露がなくなるまで放置し、結露がなく られます。 なってからご使用ください。結露時のご使 高性能ルーペ 用は機器の故障の原因となる場合がありま 非球面を含む 2 群 3 枚構成レンズを使用して... -
Page 6: 各部の名称と働き
LCD 画面の表示について 各部の名称と働き LCD パネルの特性上、長期間ご使用の間に 輝度が下がり、色温度が変化することがあ ります。これらの現象は故障ではありませ んので、ご了承の上本機をお使いください。 なお、これらの現象が記録に影響すること はありません。 また、静止画を継続的に表示すると残像が 現れることがあります。長時間使用しない ときは電源を切ってください。 電解コンデンサについて 電解コンデンサの寿命は約 5 年です。 (常温で 1 日に 8 時間、 1 カ月で 25 日間、通常 に使用すると想定した場合) したがって、使用時間が上記より長い場合 は、その分寿命は短くなります。 接眼レンズについて 本機の接眼レンズを太陽などの強い光に向 けないでください。 太陽光などの強い光がレンズによって集光 することにより、 LCD パネルの焼損や火災 の原因になるおそれがあります。 a コネクター カメラの VF 端子(角型)に接続します。 b スライドストッパー... - Page 7 f VF 筒部 n MIRROR (反転)スイッチ 使用状況に応じて、跳ね上げたり、取りは VF 筒部を跳ね上げたり、回転させたりして ずしたりすることができます。 画像が左右または上下に反転しているとき に使用します。 g タリーランプ L/R :画像を左右に反転させる カメラの REC START ボタン、レンズの VTR OFF :画像を反転させない ボタン、またはリモートコントロールユ B/T :画像を上下に反転させる ニットの VTR ボタンを押して、記録が始ま o ビューファインダーケーブル ると点灯します。 異常発生時は、点滅して警告表示を行いま p マイクホルダー す。 h PEAKING (ピーキング調整)つまみ 時計方向に回すと、画面の映像の輪郭が強 調され、レンズのフォーカス合わせが容易...
-
Page 8: カメラに取り付ける
ビューファインダーコネクターをカ カメラに取り付ける メラの VF 端子(角型)に接続する。 VF 端子(角型) ビューファインダーを取り付けたあと、接眼レン ズを太陽に向けて放置しないでください。 太陽光が接眼レンズを通して焦点を結び、火災の 原因になることがあります。 ご注意 本機を取り付けるときは、以下の点にご注意くだ さい。 • 必ずカメラの電源をオフにしてから、ビュー ファインダーコネクターをカメラの VF 端子(角 型)に差し込んでください。電源がオンの状態 でコネクターを差し込むと、本機が正常に動作 しないことがあります。 • ビューファインダーコネクターをカメラの VF 端 ご注意 子(角型)の奥まで確実に差し込んでくださ 「 UPPER 」 と記載されているほうを上向きにして接 い。コネクターが確実に接続されていないと、 続してください。 画像が乱れたり、タリーランプが正常に点灯し ないことがあります。 取りはずすには カメラの左右位置固定リングをゆる める。 カメラのビューファインダー 取り付けと逆の手順で行います。ただし、... -
Page 9: 角度を調整する
ビューファインダー左右位置固定リング 視度と画面を調整する 視度を調整するには 視度調整リングを回して、画像がはっきり 見えるように調整します。 ビューファインダー前後位置 LOCK つまみ 角度を調整する 本機の角度を調整します。 視度調整リング 画面を調整するには 画像/文字表示を上下反転させる 画面の状態を、次の項目について調整でき には ます。 輪郭: PEAKING つまみで調整する。 本機は、被写体側から見ることもできるよ 濃淡: CONTRAST つまみで調整する。 うに 180 °回転します。 明るさ: BRIGHT つまみで調整する。 この場合、画面上の画像や文字表示の上下 が逆になります。 MIRROR スイッチを B/T にすると、画像や文 字表示の上下を反転させて、通常の状態に 戻すことができます。 1 PEAKING つまみ 2 CONTRAST つまみ... -
Page 10: Vf 筒部/アイピース部を跳ね上げる
跳ね上げるには VF 筒部/アイピース 部を跳ね上げる 底のクリップを押してはずし、上に開きま す。 120 °開いた位置でロックします。 VF 筒部/アイピース部を跳ね上げると、内 部の LCD 画面またはその鏡像を見ることが できます。 ここでは、 VF 筒部の跳ね上げ/取りはずし について説明します。アイピース部も同様 に跳ね上げたり、取りはずしたりすること ができます。 通常はロック位置で使用してください。 LCD 画面 ロック位置からさらに開くこともできます が、再度 120 °の位置でロックしたい場合 は、いったん元の閉じた位置まで戻してか ら開き直してください。 VF 筒部/アイピース部を跳ね上げる... - Page 11 取りはずすには 画像/文字表示を左右反転させる には MIRROR スイッチを L/R にすると、画面上の 画像や文字表示の左右を反転させることが できます。 底のクリップを押してはずす。 VF 筒部を上げる。 上のボタンを VF 筒部と反対の方向に スライドさせてロックをはずす。 VF 筒部を水平にスライドさせて取り はずす。 VF 筒部/アイピース部を跳ね上げる...
-
Page 12: 画面や内部( Lcd 画面)をクリーニングする
画面や内部( LCD 画面) 仕様 をクリーニングする 一般 本機の画面や内部( LCD 画面)をクリーニ ングするときは、本機をカメラから取りは 電源 ずし、内部の部品を傷つけないように充分 DC10.5 〜 17.0 V (カメラから供給) 注意して行ってください。 消費電力 2.0 W 使用温度 ◆ 本機をカメラから取りはずす方法について 0 ℃〜 40 ℃ は、 「カメラに取り付ける」 ( 8 ページ)をご 保存温度 覧ください。 − 20 ℃〜+ 60 ℃ 質量... - Page 13 性能 輝度 200 cd/m ( typical ) アイピース装着時 解像度 500 本以上 色温度 6500K ( typical ) 接続端子 角型 26 ピンコネクター 付属品 オペレーションマニュアル( 1 ) 別売品 ビューファインダー回転収納機構 BKW-401 関連製品 ソリッドステートメモリーカムコーダー 1 ) PXW-X500 、 PMW-500 HD カラーカメラ 2 ) HXC-D70 1) PMW-500 に取り付ける場合は、カムコーダー側 のバージョンが...
- Page 14 This product has been manufactured by or determined by turning the equipment off and on behalf of Sony Corporation, 1-7-1 Konan on, the user is encouraged to try to correct Minato-ku Tokyo, 108-0075 Japan. Inquiries...
- Page 15 For the customers in the U.S.A. SONY LIMITED WARRANTY - Please visit http://www.sony.com/psa/warranty for important information and complete terms and conditions of Sony’s limited warranty applicable to this product. For the customers in Canada SONY LIMITED WARRANTY - Please visit http://www.sonybiz.ca/solutions/Support.do...
- Page 16 Table of Contents Overview ..................... 17 Usage Notes....................17 Names and Functions of Parts ..............18 Attaching the Viewfinder to a Camera ............ 19 Adjusting the Position ..............20 Adjusting the Angle ................ 20 Adjusting the Focus and Image Display ..........21 Raising the Viewfinder Barrel and Eyepiece ..........
-
Page 17: Overview
Overview Usage Notes The CBK-VF02 is a 3.5-inch LCD color Place of use viewfinder. When using the viewfinder in low temperature This viewfinder has the following features: environments, dynamic resolution levels may High resolution and wide visual angle decrease during the period immediately after you The viewfinder features a high-resolution LCD, turn on the power. -
Page 18: Names And Functions Of Parts
Electrolytic capacitors Names and Functions of The life expectancy of the electrolytic capacitor is Parts about 5 years under normal operating temperatures and normal usage (8 hours per day; 25 days per month). If usage exceeds the above normal usage frequency, the life expectancy may be reduced correspondingly. -
Page 19: Attaching The Viewfinder To A Camera
g Tally indicator Attaching the Viewfinder Lights up when recording is started by a press of the REC START button on the camera, the VTR to a Camera button on the lens, or the VTR button on the remote control unit. When an abnormality occurs, the tally indicator flashes to indicate a warning. -
Page 20: Adjusting The Position
Couple the viewfinder connector to the Viewfinder left-to-right positioning ring VF connector (rectangular) on the camera. VF connector (rectangular) Viewfinder front-to-back positioning knob Adjusting the Angle You can adjust the angle of the viewfinder. Note Connect with the label “UPPER” facing up. Detaching the viewfinder You can detach the viewfinder by following the attaching procedure in reverse order, but there is... -
Page 21: Adjusting The Focus And Image Display
Adjusting the Focus and Raising the Viewfinder Image Display Barrel and Eyepiece You can view the LCD screen inside the Adjusting the focus viewfinder or its mirrored image by raising up the Turn the diopter adjustment ring until the image viewfinder barrel or the eyepiece. - Page 22 Raising the viewfinder barrel Detaching the viewfinder barrel Push the clip on the bottom to release and flip up the viewfinder barrel. It locks at the 120-degree position. Normally use it in the locked position. Although you can open it farther from the lock position, once return it to the closed position to lock it at the 120-degree position again.
-
Page 23: Cleaning The Lcd Screen And Interior
Cleaning the LCD Screen Specifications and Interior General When cleaning the LCD screen or interior of the viewfinder, detach the viewfinder from the Power supply camera, detach the viewfinder barrel from the 10.5 to 17.0 V DC (supplied by the camera) body, and take care not to damage the Power consumption components. - Page 24 Operation manual (1) CLAIMS OF ANY KIND MADE BY USERS OF THIS UNIT OR MADE BY THIRD PARTIES. Optional accessories • SONY WILL NOT BE LIABLE FOR THE Viewfinder Rotation Assembly TERMINATION OR DISCONTINUATION BKW-401 OF ANY SERVICES RELATED TO THIS UNIT THAT MAY RESULT DUE TO CIRCUMSTANCES OF ANY KIND.
- Page 25 « Service (SAV) » ou Garantie. Pour les clients au Canada GARANTIE LIMITÉE DE SONY - Rendez-vous sur http://www.sonybiz.ca/solutions/ Support.do pour obtenir les informations importantes et l’ensemble des termes et conditions de la garantie limitée de Sony applicable à ce produit.
- Page 26 Table des matières Présentation....................27 Remarques d’utilisation ................27 Nomenclature et fonctions des éléments ..........28 Fixation du viseur sur une caméra............30 Ajustement de la position..............30 Ajustement de l’angle ..............31 Ajustement de la mise au point et de l’affichage de l’image....31 Relèvement de l’oculaire et du barillet du viseur ........
-
Page 27: Présentation
Présentation Remarques d’utilisation Le CBK-VF02 est un viseur couleur LCD de Lieu d’utilisation 3,5 pouces. Lorsque vous utilisez le viseur dans des Ce viseur présente les caractéristiques suivantes : environnements à basse température, les niveaux Haute résolution et grand angle visuel de résolution dynamique peuvent diminuer... -
Page 28: Nomenclature Et Fonctions Des Éléments
De plus, ces événements n’affecteront pas les Nomenclature et données enregistrées. Si une image fixe s’affiche en permanence fonctions des éléments pendant une période prolongée, une image résiduelle risque de rester visible. Mettez l’appareil hors tension lorsqu’il n’est pas utilisé. Condensateurs électrolytiques La durée de vie du condensateur électrolytique est de 5 ans environ, sous des températures de... - Page 29 f Barillet du viseur n Interrupteur MIRROR Relevez-le ou retirez-le lorsque la situation le L’affichage de l’image sur l’écran est inversé nécessite. horizontalement ou verticalement lorsque vous relevez ou tournez le barillet du viseur. Utilisez g Indicateur de signalisation cet interrupteur pour commander l’affichage de Cet indicateur s’allume lorsque l’enregistrement l’image dans de telles situations.
-
Page 30: Fixation Du Viseur Sur Une Caméra
Branchez la fiche du viseur dans le Fixation du viseur sur connecteur VF (rectangulaire) de la caméra. une caméra Connecteur VF (rectangulaire) ATTENTION Lorsque le viseur est fixé, ne laissez pas l’objectif du viseur en face du soleil. Les rayons du soleil directs peuvent entrer par l’objectif, se concentrer dans le viseur et provoquer un incendie. -
Page 31: Ajustement De L'angle
Ajustement de la mise Bague de positionnement gauche/droite du viseur au point et de l’affichage de l’image Ajustement de la mise au point Tournez la bague d’ajustement de la dioptrie jusqu’à ce que l’image soit nette. Bague de positionnement avant/arrière du viseur Ajustement de l’angle Vous pouvez ajuster l’angle du viseur. -
Page 32: Relèvement De L'oculaire Et Du Barillet Du Viseur
Relèvement du barillet du viseur Relèvement de Poussez la languette à la base pour déverrouiller l’oculaire et du barillet et sortir le barillet du viseur. Il se verrouille à la position 120 degrés. du viseur Vous pouvez voir l’écran LCD dans le viseur ou son image inversée en relevant l’oculaire ou le barillet du viseur. -
Page 33: Nettoyage De L'écran Lcd Et De L'intérieur
Retrait du barillet du viseur Nettoyage de l’écran LCD et de l’intérieur Lors du nettoyage de l’écran LCD ou de l’intérieur du viseur, retirez le viseur de la caméra, retirez le barillet du viseur du boîtier, et faites attention à ne pas endommager les composants. -
Page 34: Spécifications
76,8 × 43,2 mm (3 × 1 pouces) • Sony n’assumera pas de responsabilité pour (H/V, rapport d’aspect 16:9) les réclamations, quelle qu’elles soient, effectuées par les utilisateurs de cet appareil Performance ou par des tierces parties. - Page 35 Bereich), E3 (Stadtbereich im Freien) und E4 (kontrollierter EMV-Bereich, z.B. Fernsehstudio). Für Kunden in Europa Dieses Produkt wurde von oder für Sony Corporation, 1-7-1 Konan Minato-ku Tokio, 108-0075 Japan hergestellt. Bei Fragen zur Produktkonformität auf Grundlage der Gesetzgebung der Europäischen Union kontaktieren Sie bitte...
- Page 36 Inhalt Überblick ....................37 Hinweise zur Bedienung................37 Namen und Funktionen der Teile ............38 Anbringen des Suchers an der Kamera........... 40 Justieren der Position ..............40 Einstellen der Neigung..............41 Einstellen des Fokus und der Bildanzeige ..........41 Anheben des Suchertubus und des Suchereinblicks....... 42 Reinigen des LCD-Bildschirms und des Inneren des Suchers....
-
Page 37: Überblick
Überblick Hinweise zur Bedienung Der CBK-VF02 ist ein 3,5-Zoll-Farbsucher mit Einsatzort LCD-Technologie. Wenn der Sucher in Umgebungen mit niedriger Der Sucher weist die folgenden Eigenschaften Temperatur verwendet wird, stehen unter auf: Umständen in der ersten Zeit nach dem Hohe Auflösung und breiter Blickwinkel Einschalten zunächst weniger Stufen für die... -
Page 38: Namen Und Funktionen Der Teile
Wenn ein Standbild ununterbrochen über einen Namen und Funktionen längeren Zeitraum hinweg angezeigt wird, kann es zum Einbrennen eines "Geisterbilds" kommen. der Teile Schalten Sie das Gerät aus, wenn es längere Zeit nicht benutzt wird. Elektrolytkondensatoren Die Lebensdauer des Elektrolytkondensators beträgt bei normalen Betriebstemperaturen und normaler Verwendung etwa 5 Jahre (8 Stunden pro Tag;... - Page 39 g Kontrolleuchte o Sucherkabel Leuchtet, wenn die Aufzeichnung durch Drücken p Mikrofonhalter der Taste REC START an der Kamera, der Taste VTR am Objektiv oder der Taste VTR auf der Fernbedienung gestartet wurde. Blinkt zur Warnung bei Unregelmäßigkeiten. h Regler PEAKING Drehen Sie diesen Regelung im Uhrzeigersinn, um die Bildschärfe einzustellen und die Fokussierung zu erleichtern.
-
Page 40: Anbringen Des Suchers An Der Kamera
Verbinden Sie den Sucheranschluss mit Anbringen des Suchers dem Anschluss VF (rechteckig) der Kamera. an der Kamera Anschluss VF (rechteckig) VORSICHT Bei angebrachtem Sucher darf das Sucherobjektiv nicht in Richtung der Sonne zeigen. Andernfalls könnte durch das Objektiv eintretendes Sonnenlicht m Sucher gebündelt werden und einen Brand verursachen. -
Page 41: Einstellen Der Neigung
Einstellen des Fokus und Links-Rechts-Positionierungsring des Suchers der Bildanzeige Einstellen des Fokus Stellen Sie durch Drehen des Diopter- Einstellrings die optimale Bildschärfe ein. Vorne-Hinten-Positionierungsring des Suchers Einstellen der Neigung Sie können die Neigung des Suchers einstellen. Diopter-Einstellring Einstellen der Bildanzeige Stellen mit den im Folgenden gezeigten Vertikales Spiegeln der Anzeige (Text- Bedienelementen Helligkeit, Kontrast und... -
Page 42: Anheben Des Suchertubus Und Des Suchereinblicks
Anheben des Suchertubus Anheben des Drücken Sie auf den Clip an der Unterseite des Suchertubus und des Gerätes, um den Suchertubus zu lösen und hochzuklappen. Suchereinblicks Er wird in einer 120-Grad-Position arretiert. Sie können den LCD-Bildschirm im Sucher oder dessen Spiegelbild betrachten, indem Sie den Suchertubus oder den Suchereinblick anheben. - Page 43 Abnehmen des Suchertubus Horizontales Spiegeln der Anzeige (Text- Bild-Richtung) Indem Sie den Schalter MIRROR auf L/R stellen, können Sie das Bild und weitere auf dem Bildschirm angezeigte Informationen horizontal spiegeln. Drücken Sie zum Lösen des Suchertubus auf den Clip an der Unterseite des Gerätes.
-
Page 44: Reinigen Des Lcd-Bildschirms Und Des Inneren Des Suchers
Reinigen des LCD- Technische Daten Bildschirms und des Inneren des Suchers Allgemein Nehmen Sie zum Reinigen des LCD-Bildschirms oder des Inneren des Suchers den Sucher von der Stromversorgung Kamera ab und lösen Sie den Suchertubus vom 10,5 bis 17,0 V - (durch die Kamera) Sucher. - Page 45 • SONY KANN KEINE HAFTUNG FÜR ANSPRÜCHE JEDER ART VON DEN Optionales Zubehör BENUTZERN DIESES GERÄTS ODER VON DRITTER SEITE ÜBERNEHMEN. Sucher-Drehkranz • SONY KANN KEINE HAFTUNG FÜR DIE BKW-401 BEENDIGUNG ODER EINSTELLUNG VON DIENSTLEISTUNGEN BEZÜGLICH Passendes Zubehör DIESES GERÄTS GLEICH AUS WELCHEM GRUND ÜBERNEHMEN.
- Page 46 EMC controllati, ad esempio studi televisivi). Per i clienti in Europa Questo prodotto è stato fabbricato da o per conto di Sony Corporation, 1-7-1 Konan Minato-ku Tokyo, 108-0075 Giappone. Eventuali richieste in merito alla conformità del prodotto in ambito della legislazione...
- Page 47 Indice Descrizione generale .................. 48 Note per l’uso ..................... 48 Denominazione e funzioni dei componenti ..........49 Collegamento del mirino a una telecamera ..........51 Regolazione della posizione............51 Regolazione dell’angolo..............52 Regolazione della messa a fuoco e del display immagini......52 Sollevamento del cilindro del mirino e dell’oculare .......
-
Page 48: Descrizione Generale
Descrizione generale Note per l’uso CBK-VF02 è un mirino 3,5 pollici a colori LCD. Luogo d’impiego Questo mirino offre le seguenti caratteristiche: Quando si utilizza il mirino in ambienti a bassa Alta risoluzione ed ampio angolo visuale temperatura, i livelli di risoluzione dinamica... -
Page 49: Denominazione E Funzioni Dei Componenti
Se si visualizza un’immagine fissa in modo Denominazione e continuo per un periodo prolungato, potrebbe diventare visibile un’immagine residua. Spegnere funzioni dei componenti l’unità quando non la si utilizza per periodi prolungati. Condensatori elettrolitici La vita utile prevista del condensatore elettrolitico è... - Page 50 g Indicatore TALLY L/R: Inverte l’immagine orizzontalmente. OFF: Non inverte l’immagine orizzontalmente. Si accende quando la registrazione viene avviata B/T: Inverte l’immagine verticalmente. premendo il tasto REC START sulla telecamera o il tasto VTR sull’obiettivo o il tasto VTR sul o Cavo del mirino telecomando.
-
Page 51: Collegamento Del Mirino A Una Telecamera
Accoppiare il connettore del mirino al Collegamento del mirino connettore VF (rettangolare) della telecamera. a una telecamera Connettore VF (rettangolare) ATTENZIONE Quando il mirino è collegato, non lasciare l’obiettivo del mirino rivolto verso il sole. La luce diretta del sole potrebbe entrare attraverso l’obiettivo, venire messa a fuoco nel mirino e provocare un incendio. -
Page 52: Regolazione Dell'angolo
Rotellina di posizionamento Regolazione della sinistra-destra del mirino messa a fuoco e del display immagini Regolazione della messa a fuoco Ruotare il regolatore delle diottrie fino a quando l’immagine visualizzata non diventa nitida. Rotellina di posizionamento anteriore-posteriore del mirino Regolazione dell’angolo È... -
Page 53: Sollevamento Del Cilindro Del Mirino E Dell'oculare
Sollevamento del cilindro del mirino Sollevamento del Premere il clip sulla base per sganciare e ribaltare cilindro del mirino e il cilindro del mirino. Si blocca in posizione 120 gradi. dell’oculare È possibile guardare lo schermo LCD all’interno del mirino o la sua immagine rispecchiata, sollevando il cilindro del mirino o l’oculare. -
Page 54: Pulizia Dello Schermo Lcd E Della Parte Interna
Rimozione del cilindro del mirino Pulizia dello schermo LCD e della parte interna Quando si pulisce lo schermo LCD o l’interno del mirino, rimuovere il mirino dalla telecamera, staccare il cilindro del mirino dal corpo e fare attenzione a non danneggiare i componenti. Per maggiori dettagli sulla rimozione del cilindro del mirino, consultare “Collegamento del mirino a una telecamera”... -
Page 55: Caratteristiche Tecniche
Note • Verificare sempre che l’apparecchio stia funzionando correttamente prima di usarlo. LA SONY NON SARÀ RESPONSABILE DI DANNI DI QUALSIASI TIPO, COMPRESI, MA SENZA LIMITAZIONE A, RISARCIMENTI O RIMBORSI A CAUSA DELLA PERDITA DI PROFITTI ATTUALI O... - Page 56 Para los clientes de Europa Este producto ha sido fabricado por, o en nombre de Sony Corporation, 1-7-1 Konan Minato-ku Tokyo, 108-0075 Japón. Las consultas relacionadas con la conformidad del producto basadas en la legislación de la Unión Europea deben dirigirse al...
- Page 57 Contenido Descripción general ................... 58 Notas de uso....................58 Nombres y funciones de los componentes..........59 Acople del visor a una cámara..............61 Ajuste de la posición ............... 61 Ajuste del ángulo................62 Ajuste del enfoque y la visualización de la imagen......... 62 Cómo se levantan el cilindro del visor y el ocular........
-
Page 58: Descripción General
Descripción general Notas de uso El CBK-VF02 es un visor en color con pantalla Lugar de utilización LCD de 3,5 pulgadas. Cuando utilice el visor en entornos de baja Este visor incluye las siguientes funciones: temperatura, es posible que los niveles de Alta resolución y ángulo de visión panorámico... -
Page 59: Nombres Y Funciones De Los Componentes
Si una imagen fija se muestra continuamente Nombres y funciones de durante un periodo prolongado, es posible que una imagen residual se haya hecho visible. los componentes Apague la unidad cuando no la utilice durante periodos de tiempo prolongados. Condensadores electrolíticos La vida útil del condensador electrolítico es de unos 5 años con las temperaturas de funcionamiento habituales y un uso normal... - Page 60 g Indicador de posición OFF: la imagen no se invierte. B/T: permite invertir la imagen verticalmente. Se ilumina cuando se inicia la grabación mediante la pulsación del botón REC START de la cámara, o Cable del visor el botón VTR del objetivo o el botón VTR de la unidad de control remoto.
-
Page 61: Acople Del Visor A Una Cámara
Acople el conector del visor al conector Acople del visor a una VF (rectangular) de la cámara. cámara Conector VF (rectangular) PRECAUCIÓN Cuando el visor esté acoplado, no deje el objetivo del visor orientado hacia el sol. La luz solar directa podría entrar a través del objetivo, quedar enfocada en el visor y provocar un incendio. -
Page 62: Ajuste Del Ángulo
Ajuste del enfoque y la Anillo posicionador izquierda-derecha del visor visualización de la imagen Ajuste del enfoque Gire el anillo de ajuste de dioptrías hasta que la imagen esté lo más definida posible. Anillo posicionador delante-detrás del visor Ajuste del ángulo Permite ajustar el ángulo del visor. -
Page 63: Cómo Se Levantan El Cilindro Del Visor Y El Ocular
Cómo se levanta el cilindro del visor Cómo se levantan el Presione el clip de la parte inferior para liberarlo cilindro del visor y el y tire hacia arriba del cilindro del visor. Se bloquea en la posición de los 120 grados. ocular Es posible visualizar la pantalla LCD dentro del visor o su imagen invertida al levantar el cilindro... -
Page 64: Limpieza De La Pantalla Lcd Y Del Interior
Desmontaje del cilindro del visor Limpieza de la pantalla LCD y del interior Cuando limpie la pantalla LCD o el interior del visor, extraiga el visor de la cámara, desmonte el cilindro del visor del cuerpo de la cámara y asegúrese de no dañar ninguno de los componentes. -
Page 65: Especificaciones
76,8 × 43,2 mm (H/V, formato 16:9) RECLAMACIONES DE NINGÚN TIPO REALIZADAS POR USUARIOS DE ESTA UNIDAD O POR TERCEROS. Rendimiento • SONY NO SE HACE RESPONSABLE DE LA Brillo FINALIZACIÓN NI DE LA INTERRUPCIÓN, 200 cd/m (típico) (cuando el ocular está... - Page 66 中文 机型名称:液晶彩色寻像器 使用产品前请仔细阅读本书,并请妥善 保管。 关于废弃产品的处理 请不要将废弃的产品与一般生活垃圾一 同弃置。 正确处置废弃的产品有助于避免对环境 和人类健康造成潜在的负面影响。 具体的处理方法请遵循当地的规章制 度。...
- Page 67 目录 概述....................68 使用注意事项 ................... 68 部件名称及功能................69 将取景器连接到摄像机上 ..............71 调整位置..................71 调整角度..................72 调整焦距和图像显示 ................ 72 抬起取景器镜头筒和接目镜.............. 73 清洁 LCD 屏幕及内部 ..............74 规格....................75 目录...
-
Page 68: 使用注意事项
概述 使用注意事项 CBK-VF02 是一款 3.5 英寸的 LCD 彩色 使用地点 取景器。 在低温环境下使用取景器时,在开启电 此取景器有以下特点: 源后的片刻,动态分辨率水平可能会下 降。 高分辨率及宽可视角 取景器配有一块高分辨率的 LCD,水平 冷凝 分辨率达到 500 TV 线或更高。 如果将设备突然从寒冷的地方带到温暖 即使取下接目镜,也可通过取景器的大 的场所,或者室温突然升高,设备的外 LCD 屏幕轻松拍摄。 表面和内部可能会形成水汽。这称为冷 稳定的图像 凝。如果发生冷凝,请关闭设备电源, 无论什么屏幕亮度, LCD 屏幕都能提供 待到冷凝消失后才能操作设备。冷凝仍 没有扭曲的稳定图像。 然存在时使用设备可能会导致设备损 高性能放大镜 坏。 此放大镜为 2 组 3 元件的镜头 (包括非... -
Page 69: 部件名称及功能
如果长时间持续显示静止图像,可能会 部件名称及功能 看见残留图像。如果长时间不使用设 备,请将其关闭。 电解电容器 正常操作温度和使用条件下 (每天 8 小 时;每月 25 天) ,电解质电容器的预计 使用寿命约为 5 年。如果超过上述正常 使用频率,则预计使用寿命可能会相应 减少。 取景器镜头 请勿让取景器镜头直面强光源,例如日 光。 如果镜头将阳光或其他强光源光线聚 焦,可能会烧毁 LCD 面板或起火。 a 插头 连接至摄像机上的 VF 接口 (矩形) 。 b 制动器 左右滑动时,防止取景器从摄像机上掉 落。 c 取景接目罩 d 屈光度调节环 可实现最佳焦距调整。... - Page 70 g 讯号指示灯 B/T:垂直翻转图像。 在按下摄像机上的 REC START 按钮、 o 取景器电缆 镜头上的 VTR 按钮或遥控器上的 VTR 按钮开始拍摄时亮起。 p 麦克风支架 如果发生异常,讯号指示灯会闪烁示 警。 h PEAKING 控制 顺时针转动此控件可调整图像锐度,使 调焦更轻松。它对摄像机的输出信号没 有影响。 i CONTRAST 控制 调整屏幕的对比度。它对摄像机的输出 信号没有影响。 j BRIGHT 控制 调整屏幕的亮度。它对摄像机的输出信 号没有影响。 k TALLY 开关 控制讯号指示灯。 HIGH:讯号指示灯亮度设置为高。 OFF:禁用讯号指示灯。 LOW:讯号指示灯亮度设置为低。...
-
Page 71: 将取景器连接到摄像机上
将取景器接口连接到摄像机的 VF 接 将取景器连接到摄像机 口 (矩形)上。 上 VF 接口 (矩形) 注意 连接取景器后,请勿让取景器镜头朝向 太阳。直射阳光会透过透镜而在取景器 上聚焦,从而导致起火。 注意 在连接取景器时,请注意以下几点。 • 在将取景器接口与摄像机的 VF 接口 (矩形)连接之前,务必先关闭摄像机 电源。如果在摄像机电源打开时进行 连接,取景器可能无法正常工作。 • 将取景器接口牢固地连接到摄像机的 VF 接口 (矩形)上。如果连接得不牢 注意 固,视频上可能会出现干扰,或者讯 连接时保持标签 “UPPER”面朝上。 号指示灯可能无法正常工作。 拆下取景器 1 在摄像机上旋松取景器左右定位 您可以倒过来执行连接步骤来拆下取景 环; 2 将取景器连接到摄像机的取 器,但是还有一个额外操作:从定位靴... -
Page 72: 调整角度
取景器左右定位环 调整焦距和图像显示 调整焦距 转动屈光度调节环,直到图像最清晰。 取景器前后定位环 调整角度 可调整取景器的角度。 屈光度调节环 调整图像显示 通过如下控件调整显示亮度、对比度以 及峰值。 垂直翻转显示 (图像 / 文字显示) 可将取景器朝着拍摄对象的方向最多旋 转 180 度。 旋转后,屏幕中显示的图像及其他信息 会上下颠倒显示。要恢复正常显示,可 将 MIRROR 开关设置到 B/T 位置。 1 PEAKING 控制 2 CONTRAST 控制 3 BRIGHT 控制 调整焦距和图像显示... -
Page 73: 抬起取景器镜头筒和接目镜
抬起取景器镜头筒 抬起取景器镜头筒和接 按下底部的卡扣松开取景器镜头筒,然 目镜 后将其向上掀起。 取景器镜头筒会在 120 度位置处锁定。 通过抬起取景器镜头筒或接目镜,可以 查看取景器内部的 LCD 屏幕或者其镜 像图像。 本节说明如何抬起及拆下取景器镜头 筒。也可以采用相同的方式抬起和拆下 接目镜。 通常在锁定位置进行使用。 LCD 屏幕 尽管可以在距锁定位置更远的距离打开 取景器镜头筒,但是一旦使其回到闭合 位置,便会再次在 120 度位置处锁定。 抬起取景器镜头筒和接目镜... -
Page 74: 清洁 Lcd 屏幕及内部
拆下取景器镜头筒 清洁 LCD 屏幕及内部 如需清洁 LCD 屏幕及取景器内部,请 从摄像机上拆下取景器,然后拆下取景 器镜头筒,请小心不要损坏组件。 有关如何拆下取景器的详细信息,请参 阅 “将取景器连接到摄像机上” (第 页) 。 有关如何拆下取景器镜头筒的详细信 息,请参阅 “拆下取景器镜头筒” (第 页) 。 清除屏幕灰尘 使用吹灰器。 注意 请勿使用稀释剂等溶剂。 在恶劣的环境中使用取景器后 在恶劣的环境中 (例如沙滩、多尘区域 或温泉度假村)使用取景器后,请检查 以下各点。 • 使用气刷小心地去除取景器内部的所 有沙尘。 • 清洁接口的触点。 • 检查取景器是否正常工作。 按下底部的卡扣将取景器镜头筒松 开。 向上掀起取景器镜头筒。 滑动取景器镜头筒相对侧顶部的旋... - Page 75 高清彩色摄像机 HXC-D70 1) 要将取景器连接至PMW-500,摄录一 体机上的固件版本必须为1.10或更高。 2) 要将取景器连接至HXC-D70,摄像机 的固件版本必须为1.21或更高版本。 设计与规格如有变更,恕不另行通知。 注意 • 在使用前请始终确认本机运行正常。 无论保修期内外或基于任何理由, SONY 对任何损坏概不负责。由于 本机故障造成的利润损失等,无论 是在保修期以内或者以外, Sony 均 3.5英寸彩色TFT透反式LCD 图像显示区尺寸 不作任何赔偿。 76.8 × 43.2 mm (H/V, 16:9宽高比) • SONY 对本产品用户或第三方的任 何索赔概不负责。 性能 • SONY 对因任何情况导致终止或停 亮度 止使用本机相关服务概不负责。 (典型) (连接接目镜...
- Page 76 Русский Перед использованием устройства внимательно прочитайте настоящее руководство и сохраните его для получения необходимой информации в будущем. ЦВЕТНОЙ ЖК ВИДОИСКАТЕЛЬ Сони Корпорейшн 1-7-1, Конан, Минато-ку, Токио, Япония, 108-0075 Сделано в Китае Импортер на территории стран Таможенного союза ЗАО «Сони Электроникс», Россия, 123103, Москва, Карамышевский...
- Page 77 Содержание Обзор......................78 Примечания по использованию ............78 Названия и назначение частей ............. 79 Крепление видоискателя к камере............81 Регулировка положения ............81 Регулировка угла ................ 82 Регулировка фокусного расстояния и графического дисплея ..82 Поднятие тубуса и окуляра видоискателя ......... 83 Очистка...
-
Page 78: Обзор
Обзор Примечания по использованию CBK-VF02 — это видоискатель с 3,5- Место использования дюймовым цветным ЖК-дисплеем. Сразу после включения питания Характеристики видоискателя: видоискателя в условиях низких Высокое разрешение и широкий угол обзора температур могут снижаться уровни Видоискатель оснащен ЖК-дисплеем динамического разрешения. -
Page 79: Названия И Назначение Частей
эксплуатации возможно снижение яркости Названия и или изменение цветовой температуры. Это не является признаком неисправности. назначение частей Кроме того, это не влияет на записываемые данные. Если неподвижное изображение непрерывно отображается в течение длительного времени, может появляться остаточное изображение. Выключайте блок, если он долго не используется. Электролитические... - Page 80 f Тубус видоискателя n Переключатель MIRROR Поднимается или отсоединяется при Переворачивает изображение на экране необходимости. по горизонтали или по вертикали при подъеме или повороте тубуса g Индикатор съемки видоискателя. Этот переключатель Загорается, когда запись запускается с используется для управления помощью кнопки REC START на камере, отображением...
-
Page 81: Крепление Видоискателя К Камере
Подключите разъем видоискателя к Крепление (прямоугольному) разъему VF камеры. видоискателя к Разъем VF (прямоугольный) камере ВНИМАНИЕ! Когда видоискатель прикреплен, не направляйте объектив видоискателя на солнце. Прямой солнечный свет, пройдя через объектив, может быть сфокусирован на видоискателе и вызвать пожар. Примечания Прикрепляя... -
Page 82: Регулировка Угла
Кольцо поперечного позиционирования Регулировка видоискателя фокусного расстояния и графического дисплея Регулировка фокусного расстояния Поворачивайте кольцо регулировки диоптрий для получения резкого изображения. Ручка продольного позиционирования видоискателя Регулировка угла Угловое положение видоискателя можно регулировать. Кольцо регулировки диоптрий Регулировка графического дисплея Регулируйте яркость, контрастность и Зеркальное... -
Page 83: Поднятие Тубуса И Окуляра Видоискателя
Поднятие тубуса и окуляра видоискателя Можно смотреть на ЖК-экран через окуляр, либо на его зеркальное отображение, подняв тубус или окуляр видоискателя. В этом разделе описано, как поднимать и отсоединять тубус видоискателя. Аналогичным образом можно поднять и отсоединить окуляр. Используйте в этом фиксированном положении... - Page 84 Отсоединение тубуса видоискателя Зеркальное отражение (изображения/текста) по горизонтали Установив переключатель MIRROR в положение L/R, можно зеркально отразить изображение и другую информацию на экране по горизонтали. Нажмите на защелку в нижней части для расцепления. Откиньте тубус видоискателя. Сдвиньте защелку наверху с противоположной...
-
Page 85: Очистка Жк-Экрана И Внутренних Частей
Очистка ЖК-экрана и Технические внутренних частей характеристики Общие Для очистки ЖК-экрана и внутренних частей видоискателя отсоедините тубус Питание видоискателя от камеры, отсоедините 10,5–17,0 В постоянного тока (от камеры) тубус видоискателя от корпуса и примите Потребляемая мощность меры, чтобы не повредить компоненты. 2,0 Вт... - Page 86 ПЕРИОДА, ТАК И ПОСЛЕ ИСТЕЧЕНИЯ ГАРАНТИЙНОГО СРОКА, А ТАКЖЕ ВСЛЕДСТВИЕ Дополнительные принадлежности ЛЮБЫХ ИНЫХ ВОЗМОЖНЫХ Узел поворота видоискателя ПРИЧИН. BKW-401 • КОМПАНИЯ SONY НЕ НЕСЕТ ОТВЕТСТВЕННОСТИ ЗА ПРЕТЕНЗИИ ЛЮБОГО РОДА, Связанные принадлежности ПРЕДЪЯВЛЕННЫЕ Видеокамера на твердотельной памяти ПОЛЬЗОВАТЕЛЯМИ ЭТОГО PXW-X500, PMW-500 ПРИБОРА...
- Page 87 Қазақстан Құрылғыны пайдалану алдында осы нұсқаулықты мұқият оқып шығыңыз жəне болашақта анықтама алу үшін сақтаңыз. СҰЙЫҚ КРИСТАЛДЫ ТҮРЛІ-ТҮСТІ КӨРСЕТКІШ ТЕТІК Дайындаушы:Сони Корпорейшн Мекен-жайы:1-7-1 Конан, Минато-ку, Токио108-0075, Жапония Қытайда жасалған Кеденодағы жеріндегі шетелден əкелуші «СониЭлектроникс» ЖАҚ, Ресей, 123103, Мəскеу, Карамышевский өтпе көшесі, 6 Өндірілген...
- Page 88 Мазмұны Шолу......................89 Пайдалануға қатысты ескертпелер ............. 89 Бөліктердің атаулары мен функциялары........... 90 Көріністапқышты камераға бекіту............92 Күйді реттеу................... 92 Бұрышты реттеу ................93 Фокусты жəне кескін дисплейін реттеу..........93 Көріністапқыш цилиндрін жəне окулярды көтеру......94 СКД экранын жəне ішін тазалау ............96 Техникалық...
-
Page 89: Шолу
Шолу Пайдалануға қатысты ескертпелер CBK-VF02 — 3,5 дюймдік СКД түсті Пайдалану орны көріністапқыш. Бұл көріністапқыштың келесі мүмкіндіктері Көріністапқышты төмен температуралы бар: орталарда пайдаланғанда қуатты өшіргеннен кейін бірден болатын кезеңде динамикалық Жоғары ажыратымдылық жəне кең ажыратымдылық деңгейлері төмендеуі көру бұрышы мүмкін. -
Page 90: Бөліктердің Атаулары Мен Функциялары
температурасы өзгеруі мүмкін. Бұл мəселелер Бөліктердің ақаулық емес. Бұған қоса, бұл жағдайлар жазылған атаулары мен деректерге əсер етпейді. Егер қозғалыссыз кескін ұзақ кезең бойы функциялары үздіксіз көрсетілсе, қалдық кескін көрінуі мүмкін. Ұзақ кезеңдер бойы пайдаланылмайтын болса, құрылғыны өшіріңіз. Электролиттік конденсаторлар Электрлік... - Page 91 f Көріністапқыш цилиндрі n MIRROR (АЙНА) қосқышы Жағдай қажет етсе, мұны көтеріңі знемесе Экрандағы кескін дисплейі көріністапқыш ажыратыңыз. цилиндрін көтергенде немесе айналдырғанда көлденеңінен немесе тігінен кері етіледі. Бұл g Сан индикаторы қосқышты осындай жағдайларда кескін Камерадағы REC START түймесін, дисплейін басқару үшін пайдаланыңыз. объективтегі...
-
Page 92: Көріністапқышты Камераға Бекіту
Көріністапқыш коннекторын Көріністапқышты камерадағы VF коннекторына (тіктөртбұрышты) камераға бекіту байланыстырыңыз. VF коннекторы (тіктөртбұрышты) САҚ БОЛЫҢЫЗ Көріністапқыш бекітілген болса, көріністапқыш объективін күнге қаратып қалдырмаңыз. Тік күн сəулелері объектив арқылы еніп, көріністапқышта фокусталып, өрт тудыруы мүмкін. Ескертпелер Көріністапқышты бекіткенде келесілерді ескеріңіз. • Көріністапқыш коннекторын камераның VF коннекторына... -
Page 93: Бұрышты Реттеу
Көріністапқыштың солдан оңға орналастыру Фокусты жəне сақинасы кескін дисплейін реттеу Фокусты реттеу Диоптрияны реттеу сақинасын кескін ең анық болғанша бұрыңыз. Көріністапқыштың алдан артқа орналастыру тұтқасы Бұрышты реттеу Көріністапқыш бұрышын реттеуге болады. Диоптрияны реттеу сақинасы Кескін дисплейін реттеу Төменде көрсетілген басқару тетіктерінің көмегімен... -
Page 94: Көріністапқыш Цилиндрін Жəне Окулярды Көтеру
Көріністапқыш цилиндрін жəне окулярды көтеру Көріністапқыш цилиндрін немесе окулярды көтеру арқылы СКД экранды көріністапқыш немесе айналық кескіні ішінде көре аласыз. Бұл бөлімде көріністапқыш цилиндрін көтеру жəне ажырату сипатталған. Сондай-ақ, окулярды да дəл солай көтеруге жəне ажыратуға болады. Əдетте ол құлыпталған күйде пайдаланылады. Оны... - Page 95 Көріністапқыш цилиндрін Дисплейді (кескін/мəтін ажырату индикаторы) көлденеңінен кері ету MIRROR қосқышын L/R (С/О) күйіне орнату арқылы экранда көрсетілген суретті жəне басқа ақпаратты көлденеңінен кері етуге болады. Босату үшін төменгі жақтағы қысқышты итеріңіз. Көріністапқыш цилиндрін жоғары аударыңыз. Жоғарғы жақтағы тұтқаны көріністапқыш цилиндрінің қарама- қарсы...
-
Page 96: Скд Экранын Жəне Ішін Тазалау
СКД экранын жəне Техникалық ішін тазалау сипаттамалар СКД экранын немесе көріністапқыштың ішін Жалпы тазалағанда көріністапқышты камерадан Қуат көзі ажыратыңыз, көріністапқыш цилиндрін 10,5 - 17,0 В тұрақты ток (камера қамтамасыз корпустан ажыратыңыз жəне құрамдастарды етеді) зақымдап алмаңыз. Қуат тұтыну Көріністапқышты ажырату əдісі туралы 2,0 Вт... - Page 97 Қосымша қосалқы құралдар ҮШІНШІ ТАРАПТАРДЫҢ ЖАСАҒАН КЕЗ Көріністапқышты бұру жинағы КЕЛГЕН ШАҒЫМДАРЫ ҮШІН ЖАУАП BKW-401 БЕРМЕЙДІ. • SONY КОРПОРАЦИЯСЫ КЕЗ КЕЛГЕН ЖАҒДАЙЛАРҒА БАЙЛАНЫСТЫ БОЛУЫ Қатысты қосалқы құралдар МҮМКІН ОСЫ ҚҰРЫЛҒЫҒА ҚАТЫСТЫ Қатты жады бар бейнекамера КЕЗ КЕЛГЕН ҚЫЗМЕТТЕРДІҢ PXW-X500, PMW-500 ТОҚТАТЫЛУЫ...
- Page 98 Sony Corporation and is intended solely permesso scritto di Sony Corporation. for use by the purchasers of the equipment described in this manual.