Table of Contents
Operating & Installation Instructions
EN
Front Loading Washer Dryer
Model BD-SG100CJ
Thank you for purchasing a Hitachi front loading Washer Dryer.
■
Please read these operating & installation instructions carefully for proper
operation of the washer dryer.
■
Please keep these operating & installation instructions for future reference.
Contents
2
7
10
11
12
18
20
24
28
31
32
34
39
40
Table of Contents

Related Manuals for Hitachi BD-SG100CJ


Summary of Contents for Hitachi BD-SG100CJ
-
Page 1: Table Of Contents
Safety Precautions for Installation How to Install the Washer Dryer Trial Operation Procedure Installation Confi rmation Sheet Thank you for purchasing a Hitachi front loading Washer Dryer. ■ Please read these operating & installation instructions carefully for proper operation of the washer dryer. -
Page 2: Safety Precautions
Safety Precautions To prevent injuries to yourself and others or damage to property, please read the following precautions thoroughly. In addition, read the notes in this manual carefully to ensure proper use of the washer dryer. Meanings of listed precautions ... - Page 3 WARNING Installation Do not install the washer dryer in damp locations, such as a bathroom, or in locations exposed to rain. Doing so may cause electrical shock or electrical leakage and result in fire. Do not install the washer dryer on a wheeled platform or other unstable surface. Doing so may cause the washer dryer to move or fall over by vibration during operations.
- Page 4 Safety Precautions WARNING Miscellaneous Remove the door before disposing the washer dryer. Children may get trapped in the washer dryer. Loosen the screws and remove the door. Keep the supplied spirit level and plastic packaging away from children. Children may accidentally swallow the spirit level or place the packaging on their head and asphyxiate.
- Page 5 CAUTION Before, after, and during operation Turn on the tap and make sure there is no leakage before washing and drying. Loose screws may result in water leakage and unexpected damage. The metal fixtures and gasket of the tap can deteriorate and rust over long periods of use, resulting in leaks. ...
- Page 6 Safety Precautions CAUTION Miscellaneous Close fasteners (e.g., zippers) on laundry before operation. Failure to do so may result in malfunction of the washer dryer or water leakage. If any liquid detergent, bleach, or softener remains on any plastic parts on the exterior of the washer dryer, wipe it off immediately with a soft, damp cloth.
-
Page 7: Before You Start Washing
B e sure to check the washing instructions and guides. Before You Start Washing Do not wash or dry the following items To prevent shrinking, deformation, discoloration, changes in texture, etc. Neckties, suits, and coats Leather, fur, feathers, and items that ... - Page 8 Before You Start Washing For safety precautions, please note the washer dryer DOOR LOCK mechanism setting Operation of the DOOR LOCK function To prevent children from opening the door and getting trapped inside the drum, you can manually lock the door so that it cannot be opened when the power is off, before or during operations.
- Page 9 ■ Remove any foreign objects (coins, safety pins, etc.). Preparation of ■ the washing Use a washing net when you wash delicate clothes (knit products, lingerie, etc.). ■ Close zips, brush sand out of pockets and collars. ■ Brush pet hair out of laundries. ■...
-
Page 10: Product Descriptions
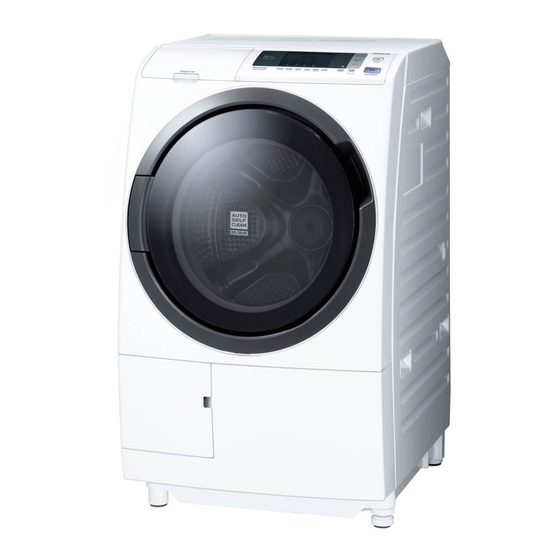
Product Descriptions Detergent case Dry fi lter (P.26) (P.24, 25) Powder detergent/bleach Liquid detergent/bleach Softener Water supply linlet (P.26) Door handle Control panel Drum Power cord Moving liquid can be heard when the drum is rotated. Door bellows This is not residual water that has been left in the drum. -
Page 11: Control Panel And Display
Control Panel and Display Button and Display Function Power button Used to switch the unit ON/OFF. If the unit is not started within 20 minutes, power will turn off automatically. Start / Pause Used to start or pause the operation. Wash, Wash Dry When the "Wash", "Wash Dry", "Dry"... -
Page 12: How To Use The Washer Dryer
How to Use the Washer Dryer (Using the Timer) ■ Sort and load Sort the laundry according to type of fabric, care label symbol, color and degree of soiling. the laundry Preparation of the washing (P.9). ■ Do not exceed the maximum load. ■... - Page 13 How to Use the Washer Dryer ■ Pause the program. Press the Start/Pause button. The washer dryer switches itself off if it is not restarted within 15 to 60 min. In this case, press the Power button to turn on the power. Then press the Start/Pause button and the srected program starts again from the beginning.
- Page 14 How to Use the Washer Dryer Note How to use the - Do not use blanket net. This may cause excessive vibration when Blanket program spinning. 1. Load the laundry : ■ Fold a large items such as a duvet or blanket as follows. ■...
- Page 15 Blankets Comforters Load Washing cap Load Washing cap Use the washing cap Less than 3 kg as necessary Wash operation 4.7 kg or less 1 kg or less Required 3 kg to 4.7 kg Required Wash Do not use the Wash Dry operation.
- Page 16 How to use Washer Dryer ■ Removing odors and germs Hygiene (Dry) ● Load : 1kg program ● Operation time : 50 minutes ● Fold the laundry neatly, and place it evenly between the lifters in the drum. ● Wool and acrylic items (except hard twist yarn) Material ●...
- Page 17 ■ You can change and save the settings of the Favorite program to Favorite create your own customized operation. After you save your settings, program they will appear whenever you select the Favorite program without having to be reset. ● If you change the program settings and press the Start button, the changed settings will be saved.
-
Page 18: Program Overview
Program Overview ○ : Can be set : Can not be selected. ― Max Load Selectable Options Wash Program Type of Laundry / Notes Spin/Dry Auto Self Wash Wash Dry Timer Time(min) Level Clean Cotton For daily washing of cotton and linen 9,12,15,20,25+ ○... - Page 19 Approximate required time Rinse Spin (may differ from actual time) Spin Speed (Wash) Spin Speed Wash Time(min) Load Wash Low Normal High (Wash Dry) Sparkling Normal 1,2,4,7,9 680,950,1300 r/min 1700 r/min ○ ○ 10kg → 45 min ― ― 7kg → 45 min 7:00 6:00...
-
Page 20: Other Settings
Other Settings Changing or disabling the operation start/fi nish sounds A sound is emitted when an operation starts or fi nishes. 1. Press Power button to turn on the power. 2. Hold Wash Dry button for at least 3 seconds. The setting changes as follows each time the button is held for 3 seconds. - Page 21 Reducing uneven or over-dry drying results The drying results for laundry will vary depending on the wash load size and type of laundry. Before you start the operation, adjust the level of drying according to your situation. 1. Press Power button to turn on the power. 2.
- Page 22 Other Settings Changing the dehumidifi cation mode You can change the method of dehumidifi cation used during drying operations. Air Cooling Mode: Expels moisture and warm air from the drain hose during drying operations. Water Cooling Mode: Uses water for dehumidification during drying operations. (More water is consumed.) Water Cooling Mode is always used during the Silent, Cotton(15 min), and Hygiene programs, and the Steam Iron operation.
- Page 23 Care and Maintenance Lint fi lter Clean the lint fi lter regularly. A clogged lint fi lter will result in poor detergent fl ow and drainage ("C02"). 1. Perform a spin operation before removing the lint fi lter, and make sure the water has drained.
-
Page 24: Care And Maintenance
Care and Maintenance Dry fi lter Clean the dry fi lter after every drying operation. 1. Lift the dry fi lter vertically. Dry fi lter Drying inner fi lter 2. Remove lint and dust attached to the drying inner fi lter and drying fi xed fi lter.* ●... - Page 25 Dry Filter Port Clean the dry fi lter port when the Dry Filter indicator does not turn off or when "C06" appears. Lint may be present at the rear of the dry fi lter port. 1. Press Power button to turn on the power. 2.
- Page 26 Care and Maintenance Wipe the detergent case lid with a cloth, Detergent Detergent case lid Packing when detergent or softener is caked on the case lid lid or the lid is dirty. 1. Lift the detergent case lid handle to open the detergent case lid.
- Page 27 Clean the main body and drum whenever they are dirty. Maintenance ■ of the washer External cleaning Clean the surface of the washer dryer with a soft cloth. Do not use dryer solvents such as alcohol or benzine. ■ After each wash Leave the door open for a while to dry the drum.
-
Page 28: Troubleshooting
Troubleshooting Problem Possible Cause Solution ● ● Door cannot be There is still some water in the washer Run the Drain program to opened. dryer. drain water. ● ● Door Lock may be activated. Deactivate the Door Lock. (P.8) ● ●... - Page 29 Problem Possible Cause Solution ● ● Foam remains You may have used too much detergent. Use the appropriate amount of on the door or detergent. ● the door seal. Laundry is new or not that soiled. ● ● Fabric softener You may have exceeded the max.
- Page 30 Troubleshooting Code Description Possible Cause Solution ● Water is not Water tap may not be turned on. Check water tap, water ● supplied. Water inlet fi lter may be clogged. inlet fi lter, water line and ● Water line or water hose may be frozen. water hose.
-
Page 31: Specifi Cations
630 × 715 × 1050 mm (W×D×H) Weight Approx. 78 kg Optional Accessories Please contact Hitachi Customer Service if you would like to purchase the optional accessories. ■ Washing cap (MO-F104) ■ Drain extension hose (approx. 83 cm) (Part number: MO-F104-001) (Part number: BD-V9500L-005) ●Used to extend the drain hose... -
Page 32: Safety Precautions For Installation
Safety Precautions for Installation Before starting installation, please thoroughly read the following safety precautions. Note about symbols used in this manual ■ The following symbols indicate the degree of hazard that exists if the accompanying warning, caution, or instruction is not observed. Symbol examples Indicates WARNING or CAUTION Indicates that death or... - Page 33 CAUTION Use the supplied one-touch joint and When changing the connection tightly fasten connector to the water tap after installing or moving the washer dryer, turn on Water may leak Water Water the tap and check for water leakage if any one-touch leakage leakage...
-
Page 34: How To Install The Washer Dryer
How to Install the Washer Dryer ■ The washer dryer is heavy. Be careful when lifting it. Safety Instructions ■ When lifting the washer dryer, do not hold the door or the detergent case. Lift the washer dryer with two persons holding the handles or holding the bottom and the back of the washer dryer. - Page 35 ■ Where to install Install the washer dryer on a fl at hard fl oor to avoid excessive vibration and noise. the washer dryer ■ Do not install the washer dryer in humid places such as a bathroom or places that are exposed to wind and rain. ■...
- Page 36 How to Install the Washer Dryer ● Water supply hose Conecting the water supply ■ Optimum water pressure is 0.03-0.8MPa. ■ Do not connect to the mixer tap of an unpressurised hot-water apparatus. ■ Use a horizontal tap. Horizontal tap Extension tap Square tap Connect the water supply hose to the top panel of...
- Page 37 ■ Changing drain hose routing from one side of the Replacing the washer dryer to the other Drain hose ● When shipped from the factory, the drain hose is routed out of the right side of the washer dryer. 1. Gently lay down the washer dryer on its back side. 2.
- Page 38 How to Install the Washer Dryer ■ Insert the drain hose into the drain outlet. Conecting the Drain hose ● If the drain outlet is shallow and the Drain hose L-Pipe comes in contact with the bottom L-Pipe of the hole, cut off the L-Pipe at the groove and reattach the L-Pipe to the drain hose.
-
Page 39: Trial Operation Procedure
1. Loosen the fi xing nut by turning it in the direction indicated by the Level arrow , and turn the adjustable foot to eliminate wobble. Adjustment ● The maximum adjustment height is 14 mm. 2. After adjustment, tighten the fi xing nut by turning it in the direction indicated by the arrow Tighten the fixing nut until it Plastic base... -
Page 40: Installation Confi Rmation Sheet
Check if there is no any air leakage from nearby pipes. Please explain the DOOR LOCK function / DOOR LOCK PREVENTION function to the customer who has small children. Hitachi Global Life Solutions, Inc. Hitachi Atago Bldg., 15-12, Nishi Shimbashi 2-chome, 3-Q1686-8 Minato-ku, Tokyo 105-8410 Japan E9(C)