Table of Contents
Quick Links
Instruction
Manual
Hitachi
Cordless Stick
Vacuum Cleaner
Model
PV-XL300J
Thank you for purchasing a Hitachi Cordless Stick
Vacuum Cleaner.
This vacuum cleaner is designed for household and
indoor use only. Do not use for commercial, non-
cleaning related, and outdoor purpose.
To ensure proper use, read this manual carefully
before using the vacuum cleaner.
For future reference, keep this manual in an easily
accessible place.
To ensure proper use, read the safety
precautions (P.E-4 to E-8) .
PV-XL300J_EN.indd 1
PV-XL300J_EN.indd 1
Contents
Before use
Part names and assembly ..........
Safety precautions .....................
Usage notes ...............................
Controls and indicators .............
Control buttons ....................................
Indicator during charging or use ..........
Charging the vacuum cleaner .... E-10
To operate .................................. E-12
Using the attachments ............... E-13
Power head ..........................................
Handy brush .........................................
Crevice nozzle ......................................
Broom brush ........................................
Maintenance
Emptying the dust case .......................
Cleaning the fi lters ...............................
Attaching the dust case .......................
Maintenance .............................. E-20
Washable Parts ....................................
Cleaning the power head ........... E-23
Appendix
Troubleshooting ......................... E-25
Replacing the battery ................... E-28
Disposing of the vacuum cleaner .... E-28
Replacement parts ..................... E-30
E-2
E-4
E-8
E-8
E-8
E-9
E-13
E-14
E-15
E-15
E-16
E-16
E-18
E-20
E-20
E-21
E-21
2021/9/22 11:11:01
2021/9/22 11:11:01
Table of Contents

Related Manuals for Hitachi PV-XL300J


Summary of Contents for Hitachi PV-XL300J
-
Page 1: Table Of Contents
Maintenance ......E-20 E-20 Vacuum cleaner, attachments, attachment accessories ..E-21 Washable Parts ........Thank you for purchasing a Hitachi Cordless Stick E-21 Maintaining (washing with water) the fi lters ..Vacuum Cleaner. Cleaning the power head ... E-23 This vacuum cleaner is designed for household and indoor use only. -
Page 2: Part Names And Assembly
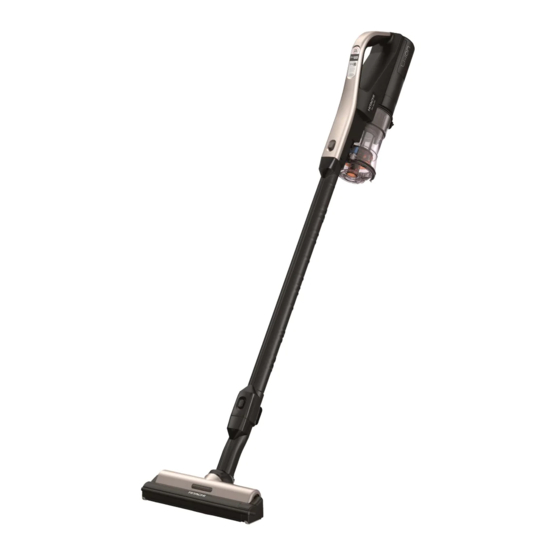
Part names and assembly Hand-held configuration Stick configuration Handle Control buttons Battery (P.E-8) Indicator Vacuum cleaner (P.E-9) body Release button To detach the power head or extension pipe, press the Handy brush (P.E-14) release button and pull it out. AC adapter Underside Safety switch Cord... - Page 3 Vacuum cleaner stand (P.E-10) Overall view when housed The crevice nozzle or broom brush can be attached to the indent in the base. Hook for the stand Crevice nozzle Broom brush Vacuum cleaner body Attachment groove Stand Extension Insert the hook for the stand into pipe the attachment groove of the stand.
-
Page 4: Safety Precautions
The severity of injury or damage that might occur if these precautions are ignored or the vacuum cleaner is used improperly is classifi ed and explained below. Hitachi is not responsible for any injury or damage that occurs as a result of ignoring these precautions. - Page 5 Continuing to use the vacuum cleaner under these conditions could result in smoke, fi re, or electric shock. Turn off the vacuum cleaner immediately and unplug the AC adapter from the outlet. Then, contact a Hitachi authorized service agent to request an inspection and repair. Outlet, plug, cord, and AC adapter ...
- Page 6 Safety precautions (Continued) CAUTION Socket, AC adapter, cord When unplugging the AC adapter, hold and pull it not the cord Hold the AC adapter When unplugging the AC adapter connector from the vacuum clean- er, hold and pull the tip of the connector, not the cord Holding and pulling the plug by the cord might damage the cord or cause a short circuit, which might result in an electric shock or fi...
- Page 7 Replacement of the battery is to be performed by a trained service technician. Do not remove the battery except when disposing of this vacuum cleaner. Please consult with a Hitachi authorized service agent. Do not touch the terminals or connect them by using metal items such as wires and pins.
-
Page 8: Usage Notes
Safety precautions (Continued) CAUTION When charging the battery, ensure that the ambient temperature is between 5˚C to 34˚C. Charging the battery in temperatures outside of this range might prevent the battery from being fully charged. As a result, the battery might take a long time to charge, or you might only be able to use the vacuum cleaner for a short time. -
Page 9: Indicator During Charging Or Use
Indicator during charging Battery Battery indicator Charging status indicator The battery is charging. Charge time is approx. 3.5 hours. Depending on the ambient temperature, usage time, etc, if the battery's temperature is very hot, charging may automatically go into standby until the temperature lowers to an appropriate temperature for charging, causing the charging time to increase. -
Page 10: Charging The Vacuum Cleaner
Charging the vacuum cleaner Charge the battery before using the vacuum cleaner. The battery is not fully charged at the time of purchase. It generally takes about 3.5 hours to charge the battery. (It might take longer to charge the battery de- pending on factors such as the ambient temperature and how long the vacuum cleaner was in use.) AC adapter Outlet... - Page 11 When it is used for the fi rst time or when it is not used for several days, The operating time might become shorter or the charging time might become longer. We recommend that you replug the connector into the vacuum cleaner to recharge the battery before use. ...
-
Page 12: To Operate
To operate Remove the connector of the AC adapter from the vacuum cleaner. Hold the connector of the AC adapter and pull it out *direction as shown in the right diagram. If you press the control buttons during charging, the cleaner will not operate. CAUTION When unplugging the connector, hold it. -
Page 13: Using The Attachments
Using the power head while they are worn out might damage the floor. You cannot replace the brushes or wheels by yourself. Please contact a Hitachi authorized service agent to have the brushes, wheels, and rotary brush replaced as a set. The rotary... -
Page 14: Handy Brush
Using the attachments (continued) The safety switch of the power head When you lift the power head from the fl oor, the safety switch activates and the rotary brush stops rotating for your safety. WARNING Stop Safety switch Risk of injury Do not touch the safety switch or the rotary brush of the power head. -
Page 15: Crevice Nozzle
Crevice nozzle It is used to clean narrow spaces and corners. Please use it by screwing to the inlet of the vacuum cleaner or the extension pipe. For vacuuming corners of room For vacuuming corners of a sofa Crevice nozzle Inlet Crevice nozzle Extension pipe... -
Page 16: Emptying The Dust Case And Cleaning The Fi Lters
Emptying the dust case and cleaning the fi lters Cyclonic vacuum cleaners have the advantage of not requiring paper fi lter bags. To vacuum with strong suction power, we recommend that you remove dust every time you use your cleaner and clean the fi lter frequently. ... -
Page 17: Emptying The Dust Case
Emptying the dust case [When removed] Remove the dust case. Hold the dust case and pull down the Pull out the dust case in the arrow direc- dust case release button. tion. Dust case release button Pull down Dust collection inlet Dust disposal Pull out... -
Page 18: Cleaning The Fi Lters
Emptying the dust case and cleaning the fi lters (continued) Cleaning the fi lters Clean fi lter Open the clean fi lter. Set the dust case on the Grab and hold the lower part of the dust case, lift up the knobs of the clean fi... - Page 19 Inner cylinder fi lter Open the dust case lid (P.E-17) and remove the inner cylinder fi lter. Turn the inner cylinder fi lter in the Lift the inner cylinder fi lter straight up. Unlock direction as far as it will go. Note Dust and debris might spill when you remove the inner cylinder filter.
-
Page 20: Attaching The Dust Case
Emptying the dust case and cleaning the fi lters (continued) Attaching the dust case Attach the dust case Hook the grooves (two places) of the dust Firmly attach the dust case until you hear a case on the protrusions (two places) of "click"... -
Page 21: Washable Parts
Washable Parts The handy brush (P.E-14), crevice nozzle/broom brush (P.E-15), clean fi lter (P.E-21), sponge fi lter (P.E-21), inner cylinder fi lter/dust case (P.E-22), and rotary brush (P.E-24) are washable. Do not wash any other attachments or parts with water. After washing the parts with water, allow it to dry thoroughly in the shade before using it. - Page 22 In this case, please consult a Hitachi authorized service agent. If the suction power is weak even after washing the fi lters with water, the clean fi lter, sponge fi lter, etc.
-
Page 23: Cleaning The Power Head
Using the power head while they are worn out might damage the fl oor. You cannot replace the brushes or wheels by yourself. Please contact a Hitachi authorized service agent to have the brushes, wheels, and rotary brush replaced as a set. - Page 24 Cleaning the power head (Continued) Rotary brush maintenance. Remove the brush holder. Turn the power head over and remove the brush holder while pushing the tab in the direction of the arrow. Brush holder Detach the rotary brush and remove dust. Remove tangled lint and Cut and remove tangled lint, hair, Remove dust.
-
Page 25: Troubleshooting
Before requesting for repair Troubleshooting Check the following points again. The vacuum cleaner does not operate, or stops while the vacuum cleaner is running. The suction power is weak. The rotary brush does not rotate. The safeguard might be operating. Release the safeguard with the following instructions. Suction power of the vacuum cleaner becomes The rotary brush of the power head stops. - Page 26 (wash with water), you P.E-21, E-22 might need to replace the battery. Please con- sult with a Hitachi authorized service agent. The exhaust or vacu- um cleaner gets warm This is normal. Motor will be cooled via air fl ow.
- Page 27 Has the vacuum cleaner not been in use for a long time? If it has not been charged for a long time, the battery might need to be replaced as its performance and battery life might already have deteriorated. Please consult with a Hitachi au- thorized service agent.
-
Page 28: Replacing The Battery
Please replace the battery. If you want to replace the battery without disposing of the unit due to expiration of the battery life or other reason, consult a Hitachi authorized service agent. We will replace parts at your request. The customer will bear labor costs in addition to the cost of parts. - Page 29 To dispose of the vacuum cleaner, detach the battery according to the following procedure, and then bring the vacuum cleaner to a Hitachi authorized service agent or one of our recycling partner stores. Alternatively, ask local authorities about the proper method of disposing of the vacuum cleaner, and Li-ion 20 follow your local recycling regulations.
-
Page 30: Replacement Parts
Rotary brush Vacuum cleaner stand Inner cylinder fi lter Service parts Service parts Service parts Service parts PV-XL300J-903 PV-BFL1-020 PV-XL300JT-909 PV-BL20G-009 Since batteries are consumables, they will only be available for a charge. Specifi cations Product name Cordless Stick Vacuum Cleaner... - Page 31 E-31 PV-XL300J_EN.indd 31 PV-XL300J_EN.indd 31 2021/9/22 11:11:05 2021/9/22 11:11:05...
- Page 32 E-32 PV-XL300J_EN.indd 32 PV-XL300J_EN.indd 32 2021/9/22 11:11:06 2021/9/22 11:11:06...