Samsung GT-S6012 User Manual
Hide thumbs
Also See for GT-S6012:
- User manual (20 pages) ,
- User manual (34 pages) ,
- Quick start manual (41 pages)
Table of Contents
Quick Links
Table of Contents

Related Manuals for Samsung GT-S6012


Summary of Contents for Samsung GT-S6012
- Page 1 GT-S6012 User Manual www.samsung.com...
- Page 2 Applications and their functions may vary by country, region, or hardware specifications. Samsung is not liable for performance issues caused by applications from any provider other than Samsung. Samsung is not liable for performance issues or incompatibilities caused by edited registry settings or modified operating system software.
- Page 3 No part of this guide may be reproduced, distributed, translated, or transmitted in any form or by any means, electronic or mechanical, including photocopying, recording, or storing in any information storage and retrieval system, without the prior written permission of Samsung Electronics.
- Page 4 About this manual Trademarks • S AMSUNG and the SAMSUNG logo are registered trademarks of Samsung Electronics. ™ ™ ™ ™ ™ • T he Android logo, Google , Google Maps , Google Mail , YouTube , Google Play ™...
-
Page 5: Table Of Contents
Table of Contents Entering text Getting started Connecting to a Wi-Fi network Device layout Setting up accounts Buttons Transferring files Package contents Securing the device Installing the SIM or USIM card and Upgrading the device battery Charging the battery Inserting a memory card Communication Turning the device on and off Phone... - Page 6 YouTube More settings FM Radio SIM card manager Sound Display Application & media stores Wallpaper Motion Play Store Storage Samsung Apps Battery Game Hub Applications manager Music Hub Accounts and sync Location services Utilities Security Language and input Memo Back up and reset...
-
Page 7: Getting Started
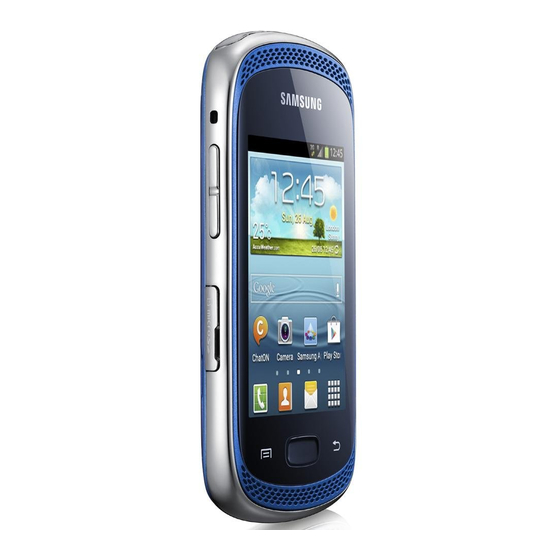
Getting started Device layout Speaker/Earpiece Proximity sensor Power button Touch screen Home button Music button Menu button Back button Speaker Microphone Headset jack Multipurpose jack GPS antenna Rear camera Volume button Back cover Memory card slot Main antenna... -
Page 8: Buttons
Getting started Do not cover the antenna area with your hands or other objects. This may cause connectivity problems or drain the battery. Do not use a screen protector. This causes sensor malfunctions. Do not allow water to contact the touch screen. The touch screen may malfunction in humid conditions or when exposed to water. -
Page 9: Package Contents
Device Battery Quick start guide Use only Samsung-approved software. Pirated or illegal software may cause damage or malfunctions, which are not covered by the warranty. The items supplied with the device and any available accessories may vary depending on the region or service provider. -
Page 10: Installing The Sim Or Usim Card And
Getting started Installing the SIM or USIM card and battery Insert the SIM or USIM card provided by the mobile telephone service provider, and the included battery. Remove the back cover. Be careful not to damage your fingernails when you remove the back cover. Do not bend or twist the back cover excessively. - Page 11 SIM card slot of your device. Use caution not to lose or let others use the SIM or USIM card. Samsung is not responsible for any damages or inconveniences caused by lost or stolen cards.
- Page 12 Getting started Removing the SIM or USIM card and battery Remove the back cover. Pull out the battery. Pull out the SIM or USIM card.
-
Page 13: Charging The Battery
Charge the battery before using it for the first time. Use the charger to charge the battery. A computer can be also used to charge the device by connecting them via the USB cable. Use only Samsung-approved chargers, batteries, and cables. Unapproved chargers or cables can cause the battery to explode or damage the device. - Page 14 If the device is not charging properly, take the device and the charger to a Samsung Service Centre. After fully charging, disconnect the device from the charger. First unplug the charger from the device, and then unplug it from the electric socket.
-
Page 15: Inserting A Memory Card
Getting started Reducing the battery consumption Your device provides options that help you save battery power. By customising these options and deactivating features in the background, you can use the device longer between charges: When you are not using the device, switch to sleep mode by pressing the Power button. Close unnecessary applications with the task manager. - Page 16 Do not remove the memory card while the device is transferring or accessing information. Doing so can cause data to be lost or corrupted or damage to the memory card or device. Samsung is not responsible for losses that result from the misuse of damaged memory cards, including the loss of data.
-
Page 17: Turning The Device On And Off
Getting started Turning the device on and off When turning on the device for the first time, follow the on-screen instructions to set up your device. Press and hold the Power button for a few seconds to turn on the device. Follow all posted warnings and directions from authorised personnel in areas where the use of wireless devices is restricted, such as aeroplanes and hospitals. -
Page 18: Locking And Unlocking The Device
Getting started Locking and unlocking the device When not in use, lock the device to prevent unwanted operation. Pressing the Power button turns off the screen and puts the device into lock mode. The device automatically gets locked if it is not used for a specified period. To unlock the device, press the Power button or the Home button when the touch screen is turned off, and then tap anywhere on the screen, and then flick your finger in any direction. -
Page 19: Switching Between Networks
Getting started Switching between networks The device has two SIM card slots that allow you to insert up to two SIM or USIM cards. When you insert two SIM or USIM cards, you can use two different subscriptions on the same network without the need to carry two devices at the same time. -
Page 20: Basics
Basics Indicator icons The icons displayed at the top of the screen provide information about the status of the device. The icons listed in the table below are most common. Icon Meaning No signal Signal strength Currently accessing SIM or USIM card Roaming (outside of normal service area) GPRS network connected EDGE network connected... -
Page 21: Using The Touch Screen
Basics Using the touch screen Use only fingers to use the touch screen. Do not allow the touch screen to come into contact with other electrical devices. Electrostatic discharges can cause the touch screen to malfunction. Do not allow the touch screen to contact water. The touch screen may malfunction in humid conditions or when exposed to water. - Page 22 Basics Dragging To move an icon, thumbnail, or preview to a new location, tap and hold it and drag it to the target position. Double-tapping Double-tap on a webpage, map, or image to zoom in a part. Double-tap again to return.
- Page 23 Basics Flicking Flick left or right on the Home screen or the Applications screen to see another panel. Flick up or down to scroll through a webpage or a list, such as contacts. Pinching Spread two fingers apart on a webpage, map, or image to zoom in a part. Pinch to zoom out.
-
Page 24: Control Motions
Basics Control motions Simple motions allow easy control of the device. Before using motions, make sure the motion feature is activated. On the Home screen, tap Settings Motion, and then drag the Motion switch to the right. Rotating the screen Many applications allow display in either portrait or landscape orientation. - Page 25 Basics Turning over Turn over the device to mute ringtone or pause media playback. Shaking Shake the device to search for Bluetooth devices.
-
Page 26: Notifications
Basics Notifications Notification icons appear on the status bar at the top of the screen to report missed calls, new messages, calendar events, device status, and more. Drag down from the status bar to open the notifications panel. Scroll the list to see additional alerts. To close the notifications panel, drag up the bar that is on the bottom of the screen. -
Page 27: Home Screen
Basics Home screen The Home screen is the starting point to access all of the device’s features. It displays indicator icons, widgets, shortcuts to applications, and others. The Home screen can have multiple panels. To view other panels, scroll left or right. Rearranging items Adding an application icon On the Home screen, tap... - Page 28 Basics Rearranging panels Adding a new panel Edit page Moving a panel Edit page, tap and hold a panel preview, and then drag it to a new location. Removing a panel Edit page, tap and hold a panel preview, and then drag it to the rubbish bin at the bottom of the screen.
-
Page 29: Using Applications
Basics Using applications This device can run many different types of applications, ranging from media to Internet applications. Opening an application On the Home screen or the Applications screen, select an application icon to open it. Opening from recently-used applications Press and hold the Home button to open the list of recently-used applications. - Page 30 Pinch on the screen, tap and hold a panel preview, and then drag it to a new location. Installing applications Use application stores, such as Samsung Apps to download and install applications. Uninstalling applications Uninstall, and then select an application to uninstall it.
-
Page 31: Entering Text
Basics Entering text Use the Samsung keyboard or the voice input feature to enter text. Text entry is not supported in some languages. To enter text, you must change the input language to one of the supported languages. Changing the keyboard type Tap any text field, open the notifications panel, tap Select input method, and then select the type of keyboard to use. -
Page 32: Connecting To A Wi-Fi Network
Basics Entering text by voice When Google voice typing is activated, the voice recognition screen appears. Speak a text into the microphone. When you are done, tap to return to the text. To change the text, tap the underlined and select a word or phrase among the dropdowns. Copying and pasting Tap and hold over text, drag to select more or less text, and then tap... -
Page 33: Setting Up Accounts
Select the network in the networks list, and then tap Forget. Setting up accounts Google applications, such as Play Store, require a Google account, and Samsung Apps requires a Samsung account. Create Google and Samsung accounts to have the best experience with the device. -
Page 34: Transferring Files
Connecting with Samsung Kies Samsung Kies is a computer application that manages media libraries, contacts, and calendars, and syncs them with Samsung devices. Download the latest Samsung Kies from the Samsung website. Connect the device to the computer using the USB cable. -
Page 35: Securing The Device
Basics Securing the device Prevent others from using or accessing personal data and information stored in the device by using the security features. The device requires a preset pattern, PIN, or password whenever unlocking it. Setting a pattern On the Applications screen, tap Settings Security Screen lock Pattern. -
Page 36: Upgrading The Device
Turn on the screen by pressing the Power button or the Home button, and enter the pattern, PIN, or password. If the unlock code is forgotten, take the device to a Samsung Service Centre to reset it. Upgrading the device The device can be upgraded to the latest software. -
Page 37: Communication
Communication Phone Use this application to make or answer a call. Tap Phone on the Applications screen. Making calls Making a call Use one of the following methods: Keypad: Enter the number using the keypad, and then tap Logs: Make a call from the history of incoming and outgoing calls and messages. Favourites: Make a call from the list of favourite contacts. - Page 38 Communication Finding contacts Enter a name, phone number, or email address to find a contact in the contacts list. As characters are entered, predicted contacts appear. Select one to place a call to it. Making an international call Tap and hold 0 until the + sign appears. Enter the country code, area code, and phone number, and then tap During a call The following actions are available:...
- Page 39 Communication Adding contacts To add a phone number to the contacts list from the keypad, enter the number and tap Add to contacts. Sending a message to send a message to the number on display. Viewing call logs Tap Logs to view the history of incoming and outgoing calls. To filter a call log, tap View by, and then select an option.
- Page 40 Communication Rejecting a call When a call comes in, drag outside the circle, or press and hold the headset button. To send a message when rejecting an incoming call, tap Reject call with message. To create the rejection message, tap Call settings Set reject messages.
-
Page 41: Contacts
Communication Contacts Use this application to manage contacts, including phone numbers, email addresses, and others. Tap Contacts on the Applications screen. Managing contacts Creating a contact and enter contact information. : Add an image. : Add or delete a contact field. Editing a contact Deleting a contact Delete. - Page 42 Communication Searching for contacts Use one of the following search methods: Scroll up or down the contacts list. Use the index on the right side of the contacts list for quick scrolling, by dragging a finger along it. Tap the search field at the top of the contacts list and enter search criteria. Once a contact is selected, take one of the following actions.
- Page 43 Communication Exporting contacts Import/Export Export to SIM card, Export to SD card, or Export to USB storage. Sharing contacts Import/Export Share namecard via, select contacts, tap Done, and then select a sharing method. Favourite contacts , and then take one of the following actions: Search: Search for contacts.
-
Page 44: Messaging
Communication Sending a message or email to a group’s members Select a group, tap Send message or Send email, select members, and then tap Done. Business card Create a business card and send it to others. Tap Set up my profile, enter details, such as phone number, email address, and postal address, and then tap Save. -
Page 45: Email
Communication Viewing incoming messages Incoming messages are grouped into message threads by contact. Select a contact to view the person’s message. Listening to a voice message Tap and hold 1 on the keypad, and then follow the instructions from your service provider. Email Use this application to send or view email messages. -
Page 46: Google Mail
Communication Reading messages Select an email account to use, and new messages are retrieved. To manually retrieve new messages, tap Tap a message to read. Reply to the message. Forward the message. Delete the message. Mark the message as a reminder. Open attachments. - Page 47 Communication Sending messages In any mailbox, tap , enter recipients, a subject, and a message, and then tap Attach file to attach images. Add Cc/Bcc to add more recipients. Save draft to save the message for later delivery. Discard to start over. Reading messages Mark the message as a reminder.
-
Page 48: Talk
Communication Talk Use this application to chat with others via Google Talk. Tap Talk on the Applications screen. This application may not be available depending on the region or service provider. Public profile Tap the account ID at the top of the friends list to change the availability status, image, or status message. -
Page 49: Google
Use this application to chat with any device that has a mobile phone number. Tap ChatON on the Applications screen. Create the buddies list by entering phone numbers or email addresses of Samsung accounts, or selecting buddies from the list of suggest. -
Page 50: Web & Network
Web & network Internet Use this application to browse the Internet. Tap Internet on the Applications screen. Viewing webpages Tap the address field, enter the web address, and then tap Go. to share, save, or print the current webpage while viewing a webpage. Opening a new page New window. - Page 51 Web & network Bookmarks To bookmark the current webpage, tap Add bookmark. To open a bookmarked webpage, tap and then select one. History History to open a webpage from the list of recently-visited webpages. To clear the history, tap Clear history. History Most visited to open a webpage from the list of most visited webpages.
-
Page 52: Bluetooth
Bluetooth creates a direct wireless connection between two devices over short distances. Use Bluetooth to exchange data or media files with other devices. Samsung is not responsible for the loss, interception, or misuse of data sent or received via the Bluetooth feature. -
Page 53: Music Player
Media Music Player Use this application to listen to music. Tap Music Player on the Applications screen. Some file formats are not supported depending on the device’s software version. Some files may not play properly depending on the encoding used. Playing music Select a music category, and then select a song to play. - Page 54 Media ™ • S RS CS Headphone delivers a 5.1 surround sound experience over standard headphones or earbuds when listening to multichannel content, such as DVD movies. ™ • S RS WOW HDx significantly improves the playback quality of audio, delivering a dynamic entertainment experience with deeper, richer bass, a wider sound stage and greater high frequency clarity for crisp details.
-
Page 55: Camera
Media Camera Use this application to take photos or videos. Use Gallery to view photos and videos taken with the device’s camera. (p. 60) Tap Camera on the Applications screen. The camera automatically shuts off when unused. Camera etiquette Do not take photos or videos of other people without their permission. Do not take photos or videos where legally prohibited. - Page 56 Media Scene mode Predefined settings make point-and-shoot photos easier to take. Scene mode. Landscape: Use this setting for a wider view. Night: Use this setting for images taken in darker conditions. Sports: Use this setting for fast-moving subjects. Party/Indoor: Use this setting for well-lit indoor scenes. Sunset: Use this setting for richer colours and sharper contrasts.
- Page 57 Media Taking videos Taking a video Slide the still-video switch to the video icon, and then tap to take a video. To stop recording, tap The zoom function may not be available when recording at the highest resolution. Recording mode Change recording mode.
- Page 58 Media to change recording mode. Normal: Use this mode for normal quality. Limit for MMS: Use this mode to lower quality for sending via messaging. Zooming in and out Use one of the following methods: Use the Volume button to zoom in or out. Spread two fingers apart on the screen to zoom in, and pinch to zoom out.
- Page 59 Media Configuring settings for Camera to configure settings for Camera. Not all of the following options are available in both still camera and video camera modes. The available options vary depending on the mode used. Edit shortcuts: Reorganise shortcuts to frequently-used options. Shooting mode: Change the shooting mode.
-
Page 60: Gallery
Media Shortcuts Reorganise shortcuts for easy access to the camera’s various options. Edit shortcuts. Tap and hold an option and drag it to a slot at the left of the screen. The other icons can be moved within the list by tapping and dragging them. Gallery Use this application to view images and videos. - Page 61 Set as: Set the image as a wallpaper or a contact image. Print: Print via a USB or Wi-Fi connection. The device is only compatible with some Samsung printers. Rename: Rename the file. Scan for nearby devices: Search for devices that have media sharing activated.
-
Page 62: Video Player
Media Setting as wallpaper When viewing an image, tap Set as to set the image as wallpaper or to assign it to a contact. Video Player Use this application to play video files. Tap Video Player on the Applications screen. Some file formats are not supported depending on the device's software. -
Page 63: Youtube
Media Deleting videos Delete, select videos by ticking, and then tap Delete. Sharing videos Share via, select a sharing method, select videos by ticking, and then tap Done. YouTube Use this application to watch videos from the YouTube website. Tap YouTube on the Applications screen. This application may not be available depending on the region or service provider. -
Page 64: Fm Radio
Media Sharing videos Select the video to view, tap , and then select a sharing method. Uploading videos Tap ACCOUNT , select a video, enter information for the video, and then tap Upload. To take a video for uploading to YouTube, tap at the top of the screen. - Page 65 Media Scanning radio stations Scan, and then select a scan option. The FM radio scans and saves available stations automatically. Select the radio station you want from the stations list and tap to return to the FM radio screen. Adding stations to the favourites list Select to a radio station, and then tap to add the station to the favourites list.
-
Page 66: Application & Media Stores
Application & media stores Play Store Use this application to purchase and download applications and games that are able to run on the device. Tap Play Store on the Applications screen. This application may not be available depending on the region or service provider. Installing applications Browse applications by category, or tap to search with a keyword. -
Page 67: Samsung Apps
This application may not be available depending on the region or service provider. If a Samsung account is not registered, follow on-screen instructions to create a Samsung account. To complete the subscription process, read the terms and conditions, and then tap Accept to agree to them. -
Page 68: Music Hub
Application & media stores Music Hub Use this application to purchase and download songs. Tap Music Hub on the Applications screen. This application may not be available depending on the region or service provider. Tap the search field, and then enter a keyword to search for. Select one from the list of search results. -
Page 69: Utilities
: Delete the memo. : Change the background colour. : Lock the memo so that others cannot view it. : Print the memo via a USB or Wi-Fi connection. The device is only compatible with some Samsung printers. - Page 70 Utilities S Planner Use this application to manage events and tasks. Tap S Planner on the Applications screen. Creating events or tasks , and then use one of the following methods: Add event: Enter an event with an optional repeat setting. Add task: Enter a task with an optional priority setting.
- Page 71 Utilities Attach a map showing the location of the event. Enter the location in the Location field, tap next to the field, and then pinpoint the precise location by tapping and holding on the map that appears. Attach an image. Tap Images, and then take a photo or select one of the existing images. Syncing with Google Calendar Settings Sync Event/Task, select the Google account, and then tick Sync...
-
Page 72: Quickoffice
Utilities Quickoffice Use this application to view documents in various formats, including spreadsheets and presentations. Tap Quickoffice on the Applications screen. Reading documents Select a Quickoffice program Internal Storage or Recent Documents a document. Searching documents Tap Search, tap the search field at the top of the screen, and then enter search criteria. Clock Use this application to set alarms, check the time in any location in the world, measure the duration of an event, or set a timer. - Page 73 Utilities Alarm Setting alarms Tap Create alarm, set a time for the alarm to go off, select days for the alarm to repeat, and then tap Save. Snooze: Set an interval and the number of times for the alarm to repeat after the preset time.
-
Page 74: Calculator
Utilities Stopwatch Tap Start to time an event. Tap Lap to record lap times. Tap Reset to clear lap time records. Timer Set the duration, and then tap Start. Drag outside the large circle when the timer goes off. Desk clock to view in full screen. -
Page 75: Voice Recorder
Utilities Voice Recorder Use this application to record or play voice memos. Tap Voice Recorder on the Applications screen. Recording voice memos to start recording. Speak into the microphone at the bottom of the device. Tap pause recording. Tap to finish recording. Recording elapsed time Start recording. -
Page 76: Search
Utilities Managing voice memos In the list of voice memos, tap and select one of the following: Share via: Select a sharing method, and then select voice memos to send. Delete: Select voice memos to delete. Settings: Change the voice recorder settings. End: Close the voice recorder. -
Page 77: My Files
Utilities My Files Use this application to access all kinds of files stored in the device, including images, videos, songs, and sound clips. Tap My Files on the Applications screen. Select a folder to open it. To go back to the parent folder, tap . -
Page 78: Travel & Local
Travel & local Maps Use this application to pinpoint the location of the device, search for places, or get directions. Tap Maps on the Applications screen. This application may not be available depending on the region or service provider. Searching for locations , enter an address, and then tap . -
Page 79: Local
Travel & local Getting directions for a destination , and then select a method to enter starting and ending locations: My current location: Use current location for starting location. Contacts: Select from the contacts list. Point on map: Pinpoint by tapping on the map. My Places: Select from the list of favourite places. -
Page 80: Latitude
Travel & local Latitude Use this application to share location information with friends. Tap Latitude on the Applications screen. This application may not be available depending on the region or service provider. To add a friend with whom location information is shared, tap Select from Contacts or Add via email address. -
Page 81: Settings
Settings About Settings Use this application to configure the device, set application options, and add accounts. Tap Settings on the Applications screen. Wi-Fi Activate the Wi-Fi feature to connect to a Wi-Fi AP and access the Internet or other network devices. -
Page 82: More Settings
Settings More settings Customise settings to control connections with other devices or networks. Flight mode This disables all wireless functions on your device. You can use only non-network services. Mobile networks Mobile data: Use to allow packet switching data networks for network services. Data roaming: Use the device to connect to another network when you are roaming or your home network is not available. -
Page 83: Sim Card Manager
Settings Wi-Fi Direct Wi-Fi Direct connects two devices directly without requiring an access point. Set up and connect to virtual private networks (VPNs). SIM card manager Activate your SIM or USIM cards and customise the SIM card settings. Receive incoming calls: Set whether or not to allow incoming calls from the GPRS network while using data services. -
Page 84: Display
Settings Display Change the settings for the display. Brightness: Set the brightness of the display. Screen timeout: Set the length of time the device waits before turning off the display’s backlight. Auto-rotate screen: Set the content to rotate automatically when the device is turned. Font style: Change the font type for display text. -
Page 85: Storage
Settings Storage View memory information for your device and memory card, or format a memory card. Formatting a memory card permanently deletes all data from it. The actual available capacity of the internal memory is less than the specified capacity because the operating system and default applications occupy part of the memory. -
Page 86: Security
Settings Security Change settings for securing the device and the SIM or USIM card. Screen lock: Activate the screen lock feature. Lock screen options: Change the settings for the locked screen. These settings are applied only when you set the swipe lock option. –... - Page 87 Remote controls: Set to allow control of your lost or stolen device remotely via the Internet. To use this feature, you must sign in to your Samsung and Google accounts. – Add account: Add or view your Samsung and Google accounts.
-
Page 88: Language And Input
Block offensive words: Set to prevent the device from recognising offensive words in voice inputs. Samsung keyboard To change the Samsung keyboard settings, tap Portrait keyboard types: Change the keyboard layout. Input language: Select languages for text input. Predictive text: Activate predictive text mode to predict words based on your input and show word suggestions. - Page 89 Settings Voice input: Activate the voice input feature to enter text by voice on the Samsung keyboard. Auto capitalisation: Set the device to automatically capitalise the first character after a final punctuation mark, such as a full stop, question mark, or exclamation mark.
-
Page 90: Back Up And Reset
Settings Back up and reset Change the settings for managing settings and data. Back up my data: Set to back up settings and application data to the Google server. Backup account: Set up or edit your Google backup account. Automatic restore: Set to restore settings and application data when the applications are reinstalled on the device. -
Page 91: Accessibility
Settings Accessibility Accessibility services are special features for those with certain physical disabilities. Access and alert the following settings to improve accessibility to the device. Auto-rotate screen: Set the interface to rotate automatically when you rotate the device. Speak passwords: Set the device to read aloud passwords you enter with Talkback. Call answering/ending: –... -
Page 92: Developer Options
Settings Developer options Change the settings for application development. USB debugging: Activate USB debugging mode to connect your device to a computer with a USB cable. Development device ID: View your device’s development ID. Allow mock locations: Allow mock locations and service information to be sent to a Location Manager service for testing. -
Page 93: Troubleshooting
Ensure that your hands are clean and dry when tapping the touch screen. Restart your device to clear any temporary software bugs. Ensure that your device software is upgraded to the latest version. If the touch screen is scratched or damaged, take it to your local Samsung Service Centre. - Page 94 Troubleshooting Your device freezes or has fatal errors If your device freezes or hangs, you may need to close programs or reset the device to regain functionality. If your device is frozen and unresponsive, press and hold the Power button for 8-10 seconds.
- Page 95 Troubleshooting Audio quality is poor Ensure that you are not blocking the device’s internal antenna. When you are in areas with weak signals or poor reception, you may lose reception. Move to another area and try again. When dialling from contacts, the call is not connected Ensure that the correct number is stored in the contact list.
- Page 96 Samsung Service Centre. Error messages appear when opening music files Some music files may not play on your Samsung device for a variety of reasons. If you receive error messages when opening music files on your device, try the following: Free some memory by transferring files to a computer or deleting files from your device.
- Page 97 If you are a Windows XP user, ensure that you have Windows XP Service Pack 3 or higher installed on your computer. Ensure that you have Samsung Kies 2.0 or Windows Media Player 10 or higher installed on your computer.
- Page 98 Some content may differ from your device depending on the region or service provider. www.samsung.com English (EU). 09/2012. Rev. 1.0...