Table of Contents
Quick Links
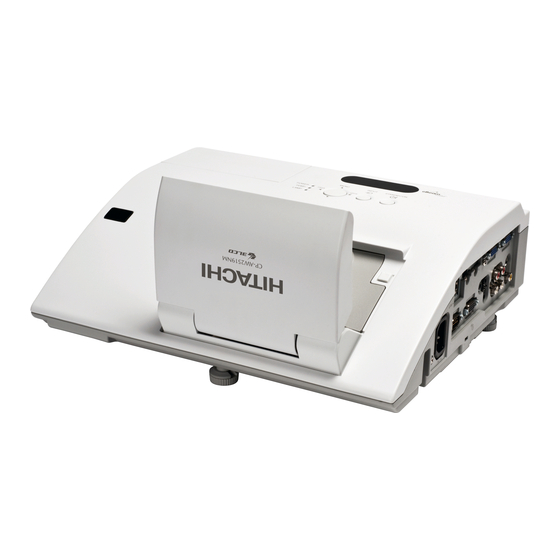
Projector
CP-AW2519N
User's Manual (concise)
Thank you for purchasing this projector.
Please read through this manual before using this product, in order to use safely
and utilize well the product.
WARNING ►Before using this product, be sure to read all manuals for this
product. See the "Using the CD manual" (19) to read the manuals in the CD.
After reading them, store them in a safe place for future reference.
►Heed all the warnings and cautions in the manuals or on the product.
►Follow all the instructions in the manuals or on the product.
NOTE • In this manual, unless any comments are accompanied, "the
manuals" means all the documents provided with this product, and "the product"
means this projector and all the accessories came with the projector.
Contents
First of all ............................................ 2
Important safety instruction ..............................2
Regulatory notices .............................. 3
About Electro-Magnetic Interference ................
Contents of package........................... 4
Arrangement ....................................... 5
Connecting with your devices ............. 6
Connecting power supply ................... 7
Using the cable cover ......................... 8
Turning on the power .......................... 9
(Type nos. CP-AW2519N, CP-AW2519NM)
Adjusting the projector's elevator ..... 10
Operation .......................................... 10
Turning off the power ........................ 12
Replacing the lamp ........................... 13
3
Preparing for the remote control ....... 16
Preparing for the interactive pen ...... 16
Caring for the mirror and lens ........... 18
Using the CD manual ....................... 19
Specifications ................................... 20
- Warranty and after-service ........... 21
1
Table of Contents

Related Manuals for Hitachi CP-AW2519NM


Summary of Contents for Hitachi CP-AW2519NM
-
Page 1: Table Of Contents
Projector CP-AW2519N (Type nos. CP-AW2519N, CP-AW2519NM) User's Manual (concise) Thank you for purchasing this projector. Please read through this manual before using this product, in order to use safely and utilize well the product. WARNING ►Before using this product, be sure to read all manuals for this product. -
Page 2: First Of All
First of all Entries and graphical symbols explanation The following entries and graphical symbols are used for the manuals and the product as follows, for safety purpose. Please know their meanings beforehand, and heed them. WARNING This entry warns of a risk of serious personal injury or even death. CAUTION This entry warns of a risk of personal injury or physical damage. -
Page 3: Regulatory Notices
Regulatory notices About Electro-Magnetic Interference This is a Class A product. In a domestic environment this product may cause radio interference in which case the user may be required to take adequate measures. This product may cause interference if used in residential areas. Such use must be avoided unless the user takes special measures to reduce electromagnetic emissions to prevent interference to the reception of radio and television broadcasts. -
Page 4: About Waste Electrical And Electronic Equipment
• About the software applications, read the manuals that are provided in the disc of the software. • StarBoard Software complies with the conditions provided by Hitachi Solutions, Ltd. Contact your local dealer or service company for inquiry. -
Page 5: Arrangement
Arrangement Refer to table T-1 and figures F-1 and F-2 at the end of this manual to determine the screen size and projection distance. The values shown in the table are calculated for a full size screen: 1280 x 800 Screen size (diagonal) Projection distance (±8%) Screen height (±8%) -
Page 6: Connecting With Your Devices
Connecting with your devices Be sure to read the manuals for devices before connecting them to the projector. Make sure that all the devices are suitable to be connected with this product, and prepare the cables required to connect. Refer to figures F-3 to F-6 at the back of this manual. -
Page 7: Connecting Power Supply
Connecting with your devices (continued) NOTE • If a loud feedback noise is produced from the speaker, move the microphone away from the speaker. • This projector doesn't support plug-in power for the microphone. • The COMPUTER IN1/2 port can support a component signal also. The specific adapter or the specific cable is required for a component video input to the projector. -
Page 8: Using The Cable Cover
Using the cable cover Utilize the cable cover as the guard and blind for the connecting parts. Connect the signal cables and the power cord to the projector first. Combine parts as shown in figure, and assemble the cable cover. Insert the three knobs on the cable cover into the three holes on the projector as shown in the figure. -
Page 9: Turning On The Power
Turning on the power STANDBY/ON button POWER indicator Make sure that the power cord is firmly and correctly connected to the projector and the outlet. Make sure that the POWER indicator is steady orange. Confirm that there is nothing that the MY SOURCE/ MY SOURCE/ VIDEO... -
Page 10: Adjusting The Projector's Elevator
Adjusting the projector's elevator The projector has Front foot for inclinations and Rear foot for horizontals. Spacers on the each elevator foot are installed at the time of shipment, and projector is in a condition to be able to just project. If necessary, detach the spacer, and the elevator feet can be manually twisted to make more precise adjustments. - Page 11 Focusing ASPECT button Use the FOCUS + and FOCUS – buttons on the projector or remote control to adjust the MY SOURCE/ VIDEO COMPUTER DOC.CAMERA VOLUME+/- button screen focus. ASPECT AUTO SEARCH BLANK MAGNIFY PAGE VOLUME FREEZE + DOWN Selecting an aspect ratio ー...
-
Page 12: Turning Off The Power
Turning off the power STANDBY/ON button Press the STANDBY/ON button on the POWER indicator projector or the remote control. The message “Power off?” will appear on the screen for about 5 seconds. Confirm that there is nothing that the lens door hits while closing. Press the STANDBY/ON button again while the MY SOURCE/ MY SOURCE/... -
Page 13: Replacing The Lamp
Replacing the lamp A lamp has finite product life. Using the lamp for long periods of time could cause the pictures darker or the color tone poor. Note that each lamp has a different lifetime, and some may burst or burn out soon after you start using them. Preparation of a new lamp and early replacement are recommended. - Page 14 Replacing the lamp (continued) HIGH VOLTAGE HIGH TEMPERATURE HIGH PRESSURE WARNING ►The projector uses a high-pressure mercury glass lamp. The lamp can break with a loud bang, or burn out, if jolted or scratched, handled while hot, or worn over time. Note that each lamp has a different lifetime, and some may burst or burn out soon after you start using them.
-
Page 15: Cleaning And Replacing The Air Filter
Cleaning and replacing the air filter The air filter has two kinds of filters inside. Please check and clean the air filter periodically. When the indicators or a message prompts you to clean the air filter, comply with it as soon as possible. -
Page 16: Preparing For The Remote Control
Align and insert the two AA batteries HITACHI MAXELL or HITACHI MAXELL ENERGY, Part No. LR6 or R6P according to their plus and minus terminals as indicated in the remote control. Replace the battery cover in the direction of the arrow and snap it back into place. -
Page 17: Replacing The Internal Clock Battery
This projector has internal clock that uses a battery. When the clock of the network function does not work correctly, please try solution by replacement of the battery: HITACHI MAXELL or HITACHI MAXELL ENERGY, part number CR2032 or CR2032H. Turn the projector off, and unplug the Battery Cover power cord. -
Page 18: Caring For The Mirror And Lens
Caring for the mirror and lens If the projection mirror or lens is flawed, soiled or fogged, it could cause deterioration of display quality. Please take care of the mirror and lens, being cautious of handling. Turn the projector off and unplug the power cord from the power outlet. -
Page 19: Using The Cd Manual
Using the CD manual The other manuals for this product are written into the included CD-ROM titled “User’s Manual (detailed)”. Before using the CD-ROM, please read the following to ensure the proper use. System requirements The system for using the CD-ROM requires the following. Windows OS:Microsoft ®... -
Page 20: Specifications
Specifications Item Specification Product name Liquid crystal projector Liquid Crystal Panel 1,024,000 pixels (1280 horizontal x 800 vertical) Lamp 210W UHP Speaker Power supply AC 100-120 V/3.1 A, AC 220-240 V/1.6 A Power consumption AC 100-120 V:310 W, AC 220-240 V:300 W 5 ~ 35°C (Operating) Temperature range 16 ~ 35°C (Interactive Function) -
Page 21: Troubleshooting - Warranty And After-Service
Blu-ray Disc Association. ® • StarBoard is a registered trademark of Hitachi Solutions, Ltd. in Japan and other countries. • © 2011 Luidia, Inc. All rights reserved. eBeam, the eBeam logo and eBeam Enabled are trademarks or registered trademarks of Luidia, Inc.