Table of Contents
Quick Links
®
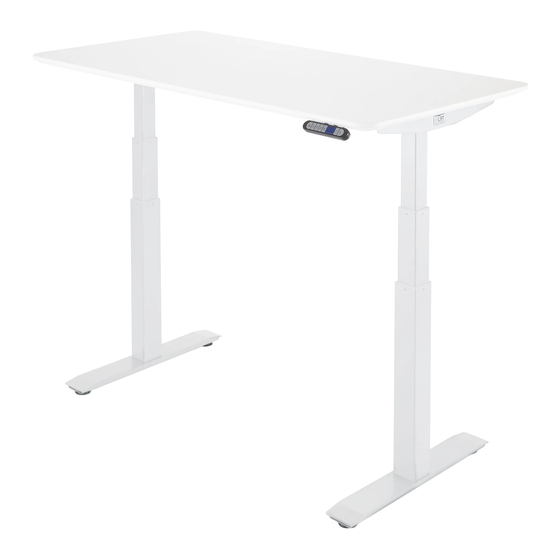
AIRLIFT
S3 Electric Height-Adjustable Standing Desk
Models: OFF65803, 15, 74
Base + Top Kits: OFFK65818, 19, 22, 23, 26, 27, 75, 76, 77
OFFK66010, 11, 12
Thank you for choosing Seville Classics! We hope that you enjoy your new sit-to-stand
desk. Please read through this user guide for parts list, instructions, frequently asked
questions and contact information.
041520
Table of Contents

Related Manuals for Seville Classics airLIFT S3


Summary of Contents for Seville Classics airLIFT S3
- Page 1 Base + Top Kits: OFFK65818, 19, 22, 23, 26, 27, 75, 76, 77 OFFK66010, 11, 12 Thank you for choosing Seville Classics! We hope that you enjoy your new sit-to-stand desk. Please read through this user guide for parts list, instructions, frequently asked questions and contact information.
- Page 2 Please read through this manual for more information regarding ® your AIRLIFT S3 Electric Height-Adjustable Standing Desk. ® Thank you for choosing Seville Classics ! We hope you will enjoy this desk for many years to come.
-
Page 3: Table Of Contents
® Mounting Seville Classics Ergo Table Top………………………... ® Mounting Non-Seville Classics Top………………………………….. Installing Feet……………………………………………………………………. Cable Management…………………………………………………………... Connect Cables………………………………………………………………….. Turn Desk Over…………………………………………………………………. INITIALIZATION & USE INSTRUCTIONS……………………………………... CABLE MANAGEMENT………………………………………………………………. TROUBLESHOOTING…………………………………………………………………. WARRANTY INFORMATION………………………….……………………………. ® MORE FROM SEVILLE CLASSICS ……………….……………………………... SPECIFICATIONS……………………………………………………………………….. CUSTOMER SERVICE INFORMATION…………………………………………. -
Page 5: Safety Instructions
Safety Instructions FAILURE TO COMPLY WITH OR OBSERVE ALL ASSEMBLY, SAFETY AND OPERATING INSTRUCTIONS AND WARNINGS REGARDING THE USE OF THIS PRODUCT MAY RESULT IN SERIOUS BODILY INJURY Read and understand this manual before attempting to install or Assure that everyone who uses this product is informed of the contents of this manual. This ... -
Page 6: Component Diagram
Component Diagram Control Box Support Bracket Controller Support Bracket Legs Legs Foot Support Beam Foot... -
Page 7: Parts List
Parts List A. Top E. Foot (2) B. Support Beam (1) F. Control Box (1) (pre-installed) C. Legs (2) G. Controller (1) (pre-installed) D. Support Bracket (2) Tools & Hardware List H. Allen wrench - 3mm O. Screw (10) I. Allen wrench - 5mm P. -
Page 8: Assembly Instructions
Assembly Instructions: Prepare Workspace ® Lay down a blanket and place your Seville Classics Ergo Table Top (or your own top) with the bottom side facing up on a soft, flat, even surface beneath the top to protect the surface. -
Page 9: Unpack & Unfold
Assembly Instructions: Unpack & Unfold STEP 1. Remove SUPPORT BEAM from box and set on TOP with legs facing upward. STEP 2. Unfold legs until the holes on the legs and beam align. 90° 90°... -
Page 10: Install Support Brackets
Assembly Instructions: Install Support Brackets STEP 3. Slide SUPPORT BRACKET into the SUPPORT BEAM (B). Tighten /w 6mm Allen Wrench Tighten /w 6mm Allen Wrench Tighten /w 6mm Allen Wrench Bolt Sleeve Support Bracket M8x25 Bolt 6mm Allen Wrench Insert BOLT SLEEVES through holes on SUPPORT BEAM and LEG (C). -
Page 11: Unlock Beam
Assembly Instructions: Unlock Beam STEP 4. Unscrew the eight M6x6 BOLTS marked in the diagram below from SUPPORT BEAM with 3mm ALLEN WRENCH (H). 3mm Allen Wrench This unlocks the SUPPORT BEAM and allows it to be extended, or shortened to Unscrew accommodate different sizes of desk tops. -
Page 12: Align Frame
SUPPORT BRACKETS with the TOP (A). ® Seville Classics Ergo Table Top features pre-installed mounting anchors. TIP: Frame is symmetrical and should be installed so that the CONTROL BOX is near a power outlet. -
Page 13: Mounting Seville Classics ® Ergo Table Top
® Seville Classics Assembly Instructions: Mounting Ergo Top STEP 7A. Use three M6x16 BOLTS to secure each SUPPORT BRACKET with 5mm ALLEN WRENCH (I). 5mm Allen Wrench M6x16 Bolt Screwdriver Install CONTROLLER to side of table with pre-drilled holes for controller. - Page 14 ® Non-Seville Classics Assembly Instructions: Mounting Other Top ® WARNING: Seville Classics does not take responsibility for damage of customer-supplied parts or desk components. WARNING: Users MUST supply their own wood screws when installing their own top. BE SURE screws ARE NOT longer than top depth.
-
Page 15: Installing Feet
Assembly Instructions: Installing Feet STEP 8. Attach FEET to the bottom of table legs with four M6x40 BOLTS and 5mm ALLEN WRENCH (I). Leveling Foot (pre-installed) 5 mm Allen Wrench M6x40 Bolts Take this time to make sure all screws and bolts have been secured tightly. -
Page 16: Cable Management
Assembly Instructions: Cable Management STEP 9. Identify the MOTOR CABLES coming from the LEGS (C). Identify the CONTROLLER CABLE coming from the CONTROLLER (G). Guide them through the cable guard toward the CONTROL BOX (F). Cable Guard Control Box... -
Page 17: Connect Cables
Assembly Instructions: Connect Cables 110-120V Socket Power Controller Motor Cable Cable Cables STEP 10. Plug the cable from the CONTROLLER to the left-side port on the CONTROL BOX (F). Then, plug the cables from the motors into the two right-side ports on the CONTROL BOX (F). -
Page 18: Turn Desk Over
Assembly Instructions: Turn Desk Over WARNING: TWO PEOPLE ARE NECESSARY TO TURN TABLE. DESK IS HEAVY. LIFT WITH EXTREME CAUTION. STEP 11. With the help of at least one other person, turn the desk onto it's feet. Desk with top weighs approximately lbs. -
Page 19: Initialization & Use Instructions
Initialization & Use Instructions DESK MUST BE INITIALIZED BEFORE YOUR FIRST USE SAVE MEMORY MEMORY 1 / 2 / 3 / 4 DISPLAY UP ARROW DOWN ARROW Initialize Press and hold the UP ARROW and DOWN ARROW simultaneously on the controller until three blinking zeros appear on the display, then release. -
Page 20: Cable Management
Cable Management Use ZIP-TIES to affi x the cables from the CONTROLLER CONTROL BOX to the SUPPORT BEAM so that the cables wont snag or get in the way as the desk moves up and down. Fastener Stick FASTENERS to the underside of the desk top near the controller. -
Page 21: Troubleshooting
Troubleshooting Problem Action Desk does not go up or down and the con- Check all connections. Make sure power cord is plugged into the control troller does not illuminate when any button box and a power outlet. Press any button on the is pressed. -
Page 22: Warranty Information
The liability of Seville Classics under the warranty shall be limited to the amount paid by the customer for the product. Seville Classics shall not be liable for any loss of use of the product, or other incidental or consequential costs, expenses or damages incurred by the customer or other user. -
Page 23: More From Seville Classics
® More from Seville Classics Visit us at www.SevilleClassics.com for additional desk tops, bases, and other home goods. ® Seville Classics Ergo Table Top Choose the desk top that just plain works. Seville ® ® Classics Ergo Table Tops pair with our AIRLIFT Electric Height-Adjustable Standing desk frames straight out of the box. -
Page 24: Specifications
Maximum Width: 62.9" Footprint: 48" W x 23.75" D Lifting Speed: 1.5" per second Base Weight: 76 lbs. ® Maximum Weight Capacity (with Seville Classics Ergo Top): 264 lbs. Customer Service Information Telephone: (800) 323-5565 Fax: (310) 533-3899 Hours: 8:30 AM – 4:30 PM (PST) Email: [email protected]...