Table of Contents
Quick Links
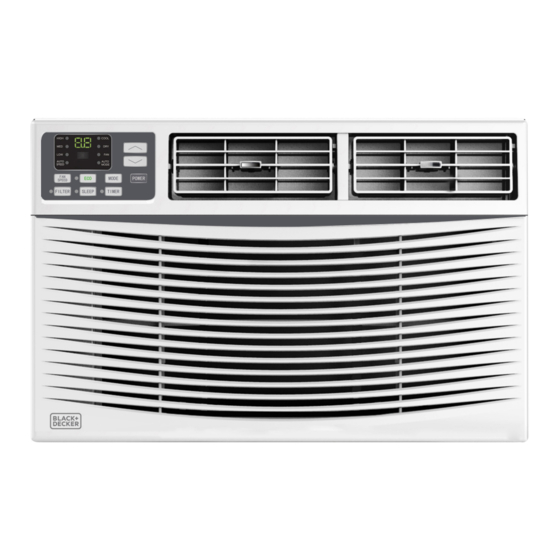
6,000, 8,000, 10,000 & 12,000 BTU
ELECTRONIC WINDOW AIR CONDITIONER
INSTRUCTION MANUAL
CATALOG NUMBER
BWAC06WT
BWAC08WT
Thank you for choosing BLACK+DECKER!
PLEASE READ BEFORE RETURNING THIS PRODUCT FOR
ANY REASON.
If you have a question or experience a problem with your BLACK+DECKER
purchase, go to www.blackanddecker.com/instantanswers
If you can't find the answer or do not have access to the Internet, call
844-299-0879 from 10:30 a.m. to 6:30 p.m. EST Mon. - Fri. to speak with an
agent. Please have the catalog number available when you call.
SAVE THIS MANUAL FOR FUTURE REFERENCE.
BWAC10WT
BWAC12WT
Table of Contents
Troubleshooting

Related Manuals for Black & Decker BWAC06WT


Summary of Contents for Black & Decker BWAC06WT
- Page 1 6,000, 8,000, 10,000 & 12,000 BTU ELECTRONIC WINDOW AIR CONDITIONER INSTRUCTION MANUAL CATALOG NUMBER BWAC06WT BWAC10WT BWAC08WT BWAC12WT Thank you for choosing BLACK+DECKER! PLEASE READ BEFORE RETURNING THIS PRODUCT FOR ANY REASON. If you have a question or experience a problem with your BLACK+DECKER purchase, go to www.blackanddecker.com/instantanswers...
-
Page 2: Table Of Contents
CONTENTS SAFETY INFORMATION Important Safety Instructions ............................3-7 Grounding Instructions ................................. 5 Safety Guidelines ..............................6 Power Cord Operation ............................7 SET UP & USE Parts Included .................................... 8 Installation & Assembly ...........................9-13 Control Panel ..............................15-16 Remote Control ..............................17-18 CLEANING &... -
Page 3: Safety Information
SAFETY INFORMATION DANGER WARNING CAUTION DANGER - Immediate hazards WARNING - Hazards or unsafe CAUTION - Hazards or unsafe which WILL result in severe practices which COULD result in practices which COULD result in personal injury or death severe personal injury or death minor personal injury IMPORTANT SAFETY INSTRUCTIONS WARNING... - Page 4 SAFETY INFORMATION HANDLING ALKALINE BATTERIES WARNING When handling alkaline batteries, basic safety precautions should be followed, including the following Should fluid from the battery accidentally get into your eyes, there is a threat of loss of eyesight, do not rub them. Immediately rinse your eyes with clean tap water and then consult a physician immediately.
-
Page 5: Grounding Instructions
SAFETY INFORMATION GROUNDING INSTRUCTIONS ELECTRICAL REQUIREMENTS The electrical requirements are a 115 volt 60 Hz, AC only, 15 amp. It is recommended that a separate circuit serving only the product be provided. The product is equipped with a 3-wire cord having a 3-prong grounding plug. It must be plugged into a wall receptacle that is properly installed and grounded. -
Page 6: Safety Guidelines
SAFETY INFORMATION SAFETY GUIDELINES To prevent injury to the user or other people and property damage, the following instructions must be followed. Incorrect operation due to ignoring of instructions may cause harm or damage. ALWAYS DO THIS NEVER DO THIS ENERGY SAVE •... -
Page 7: Power Cord Operation
SAFETY INFORMATION LCDI POWER CORD AND PLUG This air conditioner is equipped with an LCDI (Leakage Current Detection and Interruption) power cord that is required by UL. This power supply cord contains state-of-the-art electronics that sense leakage current. If the cord is damaged and leakage occurs, power will be disconnected from the unit. -
Page 8: Set Up & Use
Sponge Window Sash Seal Frame Lock Filler Panels (Marked Left & Right) Sash Lock Sponge Window Sash Seal 3/8” Screws (only included with BWAC06WT & BWAC08WT) 1/2” Screws 3/4” Screws Foam Top Window Gasket (For use as needed) Insulation Strip (sponge) Page 8... -
Page 9: Installation & Assembly
SET UP & USE INSTALLATION & ASSEMBLY FOR 6K & 8K Some assembly is required for your new air conditioner. Please read and follow these instructions carefully. Fig. 1 1. This air conditioner is designed to be installed in a standard double-hung window with a window width between 23”... - Page 10 SET UP & USE TOP RAIL ASSEMBLY (ONLY FOR 6K & 8K) The top rail must be assembled prior to installing the air conditioner in the window. Tools Needed: Phillips screwdriver 1. Remove the air conditioner from the box and place on a hard flat surface. 2.
- Page 11 SET UP & USE HOW TO INSTALL NOTE: Top rail and sliding panels at each side are offset to provide the proper pitch to the rear of 5/16”. This is necessary for proper condensed water utilization and drainage. If you are not using the side panels for any reason, this pitch to the rear must still be maintained.
- Page 12 SET UP & USE 3. Extend the side panels out against the window frame. (See Fig. 7) 4. Drive three 1/2” locking screws through filler panel holes into window sash on both left and right sides. (See Fig. 8 & 9) 5.
- Page 13 SET UP & USE IF A/C IS BLOCKED BY STORM WINDOW Fig. 13 Add wood or remove storm window before air conditioner is installed. (See Fig. 13) If storm window frame must remain, be sure the drain holes or slots are not caulked or painted shut.
- Page 14 SET UP & USE AIR CONDITIONER USE Operating your air conditioner properly helps you obtain the best possible results. This section explains proper air conditioner operation. IMPORTANT: • If you turn off the air conditioner, wait at least 3 minutes before turning it back on. This prevents the air conditioner from blowing a fuse or tripping a circuit breaker.
-
Page 15: Control Panel
SET UP & USE CONTROL PANEL SPEED MODE NOTE: This display always shows the room temperature in Fan Mode except when setting the Set temperature or the Timer. NORMAL OPERATING SOUNDS • You may hear a pinging noise caused by water hitting the condenser, or rainy days, or when the humidity is high. - Page 16 SET UP & USE 4. MODE BUTTON: Press the mode button to cycle through the various modes: Cool, Dry, Fan and Auto. Cool Mode: The cooling function allows the air conditioner to cool the room and at the same time reduces air humidify. Press the MODE button to activate the COOL mode.
-
Page 17: Remote Control
SET UP & USE REMOTE CONTROL INSERTING OR REPLACING THE BATTERIES Removing the cover on the rear of the remote control: Insert two R03 “AAA” 1.5V batteries (not included) in the correct position (see instructions inside the battery compartment). Replace the cover If the remote control unit is replaced or disposed of, the batteries must be removed and discarded in accordance with current legislation as they are harmful to the environment. - Page 18 SET UP & USE 1. POWER: Turns the air conditioner on and off. 2. COOL: Press the COOL button to COOL mode. AND : Use these buttons on the control panel and remote to increase or decrease the set temperature or timer. Temperature range: 61˚F~88˚F or 16˚C~31˚C. 4.
-
Page 19: Cleaning & Care
SET UP & USE CARE AND CLEANING Clean your air conditioner to keep it looking new and to minimize dust build up. AIR FILTER CLEANING The air filter should be checked at least once every month to see if it needs cleaning. Trapped particles and dust can build up in the filter and may decrease airflow as well as cause the cooling coils to accumulate frost. -
Page 20: Troubleshooting & Warranty
TROUBLESHOOTING & WARRANTY BEFORE YOU CALL FOR SERVICE IF THE AIR CONDITIONER FAILS TO OPERATE: A) Check to make sure that the air conditioner is plugged in securely. If it is not, remove the plug from the outlet, wait 10 seconds and plug it in again securely. B) Check for a blown circuit fuse or a tripped main circuit breaker. -
Page 21: Troubleshooting
TROUBLESHOOTING & WARRANTY Troubleshoot your problem by using the chart below. If the air conditioner still does not work properly, contact W Appliance Co. customer service center. Customers must never troubleshoot internal components. TROUBLE POSSIBLE CAUSE POSSIBLE REMEDY The air conditioner is •... - Page 22 TROUBLESHOOTING & WARRANTY TROUBLE POSSIBLE CAUSE POSSIBLE REMEDY Water is dripping Hot and humid weather • This is normal. outside The air conditioner is not • For proper water drainage, make Water is dripping correctly tilted outside sure the air conditioner is slightly inside the room tilted downward from the front of the unit to the rear.
-
Page 23: Limited Warranty
TROUBLESHOOTING & WARRANTY LIMITED WARRANTY Any repair, replacement, or warranty service, REPAIR OR REPLACEMENT AS PROVIDED UNDER THIS WARRANTY IS THE EXCLUSIVE REMEDY OF and all questions about this product should be THE CUSTOMER; W Appliance Co. SHALL NOT BE directed to W Appliance Co. - Page 24 This device complies with part 15 of the FCC rules. Operation is subject to the following two conditions: 1) This device may not cause harmful interference, and 2) This device must accept any interference received, including interference that may cause undesired operation. This equipment has been tested and found to comply with the limits for a Class B digital device, pursuant to Part 15 of the FCC rules.