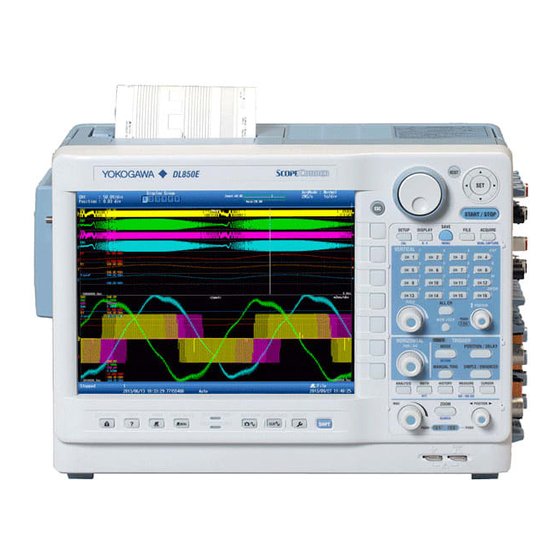
YOKOGAWA ScopeCorder DL850E Series Workbook
Hide thumbs
Also See for ScopeCorder DL850E Series:
- User manual (228 pages) ,
- User manual (195 pages) ,
- User manual (270 pages)

Related Manuals for YOKOGAWA ScopeCorder DL850E Series


Summary of Contents for YOKOGAWA ScopeCorder DL850E Series
- Page 1 ScopeCorder Introduction Version 1.2 – August 2016 Workbook DL850E series Peter Schutte Product Marketing Europe Precision Making...
- Page 2 Additional resources for support. Enjoy the exercises! Regards, Peter Schutte Product Marketing – ScopeCorder +31 (0)88 – 464 1817 Phone Email [email protected] ScopeCorder introduction workbook Precision Making Copyright © Yokogawa Electric Corporation...
- Page 3 Hard disk recording – load & view Save a settings file Load a settings file Action on trigger Window based OR trigger Dual Capture Channel labeling Scaling & Units Phase measurement between 2 channels ScopeCorder introduction workbook Precision Making Copyright © Yokogawa Electric Corporation...
-
Page 4: Factory Reset
Initialize vs. Factory Reset A factory reset will initialize ALL settings, including those of the DONE! Factory reset has been completed. communication interfaces. To maintain communication interface settings, use SETUP » INITIALIZE. ScopeCorder introduction workbook Precision Making Copyright © Yokogawa Electric Corporation... - Page 5 If other channels are still enabled, please Results are displayed turn them OFF by double-pressing each one of the corresponding channel buttons, such on the next page. as CH 2, etc. Next slide » ScopeCorder introduction workbook Precision Making Copyright © Yokogawa Electric Corporation...
- Page 6 Longer memory, higher sample rate Increase the record length (memory size) to increase the sample rate. To do so, press: ACQUIRE » Use the Jog Shuttle to adjust the Record Length. ScopeCorder introduction workbook Precision Making Copyright © Yokogawa Electric Corporation...
- Page 7 What sample rate & measurement time settings are possible? Dependent on channel count, available memory and other parameters different sample rates & measurement times are available. Review Appendix C for more information. ScopeCorder introduction workbook Precision Making Copyright © Yokogawa Electric Corporation...
- Page 8 In this exercise you will use the Zoom functionality to get more detailed insight in the acquired signal, while still having the ability to make long acquisitions. Follow these keystrokes: 10ms/div 200μs/div DONE! Results are displayed on the next page. Next slide » ScopeCorder introduction workbook Precision Making Copyright © Yokogawa Electric Corporation...
- Page 9 Zoom channel 1. To do this press: Zoom1/Zoom2 » Display (set to: On) » Zoom2 Source (set to: Zoom1) Now use the Magnitude and Position knobs to fine tune the Zoom windows. ScopeCorder introduction workbook Precision Making Copyright © Yokogawa Electric Corporation...
-
Page 10: Save A Waveform
SAVE. You can skip all but the SET button and SHUTTLE-knob the last step, if you wish for the to set PATH=HDD, in this example. DL850E(V) to name file(s) for you. ScopeCorder introduction workbook Precision Making Copyright © Yokogawa Electric Corporation... - Page 11 Follow these keystrokes: DONE! The signal acquired in Exercise 2 Will now be displayed on the screen. Note that the ‘PATH = HD-0’. Highlight the file created in the previous exercise. ScopeCorder introduction workbook Precision Making Copyright © Yokogawa Electric Corporation...
-
Page 12: Save A Screen Image
To only save image files: press SHIFT + SAVE » disable Waveform Save. One key, two actions As you just have experienced, the SAVE key can be used for saving a waveform file, a screen image or a combination of both. ScopeCorder introduction workbook Precision Making Copyright © Yokogawa Electric Corporation... -
Page 13: Rms Measurement
RMS Input module Results are displayed If an RMS input module is used on the next page. (e.g. 701267), RMS measurements can also be done using a cursor. Next slide » ScopeCorder introduction workbook Precision Making Copyright © Yokogawa Electric Corporation... - Page 14 Extra Display Measurement values are displayed on top of the waveform. To create blank space, press Display » Extra Window, set the value to 1. ScopeCorder introduction workbook Precision Making Copyright © Yokogawa Electric Corporation...
-
Page 15: Cursor Measurement
In this exercise you will perform a horizontal cursor measurement. Follow these keystrokes: Set cursor 2 to ‘0.00’ Set cursor 1 to ‘2.00’ DONE! Results are displayed on the next page. Next slide » ScopeCorder introduction workbook Precision Making Copyright © Yokogawa Electric Corporation... - Page 16 Cursor adjustment Don’t forget to use the left and right arrow button to adjust the decimal position; this will allow for fine adjustment of each cursor. ScopeCorder introduction workbook Precision Making Copyright © Yokogawa Electric Corporation...
- Page 17 In this exercise you will make an acquisition using hard disk recording. Hard disk recording makes it possible to acquire and store data for up to 200 days. Follow these keystrokes: 1 sec/DIV DONE! Results are displayed on the next page. Next slide » ScopeCorder introduction workbook Precision Making Copyright © Yokogawa Electric Corporation...
- Page 18 10. Hard disk recording – setup & create Results Verify files To verify the recorded files, press FILE » UTILITY. Look in the current media PATH for a new folder. ScopeCorder introduction workbook Precision Making Copyright © Yokogawa Electric Corporation...
- Page 19 In this exercise you will load and view a hard disk recording from file. Follow these keystrokes: Highlight Highlight FOLDER FILE DONE! Results are displayed on the next page. Next slide » ScopeCorder introduction workbook Precision Making Copyright © Yokogawa Electric Corporation...
- Page 20 11. Hard disk recording – load & view Results Zoom for detail In order to take a closer look at the waveform data, use the ZOOM function. Go to Exercise 4 for additional explanation. ScopeCorder introduction workbook Precision Making Copyright © Yokogawa Electric Corporation...
- Page 21 Use the soft keyboard or an USB keyboard name the .SET file. File verification DONE! To verify the .SET file was saved correctly: press FILE » UTILITY Browse to find the file. ScopeCorder introduction workbook Precision Making Copyright © Yokogawa Electric Corporation...
- Page 22 In this exercise you will load a .SET settings file to apply the saved settings to your ScopeCorder. Some steps may be abbreviated. Follow these keystrokes: DONE! Highlight .SET file ScopeCorder introduction workbook Precision Making Copyright © Yokogawa Electric Corporation...
- Page 23 Select ‘Beep’ with the Jog shuttle and press the ‘Set’ button. Save files on trigger Combine this with Exercise 5 and use the Save Waveform option in the Action Setup to automatically save a waveform file upon a trigger. ScopeCorder introduction workbook Precision Making Copyright © Yokogawa Electric Corporation...
- Page 24 TYPE = AND using otherwise Edge is set to IN, An edge is detected when the trigger source these same keystrokes. enters the specified level range; in our example 450 – 550 mV. ScopeCorder introduction workbook Precision Making Copyright © Yokogawa Electric Corporation...
-
Page 25: Dual Capture
Disconnect the PROBE TIP from PROBE COMP; leave PROBE GROUND connected (important). Follow these keystrokes: 1 sec/Div Touch finger on/off PROBE TIP at 1 second intervals for 12 DONE! seconds, then press STOP. See next page for results. Next slide » ScopeCorder introduction workbook Precision Making Copyright © Yokogawa Electric Corporation... - Page 26 Not all events are clearly visible in the main window. To visualise all events in the main window, press: SHIFT + ACQUIRE » Next » Event Display This can also be done after acquisition has stopped. ScopeCorder introduction workbook Precision Making Copyright © Yokogawa Electric Corporation...
-
Page 27: Channel Labeling
Input name, scale & unit string DONE! Control your instrument Results are displayed Connect a USB mouse & keyboard to make on the next page. input to the ScopeCorder easier. Next slide » ScopeCorder introduction workbook Precision Making Copyright © Yokogawa Electric Corporation... - Page 28 « Table of contents 17. Channel labeling Results Adjust multiple channels Use the ALL CH button menu to make adjustments to multiple channels at once. ScopeCorder introduction workbook Precision Making Copyright © Yokogawa Electric Corporation...
- Page 29 Follow these keystrokes: DONE! Current clamp scaling example The depicted current clamp (Yokogawa 96095) Select ‘AX+B’, change A to ‘2.00’, B to ‘0.00’, Results are displayed add a unit string named ‘A’. supplies 10mV per ampere. Using Y=A*X+B on the next page.
- Page 30 Y-scale min: -5.000A Y-scale max: 5.000A Resolution: 1A/div CH2 – Regular COMP signal Y-scale min: -2500mV Y-scale max: 2500mV Resolution: 500mV/div * Used CH2 to visualise the regular COMP signal ScopeCorder introduction workbook Precision Making Copyright © Yokogawa Electric Corporation...
- Page 31 PROBE COMP and add a delay to the channel. on the next page. To do this: Press the CH 2 button » Select Filter Delay Setup » set a delay of 166μs Next slide » ScopeCorder introduction workbook Precision Making Copyright © Yokogawa Electric Corporation...
- Page 32 CH2 (as counted at zero-crossing, from left to right). Extra Display Measurement values are displayed on top of the waveform. To create blank space, press Display » Extra Window, set the value to 1. ScopeCorder introduction workbook Precision Making Copyright © Yokogawa Electric Corporation...
-
Page 33: Appendix A - Dl850E(V) Knobs And Keys
Transmits correction signals for probes. P-P. Setup and execution keys Functional ground terminal KEY PROTECT key Connect a ground wire to this terminal when performing probe correction. Next slide » ScopeCorder introduction workbook Precision Making Copyright © Yokogawa Electric Corporation... - Page 34 CH1 to CH16. If you change the scale while waveform acquisition is stopped, the setting actually takes effect when you restart waveform acquisition. Next slide » ScopeCorder introduction workbook Precision Making Copyright © Yokogawa Electric Corporation...
- Page 35 Press this key to set the trigger position and the trigger delay. SIMPLE/ENHANCED key Displays a trigger setup menu MANUAL TRIG key Press this key to make the DL850E/DL850EV trigger regardless of the trigger settings. Next slide » ScopeCorder introduction workbook Precision Making Copyright © Yokogawa Electric Corporation...
- Page 36 Use this knob to set the zoom position. This knob has a push switch. Press the POSITION knob to switch the zoom box whose zoom position is set by it. Next slide » ScopeCorder introduction workbook Precision Making Copyright © Yokogawa Electric Corporation...
- Page 37 DL85E/DL850EV according to the input signal; storing and recalling setup Next slide » information; and so on. Press SHIFT and then SETUP to display a calibration menu. ScopeCorder introduction workbook Precision Making Copyright © Yokogawa Electric Corporation...
- Page 38 The shift key illuminates when the keys are shifted. Pressing the to a storage medium. key again clears the shifted condition. ScopeCorder introduction workbook Precision Making Copyright © Yokogawa Electric Corporation...
-
Page 39: Appendix B - Using A Usb Keyboard & Mouse
Using the right mouse button a context menu appears, allowing access to all menus and settings. Mouse menu: channels Example Enter a channel label Example Adjust cursor settings ScopeCorder introduction workbook Precision Making Copyright © Yokogawa Electric Corporation... -
Page 40: Appendix C - Sample Rate & Measurement Time
From this manual we will be using Appendix 3 and 1. Example case 4 measurement channels; up to 10MS/s sample rate /M1 memory option (1 GPoint) Use DualCapture Next slide » ScopeCorder introduction workbook Precision Making Copyright © Yokogawa Electric Corporation... - Page 41 Select the row that represents your channel count. Select the column that represents your memory option. Example case For our example case we use table 3, resulting in a maximum record length of 100M. Next slide » ScopeCorder introduction workbook Precision Making Copyright © Yokogawa Electric Corporation...
- Page 42 72 M 12 min 10 k 72 M 12 h 86.4 M an acquisition time of 10μs to 15 min 10 k 90 M 200 days. 30 min 90 M ScopeCorder introduction workbook Precision Making Copyright © Yokogawa Electric Corporation...
-
Page 43: Additional Resources
ScopeCorder product product at our Y-Link page: pages at our website: Y-Link DL850E(V) product page Subscribe to our newsletter ScopeCorder introduction workbook Precision Making Copyright © Yokogawa Electric Corporation...