Table of Contents
Quick Links
Table of Contents

Related Manuals for Cisco MERAKI MR46E-HW


Summary of Contents for Cisco MERAKI MR46E-HW
- Page 2 Meraki MR46E-HW Hardware Installation Guide...
- Page 3 In the interest of improving internal design, operational function, and/or reliability, Cisco Systems reserves the right to make changes to the products described in this document without notice. Cisco Systems does not assume any liability that may occur due to the use or application of the product(s) or circuit layout(s) described herein.
-
Page 4: Table Of Contents
Table of Contents Scope of Document and Related Publications MR46E-HW Overview 2.1 Package Contents 2.2 Understanding the MR46E-HW 2.3 Security Features 2.4 Ethernet Ports 2.5 Power Source Options 2.6 Factory Reset Button 2.7 LED Indicators and Run Dark Mode Pre-Install Preparation 3.1 Configure Your Network in Dashboard 3.2 Check and Upgrade Firmware 3.3 Check and Configure Firewall Settings... -
Page 5: Scope Of Document And Related Publications
Scope of Document and Related Publications The MR46E-HW Hardware Installation Guide describes the installation procedure for the MR46E-HW indoor access point. Additional reference documents available online www.meraki.com/library/product. -
Page 6: Mr46E-Hw Overview
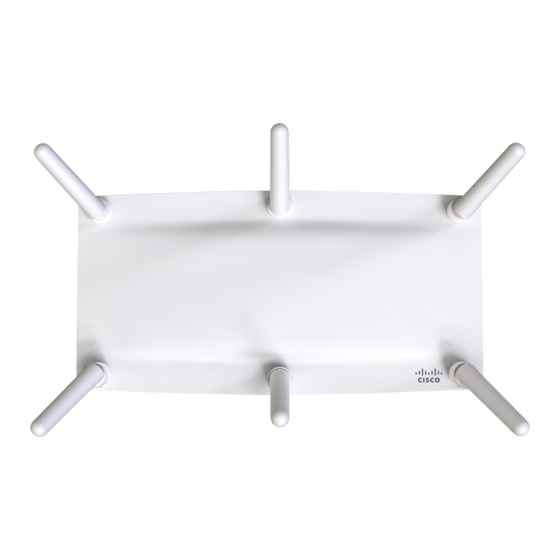
MR46E-HW Overview The Meraki MR46E-HW is an enterprise-class, dual-concurrent 4x4 MIMO 802.11ax indoor access point designed for high-density deployments in offices, schools, hospitals and hotels. When connected to the Meraki Cloud Controller, the MR46E-HW enables the creation of ultra-high speed, reliable indoor wireless networks quickly, easily and cost- effectively. - Page 7 Desk mount feets (4x) MR46E-HW cable access bay Factory Reset Button Ethernet port Power supplied by PoE: 50-57Vdc 0.6A AC Adapter plug (sold separately) Power supplied by adapter: 12Vdc, 2.5A Your MR46E-HW mount plate has the following features: Access point mounting posts (2x) Various mounting holes...
-
Page 8: Security Features
2.3 Security Features The MR46E-HW features multiple options for physically securing the access point after installation: Security screw – The accessory kit includes screws that can be used to secure the access point to the mount plate. Engaging the security screw prevents accidental dislodging and theft. Kensington lock –... -
Page 9: Pre-Install Preparation
Pre-Install Preparation You should complete the following steps before going on-site to perform an installation. 3.1 Configure Your Network in Dashboard The following is a brief overview only of the steps required to add an MR46E-HW to your network. For detailed instructions about creating, configuring and managing Meraki wireless networks, refer to the Meraki Cloud Controller Manual (meraki.com/library/product). -
Page 10: Assigning Ip Addresses To Mr46E-Hws
3.4 Assigning IP Addresses to MR46E-HWs All gateway MR46E-HWs (MR46E-HWs with Ethernet connections to the LAN) must be assigned routable IP addresses. These IP addresses can be dynamically assigned via DHCP or statically assigned. Dynamic Assignment 3.4.1 When using DHCP, the DHCP server should be configured to assign a static IP address for each MAC address belonging to a Meraki AP. -
Page 11: Collect Tools
3.5 Collect Tools You will need the following tools to perform an installation: Phillips screwdriver Hammer Drill with 1/4” (6.3mm) bits 3.6 Collect Additional Hardware for Installation 802.3at PoE power source (either AC Adapter PoE switch or Meraki 802.3at PoE Injector) Network cables with RJ45 connectors long enough for your particular mounting location... -
Page 12: Installation Instructions
Installation Instructions 4.1 Choose Your Mounting Location A good mounting location is important to getting the best performance out of your MR46E-HW access point. Keep the following in mind: The device should have unobstructed line of sight to most coverage areas. For example, if installing in an office filled with workspaces divided by mid-height cubicle walls, installing on the ceiling or high on a wall would be ideal. -
Page 13: Wall Or Solid
Wall or Solid Ceiling Mount Using Mount Plate 4.2.1.1 Using included screws, attach the mount plate to your mounting wall or ceiling. It is recommended that the MR46E-HW be mounted to a wall or solid ceiling using the mount plate for physical security reasons. -
Page 14: Drop Ceiling
Drop Ceiling Mount Using Mount Plate 4.2.1.2 To mount your MR46E-HW on a drop ceiling T-rail, use the included drop ceiling mounting accessory kit. The accessory kit can be used to mount to most 9/16”, 15/16” or 1 ½” T-rails. The kit contains: Dropped 6-32x4 mm screws... - Page 16 Using the dashed lines on the mount plate template as a guide, set the proper spacing of the T- rail clips on the T-rail Tighten the set screws on the T-rail clips to secure the clips using a 5/64”(2 mm) hex key.
- Page 17 Attach the mount plate to the T-rail clips using the mount plate holes (marked with a “T“). Flush T-rail Ceiling tiles T-rail flush with tiles T-rail recessed from tiles...
-
Page 18: 3Electrical Junction Box Mount Using Mount Plate
Electrical Junction Box Mount Using Mount Plate 4.2.1.3 The MR46E-HW can be mounted to a 4” square cable junction box, a 3.5 or 4” round cable junction box, or various U.S. and European outlet boxes (mounting screws are not included). Using appropriate mounting hardware for your specific type of junction box, attach the mount 4.2.2 Power the MR46E-HW If mounting to an electrical junction box, feed the Ethernet cable through the cable access hole in... -
Page 19: Powering The Mr46E-Hw With Meraki Ac Adapter
Powering the MR46E-HW with the Meraki AC Adapter (sold separately) 4.2.2.1 Plug the power cord into the MR46E-HW and the other end into a wall outlet. Plug an Ethernet cable that is connected to an active Ethernet connection into the Eth0 port on the MR46E-HW. -
Page 20: Powering The Mr46E-Hw With An 802.3At Power Over Ethernet Switch
Powering the MR46E-HW with an 802.3at Power over Ethernet Switch 4.2.2.3 Route Ethernet cable from a port on an active 802.3at PoE switch to the Eth0 port in the bay of the MR46E-HW. The MR46E-HW is Gigabit Ethernet-capable. To maximize device performance, a Gigabit- capable switch should be used. -
Page 21: Assemble Mr46E-Hw To The Mount Plate
Assemble MR46E-HW to the Mount Plate 4.2.3.2 (This section applies to wall and/or solid ceiling, drop ceiling or electrical junction box mount where you have already installed the mount plate.) Insert the top latch on the mount plate into the top mount plate attachment slots on the back of the device. Rotate the bottom of the unit into the bottom ount plate attachment slot. - Page 22 Desk or Shelf Mount 4.2.3.3 The MR46E-HW can be placed on a desk or shelf resting on the non-scratch rubber feet. The mount plate is not necessary for a desk or shelf mounting.
-
Page 23: Secure The Mr46E-Hw
4.3 Secure the MR46E-HW Depending on your mounting environment, you may want to secure the MR46E-HW to its mount location. Your MR46E-HW can be secured in several ways. If the MR46E-HW has been installed using the mount plate, it can be secured via security screw (Torx and phillips head security screws are included;... -
Page 24: Verify Device Functionality And Test Network Coverage
4.4 Verify Device Functionality and Test Network Coverage Check LEDs The LED should be solid white. If it is flashing orange, the firmware is automatically upgrading and the LED should turn green when the upgrade is completed (normally in under thirty minutes). Note: Your MR46E-HW must have an active route to the Internet to check and upgrade its firmware. - Page 25 information and troubleshooting tips. Regulatory FCC Statement Federal Communication Commission Interference Statement This equipment has been tested and found to comply with the limits for a Class B digital device, pursuant to Part 15 of the FCC Rules. These limits are designed to provide reasonable protection against harmful interference in a residential installation.
- Page 26 Les types d'antennes non inclus dans cette liste qui ont un gain supérieur au gain maximal indiqué pour tout type listé sont strictement interdits pour une utilisation avec cet appareil. Antenna List Brand Antenna Type Connector Gain (dBi) CISCO MA-ANT-3-A6 Dipole antenna RP-TNC Note 1 CISCO MA-ANT-3-B6...
- Page 27 Cet équipement doit être installé et utilisé avec un minimum de 33 cm de distance entre la source de rayonnement et votre corps. Telec Statement 5GHz band (W52, W53): Indoor use only. Copyright © 2019 Cisco Systems, Inc. All rights reserved. Trademarks www.ciscosystems.com Cisco Systems, Inc. 170 West Tasman Drive San Jose, CA 95134...