Table of Contents
Table of Contents

Related Manuals for Easee Home


Summary of Contents for Easee Home
- Page 1 User / installation guide Easee Home Easee Charge...
-
Page 2: Table Of Contents
Table of contents Introduction Introduction Product overview Features Technical specifications Safety Safety instructions Before the installation Planning the installation Installation Installation instructions Daily use and operation How do I charge? Apps and interfaces Charging Robot interface Maintenance Practical details IMPORTANT: Read carefully before use. -
Page 3: Introduction
Introduction Intended use This product is intended solely for charging electrically powered vehicles equipped with non-gassing batteries (e.g. lead-acid batteries). The product shall only be used with a charging cable according to IEC 62196. The product must be firmly mounted on a wall or structure that covers the entire back side of the product and has a sufficient load- bearing capacity. -
Page 4: Product Overview
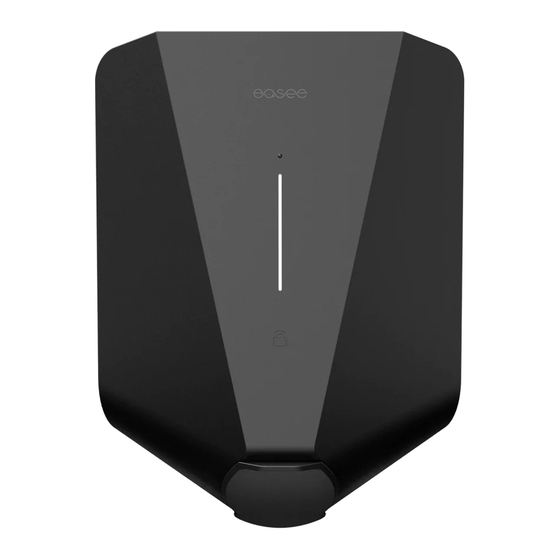
Product overview Front cover Chargeberry Backplate Protects the electronics from Contains the electronics For attaching and connecting to external influences. for charging the vehicle. the charging infrastructure. Installation kit Tool... -
Page 5: Features
Charging Robot and identification of different users. You can use it to unlock the charger with an Easee Key. Check our knowledge base at easee.support for more details on how to add and manage your Easee Keys. -
Page 6: Technical Specifications
Installation network: TN, IT and TT (detected Built-in energy meter (±2 %) automatically) Easee Home: Load balancing of up to 3 units per circuit Installation circuit breaker: Max 40 A (Easee Home) and Easee Charge: Load balancing of up to 101 units per circuit 80 A (Easee Charge) overload protection. -
Page 7: Safety Instructions
Safety instructions Safety instructions for operation — Danger to life due to high electrical voltage. Never make any changes to components, software or connecting cables. — Never use or touch the product if it is damaged or Read the entire manual carefully before installing does not function properly. -
Page 8: Planning The Installation
— Which installation method is planned to be used? possible, to make it future-proof. — If possible, use the largest approved cable cross- section (see page 6). — Consider the installation of Easee Ready backplates if the acquisition of further Charging Robots is planned for the future. - Page 9 Protection limit based on max 80% of the fuse rating can be set in used to assign the Charging Robots to the correct the WiFi interface. location inside the Easee Cloud. A Site Key can be Example for 400 V TN, deviating values for other grid types.
-
Page 10: Installation Instructions
3. Grasp the Type 2 socket and push upwards with good caution and follow instructions carefully. force until the Chargeberry disconnects. In addition to the instructions presented on the next pages, we recommend that you watch the installation videos available on our website: easee.support. - Page 11 Backplate Backplate Mounting Preparing 1. Fix the backplate to a wall or structure with sufficient 1. Shorten the sealing plug to fit the cable. The hole load-bearing capacity using the 4 screws provided in should be slightly smaller to ensure a good seal. 2.
- Page 12 Backplate TN 3 phase Wiring 1. Strip the cable cores by 12 mm. If the cable has flexible conductors, it is recommended to use cable end sleeves on all wires. Use correct tools to press them. 2. Tighten the screws with a torque of 5 Nm. NOTICE! Before attaching the Chargeberry, pull each wire to double check that they are connected properly.
- Page 13 IT/TT 3 phase TN network TN is the most common grid type in Europe. It uses five conductors to provide both 230 V and 400 V. This makes it very efficient and thus the preferred grid type for charging electric vehicles. IT/TT network IT and TT grid systems are mostly used in Norway and Albania, but occur in Belgium, France and Spain too.
- Page 14 Alternatively, you can program the backplates backplate located in the center of the installation. using the Easee Installer app (available soon). If more 3. When the Chargeberry is in the track, press it than one Charging Robot is to be installed, wait until forcefully down until you hear a click.
- Page 15 To configure the Charging Robot, connect a smartphone connect, try using flight mode. 3. Open the browser on your smartphone and enter to the Charging Robot's own WiFi or download the Easee 192.168.4.1 in the address bar. Installer app (available soon).
- Page 16 Installation details are unsure whether it has, please remove all data stored in the RFID chip on the backplate(s) before installation. This can be done via the Easee Installer app (available soon). NOTICE! Enter the installation details and follow the on-screen For several Charging Robots connected to the instructions.
- Page 17 Front cover 1. Hang the front cover at the top of the backplate and Closing let it fall into place. 2. Press the bottom of the front cover until you hear a click. 3. Bend the lower part of the rubber cover down. 4.
-
Page 18: How Do I Charge
— If you have set up access control, unlock it by using a Easee app registered RFID tag or disable it from the Easee App or the local WiFi interface The Easee app is intended for everyday use of your 1. -
Page 19: Charging Robot Interface
RFID-tag received (awaiting key verification) General error. Unplug the charging cable and replug it to the Red – constant light Charging Robot. If the red light persists, check the Easee app or our knowledge base for further information. Red – constant light, with warning sounds Wires are connected incorrectly. -
Page 20: Maintenance
All correctly — Ensure that the charger does not have any signs of installed Easee hardware is covered by our 3 years mechanical damage. limited warranty. If your charger needs to be repaired —... - Page 21 Data protection Product life cycle When the product connects to the Internet, personal data is sent to Easee AS. You will receive more Transportation: The charger should always be information about data protection during the transported within its original packaging. No other configuration of your Charging Robot.
- Page 22 Easee AS. Easee and all other Easee product names and slogans are trademarks or registered trademarks of Easee AS. Easee products can be protected by one or more patents.
- Page 24 Easee AS Grenseveien 19 4313 Sandnes, Norway .easee-international.com...