Samsung C61R1AAMST Service Manual
Hide thumbs
Also See for C61R1AAMST:
- User manual (352 pages) ,
- Nstallation and operating instructions (28 pages)
Table of Contents
SERVICE
INDUCTION HOB
INDUCTION HOB
Refer to the service manual in the GSPN(see rear cover) for the more information.
INDUCTION HOB
BASIC
:
MODEL
:
MODEL CODE :
Manual
1. Precaution
2. Product Specification
3. Disassembly and Reassembly
4. Troubleshooting
5. Exploded Views and Part List
6. PCB Diagrams
7. Wiring Diagrams
8. Schematic Diagrams
C61R1AAMST
CTI613EHST
CTI613EHST/XEF
CONTENTS
Table of Contents

Related Manuals for Samsung C61R1AAMST


Summary of Contents for Samsung C61R1AAMST
- Page 1 INDUCTION HOB BASIC C61R1AAMST MODEL CTI613EHST MODEL CODE : CTI613EHST/XEF SERVICE Manual INDUCTION HOB INDUCTION HOB CONTENTS 1. Precaution 2. Product Specification 3. Disassembly and Reassembly 4. Troubleshooting 5. Exploded Views and Part List 6. PCB Diagrams 7. Wiring Diagrams 8. Schematic Diagrams...
-
Page 2: Table Of Contents
Contents 1. General Safety Precautions..............1 2. -
Page 3: General Safety Precautions
1. General Safety Precautions 1. Information contained in this manual is intended for 7. The heating element voltage is AC230V~. The use by a qualified service technician. The technician appliance also works perfectly on networks with is required to be familiar with proper and safe proce- AC220V~ or AC240V~. -
Page 4: Specifications
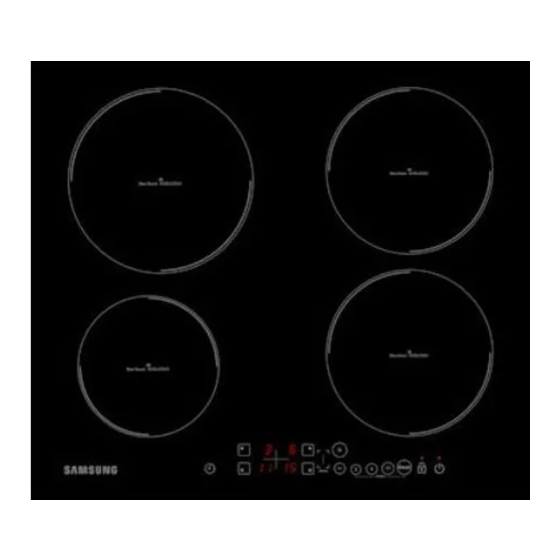
“induced currents” in the bottom of the cookware which instantly raise cookware’s temperature. Induced currents Induction coil Electronic circuits 2-2 Features Basic model New model Image Model Name C61R1AAMST/XEU CTI613EHST/XEF Product Type Radiant Hob Induction Hob Glass Ceramic Glass Ceramic Glass Control Method Touch Sensor... -
Page 5: Table Of Specification
2. Specifications Basic model New model Burner Size Front-Left 180mm 160mm Rear-Left 145mm 210mm Front-Right 145mm 180mm Rear-Right 180mm 180mm Control Features Child Safety Lock Countdown Timer Safety Timer Sound On/Off Power Level 1~9 level 1~15 level Boost Power Pre-Selection 2-3 Table of Specification Basic model New model Electrical Connection... -
Page 6: Accessory
2-4 Accessory Screw Installation Bracket Power Cable (DG97-00010A) (DG61-00005B) (DG96-00061B) - 4 -... -
Page 7: Disassembly And Reassembly
3. Disassembly and Reassembly 3-1 Replacement of the Assy Top Plate Attention The Ceramic Glass may break if you use force especially on the edge. Parts Explanation Photo Explanation 1. Disconnect power. 2. Remove 4 - side direction 12 Screws securing the Assy Top Plate to the Assy Case Burner. -
Page 8: Replacement Of The Assy-Working Coil
3-3 Replacement of the Assy-Working Coil Explanation Photo Assy-Working Coil C Cover-Coil C Adiabatic-Coil C Assy-Working Coil B Cover-Coil B Adiabatic-Coil B Assy-Working Coil A Cover-Coil A Adiabatic-Coil A Parts Explanation Photo Explanation 1. Bend the Cover-Coil a little. Assy-Working Coil 2. - Page 9 3-3 Replacement of the Assy-Working Coil Parts Explanation Photo Explanation 3. Remove the Adiabatic-Coil by using some tool. (Do not remove by hand. Adiabatic can be easily broken.) 4. Disconnect all lead wires from the Assy-Working Coil. pull & rotate 5.
- Page 10 3-3 Replacement of the Assy-Working Coil Parts Explanation Photo Explanation wire color guide wire color guide 7. After replacement, connect the Sensor-Top wire according to carved wire color guide. Assy-Working Coil ‘BL’ marking ‘BL’ marking ‘RD’ marking ‘RD’ marking ‘WH’ marking ‘WH’...
-
Page 11: Replacement Of The Bracket-Wire A
3-4 Replacement of the Bracket-Wire A Parts Explanation Photo Explanation 1. Remove the screw. 2. Pull the Bracket-Wire A toward Screw Screw Screw Screw front side. pull & lift up pull & lift up 3. Lift up the Bracket-Wire A. Bracket-Wire A 4. -
Page 12: Replacement Of The Assy-Induction Module
3-5 Replacement of the Assy-Induction Module Parts Explanation Photo Explanation 1. Remove 12 screws(4-side direc- tion) securing the Assy-Induction Module to the Assy Case Burner. Brown Brown wire wire Blue Blue 2. Disconnect Assy Wire Harness-P wire wire from the Terminal Block. 3. - Page 13 3-5 Replacement of the Assy-Induction Module Parts Explanation Photo Explanation 5. Remove the 2 screw. 6. Pull the Assy-Inverter Module(L,R) Screw Screw toward left or right side. 7. Replace the Assy-Inverter pull pull Module(L,R). Screw Screw L-marking L-marking 8.Arrange Assy-Inverter Module(L,R) to proper position.
- Page 14 3-5 Replacement of the Assy-Induction Module Attention If wire of Assy-Inverter Module(L,R) is connected to wrong Assy-Working Coil, Assy-Induction wrong cooking zone will be operated when costomer start the cook. Module 12. Remove the 1 screw at Motor DC.(bottom side) * screw-2 type : 6006-001170 (M4,L10,Ground screw) screw-2...
-
Page 15: Replacement Of The Assy Case Burner
3-6 Replacement of the Assy Case Burner Parts Explanation Photo Explanation 1. Open the cover & lock of Terminal Block by using small flat type screw driver. 2. Disconnect the power cable. Assy Case Burner 220-240V ~ 3. After replacement of Terminal Block, <... -
Page 16: Troubleshooting
4. Troubleshooting 4-1 Part Checking method Parts Photo Good No Good 7.65KΩ ~ 9.34KΩ Sensor-Top The others (at 25˚C) 1.65K~1.8KΩ Motor DC The others (between No.1 pin and No.3 pin) Coil-Working 0.01~1Ω 100MΩ exceed - 14 - - 14 -... -
Page 17: Failure Codes
4-2 Failure Codes 4-2-1 Temp Sensor Error Error Code Solution Page Top Sensor Open Error (Sensor-Top) It occurs due to a defective sensor, misplaced wires, a defective PCB and 16 Page when A/D value that MICOM senses rises over 252. Also, it may occur when the ambient temperature falls under -10˚C. - Page 18 4-2-3 Top Sensor Open Error ( Connect the sensor. : check if the sensor wire is damaged, Is the sensor connected? Replace the wire. if the sensor housing is inserted into the connector of the PCB. Is the sensor wire Connect the wire connected properly properly.
- Page 19 4-2-4 Top Sensor Short Error ( Remove any foreign substance : check if the sensor and related parts Is the sensor terminal part from the shorted part. such as the connector or soldering parts are of the PCB shorted? slightly shorted. Is the sensor's real resistance is S/W Error shorted circuit?
- Page 20 4-2-5 IGBT Sensor Open Error ( Is the sub wire connected? : check if the sub wire is damaged Connect the sub wire. (from Assy-Inverter Module to if the housing is inserted into the Assy Touch PCB) connector of the PCB. Is the sub wire sequence matched Replace the sub wire.
- Page 21 4-2-6 IGBT Sensor Short Error ( Is the sub wire connected? : check if the sub wire is damaged Connect the sub wire. (from Assy-Inverter Module to if the housing is inserted into the Assy Touch PCB) connector of the PCB. Is the sub wire sequence matched Replace the sub wire.
- Page 22 4-2-7 Key Short Error( Is the key not recognized at all? Is the key recognized intermittently? Is the key not recognized after cleaning the control panel? Assy Touch PCB is defective S/W Error Replace the Assy Touch PCB After Power > On, does the symptom continue? Replace the sub wire or Assy Touch PCB.
- Page 23 4-2-8 Low Voltage Error ( Is the sub wire connected? Connect the sub wire. ( from Assy PCB Parts to Assy Touch PCB ) Is the sub wire sequence matched Replace the sub wire. with PCB schematic? Is the SMPS's DC line has some S/W Error shorted circuit or opened circuit? After Power ->...
- Page 24 4-2-9 Over Temperature Error ( Is the hob operated with Make the hob be cool empty cookware? (Ceramic glass's surface) Is the Top sensor wire Connect the wire connected properly by burner position? properly. Is the Top sensor's real resistance is S/W Error opened circuit? After Power ->...
- Page 25 4-2-10 Pan Detection Error ( Is the hob operated with Place the cookware no cookware? Is the hob operated with Place the suitable un-suitable cookware? cookware (small size, aluminium, etc) S/W Error After Power -> On, does the symptom continue? Replace the Assy-Inverter Module or Assy Touch PCB,or Check the PCB Wiring.
- Page 26 4-2-11 DC Motor Locking Error ( Connect the Motor wire. Is the Motor wire connected? Remove the Is there some interference at rotor interference at Motor. or blade of Motor? S/W Error After Power -> On, does the symptom continue? Replace the Assy PCB Parts or DC Motor.
-
Page 27: Electrical Malfunction
4-3 Electrical Malfunction Troubleshooting (Power) No Power Check the circuit breaker. Check terminal block voltage. Check the terminal block connections (220V~240V, 50/60Hz) Replace or Repair the wiring Check the wiring. Check the votage of PCB, SMPS -input : 220V~240V -output : 12V, 5V Replace the defected PCB. - Page 28 4-3 Electrical Malfunction Troubleshooting (PCB failure) PCB Failure - Check the input voltage of Repair Faulty wiring - Check Terminal block PCB SMPS (input check- voltage(220V~240V). or PCB check point : 220V~240V ) Reset the circuit braker or check main power. - Check the output voltage of Replace PCB PCB SMPS (Output check-...
-
Page 29: Exploded Views And Parts List
5. Exploded Views and Parts List 5-1 Exploded Views M372 H042 C061 C005 R059 C061 C001 C266 W042 C265 R073 M416 M418 M417 M417 R181 R183 R182 R182 M056 Front-Left Rear-Left G001 Right P218 M015 M060 G005 Z029 - 27 -... -
Page 30: Main Parts List
5-2 Main Parts List (SNA : SERVICE NOT AVAILABLE) Code No. Description Specification Q’ty Remark C001 DG94-00179A ASSY CONTROL PANEL CTI613EHST,-,-,BETTER C005 DG64-00213A CONTROL-PANEL CTI613EHST,PBT212G30V0,T2. C061 0203-001815 TAPE-DOUBLE FACE 3M #4016,-,T1.6,W7,L14, C265 DG94-00181A ASSY-SPRING PANEL CTI613EHST,-,INDUCTION C266 DG61-00274A SPRING ETC-CONTROL C61R2CCN,STS301,-,-,- G001 DG94-00178A... -
Page 31: Assy-Working Coil Parts List
5-3 Assy-Working Coil Parts List R181 ASSY-WORKING COIL A R082 ASSY-WORKING COIL B R083 ASSY-WORKING COIL C M054 M054 R082 R082 R082 R082 M054 M054 R181 R183 R081 (SNA : SERVICE NOT AVAILABLE) Code No. Description Specification Q’ty Remark M054 DG32-00005A SENSOR-TOP -,CTI613EHST,-,-,-,-,-,-,INDU... -
Page 32: Assy-Induction Module Parts List
5-4 Assy-Induction Module Parts List R073 ASSY-INDUCTION MODULE R073 G200 W033 W004 C003 M058 M180 M183 M184 W002 (SNA : SERVICE NOT AVAILABLE) Code No. Description Specification Q’ty Remark C003 RCS-ICTOP-01 ASSY PCB PARTS CTI613EHST,230V50HZ,INDUC G200 DG94-00183A ASSY CASE-INDUCTION CTI613EHST,BETTER M058 6502-001085 CABLE CLAMP... -
Page 33: Standard Parts List
5-4 Standard Parts List (SNA : SERVICE NOT AVAILABLE) LEVEL Code No. Description Specification Q’ty Remark 6002-000217 SCREW-TAPPING TH,+,-,1,M4,L8,ZPC(WHT),SW 6006-001170 SCREW-TAPPING TH,+,WT,TC,M4,L10,ZPC(WHT) EARTH 6002-000217 SCREW-TAPPING TH,+,-,1,M4,L8,ZPC(WHT),SW SUPPORT-HEATER 6002-000217 SCREW-TAPPING TH,+,-,1,M4,L8,ZPC(WHT),SW PCB,GUIDE-AIR 6002-000630 SCREW-TAPPING PH,+,2S,M3,L8,ZPC(YEL),SWR HEAT SINK 6002-001321 SCREW-TAPPING PWH,+,2S,M5,L10,ZPC(YEL) DC MOTOR 6006-001170 SCREW-TAPPING TH,+,WT,TC,M4,L10,ZPC(WHT) -
Page 34: Diagrams
6. P.C.B Diagrams 6-1 P.C.B Diagrams : ASSY PCB PARTS ( This Document can not be used without Samsung’s authorization ) ⑧ ④ ⑦ ③ ② ⑤ ⑥ ① Parts Number Part Name Function and Rule CN101 Main PCB wire connector... -
Page 35: Diagrams : Assy Touch Pcb
6. P.C.B Diagrams 6-2 P.C.B Diagrams : ASSY TOUCH PCB ( This Document can not be used without Samsung’s authorization ) ③ ① ② ④ ⑤ ⑥ Parts Number Part Name Function and Rule CON1 Main PCB wire connector communication wire connector (to Assy PCB Parts) -
Page 36: Diagrams : Assy-Inverter Module Pcb
6. P.C.B Diagrams 6-3 P.C.B Diagrams : ASSY-INVERTER MODULE PCB ( This Document can not be used without Samsung’s authorization ) ⑤ ⑦ ⑦ ⑥ ⑥ ⑧ ⑨ ④ ④ ③ ③ ② ① Parts Number Part Name Function and Rule... -
Page 37: Wiring Diagrams
7. Wiring Diagrams ( This Document can not be used without Samsung’s authorization ) 7-1 Wiring Diagrams - 35 -... -
Page 38: Schematic Diagrams
8. Schematic Diagrams 8-1 Schematic Diagrams : ASSY PCB PARTS ( This Document can not be used without Samsung’s authorization ) POWER SUPPLY +12V C111 C107 R108 BD101 2.2nF L101 PTC101 DF06S ST101 LF-ICTOP ST-ICTOP IC102 KIA7805API D103 SR510 ZNR101... -
Page 39: Schematic Diagrams : Assy Touch Pcb
8. Schematic Diagrams 8-2 Schematic Diagrams : ASSY TOUCH PCB ( This Document can not be used without Samsung’s authorization ) +12V +12V TP65 TP65 TP63 TP63 TP56 TP56 KRA226S KRA226S TP78 TP78 TP91 TP91 R12 2K R12 2K KRC246... -
Page 40: Schematic Diagrams : Assy-Inverter Module Pcb
8. Schematic Diagrams 8-3 Schematic Diagrams : ASSY-INVERTER MODULE PCB ( This Document can not be used without Samsung’s authorization ) - 38 -... - Page 41 Mideast & Africa mea.samsungportal.com © Samsung Electronics Co., Ltd. October This Service Manual is a property of Samsung Electronics Co.,Ltd. 2008 Printed in Korea Any unauthorized use of Manual can be punished under applicable Code No. : DE68-05052A International and/or domestic law.