Table of Contents
Available languages
Available languages
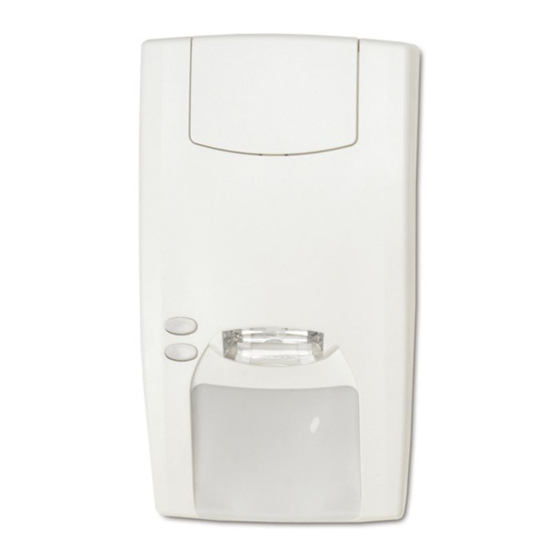
VE1012 Series PIR Detector Installation Sheet
EN DE ES FR
IT
NL PL PT SV
1
3
1
© 2010 UTC Fire & Security. All rights reserved.
GE and the GE monogram are trademarks of the General Electric Company and are under license to
UTC Fire & Security, 9 Farm Springs Road, Farmington, CT 06034-4065
J2
1 / 20
2
J1
Not used
J2
LED on
LED off
J3 and J4
See Figure 7
J5
Terminal 8 = D/N
Terminal 8 = remote test
J6
CV + polarity
CV − polarity
P/N 146414999-2 • REV 2.0 • ISS 20JUL10
1
2
3
Table of Contents

Related Manuals for GE VE1012 Series


Summary of Contents for GE VE1012 Series
- Page 1 © 2010 UTC Fire & Security. All rights reserved. 1 / 20 P/N 146414999-2 • REV 2.0 • ISS 20JUL10 GE and the GE monogram are trademarks of the General Electric Company and are under license to UTC Fire & Security, 9 Farm Springs Road, Farmington, CT 06034-4065...
- Page 2 12 m range (39 ft. 4 in.) 2.4 m (7 ft. 10 in.) (optimum) 3.67 (12 ft.) 2.0 m (39 ft. 4 in.) 2 / 20 P/N 146414999-2 • REV 2.0 • ISS 20JUL10...
-
Page 3: En: Installation Sheet
Figure 7 legend Item Description Introduction Standard connection (factory default) The VE1012 series consists of models VE1012 and Dual loop connection VE1012AM. These detectors use PIR or PIR-AM sensors. They have a patented mirror, pyro, and signal processing Control panel technology. -
Page 4: Jumper Settings
Use this jumper to set terminal 8 to either D/N or Rtest. alarm (Alarm) after 3 s GE Security recommends that you use D/N to manage the AM/TF activation when required. Use Rtest to test the detector PIR/AM Yellow Alarm To reset from the control panel. -
Page 5: Regulatory Information
• Objekte innerhalb von 50 cm des Melders mit VE1012 VE1012AM Abdeckerkennung (AM) Detector start-up time 25 s 60 s • Montage zweier gegenüberliegender Melder in einem Normal current consumption 5.5 mA 10 mA Abstand von weniger als 50 cm Current consumption in alarm 1.1 mA 3.8 mA... -
Page 6: Led-Anzeige
Einstellung für Scharf/Unscharf gesteuert. Dies Verwenden Sie diese Steckbrücke, um Anschlussklemme 8 aktiviert die Speicherfunktion des Melders. entweder auf D/N oder Rtest einzustellen. GE Security empfiehlt für die erforderliche Verwaltung der AM/TF- LED-Anzeige Aktivierung die Einstellung D/N. Verwenden Sie Rtest, um den Melder von der Einbruchmeldezentrale aus zu testen. -
Page 7: Es: Instrucciones De Instalación
• Instalar dos detectores uno en frente del otro a menos de VE1012-D VE1012AM 50 cm de distancia Notschalter für Optional Intern (Ja) Gehäuseöffnung Instalación del detector Eigenschaften AM-Relais — 80 mA bei 30 V Gleichspannung Figura 7 elementos max. Elemento Descripción Alarmdauer... -
Page 8: Indicación Led
Prueba de paseo y Día/Noche. Esto activa la función de memoria del detector. Utilice este puente para configurar la terminal 8 como D/N o Rtest. GE Security recomienda utilizar D/N para administrar la Indicación LED activación de AM/FT cuando sea necesario. Utilice Rtest para realizar una prueba del detector desde el panel de control. -
Page 9: Fr: Manuel D'installation
La présence d’objets à moins de 50 cm du détecteur anti- distance masque (AM) Utilisez ce cavalier pour régler le terminal 8 sur J/N ou test à distance. GE Security recommande l’utilisation de J/N pour P/N 146414999-2 • REV 2.0 • ISS 20JUL10 9 / 20... -
Page 10: Spécifications Techniques
Activé : Logique active haute. « Sortie active » fournit la intrusion (alarme) après 3 s logique GE Security standard avec une sortie active pour activer les entrées test de marche et jour/nuit (sortie d’usine). Désactivé : Actif Bas. « Sortie non active » fournit une sortie IRP/AM Témoin... -
Page 11: It: Istruzioni Per L'installazione
Utilizzare qu esto ponticello per impostare il terminale 8 su D/N di 50 cm di distanza o Rtest. GE Security consiglia di utilizzare D/N per gestire l'attivazione AM/TF quando necessario. Utilizzare Rtest per Installazione del rivelatore testare il rivelatore dalla centrale. Il rivelatore attiva il relè... -
Page 12: Indicatori Led
Aperto: “Attiva bassa” fornisce la logica attiva bassa che abilita PIR/AM Relè di Relè AM Reset gli ing ressi test di copertura e giorno/notte. rosso giallo allarme Avviamento Chiuso Chiuso Automatico dopo Impostazione commutatore DIP-switch 60 s Vedere figura 3, oggetto 1. Bassa Aperto Aperto... -
Page 13: Nl: Installatie-Instructies
Met deze jumper kunt u aansluiting 8 op D/N of Rtest inst ellen. • Grote dieren binnen het detectieveld van de detector GE Security raadt aan dat u D/N gebruikt voor het control eren • Het kijkveld van de detector afschermen met grote van de AM/TF-activering, indien no dig. -
Page 14: Led-Indicatie
SW 1: Wanneer u AM (anti-maskering) of TF (technische PIR/AM Rode Gele Alarm- Opnieuw fout) moet melden relais relais instellen Aan: AM of TF alleen melden w anneer het systeem in de Vergrendeld Overschakelen modus Dag staat uitgeschakeld (fabrieks instelling). naar Nacht- modus (geheugen) -
Page 15: Pl: Instrukcja Instalacji
Obiekty w odległości do 50 cm (20 cali) od czujki z Zworka pozwala ustawić zasick 8 do sterowania trybem D/N układem AM lub Rtest. Firma GE Security zaleca korzystanie z trybu D/N • Instalacja dwóch czujek naprzeciw siebie w odległości sterowania pracą układ u AM/TF (w razie potrzeby). - Page 16 uszkodzona. Użytkownik powinien wizualnie sprawdzić, czy Param etry czujka nadal funkcjonuje. VE1012 VE1012AM Zał.: Zeruje stan AM lub TF po 40 sekundach od alarmu PIR. Czujka PIR + AM Wył.: Zeruje stan AM lub TF po alarmie PIR, kiedy syste Przetwarzanie sygnału pracuje w stanie Dzień...
-
Page 17: Pt: Instruções De Instalação
Utilize este jumper para definir o ter minal 8 para D/N ou Rtest. objectos grandes, tais como m obília A GE Security recomenda que utilize D/N para gerir a • Objectos a uma distância de 50 cm do detector anti- activação AM/TF, se necessário. - Page 18 estiver no estado Noite, o LED amarelo desliga-se e o sistema VE1012 VE1012AM é reposto (fora de fábrica). Tempo de início do detector 25 s 60 s Consumo normal de corrente 5,5 mA 10 mA SW 4: Sinalizar a saída AM ou TF Consumo de corrente no alarme 1,1 mA 3,8 mA...
- Page 19 För plan montering använd minst två skruvar (DIN SSF1014 kompatibel (Fabriksinställning). 7998), min st en skruv i position A och en i läge B. För Av: Alltid aktiv utgång vid AM eller TF under både dag- och hörnmontering använd skruvar i positionerna B eller nattläge.
-
Page 20: Tekniska Specifikationer
(Larm) efter 3 s återförsäljare vid köp av liknande ny utrustning eller Latched PIR Växla till lämnas till en därför avsedd deponering. För mer (Minne) Nattläge information, se: www.recyclethis.info. AM alarm Öppen * Öppen Se DIP (Larm) (Larm)