Mitsubishi Electric FR-A800 Series Beginner's Manual
Hide thumbs
Also See for FR-A800 Series:
- Instruction manual (914 pages) ,
- Manual (154 pages) ,
- Installation manuallines (69 pages)

Related Manuals for Mitsubishi Electric FR-A800 Series


Summary of Contents for Mitsubishi Electric FR-A800 Series
- Page 1 MITSUBISHI ELECTRIC Frequency Inverter Beginner’s Guide FR-A800 Art. no.: 280305 23 10 2014 INDUSTRIAL AUTOMATION MITSUBISHI ELECTRIC Version A Version check...
- Page 3 (see back cover). You can find the latest information and answers to frequently asked questions on our website at https://eu3a.mitsubishielectric.com. MITSUBISHI ELECTRIC EUROPE BV reserves the right to make changes to this manual or the technical specifications of its products at any time without notice. © 2014 Beginner’s Guide for Frequency Inverters...
- Page 5 Proper use of the products The inverters of the FR-A800 series are only intended for the specific applications explicitly described in this manual. All parameters and settings specified in this manual must be observed. The products described have all been designed, manufactured, tested and documented in strict compliance with the relevant safety standards.
- Page 6 Safety warnings in this manual Do not use the inverter until you have a full knowledge of the equipment, safety information and in- structions. In this manual, the safety instruction levels are classified into "WARNING" and "CAUTION". WARNING: Assumes that incorrect handling may cause hazardous conditions, resulting in death or severe injury.
- Page 7 Electric shock prevention WARNING: ● While power is on or when the inverter is running, do not open the front cover. Otherwise you may get an electric shock. ● Do not run the inverter with the front cover removed. Otherwise, you may access the exposed high-voltage terminals or the charging part of the circuitry and get an electric shock.
- Page 8 Fire prevention CAUTION: ● Mount the inverter to incombustible material. Install the inverter on a nonflammable wall without holes (so that nobody can touch the inverter heatsink on the rear side, etc.). Mount- ing it to or near combustible material can cause a fire. ●...
- Page 9 Additional instructions Also note the following points to prevent an accidental failure, injury, electric shock, etc. Transportation and installation CAUTION: ● Any person who is opening a package using a sharp object, such as a knife and cutter, must wear gloves to prevent injuries caused by the edge of the sharp object. ●...
- Page 10 Wiring CAUTION: ● Do not install assemblies or components (e. g. power factor correction capacitors) on the inverter output side, which are not approved from Mitsubishi. These devices on the inverter output side may be overheated or burn out. ● The direction of rotation of the motor corresponds to the direction of rotation commands (STF/STR) only if the phase sequence (U, V, W) is maintained.
- Page 11 Operation WARNING: ● When you have chosen the retry function, stay away from the equipment as it will restart suddenly after an alarm stop. ● Since pressing the key may not stop output depending on the function setting status, provide a circuit and switch separately to make an emergency stop (power off, mechanical brake operation for emergency stop, etc).
- Page 12 CAUTION: ● The electronic thermal relay function does not guarantee protection of the motor from overheating. It is recommended to install both an external thermal and PTC thermistor for overheat protection. ● Do not use a magnetic contactor on the inverter input for frequent starting/stopping of the inverter.
- Page 13 Emergency stop CAUTION: ● Provide a safety backup such as an emergency brake which will prevent the machine and equipment from hazardous conditions if the inverter fails. ● When the breaker on the inverter primary side trips, check for the wiring fault (short circuit), damage to internal parts of the inverter, etc.
- Page 14 IP55 compatible models: Waterproof and dustproof performances CAUTION: ● The inverter is rated with an IPX5 waterproof rating and an IP5X dustproof rating when the parameter unit (FR-DU08-01), the front cover, the wiring cover, and the cable glands are securely fixed with screws. ●...
- Page 15 Symbols used in the manual Use of instructions Instructions concerning important information are marked separately and are displayed as follows: NOTE Text of instruction Use of examples Examples are marked separately and are displayed as follows: Example Example text Use of numbering in the figures Numbering within the figures is displayed by white numbers within black circles and is explained in a table following it using the same number, e.g.: Use of handling instructions...
-
Page 17: Table Of Contents
FR-A800 series inverters........ - Page 18 Contents Parameter Simple mode parameters ............. . .6-1 The simple mode parameters in detail.
-
Page 19: Introduction
Introduction What is a frequency inverter? Introduction What is a frequency inverter? Asynchronous three-phase electric motors are simple, reliable and inexpensive, which makes them a particularly popular choice for industrial applications. The speed of an asynchronous three-phase motor is determined by two factors: –... -
Page 20: Ambient Conditions
Ambient conditions Introduction Ambient conditions Please observe the ambient conditions limits listed in the table below when operating the frequency inverters described in this guide. FR-A800 Specification FR-A820/A840/A842 FR-A846 −10 °C to 50 °C −10 °C to 40 °C −10 °C to 40 for operation Surrounding Non freezing... -
Page 21: Terminology
Introduction Terminology Terminology The terms and concepts below are important for frequency inverters and are used frequently in this guide. Direction of rotation of electric motors The direction (or sense) of rotation of electric motors is defined looking at the end of the motor shaft. If the motor has two shaft ends the direction is defined looking at the main drive shaft end, which is defined as the shaft end away from the end where the cooling fan or the brake are installed. - Page 22 Related manuals Introduction 1 - 4...
-
Page 23: Introduction To The Inverters
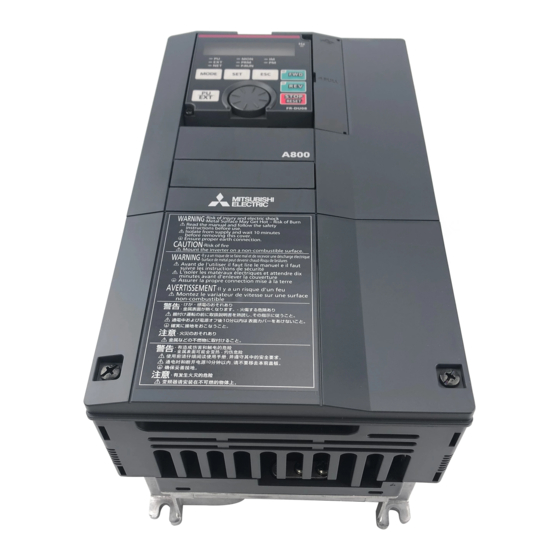
Introduction to the inverters FR-A820/A840 Introduction to the inverters FR-A820/A840 ³ · » ¿ ¶ ´ ² º ¾ µ ¹ ¸ Symbol Name Symbol Name ³ ¸ PU connector Main circuit terminal block · ¹ USB A connector CHARGE lamp »... -
Page 24: A842
FR-A842 Introduction to the inverters FR-A842 ¿ ³ ¶ · » ´ ² º ¾ ¹ ¸ µ Symbol Name Symbol Name ³ µ PU connector Main circuit terminal block · ¸ USB A connector CHARGE lamp » ¹ USB mini B connector ALARM lamp ¿... -
Page 25: Fr-A846
Introduction to the inverters FR-A846 FR-A846 ¶ ¿ · ³ » ² ´ º ¸ µ ¾ ¹ Symbol Name Symbol Name ³ ¹ PU connector Metal fitting for earthing · USB A connector Main circuit terminal block » USB mini B connector Wiring cover ¿... -
Page 26: Removal And Reinstallation Of The
P/+ and N/- with a meter etc., to avoid a hazard of electrical shock. 2.4.1 FR-A800 series inverters Removal and reinstallation of the parameter unit (FR-A820/A840/A842 models) Loosen the two screws on the parameter unit. (These screws cannot be removed.) Press the upper edge of the parameter unit while pulling out the parameter unit. - Page 27 Introduction to the inverters Removal and reinstallation of the front cover Removal and reinstallation (FR-A820-01540(30K) or lower, FR-A840-00770(30K) or lower) ● Removal of the terminal block cover Loosen the screws on the terminal block cover. (These screws cannot be removed.) Holding the areas around the installation hooks on the sides of the terminal block cover, pull out the terminal block cover using its upper side as a support.
- Page 28 Removal and reinstallation of the front cover Introduction to the inverters ● Reinstallation of the front cover and the terminal block cover Insert the upper hooks of the front cover into the sockets of the inverter. Securely install the front cover to the inverter by fixing the hooks on the sides of the cover into place.
- Page 29 Introduction to the inverters Removal and reinstallation of the front cover Removal and reinstallation (FR-A820-01870(37K) or higher, FR-A840-00930(37K) or higher, FR-A842 models) ● Removal of the terminal block cover Remove the mounting screws to remove the terminal block cover. (The number of the mounting screws differs by the capacity.) With the terminal block cover removed, wiring of the main circuit terminals can be performed.
- Page 30 Removal and reinstallation of the front cover Introduction to the inverters ● Reinstallation of the front cover and the terminal block cover Insert the upper hooks of the front cover into the sockets of the inverter. Securely install the front cover to the inverter by fixing the hooks on the sides of the cover into place.
- Page 31 Introduction to the inverters Removal and reinstallation of the front cover ● Reinstallation of the front cover Fix the front cover with the front cover installation screws. (Tightening torque: 1.4 to 1.9 Nm). Tighten the front cover installation screws in the numerical order in the figure shown below. FR-A846-00250(7.5K) or higher FR-A846-00170(5.5K) or lower Tighten...
- Page 32 Removal and reinstallation of the front cover Introduction to the inverters 2 - 10...
-
Page 33: Connections
Connections Power supply, motor and earth connections Connections WARNING: ● Always disconnect the power before performing any wiring work on frequency inverters. Frequency inverters contain high voltages that are potentially lethal. ● After switching off the power supply always wait for at least 10 minutes before proceeding to allow the charge in the inverter’s capacitors to drop to safe levels and check for residual voltage between terminal P/+ and N/- with a meter etc., to avoid a hazard of electrical shock. - Page 34 Power supply, motor and earth connections Connections The three-phase AC mains power supply is connected to terminals R/L1, S/L2 and T/L3 of the inverter (resp. the converter unit for FR-A842 inverters). The motor is connected to terminals U, V and W. The inverter must also be grounded with a cable connected to the protective earth terminal.
- Page 35 Connections Power supply, motor and earth connections The following table lists the power connection terminals found on the various inverter models. Terminals Function Description Mains power supply R/L1, S/L2, T/L3 Mains power supply input for the frequency inverter (3-phase) This is the inverter’s power output U, V, W Inverter output Connect these terminals to a three-phase squirrel cage motor or a PM...
-
Page 36: Control Terminals
Control terminals Connections Control terminals In addition to the power terminals for the mains power supply and the motor there are also a large number of additional terminals that are used for controlling the frequency inverter. The table below only lists the most important control terminals – for complete details refer to the Instruction Manual of your inverter. - Page 37 Connections Control terminals Type Terminal Function Description Safety stop input (Channel 1) Used for the safety stop input signal for the safety relay module. Input resistance 4.7 kΩ Safety stop input (Channel 2) Input current 4–6 mA DC Safety stop input terminal Common terminal for terminals S1 and S2.
- Page 38 Control terminals Connections The following illustration shows the connection of the control terminals when sink logic (factory de- fault for FM types) is used. The inputs are connected to 24 V DC. FR-A820/A840/A846 Forward Reverse Start self-holding selection Multi speed selection RL RL Inverter Jog operation...
-
Page 39: Em-Compatible Installation
Connections EM-compatible installation EM-compatible installation Fast switching of electrical currents and voltages, which naturally also occurs when frequency invert- ers are used, generates radio frequency interference (RF noise) that can be propagated both along ca- bles and through the air. The power and signal cables of the inverter can act as noise transmission an- tennas. -
Page 40: Wiring
EM-compatible installation Connections FR-A846 inverters (IP55 compatible model) These types of inverter have been approved as products for a UL type12 enclosure that is suitable for Installation in a Compartment Handling Conditioned Air (Plenum). ● Install the inverter so that the inverter surrounding air temperature, humidity and atmosphere satisfy the specifications (refer to section 1.2). -
Page 41: Emc Filters
Connections EM-compatible installation 3.3.3 EMC filters EMC filters (mains RFI suppression filters) significantly reduce interference. They are installed be- tween the mains power supply and the frequency inverter. The standard models and the IP55 compatible models of the FR-A800 inverter series are equipped with a built-in EMC filter. - Page 42 EM-compatible installation Connections 3 - 10...
-
Page 43: Start-Up
Start-up Preparations Start-up Preparations 4.1.1 Before switching on the inverter for the first time Check all the following points carefully before switching on a frequency inverter for the first time: ● Has all the wiring been performed correctly? Check the power supply connections particularly carefully: 3-phase to R/ L1, S/L2 and T/L3. -
Page 44: Functional Test
Functional test Start-up Functional test For a functional test the inverter is operated with minimum external wiring. The motor should be al- lowed to run free without any connected load. You need to check whether the connected motor runs properly and that you can adjust its speed with the inverter. There are two ways to perform this test: ●... - Page 45 Functional test ● Controlling the inverter using the PU The inverters of the FR-A800 series can be controlled directly using the standard parameter unit or an optional parameter unit. This makes it possible to perform the functional test without connecting anything to the control inputs.
- Page 46 Functional test Start-up 4 - 4...
-
Page 47: Operation And Settings
Operation and settings Operation and settings The frequency inverters of the FR-A800/A802 series are equipped with the parameter unit FR-DU08 as standard. The FR-A846 models are equipped with the IP55 compatible parameter unit FR-DU08-01. These parameter units allow you to monitor and display status data and alarms and to enter and dis- play the inverter‘s setting parameters (see chapter 6). -
Page 48: Operating Fr-A800 Inverters
Operating FR-A800 inverters Operation and settings Operating FR-A800 inverters 5.1.1 Parameter unit FR-DU08 (FR-A800/A802 ) Components of the parameter unit are shown below. ³ · » ¿ ´ ² ¶ µ ¸ ¹ º ¾ Refer to the next page for a description of the components. 5 - 2... - Page 49 Operation and settings Operating FR-A800 inverters Component Name Description PU : Lit to indicate the PU operation mode. EXT: Lit to indicate the External operation mode. Operation mode ³ (Lit at power-ON in the initial setting.) indicator NET: Lit to indicate the Network operation mode. PU and EXT: Lit to indicate the External/PU combined operation mode 1 or 2.
- Page 50 Operating FR-A800 inverters Operation and settings Basic functions (FR-DU08) Operation mode switchover/Frequency setting External operation mode (At power-ON) PU operation mode PU JOG operation mode Flicker Example Frequency setting has been Value change written and completed! Output current monitor Output voltage monitor Parameter setting mode (at power-ON) Select parameter Parameter setting mode...
-
Page 51: Parameter Unit Fr-Du08-01 (Fr-A806)
Operation and settings Operating FR-A800 inverters 5.1.2 Parameter unit FR-DU08-01 (FR-A806) Components of the parameter unit are shown below. Compared with the FR-DU08 two components are different: the operation key (HAND/AUTO) and the operation mode indicator. ³ · » ¿ ´... - Page 52 Operating FR-A800 inverters Operation and settings Component Name Description HAND : Lit to indicate the PU operation mode. AUTO: Lit to indicate the External operation mode. Operation mode ³ (Lit at power-ON in the initial setting.) indicator NET: Lit to indicate the Network operation mode. HAND and AUTO: Lit to indicate the External/PU combined operation mode 1 or 2.
- Page 53 Operation and settings Operating FR-A800 inverters Basic functions (FR-DU08-01) Operation mode switchover/Frequency setting External operation mode (At power-ON) PU operation mode PU Jog operation mode Flicker Example Frequency setting has been Value change written and completed! Output current monitor Output voltage monitor Parameter setting mode (at power-ON) Select parameter Display the present...
-
Page 54: Operation Mode Selection
Operation mode selection Operation and settings Operation mode selection The operation mode specifies the source of the start command and the frequency command for the inverter. The mode is controlled with parameter 79 (see section 6.2.7). Basically, there are following operation modes: ●... -
Page 55: Setting The Frequency And Starting The Motor
Operation and settings Setting the frequency and starting the motor Setting the frequency and starting the motor When external control signals are not used you can only start, stop and change the speed of the ex- ternal motor with the parameter unit. Example Procedure on FR-A800 inverters (using FR-DU08): Example of drive operation at a 30 Hz output frequency. -
Page 56: Editing Parameter Settings
Editing parameter settings Operation and settings Editing parameter settings All the settings for the operation of frequency inverters are stored in editable parameters. You can find a detailed reference to the most important parameters in chapter 6. All the parameters are preset to default values when the inverter leaves the factory. -
Page 57: Parameter
Parameter Simple mode parameters Parameter For optimum operation you need to configure your frequency inverter for the specific requirements and specifications of the connected drive system and your application. All the necessary settings are stored in numbered parameters in the inverter‘s memory – you only have to set them once because this memory is not cleared when the power is switched off. -
Page 58: The Simple Mode Parameters In Detail
The simple mode parameters in detail Parameter The simple mode parameters in detail 6.2.1 Torque Boost (Pr. 0) Parameter 0 enables you to increase the output voltage at low output frequencies, which increases the motor‘s torque. This function is useful in applications when you need high start-up torque at low speeds. -
Page 59: Base Frequency (Pr. 3)
Parameter The simple mode parameters in detail 6.2.3 Base frequency (Pr. 3) The setting of parameter 3 is very important because it matches the frequency inverter‘s output to the requirements of the motor. Parameter 3 specifies the output frequency at which the output voltage is set to its maximum value. This is normally set to the rated frequency of the motor, which can be found on the motor‘s rating plate. - Page 60 The simple mode parameters in detail Parameter As the graphic below shows, you can select up to seven frequency setpoint values by applying com- binations of signals to terminals RH, RM and RL. The first three values are selected with single termi- nals, the remaining values with combinations.
-
Page 61: Acceleration And Deceleration Times (Pr. 7, Pr. 8)
Parameter The simple mode parameters in detail 6.2.5 Acceleration and deceleration times (Pr. 7, Pr. 8) One of the big advantages of frequency inverters is that they can accelerate and slow down the con- nected motor gradually. Electric motors connected directly to the mains power accelerate up to their maximum speed very rapidly;... -
Page 62: Operation Mode Selection (Pr. 79)
The simple mode parameters in detail Parameter 6.2.7 Operation mode selection (Pr. 79) Parameter 79 sets the operation mode of the frequency inverter. You can set it for operation via external signals, via parameter unit (PU mode), a combination of ex- ternal signals and PU mode or via a network connection. -
Page 63: Setting Input Gain Maximum Frequency (Terminals 2, 4) (Pr. 125, Pr. 126)
Parameter The simple mode parameters in detail Pr. 79 = „0“ (external operation mode, switchable to PU, initial value) Pr. 79 = „2“ (external operation, non-switchable) When parameter 79 is set to „0“ or „2“, external operation mode is activated when the power supply is switched on. -
Page 64: User Group Read Selection (Pr. 160)
The simple mode parameters in detail Parameter 6.2.9 User group read selection (Pr. 160) This function restricts the parameters that are read by the parameter unit. With the initial value (Pr. 160 = "0"), simple mode parameters and extended parameters can be dis- played. -
Page 65: Protective And Diagnostics Functions
Protective and diagnostics functions Protective and diagnostics functions The Mitsubishi Electric inverters of the FR-A800 series have many functions that protect both the in- verter itself and the connected motor against damage when errors occur. If a serious error triggers a protective function the inverter output is turned off, the motor coasts to a stop and an error code is displayed on the parameter unit. -
Page 66: Troubleshooting
Troubleshooting Protective and diagnostics functions Troubleshooting When an error occurs or you experience some other problem with operation you can often diagnose the cause from the behaviour of the motor and/or the inverter. Error Possible cause Check points / Remedy Are the terminals R/L1, S/L2 and T/L3) connected properly? Is the proper power supply voltage applied? Main circuit or motor... - Page 67 Protective and diagnostics functions Troubleshooting Error Possible cause Check points / Remedy Load Check that the load is not varying. Check that the frequency setting signal is not varying. Speed varies during Check that the frequency setting signal is not affected by noise. Input signals operation Check for a malfunction due to undesirable currents when the transis-...
-
Page 68: List Of Alarm Displays
List of alarm displays Protective and diagnostics functions List of alarm displays Inverter Display Classification Meaning FR-A800 Plaintext E--- Faults history HOLD Operation panel lock LOCD Password locked Parameter write error Er4, Error messages rE4, Copy operation error Err. Error (e. g. incorrect parameter) Stall prevention (overcurrent) Stall prevention (overvoltage) Regenerative brake prealarm... - Page 69 Protective and diagnostics functions List of alarm displays Inverter Display Classification Meaning FR-A800 Plaintext Regenerative overvoltage shut-off E.OV1 during acceleration Regenerative overvoltage shut-off E.OV2 during constant speed Regenerative overvoltage shut-off E.OV3 during deceleration or stop Inverter overload shut-off E.THT (electronic thermal relay function) Motor overload shut-off (electronic E.THM thermal relay function)
- Page 70 List of alarm displays Protective and diagnostics functions Inverter Display Classification Meaning FR-A800 Plaintext Output current detection value E.CDO exceeded Inrush current limit circuit alarm E.IOH E.SER Communication error (inverter) E.AIE Analog input error E.USB USB communication error E.SAF Safety circuit fault E.PBT Internal circuit fault E.OS...
-
Page 71: Resetting The Inverter (Reset)
Protective and diagnostics functions Resetting the inverter (Reset) Resetting the inverter (Reset) After you have located and corrected the cause of a shutdown you need to reset the inverter so that normal operation can continue. In addition to clearing the error history, executing a RESET also clears the stored record of the number of restart attempts and the stored values registered for the electronic thermal overload relay. - Page 72 Resetting the inverter (Reset) Protective and diagnostics functions 7 - 8...
-
Page 73: A Appendix
Appendix Parameter list (FR-A800) Appendix Parameter list This reference section lists all the parameters supported in each series of Mitsubishi Electric inverters. Please see the documentation of your inverter for more detailed descriptions of each parameter. NOTE Simple Simple Simple indicates simple mode parameters. -
Page 74: Parameter List
Parameter list (FR-A800) Appendix Param- Param- Name Setting Range Initial Value Name Setting Range Initial Value eter eter Restart cushion time 0–60 s Frequency jump 2A 0–590 Hz, 9999 9999 Remote function 0–3, 11–13 selection Energy saving control Frequency jump 2B 0–590 Hz, 9999 9999 0, 4, 9... -
Page 75: A800
Appendix Parameter list (FR-A800) Param- Param- Name Setting Range Initial Value Name Setting Range Initial Value eter eter Third torque boost 0–30 %, 9999 9999 2, 4, 6, 8, 10, 12, Number of motor poles 9999 9999 Third V/F (base 0–590 Hz, 9999 9999 frequency) - Page 76 Parameter list (FR-A800) Appendix Param- Param- Name Setting Range Initial Value Name Setting Range Initial Value eter eter Automatic switch-over 0.01–10.00 s, PID differential time 9999 frequency range from 9999 0–10 Hz, 9999 9999 bypass to inverter operation Electronic bypass 0, 1 sequence selection User group read...
- Page 77 Appendix Parameter list (FR-A800) Param- Param- Name Setting Range Initial Value Name Setting Range Initial Value eter eter 0–100 s, Stop selection 1000–1100 s, 9999 8888, 9999 Output phase loss 0, 1 protection selection Override bias 0–200 % 50 % Override gain 0–200 % 150 %...
- Page 78 Parameter list (FR-A800) Appendix Param- Param- Name Setting Range Initial Value Name Setting Range Initial Value eter eter Analog output signal Brake opening current 0–400 % 130 % selection Brake opening current 0–2 s 0.3 s Setting for zero analog detection time output Brake operation time at...
- Page 79 Appendix Parameter list (FR-A800) Param- Param- Name Setting Range Initial Value Name Setting Range Initial Value eter eter Communication EEPROM Orientation selection 0–2 0, 1 write selection Orientation speed gain (P 0–1000 Communication error term) — count Orientation speed 0–20 s 0.333 s DeviceNet address integral time...
- Page 80 Parameter list (FR-A800) Appendix Param- Param- Name Setting Range Initial Value Name Setting Range Initial Value eter eter Second target position upper 4 digits Third target position lower 4 digits 0, 1, 3–6, 13–16, Third target position 20, 23, 24, 30, 33, upper 4 digits 34, 40, 43, 44, 50, 53, 54, 70, 73, 74,...
- Page 81 Appendix Parameter list (FR-A800) Param- Param- Name Setting Range Initial Value Name Setting Range Initial Value eter eter Communication error Energization time (0–65535) Parameter for communication execution waiting time carrying-over times options FR-A8NC, FR-A8ND, Communication error Operating time carrying- FR-A8NP (0–65535) occurrence count display over times...
- Page 82 Parameter list (FR-A800) Appendix Param- Param- Name Setting Range Initial Value Name Setting Range Initial Value eter eter Acceleration time at a 0–3600 s, 9999 9999 Deceleration check time 0–3600 s, 9999 restart Brake opening current 0, 1 Second free thermal selection 0–590 Hz, 9999 9999...
- Page 83 Appendix Parameter list (FR-A800) Param- Param- Name Setting Range Initial Value Name Setting Range Initial Value eter eter Second motor low-speed 4mA input fault range torque 0, 9999 9999 0–590 Hz, 9999 9999 operation frequency characteristic selection 4mA input check filter 0–10 s Operation frequency during communication...
- Page 84 Parameter list (FR-A800) Appendix Param- Param- Name Setting Range Initial Value Name Setting Range Initial Value eter eter Torque control P gain 1 Torque monitoring 0–400 % 150 % (current loop 0–500 % 100 % reference proportional gain) AM output filter 0–5 s 0.01 s Torque control integral...
- Page 85 Appendix Parameter list (FR-A800) Param- Param- Name Setting Range Initial Value Name Setting Range Initial Value eter eter Terminal 2 frequency PID display gain analog 0–590 Hz 0 Hz 0–300.0 % 100 % (902) setting bias frequency (935) value Terminal 2 frequency Input voltage mode 0–300 % 0, 1...
- Page 86 Parameter list (FR-A800) Appendix Param- Param- Name Setting Range Initial Value Name Setting Range Initial Value eter eter 0–59, 100–159, Analog source selection 200–259, 1027 (1ch) 300–359, 400–459, 500–559, 600–659, 1–3, 5–14, 17–20, 700–759, 22–24, 32–35, 800–859, 40–42, 52–54, 61, 900–959, 62, 64, 67, 87–98, 1000–1059,...
- Page 87 Appendix Parameter list (FR-A800) Param- Param- Name Setting Range Initial Value Name Setting Range Initial Value eter eter Swinging suppression Second PID deviation 0.0–100.0 %, 1074 0.05–3 Hz, 9999 1 Hz 1145 9999 frequency limit 9999 Swinging suppression Second PID signal 1075 0–3 1146...
- Page 88 Parameter list (FR-A800) Appendix Param- Param- Name Setting Range Initial Value Name Setting Range Initial Value eter eter Fifth positioning dwell 1240 0–20000 ms 0 ms time Eleventh positioning 0, 1, 10, 11, 100, 1265 sub-function 101, 110, 111 Fifth positioning 0, 1, 10, 11, 100, 1241 sub-function...
- Page 89 Appendix Parameter list (FR-A800) Param- Name Setting Range Initial Value eter Home position return 1290 0–10 s 0.5 s stopper waiting time Position control terminal 1292 0, 1 input selection Roll feeding mode 1293 0, 1 selection Position detection lower 1294 0–9999 4 digits...
-
Page 90: Sample Applications
Constant speed Deceleration Pr. 7 Pr. 8 In this example we are going to use an FR-A800 series inverter to power and control the belt using the speed/time pattern shown in the graph above. Frequency inverter FR-A800 Material Power supply... - Page 91 Appendix Sample applications (Conveyor belt) If the material on the belt still shifts when stopping and starting even with a gentle acceleration curve you can solve the problem by programming an S-curve for acceleration and deceleration, as shown in the graph on the left. You can change the curve with parameter 29.
-
Page 92: Lifting Drive
Sample applications (Lifting drive) Appendix A.2.2 Lifting drive The illustration below shows the basic configuration of an inverter for powering a drive for lifting ap- plications like hoists or roll-up gates. A motor with a mechanical brake is used to ensure that the load cannot slip down when the motor is off. - Page 93 Appendix Sample applications (Lifting drive) Wiring R/L1 S/L2 T/L3 Frequency Inverters - Beginner's Guide A - 21...
-
Page 94: Pid Controller
A.2.3 PID controller The FR-A800 series have integrated PID controllers, which makes it possible to use these inverters for applications in the process industry like flow and pressure regulation. The setpoint value is stored internally in an inverter parameter or input as an external signal via input terminals 2. - Page 95 Appendix Sample applications (PID controller) External setpoint signal Source logic Frequency inverter Water outlet Power I> L1/L2/L3 supply Start Enable PID controller Water inlet Transducer Ι (pressure --> current) Setpoint 1 kΩ/2 W 24 V Power supply for transducer For the PID controller application using the configuration shown above you must also set the inverter parameters shown in the table below, in addition to the basic parameters.
- Page 96 Sample applications (PID controller) Appendix Setpoint value set with parameters In the configuration shown in the circuit diagram below the setpoint is entered via the parameter unit and stored in a parameter. Source logic Water outlet Frequency inverter Power I> L1/L2/L3 supply Start...
- Page 97 Index Index Acceleration time Parameter Parameter ........6-5 0 .
- Page 98 Index...
- Page 100 Phone: +371 (0)6 / 784 2280 Fax: +371 (0)6 / 784 2281 Mitsubishi Electric Europe B.V. / FA - European Business Group / Gothaer Straße 8 / D-40880 Ratingen / Germany / Tel.: +49(0)2102-4860 / Fax: +49(0)2102-4861120 / [email protected] / https://eu3a.mitsubishielectric.com...