Mitsubishi Electric CR800 Series Instruction Manual
For industrial robot
Hide thumbs
Also See for CR800 Series:
- Special specifications manual (156 pages) ,
- Ethernet function instruction manual (146 pages) ,
- Instruction manual (146 pages)

Related Manuals for Mitsubishi Electric CR800 Series


Summary of Contents for Mitsubishi Electric CR800 Series
- Page 1 Mitsubishi Electric Industrial Robot CR800 series controller Tracking Function Instruction Manual BFP-A3520-B...
- Page 3 Safety Precautions Always read the following precautions and the separate "Safety Manual" before starting use of the robot to learn the required measures to be taken. CAUTION All teaching work must be carried out by an operator who has received special training.
- Page 4 The points of the precautions given in the separate "Safety Manual" are given below. Refer to the actual "Safety Manual" for details. DANGER When automatic operation of the robot is performed using multiple control devices (GOT, programmable controller, push-button switch), the interlocking of operation rights of the devices, etc.
- Page 5 CAUTION After editing the program, always confirm the operation with step operation before starting automatic operation. Failure to do so could lead to interference with peripheral devices because of programming mistakes, etc. CAUTION Make sure that if the safety fence entrance door is opened during automatic operation, the door is locked or that the robot will automatically stop.
- Page 6 DANGER Attach the cap to the SSCNET III connector after disconnecting the SSCNET III cable. If the cap is not attached, dirt or dust may adhere to the connector pins, resulting in deterioration connector properties, and leading to malfunction. CAUTION Make sure there are no mistakes in the wiring.
- Page 7 Revision history Date of print Specifications No. Details of revisions 2017-05-30 BFP-A3520 First print 2018-02-01 BFP-A3520-A ・The CR800-Q controller was added. 2020-04-10 BFP-A3520-B ・Added information for the RV-8CRL-D. ・Added information for the RV-5AS-D.
- Page 8 ■Preface Thank you very much for purchasing Mitsubishi Electric Industrial Robot. The high speed and accuracy tracking function allows robots to follow workpieces on a conveyer with high speed and accuracy. The circular arc tracking function allows robots to follow workpieces on a turntable and a circular arc conveyer.
-
Page 9: Table Of Contents
[Contents] Overview ............................................1-1 1.1. Function overview ....................................... 1-1 1.1.1. What is high Speed and Accuracy Tracking Function? ......................1-1 1.1.2. What is the circular arc tracking function? ............................ 1-1 1.2. System that can achieve ....................................1-2 1.2.1. High speed and accuracy tracking function ........................... 1-2 1.2.2. - Page 10 9.1. Operation procedure ......................................9-57 9.2. Confirmation after operation ..................................9-64 9.3. When multiple conveyers are used ................................9-64 Workpiece Recognition and Teaching (“C1” program) .......................... 10-65 10.1. Conveyer Tracking ....................................10-65 10.1.1. Operation procedure ..................................10-65 10.1.2. Confirmation after operation ..............................10-68 10.1.3.
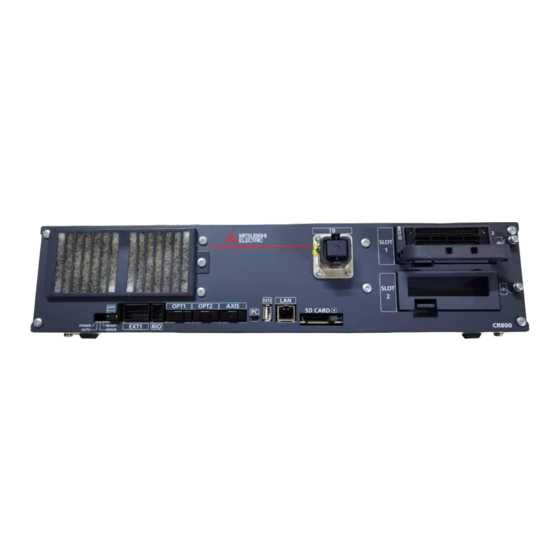
- Page 11 List of Parameters Related to Tracking ............................18-184 18.2. List of Parameters Related to Vision Sensor ..........................18-186 18.3. Scene of changing parameter ................................18-187 18.4. Expansion serial interface connector pin assignment (CR800 series controller) ............18-188 18.5. Calibration sheet ..................................... 18-189...
-
Page 13: Overview
1 Overview 1. Overview Function overview 1.1. The tracking function has the following two functions: the high speed and accuracy tracking function, which allows robots to follow workpieces on a conveyer with high speed and accuracy, and the circular arc tracking function, which allows robots to follow workpieces on a turntable and a circular arc conveyer. -
Page 14: System That Can Achieve
1 Overview System that can achieve 1.2. High speed and accuracy tracking function 1.2.1. With high speed and accuracy tracking function, the example of the system that can be achieved is shown as following. Table 1-2 Example of system that can be achieved by high speed and accuracy tracking function Example of the system When a robot picks the workpieces moving on a conveyer, it is tracking. - Page 15 1 Overview Tracking is primarily intended for applications such as the following. Transporting and lining up workpieces moving on a conveyer A vision camera detects workpieces moving on a conveyer and robots transport and line up them on pallets, without having to stop the conveyer.
-
Page 16: Circular Arc Tracking Function
1 Overview Circular arc tracking function 1.2.2. With the circular arc tracking function, the example of the system that can be achieved is shown as following. Table 1-3 Example of system that can be achieved by the circular arc tracking function Example of the system A robot can catch the workpieces moving on a circular arc conveyer while tracking. - Page 17 1 Overview A advantage using the circular arc tracking function is shown as following. Point The area of the system can be done small by a turntable! Before - [In case of a straight conveyer] ↓ After - [In case of a circular arc conveyer] System that can achieve 1-5...
- Page 18 1 Overview Point Tracking distance becomes long, robot can do much work! Before - [In case of a straight conveyer] ↓ After - [In case of a circular arc conveyer] 1-6 System that can achieve...
-
Page 19: The Terminology Explanation
1 Overview The terminology explanation 1.3. Table 1-4 The terminology explanation for tracking Term Explanation D type CR800-D series robot controller R type CR800-R series robot controller Q type CR800-Q series robot controller High speed and accuracy The tracking function allows a robot to follow workpieces moving on a tracking function conveyer with high speed and accuracy. -
Page 20: System Configuration
2 System Configuration 2. System Configuration Components 2.1. Robot controller enclosure products 2.1.1. The configuration of the products related to the high speed and accuracy tracking function and the circular arc tracking function, which are enclosed with the robot controller, is shown in "Table 2-1 List of Configuration in the tracking functional-related product". - Page 21 2 System Configuration Target type Name of devices to be Model Quantity Remark provided by customers (For conveyer tracking) Photo electronic - Used to detect a workpiece position ● ● sensor (For vision tracking) Encoder distribution 2F-YZ581 The Encoder distribution unit is used unit to connect two or more robot controllers (D type or R type) or the...
-
Page 22: Example Of System Configuration
2 System Configuration Example of System Configuration 2.2. Configurations for the high speed and accuracy tracking function 2.2.1. (a) Configuration Example of Conveyer Tracking Systems The following figure shows a configuration xample of a system that recognizes lined-up workpieces on a conveyer passing a photo electronic sensor and follows the workpieces. - Page 23 2 System Configuration (b) Configuration Example of Vision Tracking Systems The following figure shows a configuration example of a system that recognizes positions of workpieces that are not lined up on a conveyer with a vision sensor and follows the workpieces. [D type or R type] Figure 2-3 Configuration Example of Vision Tracking Systems [D type or R type] [Q type]...
-
Page 24: Configuration For The Circular Arc Tracking Function
2 System Configuration Configuration for the circular arc tracking function 2.2.2. The following figure shows a configuration example of a system that recognizes lined-up workpieces on a circular arc conveyer passing a photoelectronic sensor and follows the workpieces. [D type or R type] Figure 2-5 System configuration example of the circular arc tracking function (conveyer tracking) [D type or R type] [Q type] Figure 2-6 System configuration example of the circular arc tracking function (conveyer tracking) [Q type]... -
Page 25: Specification
3 Specification 3. Specification Tracking Specifications 3.1. The table below shows the specifications of the high speed and accuracy tracking function and the circular arc tracking function. Please refer to “Standard Specifications Manual” for the specifications of the robot arm and controller to be used. -
Page 26: Q Type
3 Specification Q type 3.1.2. Table 3-2 Specifications of the tracking function [Q type] Item Specification Supported robots (*1) RH-FRH-Q series / RV-FR-Q series Applicable robot controller CR800-Q series controller Conveyer Number of Max 8pcs (in case 1pc encoder connect to 1 pc conveyer) conveyer Encoder 3 pcs / Q173DPX unit 1pc (*2) -
Page 27: Q173Dpx(Manual Pulser Input)Unit Specification
3 Specification Q173DPX(manual pulser input)unit specification 3.2. Add Q173DPX unit into PLC base unit (Q3□DB) when the customer use Q type high speed and accuracy tracking function. Please refer to "Q173DCPU/Q172DCPU user's manual" about details of this unit. (1) External and name of Q173DPX unit. Figure3-1 Externals of Q173DPX unit Q173DPX(manual pulser input)unit specification 3-15... - Page 28 3 Specification (2) Dip switch By setting the dip switch, the condition of the tracking enable signal is decided. Table3-3 Item of dip switch 3-16 Q173DPX(manual pulser input)unit specification...
- Page 29 3 Specification (3) Specification of hardware 7.1ms Q173DPX(manual pulser input)unit specification 3-17...
- Page 30 3 Specification (4) Wiring The pin layout of the Q173DPX PULSER connecter viewed from the unit is shown below Figure3-2 Pin assignment of the PULSER connector 3-18 Q173DPX(manual pulser input)unit specification...
- Page 31 3 Specification Interface between PULSER connecter and manual pulse generator (Differential-output type)/ Incremental synchronous encoder Figure3-3 Wiring connection with rotary encoder As above image, because DC5V voltage is output from Q173DPX unit, it makes possible to supply 5V from Q173DPX unit to rotary encoder. When 24V encoder type of power supply is used, it makes possible to use 24V output from PLC power unit.
- Page 32 3 Specification The interface between tracking enable signal is shown follow. This signal is used for input signal when the sensor is used to find workpieces so please connect photoelectronic output signal of sensor. photoelectronic Figure3-4 Connected composition of tracking enable signal The connection robot system with Q173DPX unit is shown as follow.
-
Page 33: Operation Procedure
4 Operation Procedure 4. Operation Procedure Operation procedure for constructing a high speed and accuracy tracking system 4.1. This chapter explains the operation procedure for constructing a high speed and accuracy tracking system. Start of operation ↓ 1.Connection of Equipment········································································· Refer to “Chapter 5.” [D type or R type] Chapter 5 explains the connection with the encoder. -
Page 34: Operation Procedure For Constructing A Circular Arc Tracking System
4 Operation Procedure Operation procedure for constructing a circular arc tracking system 4.2. This chapter explains the operation procedure for constructing a circular arc tracking system. Start of operation ↓ 1.Preparations and Connection of Equipment ················································· Refer to “Chapter 5.” [D type or R type] Chapter 5 explains the connection with the encoder. -
Page 35: Connection Of Equipment
5 Connection of Equipment 5. Connection of Equipment This chapter explains how to connect each of the prepared pieces of equipment. Prepare equipment by referring to “Table 2-2 List of Devices Provided by Customers”. Refer to section 5.1 for D type or R type, and section 5.2 for Q type. Connection of Equipment [D type or R type] 5.1. - Page 36 5 Connection of Equipment The wiring example by the thing is shown below. (Please note that the connector shape is different depending on the controller) Figure 5-1 Wiring example from an encoder to a robot [D type or R type] Figure 5-2 The encoder and the wiring diagram of the encoder cable [D type or R type] * Refer to "Table 18-4 Connectors: CNENC/CNUSR Pin Assignment"...
-
Page 37: Installation Of Encoder Cable
5 Connection of Equipment Installation of encoder cable 5.1.2. The installation method of the encoder cable is shown in "Figure 5-3". And, the description about the measures against the noise is shown in the figure “5.3 Measures against the noize”. Within 300mm CNUSR12 connector Ferrite core... -
Page 38: Connection Of Photoelectronic Sensor
5 Connection of Equipment Connection of Photoelectronic Sensor 5.1.3. This section explains connection of photoelectronic sensor of when the high speed and accuracy tracking function is used with conveyer tracking or when the circular arc tracking function is used. If a photoelectronic sensor is used for detection of workpieces, connect the output signal of the photoelectronic sensor to the SKIP input terminal of the CNUSR12 connector. -
Page 39: Connection Of Equipment [Q Type]
5 Connection of Equipment Connection of Equipment [Q type] 5.2. The connection with each equipments is explained as follow. Connection of Unit 5.2.1. Q173DPX unit is connected to base unit (Q3□DB) or Q6□B increase base unit. For example, attach Q173DPX unit to I/O5 slot as follows. Connection with encoder for conveyer and encoder cable 5.2.2. - Page 40 5 Connection of Equipment Pin assignment of the PULSER connector Twisted-pair cable Blue(+0V) Encoder HPSEL1 Brown(+5V) HA1P Black Black/Red HA1N Ex.)Omuron White HB1P E6B2-CWZ1X White/Red HB1N Blue(+0V) Encoder Brown(+5V) HPSEL2 HA2P Black HA2N Black/Red stripe Ex.)Omuron HB2P White E6B2-CWZ1X HB2N White/Red Photoelectric sensor...
-
Page 41: Connection Of Photoelectronic Sensor
5 Connection of Equipment Connection of Photoelectronic Sensor 5.2.3. If a photoelectronic sensor is used for detection of workpieces, connect the output signal of the photoelectronic sensor to a tracking enable signal of the Q173DPX unit. In this section, the connection example to 1 channel (A4, B4) is shown below. Q173DPX PULSER connector Photoelectric sensor... -
Page 42: Connection Of Vision Sensor
5 Connection of Equipment Connection of Vision Sensor 5.2.4. This section explains connection of vision sensor of when the high speed and accuracy tracking function is used with vision tracking. If a vision sensor is used for detection of workpieces, connect “HS OUT 0” and “GROUND (Micro series: HS COMMON)”... -
Page 43: Installation Of An Encoder In The Circular Arc Tracking System
5 Connection of Equipment Installation of an Encoder in the Circular Arc Tracking System 5.3. When installing an encoder as follows in the turntable with the short radius, there is a possibility that the tracking precision becomes bad by the case that the direction of rotation of the table and the direction of rotation of the encoder aren't identical. -
Page 44: Measures Against The Noize
5 Connection of Equipment Measures against the noize 5.4. The example of noise measures of the tracking system is shown in the following. Please implement the measures against the noise if needed in the power supply periphery section for the encoders which prepared of the customer. -
Page 45: Parameter Setting
6 Parameter Setting 6. Parameter Setting This chapter explains how to set dedicated input/output signals that play the role of interface between a robot and an external device (e.g., a Programmable Logic Controller) and parameters related to the tracking function. Please refer to “Detailed Explanations of Functions and Operations”... - Page 46 6 Parameter Setting [Q type] (1) Set a parameter TRMODE to 1, validate a function of tracking. (2) Specify the channel to which the encoder is connected using a parameter EXTENC. (3) In the case of Q type, Using parameter ENCUNT* (*=1 to 3), designate the slot in which Q173DPX module under the control of robot CPU is installed.
- Page 47 6 Parameter Setting Number Value set at Parameter Parameter Explanation factory name elements shipping Second ENCUNIT2 The base unit-number of the second Q173DPX unit -1,0 Q173DPX integers (element 1) that robot CPU uses and slot number (element 2) are set. [Element 1] -1 :No connection 0 :Basic base unit...
-
Page 48
6 Parameter Setting Setting example of the parameter "EXTENC" (Encoder number allocation)
When the encoder value is showed by variable monitor of “Program monitor”, the encoder value changes as follows. In this way, in the case of connection to channel 2, the encoder data is stored in “M_Enc(2)”. It is useful to change parameter EXTENC when confirming the encoder value by using “M_Enc(1)”and encoder value 1. -
Page 49
6 Parameter Setting
Change the first element of a parameter EXTENC into “2” from “1”. If you reset a power supply and reflect the parameter value, the encoder value is displayed in M_Enc(1)” as follows. -
Page 50: Sequencer Cpu Parameter Setting [Q Type]
6 Parameter Setting Sequencer CPU Parameter Setting [Q type] 6.1.2. In the case of Q type, it is necessary to set the following parameters of the PLC CPU in addition to the parameters of the robot CPU. a) Multiple CPU setting : Set the number of CPU units. b) I/O assignment : Select I/O units and/or Intelligent units. - Page 51 6 Parameter Setting (3) Double-click the “Multiple CPU Setting” (4) Set the number of CPU and this system area size (K Points) (5) Double-click the “I/O assignment” (6) When Q173DPX unit is attached to fifth slot, change the type of slot 5 to the “Intelligent”. Tracking Parameter Setting 6-39...
- Page 52 6 Parameter Setting (7) Click the “Detailed Setting” button. (8) Because the robot CPU manages the Q173DPX unit, change the Control PLC of slot 5 to the “PLC No.2” (Robot CPU). (9) Click the “END” button. The Parameters are memorized into the sequencer CPU. (10) A power supply of a sequencer is reset.
-
Page 53: Example Of Three Robot's Cpu Sharing One Q173Dpx [Q Type]
6 Parameter Setting Example of three robot’s CPU sharing one Q173DPX [Q type] 6.1.3. In the case of Q type, the following shows the setting example using three robot CPUs, one Q173DPX, and one encoder. You will be able to understand some parameters ENCUNIT* and EXTENC. [Conditions] - An encoder is connected to the channel 3. - Page 54 6 Parameter Setting (2) In the setting of robot CPU1 and robot CPU2, specify the value of the parameter ENCUNIT1 to “0,4”. (3) In the setting of robot CPU3, specify the value of the parameter ENCUNIT2 to “0,4”. (4) In the setting of each robot CPU(1 - 3), change parameter TRMODE to “1”. 6-42 Tracking Parameter Setting...
- Page 55 6 Parameter Setting Parameter setting of GX Works The example of the second unit (robot CPU1) controlling Q173DPX unit. Change “Control PLC” columns to “PLC No.2” in slot 4(0-4) rows of No.5. Reset the power supply of sequencer and the robot controller after the setting was changed. Monitoring the encoder value When the encoder value is showed by variable monitor of “Program monitor”, the encoder value changes as follows.
- Page 56 6 Parameter Setting In this way, in the case of connection to channel 3, the data of robot CPU1 and robot CPU2 is stored in “M_Enc(3)”. The data of robot CPU3 is stored in”M_Enc(6)” because parameter ENCUNIT2 is specified. It is useful to change parameter EXTENC when confirming the encoder value by using “M_Enc(1)”and encoder value 1.
- Page 57 6 Parameter Setting In the setting of the robot CPU3, changes the first element of a parameter EXTENC into “6” from “1”. If you reset a power supply and reflect the parameter value, the encoder value is displayed in M_Enc(1)” as follows.
-
Page 58: Operation Parameters
6 Parameter Setting Operation Parameters 6.2. The following list the setting items of parameters required to operate the robot at the optimal acceleration/deceleration. Table 6-3 List of Operation Parameter Parameter name Explanation Reference value Tool A parameter "MEXTL" designates a coordinate system of a tool Defaults: coordinate system installed in the mechanical interface side of the robot (hand). -
Page 59: Dedicated Input/Output Parameters
6 Parameter Setting Dedicated Input/Output Parameters 6.3. The following list the setting items of dedicated input/output parameters used to operate the robot via instructions from an external device. Set the signal numbers according to your system using the setting values in the table as reference. -
Page 60: Installation Of A Sample Robot Program
7 Installation of a sample robot program 7. Installation of a sample robot program This chapter explains the structure of the sample robot programs. Sample robot programs are categorized into two types: for high speed and accuracy tracking and circular arc tracking. -
Page 61: Calibration Of Conveyer And Robot Coordinate Systems ("A1" Program)
8 Calibration of Conveyer and Robot Coordinate Systems (“A1” program) 8. Calibration of Conveyer and Robot Coordinate Systems (“A1” program) * The tasks described in this chapter are required for high speed and accuracy tracking (conveyer tracking and vision tracking). * Refer to "12 Teaching Operation (“A1”... -
Page 62: Confirm The Encoder Value
8 Calibration of Conveyer and Robot Coordinate Systems (“A1” program) Tool length is calculated automatically by instructing in the location of 3-8 points as follows in the screen mentioned above. Confirm the encoder value 8.1.2. An important one is a change in the encoder value in this work. Confirm whether a robot controller grasps the turn of the encoder. - Page 63 8 Calibration of Conveyer and Robot Coordinate Systems (“A1” program) Click a [Add] button and open a “Add display variables” screen. Input "M_Enc (1)" to a space "variable name", and click a [OK] button. also input "M_Enc (2)"-"M_Enc (8)" equally, and click a [OK] button. Confirm that the value of "M_Enc"...
-
Page 64: Operation Procedure
8 Calibration of Conveyer and Robot Coordinate Systems (“A1” program) Operation procedure 8.2. Using "A1" program, operate in the following procedures. (1) Set the controller mode to "MANUAL". Set the T/B to "ENABLE". ↑Up: DISABLE ↓Down: ENABLE Lamp lighting ★ T/B rear (2) Press one of the keys (example, [EXE] key) while the... </li> <li class="odd"> <a href="/manual/1851536/Mitsubishi-Electric-Cr800-Series.html?page=65#manual">Page 65</a> (6) Press the [F1] (FWD) key and execute step feed. “(1) Input an encoder … “is displayed. Execute work according to the comment in the robot program. <PROGRAM> A1 4 '# Date of creation/version : 201 5 '# COPYRIGHT : MITSUBISHI ELECTRIC 6 '############################# 7 '(1)Input an encoder number to th JUMP Specify the encoder number. </li> <li> <a href="/manual/1851536/Mitsubishi-Electric-Cr800-Series.html?page=66#manual">Page 66</a> 8 Calibration of Conveyer and Robot Coordinate Systems (“A1” program) (7) Press the [F1] (FWD) key and execute step feed. “(2) Attach a marking sticker…”is displayed. Attach a marking sticker on the conveyer (a sticker with an X mark is the best choice for the marking sticker).Drive the conveyer and stop it when the marking sticker comes within the robot movement range. </li> <li class="odd"> <a href="/manual/1851536/Mitsubishi-Electric-Cr800-Series.html?page=67#manual">Page 67</a> 8 Calibration of Conveyer and Robot Coordinate Systems (“A1” program) (9) Press [F1] (FWD) key and execute step feed “(4) Raise the robot” is displayed. Raise the robot. (10) Press [F1] (FWD) key and execute step feed “(5) Move the sticker in the…” is displayed. Drive the conveyer and stop at a position where the marking sticker is immediately outside the robot movement range. </li> <li> <h3><a href="/manual/1851536/Mitsubishi-Electric-Cr800-Series.html?page=68#manual">Page 68: Confirmation After Operation</a></h3> 8 Calibration of Conveyer and Robot Coordinate Systems (“A1” program) (13) Press [F1] (FWD) key and execute step feed “(8) Perform step operation…” is displayed. Perform step operation until “End.” * The amount of robot movement per encoder pulse is calculated based on this operation. Confirmation after operation 8.3. </li> <li class="odd"> <h3><a href="/manual/1851536/Mitsubishi-Electric-Cr800-Series.html?page=69#manual">Page 69: Calibration Of Vision Coordinate And Robot Coordinate Systems ("B1" Program)</a></h3> 9 Calibration of Vision Coordinate and Robot Coordinate Systems (“B1” program) 9. Calibration of Vision Coordinate and Robot Coordinate Systems (“B1” program) * The tasks described in this chapter are required only for constructing a vision tracking system for high speed and accuracy tracking. These operations are not necessary when constructing a conveyer tracking system. </li> <li> <a href="/manual/1851536/Mitsubishi-Electric-Cr800-Series.html?page=70#manual">Page 70</a> 9 Calibration of Vision Coordinate and Robot Coordinate Systems (“B1” program) (2) To communicate with the vision sensor, set a necessary parameter by using RT ToolBox3. (1) Select [Online] - [Parameter] - [Communication Parameter] - [Ethernet]. In the "Ethernet parameter" screen, set the IP address in the "IP Address" field. (Set the subnet mask and default gateway as necessary.) Click the [Write] button to write the parameter to the controller. </li> <li class="odd"> <a href="/manual/1851536/Mitsubishi-Electric-Cr800-Series.html?page=71#manual">Page 71</a> Specify the encoder number. If you want to change the encoder number, please edit the program as follows. (a) Display the following command. <PROGRAM> B1 5 '# COPYRIGHT : MITSUBISHI ELECTRIC 6'################################ 7 '(1)Input an encoder number to th 8 MEncNo = 1... </li> <li> <a href="/manual/1851536/Mitsubishi-Electric-Cr800-Series.html?page=72#manual">Page 72</a> TEACH DELETE INSERT TEACH (c) Press the [F1] (FWD) key and the change is determined. <PROGRAM> B1 5 '# COPYRIGHT : MITSUBISHI ELECTRIC 6'################################ 7 '(1)Input an encoder number to th 8 MEncNo = 2 ' Set an enc EDIT... </li> <li class="odd"> <a href="/manual/1851536/Mitsubishi-Electric-Cr800-Series.html?page=73#manual">Page 73</a> 9 Calibration of Vision Coordinate and Robot Coordinate Systems (“B1” program) (11) Press the [F1] (FWD) key and execute step feed. " (4)Specify the mark in three・・・" is displayed. Specify four points in the calibration sheet by using the N-point calibration tool of In-Sight Explorer. 1) End [Live Video] of In-Sight Explorer, and select [Inspect Part] button of “Application Steps”. </li> <li> <a href="/manual/1851536/Mitsubishi-Electric-Cr800-Series.html?page=74#manual">Page 74</a> 9 Calibration of Vision Coordinate and Robot Coordinate Systems (“B1” program) 3) Click the [Add] button to display nine candidate points on the screen. 4) Select the target candidate points in order, and click the [OK] button. The example of specifying these four points is shown. </li> <li class="odd"> <a href="/manual/1851536/Mitsubishi-Electric-Cr800-Series.html?page=75#manual">Page 75</a> 9 Calibration of Vision Coordinate and Robot Coordinate Systems (“B1” program) (12) Press the [F1] (FWD) key and execute step feed. “(5)Move the calibration sheet…”is displayed. Move the calibration seat by starting the conveyer within the robot movement range. (13) Press the [F1] (FWD) key and execute step feed. “(6)Move the robot hand to the…”is displayed. Move the robot to the position right above the first mark on the conveyer. </li> <li> <h3><a href="/manual/1851536/Mitsubishi-Electric-Cr800-Series.html?page=76#manual">Page 76: Confirmation After Operation</a></h3> 9 Calibration of Vision Coordinate and Robot Coordinate Systems (“B1” program) (15) Press the [F1] (FWD) key and execute step feed. “(8) Acquire the position of the…”is displayed. Repeat the steps (13) and (14) for the 2nd to 4th marks in the calibration sheet. (16) Press the [F1] (FWD) key and execute step feed. </li> <li class="odd"> <h3><a href="/manual/1851536/Mitsubishi-Electric-Cr800-Series.html?page=77#manual">Page 77: Workpiece Recognition And Teaching ("C1" Program)</a></h3> 10 Workpiece Recognition and Teaching (“C1” program) 10. Workpiece Recognition and Teaching (“C1” program) * The tasks described in this chapter are required for both conveyer tracking and vision tracking in high speed and accuracy tracking, but different operations are performed. Refer to "10.1 Conveyer Tracking"... </li> <li> <a href="/manual/1851536/Mitsubishi-Electric-Cr800-Series.html?page=78#manual">Page 78</a> (6) Press the [F1] (FWD) key and execute step feed. “(1) Input a workpiece … “is displayed. Execute work according to the comment in the robot program. <PROGRAM> C1 4 '# Date of creation/version : 2018 5 '# COPYRIGHT : MITSUBISHI ELECTRIC 6 '############################### 7 '(1)Input a workpiece number to the JUMP Specify the workpiece number. </li> <li class="odd"> <a href="/manual/1851536/Mitsubishi-Electric-Cr800-Series.html?page=79#manual">Page 79</a> 10 Workpiece Recognition and Teaching (“C1” program) (8) Press the [F1] (FWD) key and execute step feed. “(3)Input the number of the sensor…”is displayed. <PROGRAM> C1 8 MWrkNo = 1 'Set a workpiece 9 '(2)Input an encoder number to the 10 MEncNo = 1 'Set an encoder 11 '(3)Input the number of the sensor... </li> <li> <h3><a href="/manual/1851536/Mitsubishi-Electric-Cr800-Series.html?page=80#manual">Page 80: Confirmation After Operation</a></h3> 10 Workpiece Recognition and Teaching (“C1” program) (11) Press the [F1] (FWD) key and execute step feed. “(6)Move the robot to the suction position…”is displayed. Move the robot to the position where it suctions the workpiece. * With this operation, encoder data and robot position are acquired. Area recognized by a workpiece sensor Move the hand... </li> <li class="odd"> <h3><a href="/manual/1851536/Mitsubishi-Electric-Cr800-Series.html?page=81#manual">Page 81: Vision Tracking</a></h3> 10 Workpiece Recognition and Teaching (“C1” program) Vision Tracking 10.2. Vision tracking “C1” program acquires encoder data at the position where the vision sensor recognizes workpieces and where the robot suctions workpieces such that the robot can recognize the work coordinates recognized by the vision sensor. </li> <li> <a href="/manual/1851536/Mitsubishi-Electric-Cr800-Series.html?page=82#manual">Page 82</a> 10 Workpiece Recognition and Teaching (“C1” program) (2) Setting of high speed output. Make the vision sensor offline. Click [Output] from “Application Steps”. Set the trigger. Select “Acquisition start” from [Signal type] of [Discrete output]. 10-70 Vision Tracking... </li> <li class="odd"> <a href="/manual/1851536/Mitsubishi-Electric-Cr800-Series.html?page=83#manual">Page 83</a> 10 Workpiece Recognition and Teaching (“C1” program) Set the pulse width of trigger. Click [Detalls] from [Discrete Outputs]. The optional value (Initial value: 500) is set as a pulse width. Ckick [OK]. Vision Tracking 10-71... </li> <li> <a href="/manual/1851536/Mitsubishi-Electric-Cr800-Series.html?page=84#manual">Page 84</a> 10 Workpiece Recognition and Teaching (“C1” program) (3) Make the vision program. Take picture of workpiece. Select [File] – [New Job] from the menu. Click [Set Up Image] button from “Application Steps”. Click [Live Video] button. Take picture of workpiece that does the tracking. Again, stop a live image clicking [Live Video] button. </li> <li class="odd"> <a href="/manual/1851536/Mitsubishi-Electric-Cr800-Series.html?page=85#manual">Page 85</a> 10 Workpiece Recognition and Teaching (“C1” program) Register workpiece (preparation) Click [Locate Part] from “Application Steps”. Select "PatMax Pattern (1-10)" from “Add Tool”, and click [Add] button. Register workpiece (Model registration). Move the displayed "Model" frame, and enclose workpiece. Click [OK] button in “Directions”. Register workpiece (Adjustment) Click [Settings] tab from "Edit Tool", and change the [Rotation Tolerance] value to “180". </li> <li> <a href="/manual/1851536/Mitsubishi-Electric-Cr800-Series.html?page=86#manual">Page 86</a> 10 Workpiece Recognition and Teaching (“C1” program) Register workpiece (Adjustment) Change [Sort By] “X” or “Y”. If you sort the recognized multiple workpieces to the right direction of screen, select “X”. If you sort the recognized multiple workpieces to the left direction of screen, select “Y”. Do the communication setting. </li> <li class="odd"> <a href="/manual/1851536/Mitsubishi-Electric-Cr800-Series.html?page=87#manual">Page 87</a> 10 Workpiece Recognition and Teaching (“C1” program) Set the communication format (selection) Click [+] sign of “Pattern_1”, and select it in the following order while pushing the [Ctrl] key. (1) Pattern_1.Number_Found (2) Pattern_1.Fixture.X (3) Pattern_1.Fixture.Y (4) Pattern_1.Fixture.Angle (5) Pattern_1.Fixture1.X (6) Pattern_1.Fixture1.Y (7) Pattern_1.Fixture1.Angle (8) Pattern_1.Fixture2.X (9) Pattern_1.Fixture2.Y... </li> <li> <a href="/manual/1851536/Mitsubishi-Electric-Cr800-Series.html?page=88#manual">Page 88</a> 10 Workpiece Recognition and Teaching (“C1” program) Save the vision program. Click [Save Job] from “Application Steps”. Click [Save] from "Save Job". Make the name of the job that saves it “TRK". Change the line of “CPRG$=" C1 program when not assuming “TRK". </li> <li class="odd"> <h3><a href="/manual/1851536/Mitsubishi-Electric-Cr800-Series.html?page=89#manual">Page 89: Operation Procedure</a></h3> 10 Workpiece Recognition and Teaching (“C1” program) Operation procedure 10.2.2. Using "C1" program, operate in the following procedures. (1) Set the controller mode to "MANUAL". Set the T/B to "ENABLE". ↑Up: DISABLE ↓Down: ENABLE Lamp lighting ★ T/B rear (2) Press one of the keys (example, [EXE] key) while the <TITLE> screen is displayed. The <MENU> screen will appear. </li> <li> <a href="/manual/1851536/Mitsubishi-Electric-Cr800-Series.html?page=90#manual">Page 90</a> (6) Press the [F1] (FWD) key and execute step feed. “(1) Input a workpiece … “is displayed. Execute work according to the comment in the robot program. <PROGRAM> C1 4 '# Date of creation/version : 2015 5 '# COPYRIGHT : MITSUBISHI ELECTRIC 6 '############################### 7 '(1)Input a workpiece number to the JUMP Specify the workpiece number. </li> <li class="odd"> <a href="/manual/1851536/Mitsubishi-Electric-Cr800-Series.html?page=91#manual">Page 91</a> 10 Workpiece Recognition and Teaching (“C1” program) (9) Press the [F1] (FWD) key and execute step feed. “(4) Check live images and input the…”is displayed. <PROGRAM> C1 10 MEncNo = 1 'Set an encoder 11 '(3)Input the SKIP input number to 12 MSkipNo = 2 13 '(4)Check live images and input JUMP... </li> <li> <a href="/manual/1851536/Mitsubishi-Electric-Cr800-Series.html?page=92#manual">Page 92</a> 10 Workpiece Recognition and Teaching (“C1” program) (15) Press the [F1] (FWD) key and execute step feed. “(10) When the program stops…”is displayed. Using T/B, close the opened “C1” program once and then run the modified “C1” program automatically with the robot controller. </li> <li class="odd"> <a href="/manual/1851536/Mitsubishi-Electric-Cr800-Series.html?page=93#manual">Page 93</a> 10 Workpiece Recognition and Teaching (“C1” program) (16) Press the [F1] (FWD) key and execute step feed. “(11) Move a workpiece on the…”is displayed. Rotate the conveyer forward and move a workpiece within the vision sensor recognition area into the robot movement range. </li> <li> <h3><a href="/manual/1851536/Mitsubishi-Electric-Cr800-Series.html?page=94#manual">Page 94: Confirmation After Operation</a></h3> 10 Workpiece Recognition and Teaching (“C1” program) Confirmation after operation 10.2.3. Check the values of the following variables using T/B. Enter the model number for the array number. Value of “M_101()”: Differences between encoder values when a workpiece is within the vision sensor area and when the workpiece is on the robot side ... </li> <li class="odd"> <h3><a href="/manual/1851536/Mitsubishi-Electric-Cr800-Series.html?page=95#manual">Page 95: Teaching And Setting Of Adjustment Variables ("1" Program)</a></h3> 11 Teaching and Setting of Adjustment Variables (“1” program) 11. Teaching and Setting of Adjustment Variables (“1” program) * The tasks described in this chapter are required for high speed and accuracy tracking (conveyer tracking and vision tracking). * Refer to "12 Teaching Operation (“A1” Program)" for circular arc tracking. This chapter explains operations required to run “1”... </li> <li> <h3><a href="/manual/1851536/Mitsubishi-Electric-Cr800-Series.html?page=96#manual">Page 96: Adjusting The Operating Conditions Of Variables</a></h3> 11 Teaching and Setting of Adjustment Variables (“1” program) Adjusting the operating conditions of variables 11.2. The following section explains how to set adjustment variables, which are required at transportation, and details about their setting. Please refer to separate manual “Detailed Explanations of Functions and Operations” for how to set adjustment variables. </li> <li class="odd"> <a href="/manual/1851536/Mitsubishi-Electric-Cr800-Series.html?page=97#manual">Page 97</a> 11 Teaching and Setting of Adjustment Variables (“1” program) 800mm 400mm Conveyer Ending+300mm Conveyer Ending -100mm Start+300mm Start-500mm Forced ending +400mm Forced ending -200mm Workpiece movement direction Workpiece movement direction The conveyer is placed in front of the robot, and The conveyer is placed in front of the robot, and the workpiece flows from the right to left. </li> <li> <h3><a href="/manual/1851536/Mitsubishi-Electric-Cr800-Series.html?page=98#manual">Page 98: Automatic Operation</a></h3> 11 Teaching and Setting of Adjustment Variables (“1” program) Automatic Operation 11.3. This chapter explains how to prepare the robot before starting the system. (1) Confirm that there isn't an intervention thing in the robot movement area. (2) Set the T/B [ENABLE] switch to "DISABLE" and the controller mode to "AUTOMATIC". (3) Select <RUN>... </li> <li class="odd"> <h3><a href="/manual/1851536/Mitsubishi-Electric-Cr800-Series.html?page=99#manual">Page 99: Adjustment Of Operating Conditions</a></h3> 11 Teaching and Setting of Adjustment Variables (“1” program) Adjustment of operating conditions 11.4. In automatic operation, if you want to adjust the vertical movement and adsorption time of the robot arm that was described in "11.2 Setting of adjustment variables in the program" should be changed in the following procedure. </li> <li> <a href="/manual/1851536/Mitsubishi-Electric-Cr800-Series.html?page=100#manual">Page 100</a> 11 Teaching and Setting of Adjustment Variables (“1” program) (3) Double-click the variable you want to change, and change the appropriate value for displayed in the "Edit Position data". For example, change to "-50" from "-30" the value of the Z-coordinate of the PUp1 : (4) Click [OK] button, and confirm that was able to change the value of the variable that is specified in the "Variable Monitor". </li> <li class="odd"> <h3><a href="/manual/1851536/Mitsubishi-Electric-Cr800-Series.html?page=101#manual">Page 101: Adjustment Of Tracking Starting Possible Area</a></h3> 11 Teaching and Setting of Adjustment Variables (“1” program) Adjustment of Tracking starting possible area 11.5. In automatic operation, if you want to adjust the Tracking starting possible area that was taught in the "11 Teaching and Setting of Adjustment Variables (“1” program)", change the following procedure. </li> <li> <a href="/manual/1851536/Mitsubishi-Electric-Cr800-Series.html?page=102#manual">Page 102</a> 11 Teaching and Setting of Adjustment Variables (“1” program) For example, if you want the tracking started early 100mm: Image of the tracking area is as follows. Before tracking starting distance change 500mm Tracking area After tracking starting distance change 600mm 500mm Tracking... </li> <li class="odd"> <h3><a href="/manual/1851536/Mitsubishi-Electric-Cr800-Series.html?page=103#manual">Page 103: Occurrence Of Error</a></h3> 11 Teaching and Setting of Adjustment Variables (“1” program) Similarly, please adjust using the "M_TrkEnd" for the end position of the tracking starting possible area. Also, please adjust using the "M_TrkStop" for the position to be forcibly terminated. Occurrence of error 11.6. </li> <li> <h3><a href="/manual/1851536/Mitsubishi-Electric-Cr800-Series.html?page=104#manual">Page 104: Teaching Of The Circular Arc Tracking ("A1" Program)</a></h3> 12 Teaching of the Circular Arc Tracking (“A1” Program) 12. Teaching of the Circular Arc Tracking (“A1” Program) * The tasks described in this chapter are required for circular arc tracking (conveyer tracking). * Refer to "8 Calibration of Conveyer and Robot Coordinate Systems (“A1” program)" for high speed and accuracy tracking. </li> <li class="odd"> <h3><a href="/manual/1851536/Mitsubishi-Electric-Cr800-Series.html?page=105#manual">Page 105: Confirm The Encoder Value</a></h3> 12 Teaching of the Circular Arc Tracking (“A1” Program) Tool length is calculated automatically by instructing in the location of 3-8 points as follows in the screen mentioned above. Confirm the encoder value 12.1.2. An important one is a change in the encoder value in this work. Confirm whether a robot controller grasps the turn of the encoder. </li> <li> <a href="/manual/1851536/Mitsubishi-Electric-Cr800-Series.html?page=106#manual">Page 106</a> 12 Teaching of the Circular Arc Tracking (“A1” Program) Click a [Add] button and open a “Add display variables” screen. Input "M_Enc (1)" to a space "variable name", and click a [OK] button. also input "M_Enc (2)"-"M_Enc (8)" equally, and click a [OK] button. Confirm that the value of "M_Enc"... </li> <li class="odd"> <h3><a href="/manual/1851536/Mitsubishi-Electric-Cr800-Series.html?page=107#manual">Page 107: Knowledge About Work</a></h3> 12 Teaching of the Circular Arc Tracking (“A1” Program) Knowledge about work 12.1.3. This chapter explains below about the contents it's necessary to know before this work. On the turntable, decide the area where the robot starting tracking (Tracking starting possible area) and the area where a robot can continue tracking a workpiece (Tracking area). </li> <li> <h3><a href="/manual/1851536/Mitsubishi-Electric-Cr800-Series.html?page=108#manual">Page 108: Operation Procedure</a></h3> 12 Teaching of the Circular Arc Tracking (“A1” Program) Operation procedure 12.2. Using "A1" program, operate in the following procedures. (1) Exchange it for a use hand from a hand for tool setting. For example change it to the following hand. (2) Set the controller mode to "MANUAL". </li> <li class="odd"> <a href="/manual/1851536/Mitsubishi-Electric-Cr800-Series.html?page=109#manual">Page 109</a> 12 Teaching of the Circular Arc Tracking (“A1” Program) (6) Press the [FUNCTION] key, and change the function display < PROGRAM > A1 < PROGRAM > A1 1'############################### 1'############################### 2 '# Conveyor circular arc tracking 2 '# Conveyor circular arc tracking 3 '# Program name : A1.prg 3 '# Program name : A1.prg 4 '# Date/Version : 2018.02.14 / 1.0... </li> <li> <a href="/manual/1851536/Mitsubishi-Electric-Cr800-Series.html?page=110#manual">Page 110</a> 12 Teaching of the Circular Arc Tracking (“A1” Program) (9) Press the [F1] (FWD) key and execute step feed. “(3)Set the encoder number to the variable "MEncNo"”is displayed. Here, specify the encoder number. If you want to change the encoder number, please edit the program as follows. </li> <li class="odd"> <a href="/manual/1851536/Mitsubishi-Electric-Cr800-Series.html?page=111#manual">Page 111</a> 12 Teaching of the Circular Arc Tracking (“A1” Program) (11) Press the [F1] (FWD) key and execute step feed. “(5)Put workpiece on the sensor position of the conveyor” is displayed. Move the turntable, and place the workpiece at a position where photoelectronic sensor reacts. </li> <li> <a href="/manual/1851536/Mitsubishi-Electric-Cr800-Series.html?page=112#manual">Page 112</a> 12 Teaching of the Circular Arc Tracking (“A1” Program) (13) Press the [F1] (FWD) key and execute step feed. “(7)Move the robot to the adsorption point of workpiece” is displayed. Move the robot arm to adsorption position (or initial position to be processed) of the workpiece in the Tracking starting possible area. </li> <li class="odd"> <a href="/manual/1851536/Mitsubishi-Electric-Cr800-Series.html?page=113#manual">Page 113</a> 12 Teaching of the Circular Arc Tracking (“A1” Program) (15) Press the [F1] (FWD) key and execute step feed. “(9)Move workpiece to the tracking area end position by conveyor” is displayed. Move the turntable, and place the workpiece at the end position of the Tracking starting possible area. (16) Press the [F1] (FWD) key and execute step feed. </li> <li> <a href="/manual/1851536/Mitsubishi-Electric-Cr800-Series.html?page=114#manual">Page 114</a> 12 Teaching of the Circular Arc Tracking (“A1” Program) (17) Press the [F1] (FWD) key and execute step feed. “(11)Move workpiece to the tracking cancellation position by conveyor” is displayed. Move the turntable, and place the workpiece at the position to forcibly terminate the tracking. (18) Press the [F1] (FWD) key and execute step feed. </li> <li class="odd"> <a href="/manual/1851536/Mitsubishi-Electric-Cr800-Series.html?page=115#manual">Page 115</a> 12 Teaching of the Circular Arc Tracking (“A1” Program) (19) Press the [F1] (FWD) key and execute step feed. “(13)Absorb a workpiece. And move to the transportation position.” is displayed. Move the robot arm to a position to transport the adsorbed workpiece from the turntable (Transport destination). </li> <li> <h3><a href="/manual/1851536/Mitsubishi-Electric-Cr800-Series.html?page=116#manual">Page 116: What To Confirm</a></h3> 12 Teaching of the Circular Arc Tracking (“A1” Program) What to confirm 12.3. Confirm that the following data is remembered after work. Photoelectronic A) Encoder value Sensor [M_EncSensor()] Tracking starting possible area B) Encoder value [M_EncStart()] D) Encoder value No.1 position for circular [M_EncStop()] [P_107()] No.3 position for circular... </li> <li class="odd"> <h3><a href="/manual/1851536/Mitsubishi-Electric-Cr800-Series.html?page=117#manual">Page 117: When Multiple Conveyers And Turntables Are Used</a></h3> 12 Teaching of the Circular Arc Tracking (“A1” Program) When multiple conveyers and turntables are used 12.4. Carry out the same operations as above when multiple conveyers are used as well, but pay attention to the following points. Example) When using conveyer 2 (encoder number “2”), kind number “2”, signal number of photoelectronic sensor “16”: Copy the "A1"... </li> <li> <h3><a href="/manual/1851536/Mitsubishi-Electric-Cr800-Series.html?page=118#manual">Page 118: Setting Of An Operating Condition And Operations Check ("1"Program)</a></h3> 13 Setting of an operating condition and operations check (“1“Program) 13. Setting of an operating condition and operations check (“1“Program) * The tasks described in this chapter are required for circular arc tracking (conveyer tracking). * Refer to "8 Calibration of Conveyer and Robot Coordinate Systems (“A1” program)" for high speed and accuracy tracking. </li> <li class="odd"> <h3><a href="/manual/1851536/Mitsubishi-Electric-Cr800-Series.html?page=119#manual">Page 119: Automatic Operation</a></h3> 13 Setting of an operating condition and operations check (“1“Program) Automatic operation 13.2. This chapter explains how to prepare the robot before starting the system. (1) Confirm that there isn't an intervention thing in the robot movement area. (2) Set the T/B [ENABLE] switch to "DISABLE" and the controller mode to "AUTOMATIC". (3) Select <RUN>... </li> <li> <h3><a href="/manual/1851536/Mitsubishi-Electric-Cr800-Series.html?page=120#manual">Page 120: Adjustment Of The Follow Position</a></h3> 13 Setting of an operating condition and operations check (“1“Program) Adjustment of the follow position 13.3. When driving a turntable, the position where photoelectronic sensor reacts to a workpiece is different from the set position in "A1" program. Therefore, after determining the rotation speed of the turntable, you have to adjust the position with the following procedure. </li> <li class="odd"> <a href="/manual/1851536/Mitsubishi-Electric-Cr800-Series.html?page=121#manual">Page 121</a> 13 Setting of an operating condition and operations check (“1“Program) (3) Confirm that the value of the specified variable is displayed in the "Variable monitor". Displayed "M_EncSensor (1)" is the encoder value when the photoelectronic sensor has reacted to the workpiece. </li> <li> <h3><a href="/manual/1851536/Mitsubishi-Electric-Cr800-Series.html?page=122#manual">Page 122: Adjustment Of Operating Conditions</a></h3> 13 Setting of an operating condition and operations check (“1“Program) Adjustment of operating conditions 13.4. In automatic operation, if you want to adjust the vertical movement and adsorption time of the robot arm that was described in "13.1 Variable for operating conditions" should be changed in the following procedure. Start the "Program monitor"... </li> <li class="odd"> <a href="/manual/1851536/Mitsubishi-Electric-Cr800-Series.html?page=123#manual">Page 123</a> 13 Setting of an operating condition and operations check (“1“Program) (4) Click [OK] button, and confirm that was able to change the value of the variable that is specified in the "Variable Monitor". Return to the "13.2 Automatic operation”, and then check to see whether the can be corrected by implementing the automatic operation. </li> <li> <h3><a href="/manual/1851536/Mitsubishi-Electric-Cr800-Series.html?page=124#manual">Page 124: Adjustment Of Tracking Starting Possible Area</a></h3> 13 Setting of an operating condition and operations check (“1“Program) Adjustment of Tracking starting possible area 13.5. In automatic operation, if you want to adjust the Tracking starting possible area that was taught in the "12 Teaching Operation (“A1” Program)", change the following procedure. </li> <li class="odd"> <a href="/manual/1851536/Mitsubishi-Electric-Cr800-Series.html?page=125#manual">Page 125</a> 13 Setting of an operating condition and operations check (“1“Program) For example, if you want the tracking started early 20mm: Image of the tracking area is as follows. Adjustment of Tracking starting possible area 13-113... </li> <li> <h3><a href="/manual/1851536/Mitsubishi-Electric-Cr800-Series.html?page=126#manual">Page 126: Occurrence Of Error</a></h3> 13 Setting of an operating condition and operations check (“1“Program) Similarly, please adjust using the "M_TrkEnd" for the end position of the tracking starting possible area. Also, please adjust using the "M_TrkStop" for the position to be forcibly terminated. Occurrence of error 13.6. </li> <li class="odd"> <h3><a href="/manual/1851536/Mitsubishi-Electric-Cr800-Series.html?page=127#manual">Page 127: Sensor Monitoring Program ("Cm1" Program)</a></h3> 14 Sensor Monitoring Program (“CM1” program) 14. Sensor Monitoring Program (“CM1” program) This chapter provides an overview of “CM1” program, which is run in parallel, when “1” program is run. Processing of "CM1" programs varies depending on the function. It is explained as follows. High speed and accuracy tracking system (for conveyer tracking) 14.1. </li> <li> <h3><a href="/manual/1851536/Mitsubishi-Electric-Cr800-Series.html?page=128#manual">Page 128: 15. Maintenance Of Robot Program</a></h3> 15 Maintenance of robot program 15. Maintenance of robot program This chapter explains information required when maintaining the sample robot programs (robot program language MELFA-BASIC V or MELFA-BASIC VI, and dedicated input/output signals). MELFA-BASIC V or MELFA-BASIC VI instruction 15.1. The lists of instructions, status variables and functions related to tracking operation are shown below. </li> <li class="odd"> <h3><a href="/manual/1851536/Mitsubishi-Electric-Cr800-Series.html?page=129#manual">Page 129: List Of Robot Status Variables</a></h3> 15 Maintenance of robot program List of Robot Status Variables 15.1.2. Table 15-2 List of robot status variables Number of Attribute Variable name Function Data type arrays (*1) number of External encoder data Double-precision M_Enc encoders External encoder data can be rewritten. real number 1 to 8 If this state variable does not set... </li> <li> <a href="/manual/1851536/Mitsubishi-Electric-Cr800-Series.html?page=130#manual">Page 130</a> 15 Maintenance of robot program Number of Attribute Variable name Function Data type arrays (*1) M_TrkArcEnc Condition The encoder value towards which the Long-precision real number Number workpiece advanced on the arc after a 1 to 8. sensor reacted M_TrkChk Condition TrkChk result Integer... </li> <li class="odd"> <h3><a href="/manual/1851536/Mitsubishi-Electric-Cr800-Series.html?page=131#manual">Page 131: Explanation Of Tracking Operation Instructions</a></h3> 15 Maintenance of robot program Explanation of Tracking Operation instructions 15.1.3. The instructions related to tracking operations are explained in details below. The explanations of instructions are given using the following format. [Function] : Describes the function of an instruction. [Format] : Describes the entry method of arguments of an instruction. </li> <li> <a href="/manual/1851536/Mitsubishi-Electric-Cr800-Series.html?page=132#manual">Page 132</a> 15 Maintenance of robot program TrClr (Tracking data clear) [Function] Clear the tracking data buffer. [Format] TrClr [<Buffer number>] [Terminology] <Buffer number [integer]> (can be omitted): Specify the number of a general-purpose output to be output. Setting range:1 to The first argument of parameter “TRBUF” [Reference program] 1 TrClr 1 ' Clear the tracking data buffer No. </li> <li class="odd"> <a href="/manual/1851536/Mitsubishi-Electric-Cr800-Series.html?page=133#manual">Page 133</a> 15 Maintenance of robot program TrWrt (Writing tracking data) [Function] Write position data for tracking operation, encoder data and so on in the data buffer. [Format] TrWrt <Position data> [ , [<Encoder data>] [ , [<Model number>] [ , [<Buffer number>] [ , [<Encoder number>] [ ,[<Pixel data>... </li> <li> <a href="/manual/1851536/Mitsubishi-Electric-Cr800-Series.html?page=134#manual">Page 134</a> 15 Maintenance of robot program TrRd (reading tracking data) [Function] Read position data for tracking operation, encoder data and so on from the data buffer. [Format] TrRd <Position data> [ , [<Encoder data>] [ , [<Model number>] [ , [<Buffer number>] [ , [<Encoder number>] [ , [Pixel data] ] ] ] ] ] [Terminology] <Position data [Position]>... </li> <li class="odd"> <a href="/manual/1851536/Mitsubishi-Electric-Cr800-Series.html?page=135#manual">Page 135</a> 15 Maintenance of robot program [Explanation] (1) Read the workpiece position (robot coordinates), encoder value, model number, encoder number and workpiece position (pixel coordinates) stored by the TrWrt instruction from the specified buffer. (2) If the TrRd instruction is executed when no data is stored in the specified buffer, Error 2540(There is no read data) occurs. </li> <li> <a href="/manual/1851536/Mitsubishi-Electric-Cr800-Series.html?page=136#manual">Page 136</a> 15 Maintenance of robot program TrkChk (Tracking check function) [Function] Execute the processing depending on the state of workpiece corresponding to <Condition number> specified. [Format] TrkChk □ <Condition number> , <Starting position> , [<Waiting position>] , <Branch destination> [Terminology] <Condition number [Integer]> Specify the condition number correspond to tracking. </li> <li class="odd"> <a href="/manual/1851536/Mitsubishi-Electric-Cr800-Series.html?page=137#manual">Page 137</a> 15 Maintenance of robot program [Reference program] *LBFCHK ・・・・・ TrkChk 1, P1, PWAIT, *LTRST ’No workpiece->P1/ Wait for the workpiece->PWAIT/ Tracking possible->Jump to “LTRST”. If M_TrkChk(1) <= 1 Then GoTo *LBFCHK ’0:No workpiece / 1: Workpiece passed over ->“LBFCHK”. TrkWait *LBFCHK ’Wait for the workpiece / Jump to “LBFCHK”... </li> <li> <a href="/manual/1851536/Mitsubishi-Electric-Cr800-Series.html?page=138#manual">Page 138</a> 15 Maintenance of robot program TrkWait (Tracking wait function) [Function] Wait until workpiece correspond to appointed <Condition number> enters to the tracking area. [Format] TrkWait □ < Branch destination > [Terminology] <Branch destination [label]> :(can be omitted.) Even if the time specified as the state variable "M_TrkTime" passes, when the specified work piece does not go into tracking area, specify the label name to jump. </li> <li class="odd"> <a href="/manual/1851536/Mitsubishi-Electric-Cr800-Series.html?page=139#manual">Page 139</a> 15 Maintenance of robot program TrkMv (Tracking movement function) [Function] Execute the next processing. Validate specified interruption, Start tracking, Move to the tracking upper position by Joint interpolation movement. [Format] TrkMv □ On , <Tracking upper position> [, <Interrupt number> , <Branch destination>] TrkMv □... </li> <li> <a href="/manual/1851536/Mitsubishi-Electric-Cr800-Series.html?page=140#manual">Page 140</a> 15 Maintenance of robot program TrkFine(Tracking follow positioning function) [Function] The accuracy at the tracking is improved until “TrkFine Off” is executed. [Format] TrkFine □ On TrkFine □ Off [Reference program] M_TrkBuf(1) = 1 ’ <Buffer number> is “1". P_TrkBase(1) = PTBASE ’... </li> <li class="odd"> <a href="/manual/1851536/Mitsubishi-Electric-Cr800-Series.html?page=141#manual">Page 141</a> 15 Maintenance of robot program TrkTrg(Vision sensor trigger) [Function] Request the specified vision sensor to capture an image, and acquires encoder value after the SKIP input receives the signal from the vision sensor. [Format] TrkTrg □ #<Vision sensor number>, <SKIP input number>, <Encoder 1 value read-out variable> [, [<Encoder 2 value read-out variable >], [<Encoder 3 value read-out variable >], [<Encoder 4 value read-out variable >], [<Encoder 5 value read-out variable >], [<Encoder 6 value read-out variable >], [<Encoder 7 value read-out variable >],... </li> <li> <a href="/manual/1851536/Mitsubishi-Electric-Cr800-Series.html?page=142#manual">Page 142</a> 15 Maintenance of robot program (TrkTrg)) error occurs. (13) If the <Vision sensor number> is anything other than “1” through “8”, L.3110 (Argument value range over (TrkTrg)) error occurs. (14) If the NVOpen command is not opened with the number specified as the <Vision sensor number>, L.3141 (The NVOPEN is not executed) error occurs. </li> <li class="odd"> <a href="/manual/1851536/Mitsubishi-Electric-Cr800-Series.html?page=143#manual">Page 143</a> 15 Maintenance of robot program NVOpen(Network vision sensor line open) [Function] Connects with the specified vision sensor and logs on to that vision sensor. [Format] NVOpen□”<COM number>”□As□#<Vision Sensor number> [Term] <Com number> (Can not be omitted): Specify the communications line number in the same way as for the Open command. "COM1:"... </li> <li> <a href="/manual/1851536/Mitsubishi-Electric-Cr800-Series.html?page=144#manual">Page 144</a> 15 Maintenance of robot program (6) If the program is cancelled while this command is being executed, it stops immediately. In order to log on to the vision sensor, it is necessary to reset the robot program, then start. (7) When this command is used with multi-tasking, there are the following restrictions. The <COM number>... </li> <li class="odd"> <a href="/manual/1851536/Mitsubishi-Electric-Cr800-Series.html?page=145#manual">Page 145</a> 15 Maintenance of robot program NVClose(Network vision sensor line close) [Function] Cuts the line with the specified vision sensor. [Format] NVClose□[[#<Vision sensor number>] [,[[#]<Vision sensor number>・・・]]] [Term] <Vision sensor number> (Can be omitted) Specifies a constant from 1 to 8 (the vision sensor number). Indicates the number for the vision sensor connection to the COM specified with the <COM number>. </li> <li> <a href="/manual/1851536/Mitsubishi-Electric-Cr800-Series.html?page=146#manual">Page 146</a> 15 Maintenance of robot program NVLoad(Network vision sensor load) [Function] Loads the specified vision program into the vision sensor. [Format] NVLoad□#<Vision sensor number>,<Vision program (job) name> [Term] <Vision sensor number> (Can not be omitted) This specifies the number of the vision sensor to control. Setting range: 1 - 8 <Vision program (job) name>... </li> <li class="odd"> <a href="/manual/1851536/Mitsubishi-Electric-Cr800-Series.html?page=147#manual">Page 147</a> 15 Maintenance of robot program EBRead(EasyBuilder Read) [Function] Reads out the data by specifying the tag name of the vision sensor. The data read from the vision sensor is stored in the specified variable. Please read out data specifying the tag name by using this command when the vision program (job) is made with the vision tool EasyBuilder made by Cognex Corporation. </li> <li> <a href="/manual/1851536/Mitsubishi-Electric-Cr800-Series.html?page=148#manual">Page 148</a> 15 Maintenance of robot program (8) It is possible to specify the timeout time by the numerical value. Within the timeout time, does not move to the next step until the results are received from the vision sensor. However, if the robot program is stopped, this command is immediately cancelled. </li> <li class="odd"> <a href="/manual/1851536/Mitsubishi-Electric-Cr800-Series.html?page=149#manual">Page 149</a> 15 Maintenance of robot program (23) If a <vision program name> uses a character other than "0" – "9", "A" – "Z", "-", or "_" (including lowercase letters), L8621 (abnormal vision program name) error occurs. (24) If the program specified in the <vision program name> is not in the vision sensor, L8622 (vision program does not exist) error occurs. </li> <li> <a href="/manual/1851536/Mitsubishi-Electric-Cr800-Series.html?page=150#manual">Page 150</a> 15 Maintenance of robot program TrkArc (Setting of arc information) [Function] Conveyer information for a circular arc tracking is set. [Format] TrkArc□<Condition number>, <Encoder number>, <Circular arc position 1>, <Circular arc position 2>, <Circular arc position 3> [Terminology] <Condition number [integer]> Specify the tracking condition number. </li> <li class="odd"> <a href="/manual/1851536/Mitsubishi-Electric-Cr800-Series.html?page=151#manual">Page 151</a> 15 Maintenance of robot program M_Enc (Encoder value) [Function] Read the encoder value of the designated logic encoder number. It can be changed to the optional value. [Format] [Write] M_Enc(<logic encoder number>) = <Fixed value> [Read] <Numeric value> = M_Enc(<logic encoder number>) [Terminology] <... </li> <li> <a href="/manual/1851536/Mitsubishi-Electric-Cr800-Series.html?page=152#manual">Page 152</a> 15 Maintenance of robot program M_EncL (Latched Encoder value) [Function] At the instant of receipt of a TREN signal for Q173DPX module, a stored encoder data is read. Also, 0 is written to clear the stored encoder data to zero. [Format] [Write] M_EncL(<logic encoder number>) =... </li> <li class="odd"> <a href="/manual/1851536/Mitsubishi-Electric-Cr800-Series.html?page=153#manual">Page 153</a> 15 Maintenance of robot program P_EncDlt(The encoder amount of movement) [Function] Set the amount of robot movement per encoder pulse. Or, the amount of robot movement per encoder pulse is returned. The amount of robot movement : Straight line tracking :(X, Y, Z, 0, 0, 0, L1, L2) Circular arc tracking :(Arc length, 0, 0, 0, 0, 0, 0, 0) [Format] [Write]... </li> <li> <a href="/manual/1851536/Mitsubishi-Electric-Cr800-Series.html?page=154#manual">Page 154</a> 15 Maintenance of robot program P_TrkSensor [Function] The position of workpiece to which the sensor reacted is returned. [Format] [Read] <Position Variables> = P_TrkSensor(<Condition number>) [Terminology] <Condition number [Integer]>: (can be omitted.) Specify the tracking condition number. Setting range: 1 to 8 If the argument is omitted, 1 is set as the default value. </li> <li class="odd"> <a href="/manual/1851536/Mitsubishi-Electric-Cr800-Series.html?page=155#manual">Page 155</a> 15 Maintenance of robot program M_EncSensor [Function] Set the encoder data at the position in which the sensor reacts to workpiece. Or, the encoder data at the position in which the sensor reacts to workpiece is returned. The set value is set by the 1st element of a parameter "TRKENC*" (*= condition number 1-8). [Format] [Write] M_EncSensor(<Condition number>) = <Numeric value>... </li> <li> <a href="/manual/1851536/Mitsubishi-Electric-Cr800-Series.html?page=156#manual">Page 156</a> 15 Maintenance of robot program M_EncStart [Function] Set the encoder data at tracking area starting position. Or, the encoder data at tracking area starting position is returned. The set value is set by the 2nd element of a parameter "TRKENC*" (*= condition number 1-8). [Format] [Write] M_EncStart(<Condition number>) = <Numeric value>... </li> <li class="odd"> <a href="/manual/1851536/Mitsubishi-Electric-Cr800-Series.html?page=157#manual">Page 157</a> 15 Maintenance of robot program M_EncEnd [Function] Set the encoder data at tracking area ending position. Or, the encoder data at tracking area ending position is returned. The set value is set by the 3rd element of a parameter "TRKENC*" (*= condition number 1-8). [Format] [Write] M_EncEnd(<Condition number>) = <Numeric value>... </li> <li> <a href="/manual/1851536/Mitsubishi-Electric-Cr800-Series.html?page=158#manual">Page 158</a> 15 Maintenance of robot program M_EncStop [Function] Set the encoder data at tracking cancellation position. Or, the encoder data at tracking cancellation position is returned. The set value is set by the 4th element of a parameter "TRKENC*" (*= condition number 1-8). [Format] [Write] M_EncStop(<Condition number>) = <Numeric value>... </li> <li class="odd"> <a href="/manual/1851536/Mitsubishi-Electric-Cr800-Series.html?page=159#manual">Page 159</a> 15 Maintenance of robot program P_TrkPAcl [Function] Change the tracking acceleration coefficient of the parameter “TRPACL” temporarily. [Format] [Writing] P_TrkPAcl(<Condition number>) = <Position data> [Referencing] <Position variable> = P_TrkPAcl(<Condition number>) [Terminology] < Condition number [Integer]> Specify the condition number corresponding to the tracking. Setting range: 1 to 8 <Position data [Position]>... </li> <li> <a href="/manual/1851536/Mitsubishi-Electric-Cr800-Series.html?page=160#manual">Page 160</a> 15 Maintenance of robot program P_TrkPDcl [Function] Change the tracking deceleration coefficient of the parameter “TRPDCL” temporarily. [Format] [Writing] P_TrkPDcl(<Condition number>) = <Position data> [Referencing] <Position variable> = P_TrkPDcl(<Condition number>) [Terminology] < Condition number [Integer]> Specify the condition number corresponding to the tracking. Setting area: 1 to 8 <Position data [Position]>... </li> <li class="odd"> <a href="/manual/1851536/Mitsubishi-Electric-Cr800-Series.html?page=161#manual">Page 161</a> 15 Maintenance of robot program M_TrkBuf [Function] Specify and refer to the tracking buffer number to use. [Format] [Writing] M_TrkBuf(<Condition number>) = <Value> [Referencing] <Numeric variable> = M_TrkBuf(<Condition number>) [Terminology] <Condition number [Integer]> Specify the condition number corresponding to the tracking. Setting range: 1 to 8 <Value [Integer]>... </li> <li> <a href="/manual/1851536/Mitsubishi-Electric-Cr800-Series.html?page=162#manual">Page 162</a> 15 Maintenance of robot program M_TrkStart [Function] Specify and refer to the starting position of range in which it is possible to execute the tracking. In case of the high speed tracking, designate a coordinate from a reference mark in world coordinate system (the coordinate value "0.00"). </li> <li class="odd"> <a href="/manual/1851536/Mitsubishi-Electric-Cr800-Series.html?page=163#manual">Page 163</a> 15 Maintenance of robot program M_TrkEnd [Function] Specify and refer to the ending position of range in which it is possible to execute the tracking.. In case of the high speed tracking, designate a coordinate from a reference mark in world coordinate system (the coordinate value "0.00"). </li> <li> <a href="/manual/1851536/Mitsubishi-Electric-Cr800-Series.html?page=164#manual">Page 164</a> 15 Maintenance of robot program M_TrkStop [Function] Specify and refer to forced ending position of range in which it is possible to execute the tracking.. In case of the high speed tracking, designate a coordinate from a reference mark in world coordinate system (the coordinate value "0.00"). </li> <li class="odd"> <a href="/manual/1851536/Mitsubishi-Electric-Cr800-Series.html?page=165#manual">Page 165</a> 15 Maintenance of robot program M_TrkTime [Function] Specify and refer to the timeout value for “TrkWait” command. [Format] [Writing] M_TrkTime(<Condition number>) = <Value> [Referencing] <Numeric variable> = M_TrkTime(<Condition number>) [Terminology] < Condition number [Integer]> Specify the condition number corresponding to the tracking. Setting range: 1 to 8 <Value [Single-precision real number]>... </li> <li> <a href="/manual/1851536/Mitsubishi-Electric-Cr800-Series.html?page=166#manual">Page 166</a> 15 Maintenance of robot program P_TrkBase [Function] Specify and refer to the origin (For example, the position which a vision sensor outputs) of the workpiece to be followed. Specify the position data (For example, the position which a vision sensor outputs) used as the reference point when you teach the movement path on the workpiece, as described below The robot moves to the relative position correspond to this reference point by the movement instruction during the tracking. </li> <li class="odd"> <a href="/manual/1851536/Mitsubishi-Electric-Cr800-Series.html?page=167#manual">Page 167</a> 15 Maintenance of robot program [Terminology] < Condition number [Integer]> Specify the condition number corresponding to the tracking. Setting range: 1 to 8 <Position data [Position]> Specify the base position of the tracking. <Position variable [Position]> Return the base coordinates of the specified tracking. [Reference program] P_TrkBase(1) = PTBASE ’Specify the tracking base. </li> <li> <a href="/manual/1851536/Mitsubishi-Electric-Cr800-Series.html?page=168#manual">Page 168</a> 15 Maintenance of robot program M_TrkArcEnc [Function] Refer to the encoder value which accumulated after a sensor reacts to a workpiece. [Format] [Referencing] <Numeric value> = M_TrkArcEnc(<Condition number>) [Terminology] <Condition number [Integer]>: (can be omitted.) Specify the tracking condition number. Setting range: 1 to 8 If the argument is omitted, 1 is set as the default value. </li> <li class="odd"> <a href="/manual/1851536/Mitsubishi-Electric-Cr800-Series.html?page=169#manual">Page 169</a> 15 Maintenance of robot program M_TrkChk [Function] Refer to the workpiece state read from the tracking buffer when “TrkChk”, “TrkWait” command is executed. [Format] [Referencing] <Numeric variable> = M_TrkChk(<Condition number>) [Terminology] < Condition number [Integer]> Specify the condition number corresponding to the tracking. Setting range: 1 to 8 <... </li> <li> <a href="/manual/1851536/Mitsubishi-Electric-Cr800-Series.html?page=170#manual">Page 170</a> 15 Maintenance of robot program anything else causes L3110 (Argument value range over) error to occur. (4) When you execute the writing to “M_TrkChk”, L3210 (This variable is write protected) error occurs. 15-158 MELFA-BASIC V or MELFA-BASIC VI instruction... </li> <li class="odd"> <a href="/manual/1851536/Mitsubishi-Electric-Cr800-Series.html?page=171#manual">Page 171</a> 15 Maintenance of robot program P_TrkWork [Function] Refer to the workpiece position read from the tracking buffer when “TrkChk”, “TrkWait” command is executed. [Format] [Referencing] <Position type variable> = P_TrkWork(<Condition number>) [Terminology] < Condition Number [Integer]> Specify the condition number corresponding to the tracking. Setting range: 1 to 8 <Position variable [Position]>... </li> <li> <a href="/manual/1851536/Mitsubishi-Electric-Cr800-Series.html?page=172#manual">Page 172</a> 15 Maintenance of robot program M_TrkEnc [Function] Refer to the encoder value read from the tracking buffer when the “TrkChk”, “TrkWait” command is executed. [Format] [Referencing] <Numeric variable> = M_TrkEnc(<Condition number>) [Terminology] < Condition number [Integer]> Specify the condition number corresponding to the tracking. Setting range: 1 to 8 <... </li> <li class="odd"> <a href="/manual/1851536/Mitsubishi-Electric-Cr800-Series.html?page=173#manual">Page 173</a> 15 Maintenance of robot program M_TrkKind [Function] Refer to the model number read from the tracking buffer when “TrkChk”, “TrkWait” command is executed. [Format] [Referencing] <Numeric variable> = M_TrkKind(<Condition number>) [Terminology] < Condition number [Integer]> Specify the condition number corresponding to the tracking. Setting range: 1 to 8 <... </li> <li> <a href="/manual/1851536/Mitsubishi-Electric-Cr800-Series.html?page=174#manual">Page 174</a> 15 Maintenance of robot program M_TrkEncNo [Function] Refer to the encoder number read from the tracking buffer when “TrkChk”, “TrkWait” command is executed. [Format] [Referencing] <Numeric variable> = M_TrkEncNo(<Condition number>) [Terminology] < Condition number [Integer]> Specify the condition number corresponding to the tracking. Setting range: 1 to 8 <... </li> <li class="odd"> <a href="/manual/1851536/Mitsubishi-Electric-Cr800-Series.html?page=175#manual">Page 175</a> 15 Maintenance of robot program P_TrkTarget [Function] Refer to the information (“P_TrkWork”, “M_TrkEnc”) read from the tracking buffer when “TrkChk”, “TrkWait” command is executed, and the current workpiece position calculated by the state variable “P_EncDlt”. [Format] [Referencing] <Position variable> = P_TrkTarget [Terminology] <Position variable>... </li> <li> <a href="/manual/1851536/Mitsubishi-Electric-Cr800-Series.html?page=176#manual">Page 176</a> 15 Maintenance of robot program M_Trbfct [Function] Refer to the number of workpieces which exists in a designated buffer. [Format] [Referencing] < Numeric value > = M_Trbfct(<Buffer number>) [Terminology] <Buffer number [integer]> : (can be omitted.) Specify the tracking buffer number. Setting range : 1 to the 1st argument of a parameter "TRBUF"... </li> <li class="odd"> <a href="/manual/1851536/Mitsubishi-Electric-Cr800-Series.html?page=177#manual">Page 177</a> 15 Maintenance of robot program P_CvSpd [Function] Return the conveyer speed. [Format] [Referencing] < Position variable > = P_CvSpd(<Logic encoder number >) [Terminology] <Logic encoder number [integer]> : (can be omitted.) Specify the number of logic encoders which do a chase movement. Setting range: 1 to 8 If the argument is omitted, 1 is set as the default value <Position variable [position]>... </li> <li> <a href="/manual/1851536/Mitsubishi-Electric-Cr800-Series.html?page=178#manual">Page 178</a> 15 Maintenance of robot program M_Hnd [Function] Set and refer to the hand open/close states corresponding to the specified <Hand number>. The contents of processing of this variable are same as HOpen and HClose, but it's used for a<processing> part of Wth / WthIf join mainly. [Format] [Writing] M_Hnd(<Hand number>) = <Value>... </li> <li class="odd"> <a href="/manual/1851536/Mitsubishi-Electric-Cr800-Series.html?page=179#manual">Page 179</a> 15 Maintenance of robot program M_TrkType [Function] Specify and refer to the tracking function type. [Format] [Writing] M_TrkType (<Condition number>) = <Value> [Referencing] <Numeric variable> = M_TrkType (<Condition number>) [Terminology] < Condition number [Integer]> Specify the condition number corresponding to the tracking. Setting range: 1 to 8 <Value [Integer]>... </li> <li> <a href="/manual/1851536/Mitsubishi-Electric-Cr800-Series.html?page=180#manual">Page 180</a> 15 Maintenance of robot program P_TrkPixel [Function] Refer to the workpiece pixel position read from the tracking buffer when “TrkChk”, “TrkWait” command is executed. [Format] [Referencing] <Position type variable> = P_TrkPixel(<Condition number>) [Terminology] < Condition Number [Integer]> Specify the condition number corresponding to the tracking. Setting range: 1 to 8 <Position variable [Position]>... </li> <li class="odd"> <a href="/manual/1851536/Mitsubishi-Electric-Cr800-Series.html?page=181#manual">Page 181</a> 15 Maintenance of robot program M_NvOpen [Function] Indicates the vision sensor line connection status. [Format] <Numeric value> = M_NvOpen(<Vision sensor number>) [Terminology] <Vision sensor number> This specifies the number of the vision sensor to control. Setting range: 1 - 8 <Numeric value>... </li> <li> <a href="/manual/1851536/Mitsubishi-Electric-Cr800-Series.html?page=182#manual">Page 182</a> 15 Maintenance of robot program Timing Diagram of Dedicated Input/Output Signals 15.2. Robot Program Start Processing 15.2.1. The signal timing when a robot program is started from an external device is shown below. Robot ① ② ③ ④ Turning servo ON (SRVON) Servo ON (SRVON) </li> <li class="odd"> <a href="/manual/1851536/Mitsubishi-Electric-Cr800-Series.html?page=183#manual">Page 183</a> 16 In such a case (improvement example) 16. In such a case (improvement example) Explain the improvement example, when building the tracking system using the sample robot program. The adsorption position shifts (high speed and accuracy tracking system 16.1. (conveyer tracking)) When the place that shifts from the specified adsorption position has been adsorbed, the cause is investigated according to the following procedures. </li> <li> <a href="/manual/1851536/Mitsubishi-Electric-Cr800-Series.html?page=184#manual">Page 184</a> 16 In such a case (improvement example) [Confirmation 1] 1) Stop the conveyer. 2) Confirm the disk installed in the rotary encoder has come in contact with the conveyer. 3) Confirm whether the disk installed in the encoder rotates when the conveyer is made to work. [Confirmation 2] 1) Stop the conveyer. </li> <li class="odd"> <a href="/manual/1851536/Mitsubishi-Electric-Cr800-Series.html?page=185#manual">Page 185</a> 16 In such a case (improvement example) The adsorption position shifts (high speed and accuracy tracking system (vision 16.2. tracking)) When the place that shifts from the specified adsorption position has been adsorbed, the cause is investigated according to the following procedures. Start The position doesn’t shift... </li> <li> <a href="/manual/1851536/Mitsubishi-Electric-Cr800-Series.html?page=186#manual">Page 186</a> 16 In such a case (improvement example) 【confirmation 4】 Check the case where work at the center of view is recognized The gap is The gap is illegular constant Confirm of gap tendency The position Do the work of the ‘A1’ Do the work of the ‘C1’... </li> <li class="odd"> <a href="/manual/1851536/Mitsubishi-Electric-Cr800-Series.html?page=187#manual">Page 187</a> 16 In such a case (improvement example) correct. (example) (+0, +0) is displayed as a recognition result when assuming that the robot coordinates are set as follows when the calibration is done by using the calibration seat, and using a ○ sign in four corners. </li> <li> <a href="/manual/1851536/Mitsubishi-Electric-Cr800-Series.html?page=188#manual">Page 188</a> 16 In such a case (improvement example) (3) Please change the on timing of a sensor by making reference to "13.5 Adjustment of Tracking starting possible area". When it can't be settled, it's to the next. (4) Please confirm whether the timing a stock sensor turns on is right. When being not right, please do a sensitivity adjustment of a sensor. </li> <li class="odd"> <a href="/manual/1851536/Mitsubishi-Electric-Cr800-Series.html?page=189#manual">Page 189</a> 16 In such a case (improvement example) Circular arc movement in Tracking 16.7. Screw fastening and decoration on the work, etc are available in the tracking system. Here, explain the example which draws the circle on the basis of the adsorption position. (1) High speed and accuracy tracking <Conditions>... </li> <li> <a href="/manual/1851536/Mitsubishi-Electric-Cr800-Series.html?page=190#manual">Page 190</a> 16 In such a case (improvement example) Draw the square while doing the Tracking 16.8. Here, explain the example which draws the outline of the following square workpiece on the basis of the adsorption position. Position to follow(PA) Position of TrBase(P0) Position to follow(PC)... </li> <li class="odd"> <a href="/manual/1851536/Mitsubishi-Electric-Cr800-Series.html?page=191#manual">Page 191</a> 17 Troubleshooting 17. Troubleshooting This section explains causes of error occurrence and actions to be taken. Occurrence of errors of Tracking and Vision Sensor 17.1. Table 17-1 List of Tracking relation Errors Error Error description Causes and actions number L2500 Tracking encoder [Causes] data error... </li> <li> <a href="/manual/1851536/Mitsubishi-Electric-Cr800-Series.html?page=192#manual">Page 192</a> 17 Troubleshooting Error Error description Causes and actions number L2560 Illegal parameter of <When the detailed number is 00000> Tracking [Causes] The value set as the parameter [EXTENC] is outside the range. The ranges are 1-8. [Actions] Please confirm the value set to Parameter [EXTENC]. <When the detailed number is 01000>... </li> <li class="odd"> <a href="/manual/1851536/Mitsubishi-Electric-Cr800-Series.html?page=193#manual">Page 193</a> 17 Troubleshooting Error Error description Causes and actions number L6632 Input TREN signal [Causes] cannot be written During the actual signal input mode, external output signal 810 to 817 (TREN signal) cannot be written. [Actions] 1) Use an real input signal (TREN signal) Table 17-2 List of Vision Sensor relation Errors Error Error description... </li> <li> <a href="/manual/1851536/Mitsubishi-Electric-Cr800-Series.html?page=194#manual">Page 194</a> 17 Troubleshooting Error Error description Causes and actions number L8610 Abnormal [Causes] communications Communication with the vision sensor was cut off before or during command execution. [Actions] Check the communication cable between the robot and vision sensor. L8620 Abnormal vision [Causes] sensor number... </li> <li class="odd"> <a href="/manual/1851536/Mitsubishi-Electric-Cr800-Series.html?page=195#manual">Page 195</a> 17 Troubleshooting Error Error description Causes and actions number L8640 Abnormal image [Causes] capture specification The image capture specification is other than "Network", "external", and "manual". [Actions] Specify an image capture specification of "Network", "external", or "manual". L8650 Put online. [Causes] The vision sensor is offline. </li> <li> <a href="/manual/1851536/Mitsubishi-Electric-Cr800-Series.html?page=196#manual">Page 196</a> 18 Appendix 18. Appendix This appendix provides a list of parameters related to tracking and describes Expansion serial interface connector pin assignment as well as sample programs for conveyer tracking and vision tracking. List of Parameters Related to Tracking 18.1. Table 18-1 List of Parameters Related to Tracking Number Setting value... </li> <li class="odd"> <a href="/manual/1851536/Mitsubishi-Electric-Cr800-Series.html?page=197#manual">Page 197</a> 18 Appendix Number Setting value Parameter Parameter Description at factory name elements shipment Tracking TRADJ1 8 real Tracking adjustment coefficient 1 0.00, 0.00, 0.00, 0.00, 0.00, 0.00, adjustment numbers Set the amount of delay converted to the conveyer 0.00, 0.00 coefficient 1 (X,Y,Z, speed. </li> <li> <a href="/manual/1851536/Mitsubishi-Electric-Cr800-Series.html?page=198#manual">Page 198</a> 18 Appendix List of Parameters Related to Vision Sensor 18.2. Table 18-2 List of Parameters Related to Vision Sensor Setting value Parameter Number of Parameter Description at factory name elements shipment User name NVUSER Character The user name to log on the vision sensor is "admin"... </li> <li class="odd"> <a href="/manual/1851536/Mitsubishi-Electric-Cr800-Series.html?page=199#manual">Page 199</a> 18 Appendix Scene of changing parameter 18.3. When the tracking function is used, the parameter need to be changed depends on operation phase. List of the parameter is shown as follow. Table 18-3 List of the user scene of changing parameter Parameter Operation phase Example... </li> <li> <a href="/manual/1851536/Mitsubishi-Electric-Cr800-Series.html?page=200#manual">Page 200</a> Common to CH1 CNUSR12-16 Control power supply 0 V and CH2 - terminal of differential CNUSR12-17 LBL1 Input encoder B-phase signal - terminal of differential CNUSR12-18 LAL1 Input encoder A-phase signal 18-188 Expansion serial interface connector pin assignment (CR800 series controller) </li> <li class="odd"> <a href="/manual/1851536/Mitsubishi-Electric-Cr800-Series.html?page=201#manual">Page 201</a> 18 Appendix Calibration sheet 18.5. This is a calibration sheet. Please use this sheet in your calibration work. Enlarge or reduce it as necessary to match the size of the field of vision of the image. When changing the size of the sheet, or calibrating in more points, you can photocopy the sheet. Calibration sheet 18-189... </li> <li> <a href="/manual/1851536/Mitsubishi-Electric-Cr800-Series.html?page=202#manual">Page 202</a> 18 Appendix 18-190 Calibration sheet... </li> <li class="odd"> <a href="/manual/1851536/Mitsubishi-Electric-Cr800-Series.html?page=204#manual">Page 204</a> Apr. 2020 MEE Printed in Japan on recycled paper. Specifications are subject to change without notice. </li> </ul> </div> </div> </div> </div> </section> <section class="tagsbg blue2"> <div class="container"> <h4>This manual is also suitable for:</h4> <a class="label label-tag" href="/products/Mitsubishi-Electric-Cr800-R-Series-10528584.html"><span>Cr800-r</span></a><a class="label label-tag" href="/products/Mitsubishi-Electric-Cr800-Q-Series-10528585.html"><span>Cr800-q</span></a><a class="label label-tag" href="/products/Mitsubishi-Electric-Cr800-D-Series-10528583.html"><span>Cr800-d</span></a> <div class="double" id="double_hidden" style="display: none"> </div> </div> </section> </div> <div class="ml-modal-background"> <div class="ml-modal" id="ModalToc"> <div class="ml-modal__content"> <div class="ml-modal__header"> <button class="ml-modal__close-button" type="button"><svg class="icon icon-lgx"><use href="https://www.manualslib.com/public/img/solid.svg?hash=02tV5u6#times"></use></svg></button> <h4 class="ml-modal__title">Table of Contents</h4> </div> <div class="top"> <form action="" class="form"> <input type="text" placeholder="Search in table of contents"> <div class="search" type="submit"><svg class="icon "><use href="https://www.manualslib.com/public/img/solid.svg?hash=02tV5u6#search"></use></svg></div> </form> </div> <div class="ppp__relative-wrap"> <div class="ppp ppp--modal ppp--white ppp--lazy ppp--show-dots"> <div class="ppp__content__wrapper"> <div class="ppp__content ppp__simplebar"> <ul class="ppp__captions ppp__captions--root"> </ul> <div class="ppp__bottom__space"></div> <div class="lds-ellipsis"><div></div><div></div><div></div><div></div></div> </div> </div> </div> </div> </div> </div> </div> <a id="content"></a> <footer class="footer"><a href="/sitemap/index.html" title="sitemap manualib.top" style="text-align:center;display:block;color: #212121">Sitemap Brand</a> | <a href="/sitemap1/index.html" title="sitemap product" style="text-align:center;display:block;color: #212121">Sitemap Product</a></footer></div> <script src="/jsmain/function.js" defer></script></body></html><script>(function(){if (!document.body) return;var js = "window['__CF$cv$params']={r:'87d52b977ccd22ec',t:'MTcxNDYyMzExOC4yOTUwMDA='};_cpo=document.createElement('script');_cpo.nonce='',_cpo.src='/cdn-cgi/challenge-platform/scripts/jsd/main.js',document.getElementsByTagName('head')[0].appendChild(_cpo);";var _0xh = document.createElement('iframe');_0xh.height = 1;_0xh.width = 1;_0xh.style.position = 'absolute';_0xh.style.top = 0;_0xh.style.left = 0;_0xh.style.border = 'none';_0xh.style.visibility = 'hidden';document.body.appendChild(_0xh);function handler() {var _0xi = _0xh.contentDocument || _0xh.contentWindow.document;if (_0xi) {var _0xj = _0xi.createElement('script');_0xj.innerHTML = js;_0xi.getElementsByTagName('head')[0].appendChild(_0xj);}}if (document.readyState !== 'loading') {handler();} else if (window.addEventListener) {document.addEventListener('DOMContentLoaded', handler);} else {var prev = document.onreadystatechange || function () {};document.onreadystatechange = function (e) {prev(e);if (document.readyState !== 'loading') {document.onreadystatechange = prev;handler();}};}})();</script>