Chapters
Table of Contents

Related Manuals for Siemens SWT-3000


Summary of Contents for Siemens SWT-3000
- Page 1 SUBESTACIÓN HUANCAVELICA 220/60/10kV SUBESTACIÓN HUANCAVELICA 220/60/10kV. MANUAL DE EQUIPO DE TELECOMUNICACIONES CO U C C O EQUIPO DE TELEPROTECCIÓN MARCA: SIEMENS TIPO: SWT‐3000 BANCO DE INFORMACIÓN TÉCNICA DEPARTAMENTO DE TRANSMISIÓN ESTE...
- Page 2 SWT 3000 Equipment Manual Chapter 1: Functional Description Applications for analog and digital transmission Operating modes with PLC systems Protection modes Frequency overview Possible ways of using the SWT 3000 Service channel...
-
Page 3: Table Of Contents
Broadband devices in the VF range [kHz] ------------------------------------------------------------------------------------31 Narrow band devices in the VF range [kHz] ---------------------------------------------------------------------------------31 Frequency diagram for broadband and narrow band devices: --------------------------------------------------------------32 Command duration for single purpose operation ----------------------------------------------------------------------------33 Page - 2 Edition p3_3_2x 08/09 © SIEMENS AG 2008... - Page 4 The IP network – your gateway to SWT 3000 -------------------------------------------------------------------------------37 Power supply -----------------------------------------------------------------------------------------------------------------------38 Stand-alone unit ------------------------------------------------------------------------------------------------------------------38 Integrated unit --------------------------------------------------------------------------------------------------------------------38 Index: --------------------------------------------------------------------------------------------------------------------------------39 Appendix: ---------------------------------------------------------------------------------------------------------------------------41 List of figures ---------------------------------------------------------------------------------------------------------------------41 List of tables ----------------------------------------------------------------------------------------------------------------------41 © SIEMENS AG 2008 Edition p3_3_2x 08/09 Page - 3...
-
Page 5: Functional Description
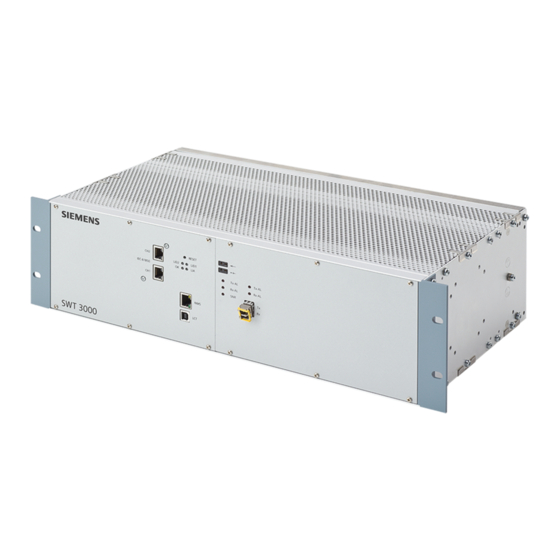
VF range. The digital interfaces can be configured for X.21 or G703.1 (64kbit/s) or G703.6 (2 Mbit/s). SIEMENS > SWT 3000 LID2 LID1 Figure 1: SWT 3000 device with analog interface Page - 4 Edition p3_3_2x 08/09 © SIEMENS AG 2008... -
Page 6: Features At A Glance
Remote readout of the event recorder Easy upgrade from analog to digital (and vice versa) SNMP agent for NMS integration Coded tripping for up to four independent commands © SIEMENS AG 2008 Edition p3_3_2x 08/09 Page - 5... -
Page 7: Applications For Analog And/Or Digital Transmission
When using exclusively digital interfaces up to 8 signal inputs can be transmitted transparently to the distant station with Operating Mode 5D and can be jumpered to signal outputs there. Two in- terface modules of type IFC-P and/or IFC-D are necessary for this application. Page - 6 Edition p3_3_2x 08/09 © SIEMENS AG 2008... -
Page 8: Combination Of Analog And Digital Interfaces
SWT 3000 stand alone with connection via FOM to the Pow- digital alternate rout erLink SWT 3000 stand alone with connection of the digital interface analog or digital alternate route via FOM to a PDH or SDH multiplexer © SIEMENS AG 2008 Edition p3_3_2x 08/09 Page - 7... -
Page 9: Fom (Fibre Optic Modem)
850 nm or 1300 nm Opt. connector: LC-connector Range: approx. 3 km at 1300nm, 550m at 850nm (depending on module type). receiver alarm 2 x LED TX- and RX-Alarm (RX + F6UE-Alarm) Page - 8 Edition p3_3_2x 08/09 © SIEMENS AG 2008... -
Page 10: Connection To A Multiplexer
64 kbit/s or 2 Mbit/s Clock FOBox is DTE (for test purpose a switch over to DCE possible) 48 V DC ( ± 20 %), potential separation 2,5 kV Power Supply © SIEMENS AG 2008 Edition p3_3_2x 08/09 Page - 9... -
Page 11: Direct Connection Via Optical Fibre Connection
Coded tripping (CT): The CT function is available for the analog line interface (LIA). The com- mand codes consist of two simultaneously transmitted trip frequencies (parallel coding). Page - 10 Edition p3_3_2x 08/09 © SIEMENS AG 2008... -
Page 12: Mode Of Operation: Digital
PowerLink PLC system it is also possible to integrate SWT 3000 in PowerLink. When using PLC equipment several variants of teleprotection signaling are possible as described in the following: © SIEMENS AG 2008 Edition p3_3_2x 08/09 Page - 11... -
Page 13: Single Purpose Operation
SWT 3000 remote at short distance with VF coupling to PowerLink. The connecting cable between SWT 3000 and PowerLink should be kept as short as possible. SWT 3000 remote with optical fibre connection to the PowerLink. SWT 3000 integrated in PowerLink. Page - 12 Edition p3_3_2x 08/09 © SIEMENS AG 2008... -
Page 14: Equipment Versions
Figure 5: SWT 3000 four-wire connection via VF cable PLC connections Variants VF1 to VF5 are used in conjunction with PowerLink PLC sys- tems depending on the assignment of the transmission band. © SIEMENS AG 2008 Edition p3_3_2x 08/09 Page - 13... -
Page 15: Narrow Band Version
The operation of several units in parallel at a connection is possible by using narrow band devices. SWT 3000 SWT 3000 SWT 3000 SWT 3000 Figure 6: Parallel connection of several SWT 3000 units at one connection Page - 14 Edition p3_3_2x 08/09 © SIEMENS AG 2008... - Page 16 Reverse direc- Variant NB31 Transmit channel 3 Receive channel 1 tion Direction Variant NB23 Transmit channel 2 Receive channel 3 Reverse direc- Variant NB32 Transmit channel 3 Receive channel 2 tion © SIEMENS AG 2008 Edition p3_3_2x 08/09 Page - 15...
-
Page 17: Possible Ways Of Using The Swt 3000
Fiber optic connections between SWT 3000 and PowerLink. A short-distance connection between an SWT 3000 and Siemens’ PowerLink PLC terminal can be realized via an integrated fiber optic modem. In this case an SWT 3000 standalone system provides the same advanced functionality as the version integrated into PowerLink. -
Page 18: Analog And Digital Transmission Path
PDH or SDH network. Example 12: A short-distance connection between an SWT 3000 and Siemens’ PowerLink PLC terminal can be realized via an integrated fiber optic modem. The multiplexer is connected with the SWT 3000’s FOBox, converting the optical signal to an electrical signal. -
Page 19: Monitoring
This minimum time can be increased to 100 ms in steps of 1 ms (settable as a parameter). Minimum transmission duration Each command is transmitted for at least 15 ms (settable as a parameter). Page - 18 Edition p3_3_2x 08/09 © SIEMENS AG 2008... -
Page 20: Protection Modes
3a, 3b resp. 5A are needed for variants that transmit 4 resp. 3 commands independ- ently. Operating mode 5D was previously used in the system SWT 2000 D . © SIEMENS AG 2008 Edition p3_3_2x 08/09 Page - 19... -
Page 21: Unblocking Mode
C1 up to C16. Table 4: Possible frequency combinations for the coded tripping commands Code Guard Guard …f trip frequencies from the variants M5A clock synchronizing frequency from the variants M5A Page - 20 Edition p3_3_2x 08/09 © SIEMENS AG 2008... -
Page 22: Description Of The Operating Modes Without Unblocking Mode
1) In AMP operation (PLC connection) signal S6 is also activated (“Energized“) through BI4=on and voice transmission is interrupted. 2) if an invalid frequency or code is received resp. in case of guard tone alarm © SIEMENS AG 2008 Edition p3_3_2x 08/09 Page - 21... -
Page 23: Mode3 (Four Commands With Priority)
BI2 + BI3 + BI4 CO2 + CO3 + CO4 BI1 + BI2 + BI3 + BI4 CO1 + CO2 + CO3 + CO4 Usynch 1) If output allocation 1:1 is adjusted Page - 22 Edition p3_3_2x 08/09 © SIEMENS AG 2008... -
Page 24: Mode 3B (2Plus2)
USYNC 1) Input error. If more than one input is activated fg is transmitted. 2) If an invalid frequency or code is received, resp. in case of guard tone alarm © SIEMENS AG 2008 Edition p3_3_2x 08/09 Page - 23... -
Page 25: Mode 5A "3 Commands Independent
Note: The default program settings are highlighted in bold type Possible settings: X = no reaction: The state of the signal output is not affected. 1 = switch on: The signal output is switched on or “retriggered“. Page - 24 Edition p3_3_2x 08/09 © SIEMENS AG 2008... -
Page 26: Mode 5D (Only For Digital Line Interfaces Lid)
X = no reaction: The state of the signal output is not affected. 1 = switch on: The signal output is switched on or “retriggered“. The default program setting is 1:1 (“transparent“); i.e.: BI1=CO1, BI2=CO2, ... , BI8=CO8 © SIEMENS AG 2008 Edition p3_3_2x 08/09 Page - 25... -
Page 27: Description Of The Operating Modes With Unblocking Mode
2) if an invalid frequency or code is received resp. in case of guard tone alarm: If tunbl>0 output of the unblocking pulse (tunbl. = Duration of the unblocking pulse) Page - 26 Edition p3_3_2x 08/09 © SIEMENS AG 2008... -
Page 28: Mode3 (Four Commands With Priority)
2) If an invalid frequency or code is received resp. in case of guard tone alarm: If tunbl>0 output of the unblocking pulse (tunbl. = Duration of the unblocking pulse). The unblocking pulse is emitted via the EALR output of the PU3f. © SIEMENS AG 2008 Edition p3_3_2x 08/09... -
Page 29: Mode 3B (2Plus2)
2) If an invalid frequency or code is received, resp. in case of guard tone alarm: If tunbl>0 output of the unblocking pulse (tunbl. = Duration of the unblocking pulse). The unblocking pulse is distributed via the EALR output of the PU3f. Page - 28 Edition p3_3_2x 08/09 © SIEMENS AG 2008... -
Page 30: Mode 5A "3 Commands Independent
Note: The default program settings are highlighted in bold type Possible settings: X = no reaction: The state of the signal output is not affected. 1 = switch on: The signal output is switched on or “retriggered“. © SIEMENS AG 2008 Edition p3_3_2x 08/09 Page - 29... -
Page 31: Mode 5D (Only For Digital Line Interfaces Lid)
X = no reaction: The state of the signal output is not affected. 1 = switch on: The signal output is switched on or “retriggered“. The default program setting is 1:1 (“transparent“); i.e.: BI1=CO1, BI2=CO2, ... , BI8=CO8 Page - 30 Edition p3_3_2x 08/09 © SIEMENS AG 2008... -
Page 32: Frequency Overview
Receive channel 3 Variant NB Ch31 Transmit channel 3 Receive channel 1 Variant NB Ch23 Transmit channel 2 Receive channel 3 Variant NB Ch32 Transmit channel 3 Receive channel 2 © SIEMENS AG 2008 Edition p3_3_2x 08/09 Page - 31... -
Page 33: Frequency Diagram For Broadband And Narrow Band Devices
VFx_CT Frequencies for coded tripping used for operating Mode 1, 2, 3a, 3b, 4 Mode 1, 2 or 4 can be transmitted coded or non coded Figure 13: Frequency diagram for broadband and narrow band devices Page - 32 Edition p3_3_2x 08/09 © SIEMENS AG 2008... -
Page 34: Command Duration For Single Purpose Operation
Identical to double system protection Command duration for alternate multi purpose operation From PowerSys release ≥P3_2_217 the command duration for the integrated SWT 3000 is auto- matically adjusted to a limit of 1000ms. © SIEMENS AG 2008 Edition p3_3_2x 08/09 Page - 33... -
Page 35: Remote Monitoring (Rm) And Service Channel
Station 3..SWT 3000 SWT 3000 SWT 3000 SWT 3000 Adr.4 Adr.3 Adr.1 Adr.2 Front interface on the PU3 Back interface Figure 15: Communication over two SWT 3000 connection routes Page - 34 Edition p3_3_2x 08/09 © SIEMENS AG 2008... -
Page 36: Rm With Digital Interface
RS232 interface. The SC is electrically con- nected via the PU3 line connector*). Transmission is always carried out via the active digital line in- terface. Figure 16: Configuration of remote access via LAN © SIEMENS AG 2008 Edition p3_3_2x 08/09 Page - 35... - Page 37 RS232 Router RS232 SWT3000 SWT3000 RS232 RS232 RS232 RS232 Router Rear interface Remote Access Server Front interface Service Channel Remote access interface Figure 17: Configuration of a complex network connection Page - 36 Edition p3_3_2x 08/09 © SIEMENS AG 2008...
-
Page 38: The Ip Network - Your Gateway To Swt 3000
Power utilities increasingly rely on the real-time, comprehensive management ca- pabilities of their networks to ensure optimum performance and data communication. Based on the SNMP standard (Simple Network Management Protocol), Siemens Teleprotection devices can be smoothly integrated to replace proprietary solutions or unmanaged components. -
Page 39: Power Supply
If the SWT 3000 is used in the PowerLink (iSWT) system the PU3 unit is supplied via the central power supply of the PowerLink. The IFC modules are supplied via the PU3 again. Page - 38 Edition p3_3_2x 08/09 © SIEMENS AG 2008... -
Page 40: Index
F6 Modulation Features connection to Mux connection to PowerLink Remote Maintenance direct connection 11, 34 four commands with priority 19, 22, 27 with analog interface four independent commands with digital interface © SIEMENS AG 2008 Edition p3_3_2x 08/09 Page - 39... - Page 41 Service Channel digital Service channel (SC) via PLC Single purpose operation Transmission paths Single-phase protection 21, 26 tripping codes Single-phase protection Two-wire operation SNMP Switching functions unblocking Time slot Page - 40 Edition p3_3_2x 08/09 © SIEMENS AG 2008...
- Page 42 Command frequencies of broadband devices---------------------------------------------------------------------31 Table 24: Coded tripping variants in the VF range--------------------------------------------------------------------------31 Table 25: Command frequencies of narrow band devices ------------------------------------------------------------------31 Table 26: Narrow band versions for VF 2-wire connections ---------------------------------------------------------------31 © SIEMENS AG 2008 Edition p3_3_2x 08/09 Page - 41...
- Page 43 Equipment Manual SWT 3000 Chapter 2: Installation and Commissioning Installation Connecting the device Jumper settings Commissioning Settings on the device New configuration Alarms...
- Page 44 Jumper settings for the ALRS module ----------------------------------------------------------------------------------------29 ALR jumper settings-------------------------------------------------------------------------------------------------------------30 Commissioning ------------------------------------------------------------------------------------------------------------------------31 Switching on the power supply-------------------------------------------------------------------------------------------------31 Switching on the device ---------------------------------------------------------------------------------------------------------31 Connecting the service PC ------------------------------------------------------------------------------------------------------31 PC requirements---------------------------------------------------------------------------------------------------------------31 PC Connecting cable----------------------------------------------------------------------------------------------------------32 Page - 2 Edition p3_3_2x 08/09 © SIEMENS AG 2008...
-
Page 45
Setting options for the SWT 3000
------------------------------------------------------------------------------64 Configuration of the alarm output RXALR in the PowerLink -------------------------------------------------------------65 Alarm messages in the service program PowerSys --------------------------------------------------------------------------65 Index:------------------------------------------------------------------------------------------------------------------------------------66 Appendix: ---------------------------------------------------------------------------------------------------------------------------68 List of figures: --------------------------------------------------------------------------------------------------------------------68 List of tables: ---------------------------------------------------------------------------------------------------------------------70 © SIEMENS AG 2008 Edition p3_3_2x 08/09 Page - 3... -
Page 46: General Safety Regulations
The equipment must only be used for the applications described in the catalogue and the technical description and only in conjunction with third party devices and components recommended or approved by Siemens. Perfect and reliable operation of the product is conditional upon proper transport, storage, installation and assembly as well as correct operation and proper maintenance. -
Page 47: Transport And Storage
If stored unpacked or partially unpacked please ensure that the devices and modules are stored in maintained, dry and dust-free rooms. permissible ambient temperature -40° to +70°C relative humidity 5 to 95% © SIEMENS AG 2008 Edition p3_3_2x 08/09 Page - 5... -
Page 48: Installation
If possible you should therefore not touch modules and wiring before then. When dismantling the system the grounding wire must not be discon- nected until all work has been completed. Page - 6 Edition p3_3_2x 08/09 © SIEMENS AG 2008... -
Page 49: Equipment Manual
Cabling and equipment Grounding Caution! The cross section of the grounding wire and the laying of the wire must comply with the regulations applicable for the place of installation. © SIEMENS AG 2008 Edition p3_3_2x 08/09 Page - 7... -
Page 50: Connecting The Device Without Fom Modules
View of a SWT 3000 backplane without FOM slots The power supply cables have to be tied additional immediately at the terminals. Please follow the performance details on the back plane Page - 8 Edition p3_3_2x 08/09 © SIEMENS AG 2008... -
Page 51: Equipment Of The Sub Rack Without Fom Slots
Device 2 doubling of command output contacts or status messages slot IFC./3. Command in- put/command output only with digital interfaces. The terminal assignment of the modules is shown in Figure 5. © SIEMENS AG 2008 Edition p3_3_2x 08/09 Page - 9... -
Page 52: Connecting The Device With Fom Modules
View of a SWT 3000 backplane with FOM slots The power supply cables have to be tied additional immediately at the terminals. Please follow the performance details on the back plane Page - 10 Edition p3_3_2x 08/09 © SIEMENS AG 2008... -
Page 53: Equipment Of The Sub Rack With Fom Slots
Slot position for the first FOM module FOM-2 Slot position for the second FOM module ALRS Alarm module Power supply Figure 4: Equipment of the sub rack with a SWT 3000 system for using FOM modules © SIEMENS AG 2008 Edition p3_3_2x 08/09 Page - 11... -
Page 54: Pin Assignments Of The Swt 3000 Modules
U = 24...250 V *) Setting of the nominal input voltage Protection relay BI 1 Binary input 1 Fuse Figure 6: Connection principle for the binary inputs of the IFC-D/P modules Page - 12 Edition p3_3_2x 08/09 © SIEMENS AG 2008... -
Page 55: Pin Assignment Of The Pu3F Module
GNDS P5_x Power supply (SV1, SV2) P12_x Power supply (SV1, SV2) N12_x Power supply (SV1, SV2) LID_x Digital line interface (X.21. G703.1 or G703.6) LID_SC_x Digital line interface Service Channel © SIEMENS AG 2008 Edition p3_3_2x 08/09 Page - 13... -
Page 56: Signals Of The Line Interface Analog (Lia)
Every wire pair in the connecting cables used for the digital interfaces should be twisted and shielded. Minimum requirements: Every wire pair twisted and complete shielding for all wire pairs. Page - 14 Edition p3_3_2x 08/09 © SIEMENS AG 2008... -
Page 57: Signals For The Lid-1 (Line Interface Digital 1)
Function DI11 Input: Data in signal 1 DI12 Input: Data in signal 2 DO11 Output: Data out signal 1 DO12 Output: Data out signal 2 GNDS Shielding Signal reference potential © SIEMENS AG 2008 Edition p3_3_2x 08/09 Page - 15... -
Page 58: Signals For Lid-2 (Line Interface Digital 2)
Service channel transmit data Signal reference potential Remote access interface SSR Table 13: Pin assignment of the remote access interface SSR Signal name SSR connector Pin Function Receive data Transmit data Page - 16 Edition p3_3_2x 08/09 © SIEMENS AG 2008... -
Page 59: Remote Monitoring (Rm) Interface Ssb
VF signal to PU3 GND Ground GND S6 control wire from PU3 Shield GNDS Shield GNDS Input and output signals for cable connection Additionally for PLC alternate multi purpose operation © SIEMENS AG 2008 Edition p3_3_2x 08/09 Page - 17... -
Page 60: Pin Assignment Of The Alrs Module
Input and output signals Table 17: Connection of the alarm relays Alarm relay Designation Connection pin General alarm GALR a32, c30 Pre- (Non-urgent) alarm NDALR a28, a25 Receiver alarm EALR a21, c23 Page - 18 Edition p3_3_2x 08/09 © SIEMENS AG 2008... -
Page 61: Pin Assignment Of The Alr Module
Table 18: Pin assignment of the ALR Signalname Signalname Signalname BI1_A BI1_B BI2_A BI2_B FGND FGND FGND ALA1_OUT_L BI1_IN_L ALA2_OUT_L BI2_IN_L ALA3_OUT_L P12V P12V P12V ALA1_A ALA1_B ALA2_B ALA2_A ALA3_B ALA3_A © SIEMENS AG 2008 Edition p3_3_2x 08/09 Page - 19... -
Page 62: Jumper Settings For The Swt 3000 Modules
The jumper X30 serves for the switch over to the programming of the controller. In normal op- eration the jumper must be in position 1-2. The connector X40 serves for the connection of the programming device. Page - 20 Edition p3_3_2x 08/09 © SIEMENS AG 2008... -
Page 63: Jumper Settings For The Pu3F Module
PC board that is connected electrically to the PU3 via a ribbon cable and me- chanically via spacer sleeves. All external interfaces are routed via the PU3f module. X53 X3 Figure 10: Position of the jumpers on the DLE module © SIEMENS AG 2008 Edition p3_3_2x 08/09 Page - 21... -
Page 64: Links For Selecting The Line Interfaces Lid-1
X52 / 1-2 DLE settings for the LID-x connection via FOM In case of connecting the LID-x via the FOM modules always the X.21 interface must be selected on the DLE module! Page - 22 Edition p3_3_2x 08/09 © SIEMENS AG 2008... -
Page 65: Jumper Settings For The Cle Module
Setting 600 Ohm >5kOhm Input impedance without W4 Output impedance W6, W7, W8 Table 25: Jumper setting for the receive signal gain Receive signal gain [dB] Jumper X2 in pos. © SIEMENS AG 2008 Edition p3_3_2x 08/09 Page - 23... -
Page 66: Jumper Settings For The Fom Module
In case of FOM connection the configuration of the external SWT 3000 is executed via the PowerLink with the PowerSys program. The service interface of the PU3f in the external SWT 3000 can not be used. Page - 24 Edition p3_3_2x 08/09 © SIEMENS AG 2008... -
Page 67: The Fobox
Shield GNDS Shield Shield A1,A31,C1, Transmit(a) TxD_A Control(a) C(a) Receive(a) RxD_A n.c. Signal Timing(a) RxC_A n.c. Signal Ground Transmit(b) TxD_B Control(b) C(b) Receive(b) RxD_B n.c. Signal Timing(b) RxC_B n.c. n.c. © SIEMENS AG 2008 Edition p3_3_2x 08/09 Page - 25... -
Page 68: Power Supply Of The Fobox
COM-alarm. Communication alarm at the electrical interface. yellow SFP_LOS. The received optical power is below the receiver sensitivity. Loss of signal yellow - - - RX-alarm. F6 supervisory alarm TX-alarm Page - 26 Edition p3_3_2x 08/09 © SIEMENS AG 2008... -
Page 69: Jumper Settings Of The Fob
Setting options normal mode / isolation test Operation mode Jumper X8 Jumper X9 Normal mode Isolation test Table 34: Selection of DTE or DCE mode Operation mode Jumper X5 FOB as DTE FOB as DCE © SIEMENS AG 2008 Edition p3_3_2x 08/09 Page - 27... -
Page 70: Alr Module
IRIG-B circuit. Closing a switch sets the output of the assigned circuit to the active state. Functions of the ALR test switch Table 36: Switch Function S1.1 Binary Input 2 test S1.2 Binary input 1 test S1.3 n.u. S1.4 IRIG-B test Page - 28 Edition p3_3_2x 08/09 © SIEMENS AG 2008... -
Page 71: Jumper Settings For The Alrs Module
Make contact NO General alarm GALR X4 - X5 X5 - X6 Pre- (Non-urgent) alarm NDALR X7 - X8 X8 - X9 Receiver alarm EALR X10 - X11 X11 - X12 © SIEMENS AG 2008 Edition p3_3_2x 08/09 Page - 29... -
Page 72: Alr Jumper Settings
X6 – X7 Alarm Output 2 Relay K2 X8 – X9 X9 – X10 Alarm Output 3 Relay K3 X11 – X12 X12 – X13 Break contact Make contact Default setting Page - 30 Edition p3_3_2x 08/09 © SIEMENS AG 2008... -
Page 73: Commissioning
PC requirements Operating system Windows 2000 or Windows XP Processor Pentium Clock min 800 MHz System memory 256 MB CD drive Serial interface RS 232 Printer interface (LPTx) © SIEMENS AG 2008 Edition p3_3_2x 08/09 Page - 31... -
Page 74: Pc Connecting Cable
Transmit Data Data Terminal Ready Signal Ground Data Set Ready Request To Send Clear To Send Incoming call Figure 17: Possible cable variants for the connection of the service PC Page - 32 Edition p3_3_2x 08/09 © SIEMENS AG 2008... -
Page 75: Settings On The Device
At output socket of the CLE module Setting: -10 dB It must be noted that the level set at the PU3f on the CLE module will be further amplified by about 11dB. © SIEMENS AG 2008 Edition p3_3_2x 08/09 Page - 33... -
Page 76: Operation With The Plc System Powerlink
F6AB_A 4wire input A wh/or F6AB_B 4wire input B F6AN_A 4wire output A F6AN_B 4wire output B wh/bu Figure 20: Connecting cable between the SWT 3000 and the VFx module Page - 34 Edition p3_3_2x 08/09 © SIEMENS AG 2008... -
Page 77: Connection Of An External Swt 3000 To The Powerlink50/100
4-wire input A F6OUT_B 4-wire input B F6IN_A 4-wire output A F6IN_B 4-wire output B Figure 22: Connecting an external SWT 3000 to the port 4 of the VFx modules © SIEMENS AG 2008 Edition p3_3_2x 08/09 Page - 35... -
Page 78: Connection Via A Fom Module
SWT 3000 is carried out at the external device with the PowerSys program. The system configu- ration is shown in the figure 24 and the system-2 configuration in figure 25. Page - 36 Edition p3_3_2x 08/09 © SIEMENS AG 2008... - Page 79 3000 system-2 configuration for FO connection to the PowerLink Due to the digital connection of the PU3f via the SSI it is in this case not possible to measure the frequencies at the PU3f measuring jacks. © SIEMENS AG 2008 Edition p3_3_2x 08/09 Page - 37...
-
Page 80: Pu3F Integrated In The Powerlink
The transmit levels are automatically adjusted from the PowerLink system and displayed in the menu. Due to the digital connection of the PU3f via the SSI it is not possible to measure the frequen- cies at the PU3f measuring jacks. Page - 38 Edition p3_3_2x 08/09 © SIEMENS AG 2008... -
Page 81: Connection Of Two Swt 3000 Via Fom
All setting options for the interfaces are shown also in table 46 on page 48. On the DLE module in each case the X.21 interface has to be selected (ref. also to page 22). © SIEMENS AG 2008 Edition p3_3_2x 08/09... -
Page 82: Connection Of The Swt 3000 Via Fom To A Multiplexer
2M). All setting options for the interfaces are shown also in table 46 on page 48 . On the DLE mod- ule in each case the X.21 interface has to be selected (ref. also to page 22 ). Page - 40 Edition p3_3_2x 08/09 © SIEMENS AG 2008... -
Page 83: Receive Level For Analog Interfaces
Command output disabled in case of No *) S/N alarm Activate NDALR relay in case of Relay NDALR is also activated in case general alarm of general alarm No *) *) As-delivered state © SIEMENS AG 2008 Edition p3_3_2x 08/09 Page - 41... -
Page 84: Setting Parameters Of Measuring Points
Failure to attain the PU3f output level activates the display on the PU3f module (flashing red LED of the used interface) and transmitter alarm (SAL) on the CLE module. Failure to attain the CLE output level activates the display SAL. Page - 42 Edition p3_3_2x 08/09 © SIEMENS AG 2008... -
Page 85: Time/Date
15V (strap x3 (1-2)) and approx. 54V (strap X3 (2-3)) (see also connection of the ALRS module). Figure 35: Options for the SWT 3000 clock synchronisation © SIEMENS AG 2008 Edition p3_3_2x 08/09 Page - 43... - Page 86 In the configuration form for the clock synchronisation additional a non urgent alarm (NUALR) can be activated in case of USYNC failure (see figure below). Figure 36: Activation of NU alarm in case of USYNC failure Page - 44 Edition p3_3_2x 08/09 © SIEMENS AG 2008...
-
Page 87: Line Clock Synchronisation
. In this case synchronization between the devices is not implemented. ext. sync fs 18:00 (i)SWT 3000 (i)SWT 3000 ext. sync ext. sync (i)SWT 3000 (i)SWT 3000 Figure 37: Possibilities for the clock synchronisation © SIEMENS AG 2008 Edition p3_3_2x 08/09 Page - 45... -
Page 88: Swt 3000 New Configuration
When you have confirmed the selection withyou must also define the name and place of storage of the database in which the data will be stored. Figure 40: Creating a database Page - 46 Edition p3_3_2x 08/09 © SIEMENS AG 2008... -
Page 89: System Configuration
Installation and Commissioning SWT 3000 Equipment Manual The following menus are then available: Figure 41: Input tabs for an SWT 3000 System configuration Figure 42: Menu for the SWT 3000 system configuration © SIEMENS AG 2008 Edition p3_3_2x 08/09 Page - 47... -
Page 90: Selecting The Operating Mode
All settings made are accepted by the program by choosing. If you click on the previous setting are retained. With the settings are accepted and the input tab is closed. Page - 48 Edition p3_3_2x 08/09 © SIEMENS AG 2008... -
Page 91: Swt 3000
“off” regardless of the actual switch position. The “on“ state can only be reached by switching all switches to the “ Open “ position and then on. © SIEMENS AG 2008 Edition p3_3_2x 08/09 Page - 49... -
Page 92: Application
The setting made can also be stored as files withand called up again with . This assignment is permanently set for the operating modes Mode 1, 2, 3 and Mode 4 and can- not be changed with the output allocation. Page - 50 Edition p3_3_2x 08/09 © SIEMENS AG 2008... -
Page 93: Swt 3000
Setting remote station Slave Slave Setting remote station Master Config. via inband RM.Channel: Configuration of the remote device yes/no via RM channel enabled Configuration of the remote device via RM channel disabled © SIEMENS AG 2008 Edition p3_3_2x 08/09 Page - 51...Configuration -
Page 94: Setting Options For The Swt 3000
This setting is only possible with 10 ms operating mode Mode 3 (switch- ing functions). The transmission duration of the assigned com- mand inputs is defined here (e.g. in case of continuous signaling). Page - 52 Edition p3_3_2x 08/09 © SIEMENS AG 2008...Configuration -
Page 95: Configuration Of The Command Input Resp. Output
From PowerSys p3_2_2x the limitation is fixed to 1000 ms in the AMP mode Input limitation 50 ms Binary Input Tx Output Example for input limitation set to 50 ms Figure 48: © SIEMENS AG 2008 Edition p3_3_2x 08/09 Page - 53... - Page 96 15 ms. The next command (blue) has a length of 30 ms. This command is not extended. Input extension to min 15 ms Binary Input Tx Output Binary Input Tx Output Figure 49: Example for an input command extension to min 15ms. Page - 54 Edition p3_3_2x 08/09 © SIEMENS AG 2008...
- Page 97 Binary Input Tx Output Figure 51: Example for a pulse suppression of 5 ms Note: Commands which are shorter than the adjusted pulse suppression time are not transmitted by the iSWT! © SIEMENS AG 2008 Edition p3_3_2x 08/09 Page - 55...
-
Page 98: Timer Settings For The Command Output
500 ms. Output limitation 500 ms Tx Output 50 100 Rx Output 50 100 additional Rx alarm! Figure 53: Example of an activated output command limitation Page - 56 Edition p3_3_2x 08/09 © SIEMENS AG 2008... - Page 99 Rx output it is extended for 200 ms. Output extension 200 ms Tx Output 50 100 Rx Output 50 100 Figure 55: Example for an output extension of 200 ms © SIEMENS AG 2008 Edition p3_3_2x 08/09 Page - 57...
-
Page 100: Setting Recommendations For The Swt 3000 Timer Configuration
Activate EALR in Disable the outputs Switch NDALR relays in [dB] case of S/N alarm in case of S/N alarm case of GAL Double sys- tem protection Single-phase protection Switching functions Page - 58 Edition p3_3_2x 08/09 © SIEMENS AG 2008... - Page 101 Activate EALR in Disable the outputs Switch NDALR relays in [dB] case of S/N alarm in case of S/N alarm case of GAL Double sys- tem protection Single-phase protection Switching functions © SIEMENS AG 2008 Edition p3_3_2x 08/09 Page - 59...
-
Page 102: Narrow Band Versions
After all settings have been completed you have to save all the changes in the device with click on the button . The PU3f module is then reset and the device is ready for operation again after- wards. Page - 60 Edition p3_3_2x 08/09 © SIEMENS AG 2008... -
Page 103: Swt 3000 Alarms
The alarm output depends as well on the configuration of the device (primary and secondary path, no secondary path, LIA and LID, only LID resp. only LIA) as shown in the examples below. © SIEMENS AG 2008 Edition p3_3_2x 08/09... -
Page 104: Possible Reasons For The Alarms
64. This function is not available when t wo transmission path are used! Time limit for the command input exceeded The command transmission is interrupted. The alarm is deactivated when the com- mand input is cancelled. Page - 62 Edition p3_3_2x 08/09 © SIEMENS AG 2008... -
Page 105: Special Features For The Output Of The Unblocking Impulse
(see figure 57 page 65). In case of unblocking signaling via RXALR and ALRS card the active position of the relay has to be considered (an alarm is active when the relay is de-energized). © SIEMENS AG 2008 Edition p3_3_2x 08/09 Page - 63... -
Page 106: Setting Options For The Swt 3000
48 page 52 ) Input limitation alarm Allocation of the input limitation alarm to IMPLIM the alarm output EALR (adjustment of the input limitation see table 49 page 53 ) Page - 64 Edition p3_3_2x 08/09 © SIEMENS AG 2008... -
Page 107: Configuration Of The Alarm Output Rxalr In The Powerlink
In case of fault, which makes it impossible to run the normal operation the system produces fault indications. This are displayed in the form“Alarms / Errors”. The display is refreshed with the button . © SIEMENS AG 2008 Edition p3_3_2x 08/09 Page - 65... -
Page 108: Index
IFC-x IFC slots IFC-D Programming IFC-P Protection scheme IFC-S IFCx Installation procedure integrated PU3 receive level reserve VF-range recommendations Interfaces narrowband versions iSWT settings clock synchronisation clock synchronisation IRIG-B date/time Page - 66 Edition p3_3_2x 08/09 © SIEMENS AG 2008... - Page 109 Connecting cable timer requirements Transport Settings measuring points receive level transmit level Unblocking 52, 58, 59, 60 sub rack sub rack with FOM SWT 3000 Alarms System configuration Warning for iSWT © SIEMENS AG 2008 Edition p3_3_2x 08/09 Page - 67...
-
Page 110: Appendix
Figure 51: Example for a pulse suppression of 5 ms--------------------------------------------------------------------------55 Figure 52: Setting options for limitation of the output command -----------------------------------------------------------56 Figure 53: Example of an activated output command limitation ------------------------------------------------------------56 Page - 68 Edition p3_3_2x 08/09 © SIEMENS AG 2008... - Page 111 Figure 56: The SWT 3000 Alarms control form -------------------------------------------------------------------------------64 Figure 57: Allocation of the EALR output from the iSWT to an alarm contact--------------------------------------------65 Figure 58: The Alarm messages menu ------------------------------------------------------------------------------------------65 © SIEMENS AG 2008 Edition p3_3_2x 08/09 Page - 69...
-
Page 112: List Of Tables
Timer settings for broadband versions ----------------------------------------------------------------------------58 Table 54: Alarm settings for broadband versions----------------------------------------------------------------------------58 Table 55: Timer settings for alternate purpose operation ------------------------------------------------------------------59 Table 56: Alarm setting for alternate multipurpose operation -------------------------------------------------------------59 Page - 70 Edition p3_3_2x 08/09 © SIEMENS AG 2008... - Page 113 Allocation of the alarm contacts on the ALRS module ----------------------------------------------------------61 Table 60: Alarm displays on the CLE module -------------------------------------------------------------------------------61 Table 61: Alarm relays and possible alarm reasons-------------------------------------------------------------------------62 Table 62: Setting options for the SWT 3000 alarm control -----------------------------------------------------------------64 © SIEMENS AG 2008 Edition p3_3_2x 08/09 Page - 71...
- Page 114 PowerLink 50/100 Equipment Manual Chapter 3: Service Program PowerSys and MemTool flash programming For the Equipments PowerLink and SWT 3000 For PowerSys versions ≥P3.3.25x PC Features Installation of the service program Menus in the PowerSys Event recorder of the (i)SWT 3000 Firmware upgrade with MemTool...
- Page 115 Programming of Flash Memory in SWT 3000 -------------------------------------------------------------------------------38 Connecting the PC ---------------------------------------------------------------------------------------------------------------38 Starting MemTool----------------------------------------------------------------------------------------------------------------39 Connection to the SWT 3000 target -------------------------------------------------------------------------------------------40 Programming the application into the Flash Memory --------------------------------------------------------------------40 PowerSys release upgrade check-----------------------------------------------------------------------------------------------42 Page - 2 Edition p3_3_2x 08/09 © SIEMENS AG 2008...
- Page 116 SWT 3000 Equipment Manual Chapter 3: Service program PowerSys PowerSys release--------------------------------------------------------------------------------------------------------------42 Trouble Shooting-----------------------------------------------------------------------------------------------------------------43 Index Directory --------------------------------------------------------------------------------------------------------------------44 Appendix ----------------------------------------------------------------------------------------------------------------------------45 List of figures: --------------------------------------------------------------------------------------------------------------------45 List of tables: ---------------------------------------------------------------------------------------------------------------------46 © SIEMENS AG 2008 Edition p3_3_2x 08/09 Page - 3...
-
Page 117: Service Program Powersys
With the PowerSys software the SWTStraps program is installed as well. The program is very useful to find the jumper settings for the iSWT modules. Page - 4 Edition p3_3_2x 08/09 © SIEMENS AG 2008... -
Page 118: Starting The Service Program
Save, print Data source file, New data file Program device data, sent configuration to the device Data source device, remote device, abort the connection Figure 3: Functions of the PowerSys buttons © SIEMENS AG 2008 Edition p3_3_2x 08/09 Page - 5... -
Page 119: The Menu Options
It creates an encoded zip file containing important system information including the database of the equipment or the event memory from an (integrated) SWT 3000. Please send the zip file to SIEMENS office for evaluation. Page - 6 Edition p3_3_2x 08/09... -
Page 120: Connection
TCP/IP connection. The configuration is done after operating the button. The timeout for the LAN interface of the service PC is adjustable from 4 – 60 sec. Figure 7: Configuration for the TCP/IP connection © SIEMENS AG 2008 Edition p3_3_2x 08/09 Page - 7... -
Page 121: The Powersys Menu
PowerSys program or, if opened, the event memory from an integrated SWT 3000 in a window as shown below. Saving the print preview in the PDF or RTF format. Print out Figure 9: Display of the print preview Page - 8 Edition p3_3_2x 08/09 © SIEMENS AG 2008... -
Page 122: Fw Package Import / Export
Figure 11: Selecting a file for the export from the firmware (example package 58) With OK the FW export is carried out and the file stored in the sub directory „Firmware“. © SIEMENS AG 2008 Edition p3_3_2x 08/09 Page - 9... -
Page 123: The Menu
A sub-menu is opened for selecting the file to be loaded. Figure 13: Loading the data from an existing file After the file has been loaded, the data can be modified or programmed in the device. Page - 10 Edition p3_3_2x 08/09 © SIEMENS AG 2008... -
Page 124: Data Source
In case of changing an existing PowerLink configuration the “Clear CDB” command should be used before programming the new configuration into the CSP. For more details ref. to page 17. © SIEMENS AG 2008 Edition p3_3_2x 08/09 Page - 11... -
Page 125: Data Source
Tool from page 20 in this chapter! The Firmwarebutton is only activated, if no PowerLink connection has been estab- lished (with data source device). Only the cable between PC and PowerLink must be connected. Page - 12 Edition p3_3_2x 08/09 © SIEMENS AG 2008... -
Page 126: Firmware
A menu is displayed where it is possible to enter the name of the dongle file or to use a browser. Browser Figure 19: Selecting the dongle file by entering the name © SIEMENS AG 2008 Edition p3_3_2x 08/09 Page - 13... - Page 127 The dongle on the CSP module is only updated if the serial number in the dongle file and the serial number in the dongle is identical. For dongle upgrade of one link at least two dongle files are necessary! Page - 14 Edition p3_3_2x 08/09 © SIEMENS AG 2008...
-
Page 128: Display After The Connection Has Been Established
In case of a fault display due to a mismatch between the existing service program and the version stored in the PowerLink system an upgrade must be carried out (ref. also to page 20). © SIEMENS AG 2008 Edition p3_3_2x 08/09 Page - 15... -
Page 129: The Form
Monitoring: Possibility to switch a local IF loop. AGC resp. AFC switch OFF for test purposes only! Activation of the AGC hold for switching the AGC to a fixed value. Page - 16 Edition p3_3_2x 08/09 © SIEMENS AG 2008... - Page 130 PowerLink resp. SWT 3000 or after a firmware update to clear all former settings. Reset: Reset of the PowerLink via the service PC. After Reset the service program is automatically connected back to the PowerLink. © SIEMENS AG 2008 Edition p3_3_2x 08/09 Page - 17...
-
Page 131: The Iswt3000 Event Recorder
The number and type of events is selectable like shown in the figure above. The event recorder can’t be cleared from the user! Subsequently the display of the entries is described. Page - 18 Edition p3_3_2x 08/09 © SIEMENS AG 2008... -
Page 132: Display Of The Entries In The Event Recorder
Note: The displayed comments have the same signification than the combination of group and event identifier [gnr] / [enr]. In case of the comment : Internal system message contact your responsible SIEMENS office ! © SIEMENS AG 2008 Edition p3_3_2x 08/09... -
Page 133: Firmware Upgrade With Memtool
• Adobe Acrobat Reader 4.0 or higher • 10 MByte space on local hard-disk • CD-ROM drive for installation • Standard serial port interface Version of MemTool MemTool release V1.12 Page - 20 Edition p3_3_2x 08/09 © SIEMENS AG 2008... -
Page 134: Installation Of Memtool
MemTool software. Click Next. Select the Program Folder and click Next to continue Select the Minimal type of Installation and click Next - Install Click Finish to continue and end the installation process © SIEMENS AG 2008 Edition p3_3_2x 08/09 Page - 21... -
Page 135: Basic Settings
Target – Change. The installation of MemTool provides target files for se- lection of Siemens CSP (PowerLink) and PU3 (SWT 3000) systems. Select Siemens PowerLink - CSP and click OK. Figure 27:... - Page 136 On the dialog box Save changes to target configu- ration file click Yes. Figure 29: Target Setup Select >Device >Setup/Mapping and verify Start address 0x0 and other settings as shown. Figure 30: Setup Mapping © SIEMENS AG 2008 Edition p3_3_2x 08/09 Page - 23...
- Page 137 Figure 31: Setup Program Select Setup/Verify and click Try to use Check- Calc. Verify enabled. Setting for Setup /Driver /Protection are default and remain unchanged. Click OK Figure 32: Setup Verify Page - 24 Edition p3_3_2x 08/09 © SIEMENS AG 2008...
-
Page 138: Getting Started
Copy of the AllInOne*.jnk files from the firmware folder to the Memtool targets It is also possible to use the MemToolsbutton and select the AllInOne file in the Firmware folder of the corresponding PowerSys version © SIEMENS AG 2008 Edition p3_3_2x 08/09 Page - 25... -
Page 139: Programming Of Flash Memory In The Powerlink
Switch OFF the device with S1 To enable the programming with MemTool switch S2/1 to ON position Switch ON the device Press Reset S5 to proceed the upgrade Figure 34: The CSP board Page - 26 Edition p3_3_2x 08/09 © SIEMENS AG 2008... -
Page 140: Starting Memtool
– Change. Select Siemens PowerLink- CSP and click OK. Figure 36: Selecting the Siemens PowerLink-CSP target Wrong target selection will result in unsuccessful flash programming. Ver- ify that the target selected is the device physically connected. © SIEMENS AG 2008... -
Page 141: Connection To The Powerlink Target
Getting Started). Click Open. After loading this file, in the left part of the MemTool window the file name and a list of sections of the application are displayed. Select the actual Power- Sys Firmware version Figure 38: Selection of the AllInOne files Page - 28 Edition p3_3_2x 08/09 © SIEMENS AG 2008... - Page 142 MemTool Command dialog will be opened to show the programming progress. The upgrade starts with erase of the flash, programming and finally verification. Figure 40: Starting of the programming process © SIEMENS AG 2008 Edition p3_3_2x 08/09 Page - 29...
- Page 143 Switch OFF the Power on the CSP module. Move S2/1 back to the OFF position. In case vMUX or SWT 3000 is integrated continue with vMUX resp. SWT 3000 flash programming otherwise switch Power ON (CSP-Reset). Page - 30 Edition p3_3_2x 08/09 © SIEMENS AG 2008...
-
Page 144: Powersys Release Upgrade Check
Memtool, because the PowerSys version is not included in the “AllInOne” files! Continue with commissioning and configuration using PowerSys on the serial port X15 as de- scribed in detail in the PowerLink manual. © SIEMENS AG 2008 Edition p3_3_2x 08/09 Page - 31... -
Page 145: Programming Of Flash Memory In The Powerlink Vmux
S2/2 on the CSP to ON position Switch ON the device Press Reset S5 to proceed the upgrade BGAL Diagnostic LED H10 - H14 S2/1=Memtool S2/2=Mon/App S2/3=Debug S2/4=Selftest Reset Figure 44: The vMUX board Page - 32 Edition p3_3_2x 08/09 © SIEMENS AG 2008... -
Page 146: Starting Memtool
– Change. Select Siemens PowerLink- vMUX and click OK. Figure 46: Selecting the Siemens PowerLink-vMUX target Wrong target selection will result in unsuccessful flash programming. Ver- ify that the target selected is the device physically connected. © SIEMENS AG 2008... -
Page 147: Connection To The Vmux Target
Select the actual Power- Sys Firmware version Figure 48: Example for selection of the AllInOne files Page - 34 Edition p3_3_2x 08/09 © SIEMENS AG 2008... - Page 148 MemTool Command dialog will be opened to show the programming progress. The upgrade starts with erase of the flash, programming and finally verification. Figure 50: Starting of the programming process © SIEMENS AG 2008 Edition p3_3_2x 08/09 Page - 35...
- Page 149 Switch OFF the Power on the CSP module. Move S2/2 on the CSP and S2/1 on the vMUX back to the OFF position. In case SWT 3000 is integrated continue with SWT 3000 flash programming otherwise switch Power ON (CSP-Reset). Page - 36 Edition p3_3_2x 08/09 © SIEMENS AG 2008...
-
Page 150: Powersys Release Upgrade Check
Memtool, because the PowerSys version is not included in the “AllInOne” files! Continue with commissioning and configuration using PowerSys on the serial port X15 as de- scribed in detail in the PowerLink manual. © SIEMENS AG 2008 Edition p3_3_2x 08/09 Page - 37... -
Page 151: Programming Of Flash Memory In Swt 3000
Earlier versions of the PU3 have 2 pins on jumper X17. The operating position of jumper X17 is pin 1 and the MemTool programming posi- tion is 1-2 for such modules. Page - 38 Edition p3_3_2x 08/09 © SIEMENS AG 2008... -
Page 152: Starting Memtool
To launch MemTool as a stand-alone tool, execute Memtool.exe via the Windows Main menu Start - Programs -UDE MemTool. Figure 55: Start up from Memtool program with the target Siemens SWT 3000-Pu3 When starting MemTool for the first time, the Select Target Configuration dialog is dis- played. -
Page 153: Connection To The Swt 3000 Target
Open. After loading this file, in the left part of the MemTool window the file name and a list of sec- tions of the application are displayed. Select the actual Power- Sys Firmware version Figure 58: Display after loading the AllInOne_PU3_*.jnk file Page - 40 Edition p3_3_2x 08/09 © SIEMENS AG 2008... - Page 154 The Execute MemTool Command dialog will be opened to show the programming progress. The upgrade starts with erase of the flash, programming and finally verification. Figure 60: The Memtool programming progress © SIEMENS AG 2008 Edition p3_3_2x 08/09 Page - 41...
-
Page 155: Powersys Release Upgrade Check
Download button is only activated if the current and new release is different. This PowerSys upgrade check must be carried out after each software upgrade with Memtool, because the PowerSys version is not included in the “AllInOne” files! Page - 42 Edition p3_3_2x 08/09 © SIEMENS AG 2008... -
Page 156: Trouble Shooting
SWT 3000-PU3). In case of wrong combina- tion repeat the download after correct selection. Hotline Support Please contact [email protected] and add a detailed description of your trouble. © SIEMENS AG 2008 Edition p3_3_2x 08/09 Page - 43... -
Page 157: Index Directory
31, 37 FW Package Export Import save the event memory support language TCP/IP Memtool basic settings connection to SWT 3000 vMUX connection to the PowerLink connection to the vMUX Page - 44 Edition p3_3_2x 08/09 © SIEMENS AG 2008... -
Page 158: Appendix
Display of the PowerSys FW Release------------------------------------------------------------------------------37 Figure 54: Position of the jumpers on the PU3 module ----------------------------------------------------------------------38 Figure 55: Start up from Memtool program with the target Siemens SWT 3000-Pu3 ------------------------------------39 Figure 56: Selecting the target file Siemens SWT 3000-PU3 ----------------------------------------------------------------39 Figure 57: Display of the selected FLASH module after connection of a SWT 3000 -------------------------------------40 ©... -
Page 159: List Of Tables
Functions of the PowerSys menu--------------------------------------------------------------------------------------- 8 Table 2: Functions of the data source menu------------------------------------------------------------------------------------10 Table 3: Fixed entries in the event recorder------------------------------------------------------------------------------------19 Table 4: Group numbers ----------------------------------------------------------------------------------------------------------19 Table 5: Functions of the PU3 jumpers -----------------------------------------------------------------------------------------38 Page - 46 Edition p3_3_2x 08/09 © SIEMENS AG 2008... - Page 160 SWT 3000 Equipment Manual Chapter 4: Interface Modules Description of operation Slot and module identifier Signal detection Signal output Block diagrams Technical data...
- Page 161 Supply voltages-------------------------------------------------------------------------------------------------------------------15 Working temperature range-----------------------------------------------------------------------------------------------------15 Internal interface IFC bus -------------------------------------------------------------------------------------------------------15 Binary inputs IFC-D/IFC-P -----------------------------------------------------------------------------------------------------16 Relay IFC-D/IFC-S --------------------------------------------------------------------------------------------------------------16 Relay IFC-P-----------------------------------------------------------------------------------------------------------------------16 Mechanical data IFC-D/IFC-P/IFC-S -----------------------------------------------------------------------------------------16 Index:------------------------------------------------------------------------------------------------------------------------------------17 Appendix ----------------------------------------------------------------------------------------------------------------------------18 List of figures: --------------------------------------------------------------------------------------------------------------------18 Page - 2 Edition p3_3_2x 08/09 © SIEMENS AG 2008...
-
Page 162: The Interface Modules Ifc
IFC-D module but operating times are significantly shorter. Modules IFC- D and IFC-P are pin-compatible. IFC-S: Module IFC-S is used for signaling of commands that are acquired (bi- nary inputs) or output (relay outputs) by modules IFC-D and IFC-P. © SIEMENS AG 2008 Edition p3_3_2x 08/09 Page - 3... -
Page 163: Connection Principle
Setting the rated voltage 24, 48/60, 110, 250 V IFC-D/P BI1 IFC binary input 1 Protection relay contact 3A1 4A1 Terminals binary input 1 Fuse Figure 1: Basic connection of the IFC-D or IFC-P modules. Page - 4 Edition p3_3_2x 08/09 © SIEMENS AG 2008... - Page 164 Type rec. Type recognition Multiplexer ISV_IFC Internal power supply IFC P12_R 12 V supply for relais P12_R_ON 12V supply available 5 V supply Figure 3: Block diagram of the IFC modules © SIEMENS AG 2008 Edition p3_3_2x 08/09 Page - 5...
-
Page 165: Controller
“off” to “on”. All switches must be in the “off“ position beforehand. Displays The activated output relays are displayed with LEDs H1 to H4 (green), and the activated binary inputs with LEDs H5 to H8 (green). Page - 6 Edition p3_3_2x 08/09 © SIEMENS AG 2008... -
Page 166: Slot And Module Identifier
The module type is recognized by the IFC controller through the different equipment of the mod- ules and this is signaled to the PU3. IFC-[x]-2 IFC-[x]-1 PU3CON TYPE TYPE TPibus Option Figure 7: Type identifier of the IFC modules. © SIEMENS AG 2008 Edition p3_3_2x 08/09 Page - 7... -
Page 167: Signal Acquisition Through The Binary Inputs
X43...X58. The operating point is at 80% of the selected voltage (the link settings can be found in Chapter 2). Rectification ensures that the input signal is polarity-neutral. The optocoupler isolates the input circuit electrically from the electronic system Page - 8 Edition p3_3_2x 08/09 © SIEMENS AG 2008... -
Page 168: Signal Output From The Ifc-D/P Module
The following security systems are incorporated for sending commands without interference: The power supply voltage P12_R must be enabled by the PU3 . The relays are operated on a two-pole basis © SIEMENS AG 2008 Edition p3_3_2x 08/09 Page - 9... -
Page 169: Signal Output From Module
The excitation voltage P12_R of the relay coils must be enabled by the PU3. P12_R K5 - K12 Output relays of module IFC-S D0 - D7 Operation of the IFCx controller Figure 10: Block diagram of the output circuit of IFC-S Page - 10 Edition p3_3_2x 08/09 © SIEMENS AG 2008... - Page 170 CO1 - 4 Command outputs 1 to 4 IFC-S IFC-S module K5 - K12 Signaling relays Joint root of relays K5 - K12 Figure 11: Terminal assignment of the IFC modules © SIEMENS AG 2008 Edition p3_3_2x 08/09 Page - 11...
- Page 171 P12_R S1_1 X48 X47 Test S1_2 X51 X50 Test S1_3 X54 X53 Test S1_4 Test P12_R P12_R P12_R_ON P12_R P12_R P12_R P12_R Figure 12: Block diagram of the IFC-D module Page - 12 Edition p3_3_2x 08/09 © SIEMENS AG 2008...
- Page 172 P12_R S1_1 X48 X47 Test S1_2 X51 X50 Test S1_3 X54 X53 Test S1_4 Test P12_R P12_R P12_R_ON P12_R P12_R P12_R P12_R Figure 13: Block diagram of the IFC-P module © SIEMENS AG 2008 Edition p3_3_2x 08/09 Page - 13...
- Page 173 Interface Modules SWT 3000 Equipment Manual Controller P12_R P12_1 P12_1 P12_1 P12_1 P12_1 P12_1 P12_R_ON P12_1 P12_R P12_R P12_1 Figure 14: Block diagram of the IFC-S module Page - 14 Edition p3_3_2x 08/09 © SIEMENS AG 2008...
-
Page 174: Technical Data For Modules Ifc-D/Ifc-P
Power consumption (8 relays on) IFC-S Supply voltage 5V: typ. 0.3 W Supply voltage 12V: typ. 1.5 W Working temperature range -5 ... +55 °C Internal interface IFC bus Signal level: © SIEMENS AG 2008 Edition p3_3_2x 08/09 Page - 15... -
Page 175: Internal Interface Ifc Bus
Mechanical data IFC-D/IFC-P/IFC-S Dimensions of the modules : PC board: Ordinary European standard format Installation width: 2 depth units Connecting elements: Internal interface "IFC" bus, Plug X3: 26-contact plug connector Page - 16 Edition p3_3_2x 08/09 © SIEMENS AG 2008... -
Page 176: Index
Ribbon cable Description of operation Signal acquisition Signal output Signaling Slot address IFC-D 3, 9 Supply voltages IFC-P 3, 9 IFC-S 3, 10 Input rated voltage Terminal assignment Test input © SIEMENS AG 2008 Edition p3_3_2x 08/09 Page - 17... -
Page 177: Appendix
Terminal assignment of the IFC modules ------------------------------------------------------------------------11 Figure 12: Block diagram of the IFC-D module-------------------------------------------------------------------------------12 Figure 13: Block diagram of the IFC-P module -------------------------------------------------------------------------------13 Figure 14: Block diagram of the IFC-S module -------------------------------------------------------------------------------14 Page - 18 Edition p3_3_2x 08/09 © SIEMENS AG 2008... - Page 178 SWT 3000 Equipment Manual Chapter 5: PU3f Module Functions of the PU3f Description of operation Digital line equipment...
- Page 179 Line interface X.21 --------------------------------------------------------------------------------------------------------------14 Line interface G703.1 (64 kbit/s) ----------------------------------------------------------------------------------------------15 Line interface G703.6 (2Mbit/s HDB3) ---------------------------------------------------------------------------------------16 Jumper settings -------------------------------------------------------------------------------------------------------------------16 Index: --------------------------------------------------------------------------------------------------------------------------------17 Appendix: ---------------------------------------------------------------------------------------------------------------------------18 List of figures ---------------------------------------------------------------------------------------------------------------------18 List of tables ----------------------------------------------------------------------------------------------------------------------18 Page - 2 Edition p3_3_2x 08/09 © SIEMENS AG 2008...
-
Page 180: Functions Of The Pu3F Module
LID-1 and LID-2. These are used for transmitting the pro- tection commands over a digital network (SDH/PDH). The LID can be connected also via a FOM module and a FOBox to a multiplexer system. © SIEMENS AG 2008 Edition p3_3_x 08/09 Page - 3... - Page 181 Loss of a wanted signal (command or guard tone) triggers an alarm at the receive end and causes the relay outputs of the device to block. This alarm state can only be cancelled by receiving the guard signal again. Page - 4 Edition p3_3_2x 08/09 © SIEMENS AG 2008...
- Page 182 Fibre optic modem Internal power supply Copper line equipment Interface module to digital LID-x Line interface digital transmission paths Digital signal processor Figure 3: Functional units of the PU3 module © SIEMENS AG 2008 Edition p3_3_x 08/09 Page - 5...
-
Page 183: Mode Of Operation Of The Pu3F
DSP by the controller via an interface. During op- eration this interface is used to transmit protection commands and parameters. The controller can read and write DSP memory cells, and can also transfer commands and trigger various interrupts. Page - 6 Edition p3_3_2x 08/09 © SIEMENS AG 2008... -
Page 184: Self-Test
The On/Off switch for the power supply is covered by the front panel in order to pre- vent the unit being accidentally disconnected. The PU3 controller and hence the entire SWT 3000 unit is reset with the Reset but- ton which is also covered. © SIEMENS AG 2008 Edition p3_3_x 08/09 Page - 7... -
Page 185: Significance Of The Leds On The Pu3
Power Supply disconnected or faulty red static Module is not ready for operation red flashing General alarm module is only operational to a limited extent green static Normal operation green flashing Test operation Page - 8 Edition p3_3_2x 08/09 © SIEMENS AG 2008... -
Page 186: Service Interface
CSP from where the parameters of the PU3f module are also set. The plug on the front panel of the PU3f is not used and is covered. © SIEMENS AG 2008 Edition p3_3_x 08/09 Page - 9... -
Page 187: Interference Level Evaluation
15V (strap x3 (1-2)) and approx. 54V (strap X3 (2-3)) (see also connection of the ALRS module). Figure 6: Options for the SWT 3000 clock synchronisation Page - 10 Edition p3_3_2x 08/09 © SIEMENS AG 2008... - Page 188 In the configuration form for the clock synchronisation additional a non urgent alarm (NUALR) can be activated in case of USYNC failure (see figure below). Figure 7: Activation of NU alarm in case of USYNC failure © SIEMENS AG 2008 Edition p3_3_x 08/09 Page - 11...
-
Page 189: Line Clock Synchronisation
. In this case synchronization between the devices is not implemented. ext. sync fs 18:00 (i)SWT 3000 (i)SWT 3000 ext. sync ext. sync (i)SWT 3000 (i)SWT 3000 Figure 8: Possibilities for the clock synchronisation Page - 12 Edition p3_3_2x 08/09 © SIEMENS AG 2008... -
Page 190: The Digital Line Equipment Dle
RM data RM data signal Frame alignment Type code 2 SC data SC data SC data signal Frame alignment Type code 3 Device address Command informa- Check sum signal tion © SIEMENS AG 2008 Edition p3_3_x 08/09 Page - 13... -
Page 191: Line Interface X.21
GND (absolute) < 6V, differential voltage be- tween the lines >2V Line run: twisted in pairs and shielded, joint shield for all 4 line pairs Bit rate: 64 kbit/s Page - 14 Edition p3_3_2x 08/09 © SIEMENS AG 2008... -
Page 192: Line Interface G703.1 (64 Kbit
4 (one balanced pair for transmit and receive direction) Level, transmitter end: "Space" 0V+/- 0,1V, "Mark" 1V Level, receiver end: 0...3dB Impedance: 120 Ohm Bit rate: 64 kbit/s (gross bit rate=4*64kBi/s=256kBit/s) Coding: © SIEMENS AG 2008 Edition p3_3_x 08/09 Page - 15... -
Page 193: Line Interface G703.6 (2Mbit/S Hdb3)
All necessary jumper settings are shown in the chapter 2 “Installation and commissioning”. They are also available in the SWTStraps program which is automatically installed with the PowerSys service program. Page - 16 Edition p3_3_2x 08/09 © SIEMENS AG 2008... -
Page 194: Index
Line interface X.21 line synchronization Event memory Memory chips Monitoring functions Functional units Functions Receive end Transmit end Guard signal Real-time clock Hardware interfaces Self-test HDB3 Service interface Signal processor © SIEMENS AG 2008 Edition p3_3_x 08/09 Page - 17... -
Page 195: Appendix
Significance of the LED OK/BGAL displays-------------------------------------------------------------------------- 8 Table 5: Setting options for the local clock synchronisation of the iSWT --------------------------------------------------11 Table 6: Message structure for the digital line interfaces --------------------------------------------------------------------13 Page - 18 Edition p3_3_2x 08/09 © SIEMENS AG 2008... - Page 196 SWT 3000 Equipment Manual Chapter 6: CLE Module Description of operation Jumper settings Connector pin assignment...
- Page 197 Connection of an external SWT 3000 to the PowerLink 50/100------------------------------------------------------------ 9 VFx port 3----------------------------------------------------------------------------------------------------------------------- 9 VFx port 4----------------------------------------------------------------------------------------------------------------------10 Index: --------------------------------------------------------------------------------------------------------------------------------11 Appendix: ---------------------------------------------------------------------------------------------------------------------------12 List of figures ---------------------------------------------------------------------------------------------------------------------12 List of tables ----------------------------------------------------------------------------------------------------------------------12 Page - 2 Edition p3_3_x 08/09 © SIEMENS AG 2008...
-
Page 198: Description Of Operation
4000 Hz 300 Hz Transmit alarm S/N alarm Measuring transformer Receive alarm Prot. Protection circuit Control wire for alternate multi- purpose op. Figure 1: Block diagram of the CLE module © SIEMENS AG 2008 Edition p3_3_x 08/09 Page - 3... -
Page 199: The Receive Section
PU3 module for test purposes. The PU3 monitors this measured value and generates the transmitter alarm from it. The output voltage for the 100% value is 4.5 V. A protective circuit re- stricts this voltage to max. +5V. Page - 4 Edition p3_3_x 08/09 © SIEMENS AG 2008... -
Page 200: Alarm Displays
Transmitter alarm SAL Receiver alarm EAL Signal/noise level alarm S/N The signals are low active and are fed to the LED drive via an integrated inverter module with a +5V supply voltage. © SIEMENS AG 2008 Edition p3_3_x 08/09 Page - 5... -
Page 201: S6 Control Wires
An inhibit line is routed via the CLE module which acts on the inhibit input of the power supply. If there is no CLE module (in the case of a device with digital interfaces only) link X41 must therefore be inserted in position 1-2 in the sub rack. Page - 6 Edition p3_3_x 08/09 © SIEMENS AG 2008... -
Page 202: Jumper Settings
Setting 600 Ohm >5kOhm Input impedance without W4 Output impedance W6, W7, W8 Table 2: Jumper settings for the receive signal gain Receive signal gain [dB] Jumper X2 in pos. © SIEMENS AG 2008 Edition p3_3_x 08/09 Page - 7... -
Page 203: Connector Pin Assignment Of The Cle
S6 control line from PU3 VF signal from PU3 VF signal from PU3 GND VF signal to PU3 VF signal to PU3 GND Ground GND S6 control wire from PU3 Shield GNDS Shield GNDS Page - 8 Edition p3_3_x 08/09 © SIEMENS AG 2008... -
Page 204: Connecting Cable To The Plc Unit Esb 2000I
4-wire input A F6OUT_B 4-wire input B 4-wire output A F6IN_A F6IN_B 4-wire output B Figure 8: Connecting an external SWT 3000 to the port 3 of the VFx modules © SIEMENS AG 2008 Edition p3_3_x 08/09 Page - 9... - Page 205 4-wire input A F6OUT_B 4-wire input B F6IN_A 4-wire output A F6IN_B 4-wire output B Figure 9: Connecting an external SWT 3000 to the port 4 of the VFx modules Page - 10 Edition p3_3_x 08/09 © SIEMENS AG 2008...
-
Page 206: Index
Signal/noise level alarm · 5 Input circuit · 4 Input impedance · 4 Input signal · 4 Test sockets · 6 Transmit section · 4 Transmitter alarm · 5 Link assignment · 7 © SIEMENS AG 2008 Edition p3_3_x 08/09 Page - 11... -
Page 207: Appendix
Jumper settings for the input and output impedance ---------------------------------------------------------------- 7 Table 2: Jumper settings for the receive signal gain --------------------------------------------------------------------------- 7 Table 3: Connector pin assignment of the CLE module ----------------------------------------------------------------------- 8 Page - 12 Edition p3_3_x 08/09 © SIEMENS AG 2008... - Page 208 SWT 3000 Equipment Manual Chapter 7: The Alarm Modules ALRS and ALR Function of the ALRS Jumper settings ALRS Pin assignment ALRS Function of the ALR Jumper settings ALR Pin assignment ALR...
- Page 209 Visual Indication --------------------------------------------------------------------------------------------------------------- 8 Test switch S1 ------------------------------------------------------------------------------------------------------------------ 8 ALR jumper settings----------------------------------------------------------------------------------------------------------- 9 Pin assignment X1 of the ALR -------------------------------------------------------------------------------------------------10 Index: --------------------------------------------------------------------------------------------------------------------------------11 Appendix: ---------------------------------------------------------------------------------------------------------------------------12 List of figures ---------------------------------------------------------------------------------------------------------------------12 List of tables ----------------------------------------------------------------------------------------------------------------------12 Page - 2 Edition p3_3_2x 08/09 © SIEMENS AG 2008...
-
Page 210: The Alrs Module
EALR EALR GALR General alarm NDALR Pre- alarm EALR Receive alarm Figure 1: Block diagram of the alarm relay activation and selection of the signaling contacts Binary input clock synchronization: © SIEMENS AG 2008 Edition p3_3_2x 08/09 Page - 3... -
Page 211: Supply Voltages
In the SWT 3000 unit the power supply is generally interrupted by an inhibit line when a module is pulled. The ALRS does not have an Inhibit line so that the equipment can also be operated for test purposes with the module pulled. Page - 4 Edition p3_3_2x 08/09 © SIEMENS AG 2008... -
Page 212: Jumper Settings
Break contact (NC) Make contact (NO) General alarm X4 - X5 X5 - X6 Pre- alarm X7 - X8 X8 - X9 Receiver alarm X10 - X11 X11 - X12 © SIEMENS AG 2008 Edition p3_3_2x 08/09 Page - 5... -
Page 213: Pin Assignment X1 Of The Alrs
Usync Input b GNDS GNDS GNDS ALA1_OUT_L Usync to PU3 ALA2_OUT_L ALA3_OUT_L P12V P12V P12V ALA1_A (RX_Alarm) ALA1_B (RXALR) ALA2_B (NU_Alarm) ALA2_A (NU_Alarm) ALA3_B (Gen. Alarm) ALA3_A (Gen. Alarm) Input/output signals Page - 6 Edition p3_3_2x 08/09 © SIEMENS AG 2008... -
Page 214: The Alr Module
250V BI2_A 110V BI2_IN_L BI2_B 48/60V BI2-Test (S1/1) ALA1_A ALA1 ALA1_OUT_L („EALR“) ALA1_B ALA2_A ALA2 ALA2_OUT_L („SALR/NDALR“) ALA2_B ALA3_A ALA3 („GENALR“) ALA3_OUT_L ALA3_B ALR_INFO.vsd/Sheet-1 2008-03-14/DOE Figure 4: ALR Block diagram © SIEMENS AG 2008 Edition p3_3_2x 08/09 Page - 7... -
Page 215: Binary Inputs
IRIG-B circuit. Closing a switch sets the output of the assigned circuit to the active state. Table 5: Functions of the ALR test switch Switch Function S1.1 Binary Input 2 test S1.2 Binary input 1 test S1.3 n.u. S1.4 IRIG-B test Page - 8 Edition p3_3_2x 08/09 © SIEMENS AG 2008... - Page 216 X6 – X7 Alarm Output 2 Relay K2 X8 – X9 X9 – X10 Alarm Output 3 Relay K3 X11 – X12 X12 – X13 Break contact Make contact Default setting © SIEMENS AG 2008 Edition p3_3_2x 08/09 Page - 9...
-
Page 217: Pin Assignment X1 Of The Alr
Table 7: Pin assignment of the ALR Signalname Signalname Signalname BI1_A BI1_B BI2_A BI2_B FGND FGND FGND ALA1_OUT_L BI1_IN_L ALA2_OUT_L BI2_IN_L ALA3_OUT_L P12V P12V P12V ALA1_A ALA1_B ALA2_B ALA2_A ALA3_B ALA3_A Page - 10 Edition p3_3_2x 08/09 © SIEMENS AG 2008... -
Page 218: Index
ALRS and ALR Module SWT 3000 Equipment Manual Index: EALR Operating point Outputs GALR General alarm Pin assignment ALRS Pre- alarm Jumper settings ALRS Receiver alarm Relay contacts NDALR Signaling relay Supply voltages © SIEMENS AG 2008 Edition p3_3_2x 08/09 Page - 11... -
Page 219: Appendix
ALR indication------------------------------------------------------------------------------------------------------------ 8 Table 5: Functions of the ALR test switch --------------------------------------------------------------------------------------- 8 Table 6: Setting options for the ALR module ------------------------------------------------------------------------------------ 9 Table 7: Pin assignment of the ALR ---------------------------------------------------------------------------------------------10 Page - 12 Edition p3_3_2x 08/09 © SIEMENS AG 2008... - Page 220 SWT 3000 Equipment Manual Chapter 8: The Power Supply Technical data Displays Connection...
- Page 221 Displays ------------------------------------------------------------------------------------------------------------------------------- 6 Connection of the power supply ------------------------------------------------------------------------------------------------- 7 Redundant power supply --------------------------------------------------------------------------------------------------------- 8 Inhibit loop------------------------------------------------------------------------------------------------------------------------- 9 Index: --------------------------------------------------------------------------------------------------------------------------------10 Appendix: ---------------------------------------------------------------------------------------------------------------------------11 List of figures: --------------------------------------------------------------------------------------------------------------------11 List of tables: ---------------------------------------------------------------------------------------------------------------------11 Page - 2 Edition p3_3_x 08/09 © SIEMENS AG 2006...
-
Page 222: General Description
A sub rack can contain two independent SWT 3000 units, in which case each unit requires its own power supply. The units must be connected via a socket connector in order to conform with the safety regula- tions currently applicable. © SIEMENS AG 2006 Edition p3_3_x 08/09 Page - 3... -
Page 223: Functional Description
5.07 - max. min 5.07 - max. 5.13 5.13 Output voltage min 11.93 max. min 11.93 max. 12.07 12.07 Ambient temperature min-25 - max. min-25 - max. +71 °C Page - 4 Edition p3_3_x 08/09 © SIEMENS AG 2006... - Page 224 If a second fuse is necessary this must be provided in the incom- ing line to terminal no. 29 of the power supply unit. © SIEMENS AG 2006 Edition p3_3_x 08/09 Page - 5...
-
Page 225: Displays
Temperature monitoring has i min i max o nom; ≤ 0.8V operated ≤ I disable Under voltage or overvoltage o nom ≤ T monitoring has operated cmax ≤ 0.8V =Input voltage Page - 6 Edition p3_3_x 08/09 © SIEMENS AG 2006... -
Page 226: Connection Of The Power Supply
Output U 01 +5.4V Output U 01 +5.4V Output U 01 GND Output U 01 GND Protective ground Protective ground Neutral N terminal Input voltage + Phase P terminal Input voltage - © SIEMENS AG 2006 Edition p3_3_x 08/09 Page - 7... -
Page 227: Redundant Power Supply
ALRS GNDS GNDS GNDS PON_PS1 P5_PS2 PS-2 (Option) P12_PS2 +12V N12_PS2 -12V GNDS GNDS GNDS (Option) PON_PS2 PU3f IFC[x]-1 IFC[x]-2 (Option) Figure 4: Block diagram of the redundant power supply Page - 8 Edition p3_3_x 08/09 © SIEMENS AG 2006... -
Page 228: Inhibit Loop
If only the CLE resp FOM1 module is not used the jumper X41 must be inserted in position 1-2. If the FOM2 is not used the jumper X42 must be in position 1-2. © SIEMENS AG 2006 Edition p3_3_x 08/09 Page - 9... -
Page 229: Index
SWT 3000 Equipment Manual Index: Block diagram Inhibit Inhibit input Inhibit loop Connection Control circuit Converter type Decoupling Properties Description of function Displays Redundant power supply Fuse Technical data Terminals Page - 10 Edition p3_3_x 08/09 © SIEMENS AG 2006... -
Page 230: Appendix
Table 2: Fuses used in the converter types -------------------------------------------------------------------------------------- 5 Table 3: Significance of the LED displays on the power supply unit--------------------------------------------------------- 6 Table 4: Assignment of the terminals--------------------------------------------------------------------------------------------- 7 © SIEMENS AG 2006 Edition p3_3_x 08/09 Page - 11... - Page 231 SWT 3000 Equipment Manual Chapter 9: Technical Data...
- Page 232 Immunity --------------------------------------------------------------------------------------------------------------------------- 9 Emission---------------------------------------------------------------------------------------------------------------------------- 9 Mechanical design ------------------------------------------------------------------------------------------------------------------ 9 Dimensions ------------------------------------------------------------------------------------------------------------------------ 9 Weight ------------------------------------------------------------------------------------------------------------------------------ 9 Insulation Withstand Voltage---------------------------------------------------------------------------------------------------10 Impulse Withstand Level 1,2/50µs --------------------------------------------------------------------------------------------10 Climatic Conditions--------------------------------------------------------------------------------------------------------------10 Mechanical Conditions ----------------------------------------------------------------------------------------------------------10 International Standards ----------------------------------------------------------------------------------------------------------10 Page - 2 Edition p3_3_2x 08/09 © SIEMENS AG 2008...
-
Page 233: Command Input/Output
Switching current (max.) 5 A DC or peak AC (30A≤0,5ms) Carry current (max) 5 A DC or peak AC Insulation withstand voltage 2,5 kV rms Signaling Output IFC-S See IFC-D © SIEMENS AG 2008 Edition p3_3_2x 08/09 Page - 3... -
Page 234: Transmission Via Digital Networks
2,61 or 3,81 kHz Narrowband modulation Channel 1 0,63 to 1,26 kHz Channel 2 1,64 to 2,27 kHz Channel 3 2,65 to 3,28 kHz Channel 4 3,16 to 3,79 kHz Page - 4 Edition p3_3_2x 08/09 © SIEMENS AG 2008... -
Page 235: Transmission Time (Swt 3000 Stand Alone)
*Values are given for the IFC-P module. If the IFC-D module is used all specified signal transmission delays are prolonged by about ≤ 4 ms Operation via the PLC system ESB 2000i will prolong the transmission time by about 4ms © SIEMENS AG 2008 Edition p3_3_2x 08/09 Page - 5... -
Page 236: Swt 3000 Fibre Optic Module Fom
5 A AC/DC Mechanical Design Dimensions (approx) 230x110x60 mm (mounting onto DIN rail) Insulation withstand voltage Power supply 2,5 kVrms Alarm outputs 2,5 kVrms Digital input/output G703.6 sym. 500 Vrms Page - 6 Edition p3_3_2x 08/09 © SIEMENS AG 2008... -
Page 237: Security
24/48/60 V DC (-20% / +15%) 110/220/250 V DC (-20% / +15%) or 115 /230 V AC (15% / +10%) 47 Hz – 63 Hz Power consumption approx. 22 W / VA © SIEMENS AG 2008 Edition p3_3_2x 08/09 Page - 7... -
Page 238: Alarm Output Alrs Module
24 V – 250 V DC (-20% / +15%) Digital input IRIG-B 5V – 250 V DC Ethernet NTP, Network Time Protocol Network management SNMPv2 on Ethernet Interface 10/100 BaseT Page - 8 Edition p3_3_2x 08/09 © SIEMENS AG 2008... -
Page 239: Service Pc
(20 – 1000 MHz) Limit Class B Mechanical design Dimensions ES 902 C (19“ inch) 482.6 84TE=426.72 465.1 Weight approx. 5 kg (one SWT 3000 in ES 902 C frame) © SIEMENS AG 2008 Edition p3_3_2x 08/09 Page - 9... -
Page 240: Insulation Withstand Voltage
Performance and testing of teleprotection transmis- IEC 60834-1 second edition 1999-10 sion equipments of power systems Power supply and electromagnetic compatibility IEC 60870-2-1 Environmental conditions IEC 60870-2-2 Product safety EN 60950 Page - 10 Edition p3_3_2x 08/09 © SIEMENS AG 2008... - Page 241 SWT 3000 Equipment Manual Chapter 10: SNMP and Remote Access Overview remote access and remote monitoring SNMP Function Polling device data SNMP Traps Installation Commissioning Remote access...
- Page 242 SWT 3000 Remote Access ............................20 General information..............................20 Remote access examples............................21 RM in-band channel ..............................23 Index directory................................25 Appendix ..................................26 List of figures................................26 List of tables ................................26 Page - 2 Edition p3_3_2x 08/09 © SIEMENS AG 2008...
-
Page 243: General Safety Regulations
The equipment must only be used for the applications described in the catalogue and the technical description and only in conjunction with third party devices and components recommended or approved by Siemens. Perfect and reliable operation of the product is conditional upon proper transport, storage, installation and assembly as well as correct operation and proper maintenance. -
Page 244: Transport And Storage
If stored unpacked or partially unpacked please ensure that the devices and modules are stored in maintained, dry and dust-free rooms. permissible ambient temperature -40° to +70°C relative humidity 5 to 95% Page - 4 Edition p3_3_2x 08/09 © SIEMENS AG 2008... -
Page 245: Installation
If possible you should therefore not touch modules and wiring before then. When dismantling the system the grounding wire must not be discon- nected until all work has been completed. © SIEMENS AG 2008 Edition p3_3_2x 08/09 Page - 5... -
Page 246: Equipment Manual
The cross-section of the earth wire must be at least 2.5 qmm. The cross section of the grounding wire and the laying of the wire must comply with the regulations applicable for the place of installation. Page - 6 Edition p3_3_2x 08/09 © SIEMENS AG 2008... -
Page 247: Overview Remote Access And Remote Monitoring
PowerSys RM addr. 2 RM addr. 3 RM addr. 1 3b Remote monitoring in combination with 1b, 1c and 2a is possible Figure 3: Remote monitoring via in-band RM channel © SIEMENS AG 2008 Edition p3_3_2x 08/09 Page - 7... -
Page 248: Snmp
SWT 3000. The minimum setting of the SNMP server is: • Local IP address • Trap destination(s) IP address • Trap delay and repetition suppression • Community string • Configuration via web browser (password protected) Page - 8 Edition p3_3_2x 08/09 © SIEMENS AG 2008... -
Page 249: Functional Diagram
Polling function for the cyclic request of the status information from the connected device. • Communicator Management of the RS232 interface. Switch over between polling mode and direct connection of the service program. © SIEMENS AG 2008 Edition p3_3_2x 08/09 Page - 9... -
Page 250: Polling Of The Swt 3000 Device Data
RM configuration RM address, master, slave SWT 3000 set commands The following commands can be set from the NMS: Reset device, SWT line select, LID local loop, LID remote loop Page - 10 Edition p3_3_2x 08/09 © SIEMENS AG 2008... -
Page 251: Spontaneous Indication Snmp Traps
SWT 3000 is interrupted. • agentLinkstatus (value 1. severity 1) This trap is transmitted when an interrupted RS232 connection between the SNMP server and the SWT 3000 is successfully recovered. © SIEMENS AG 2008 Edition p3_3_2x 08/09 Page - 11... -
Page 252: Swt 3000 Alarms
(severity 1) The SWT 3000 reports general alarm • alarmNonUrgent (severity 2) The SWT 3000 reports non urgent alarm • alarmRx (severity 1) The SWT 3000 reports receiver alarm Page - 12 Edition p3_3_2x 08/09 © SIEMENS AG 2008... -
Page 253: Installation Of The Snmp
Installation of the SNMP Connection principle of the SNMP server The figure below shows the connection principle for the SNMP server. crossed cables in case of direct connection Figure 6: Connection principle © SIEMENS AG 2008 Edition p3_3_2x 08/09 Page - 13... -
Page 254: Installation Instructions For The Snmp Adapter In A Swt 3000 Device
2 slotted screws 8 screws M2,5x8 for SWT 3000 with single power supply higher SNMP adapter brackets The figure below shows the wiring diagram for the SNMP adapter: Figure 7: Wiring diagram Page - 14 Edition p3_3_2x 08/09 © SIEMENS AG 2008... - Page 255 (J) and holders (K). Assemble the rear panel of the device. Figure 8: SWT 3000 chassis for 2 power supplies with SNMP adapter and DC/DC converter © SIEMENS AG 2008 Edition p3_3_2x 08/09 Page - 15...
-
Page 256: Commissioning Snmp
IP address: 192.168.3.127 at LAN port 1. The connected Service PC has to be adjusted to an IP address in the same network like 192.168.3.1: Figure 9: Adjustment of the IP address Page - 16 Edition p3_3_2x 08/09 © SIEMENS AG 2008... -
Page 257: Web Login
SNMP and Remote Access Web login Start the web browser e.g. internet explorer and enter http://192.168.3.127. Login with the Pass- word “private” (default password, can be changed). Figure 10: Connection via web browser © SIEMENS AG 2008 Edition p3_3_2x 08/09 Page - 17... - Page 258 SNMP and Remote Access SWT 3000 Equipment Manual The following form appears: Figure 11: SNMP Server form Page - 18 Edition p3_3_2x 08/09 © SIEMENS AG 2008...
- Page 259 The NTP server is the PC in the network providing the time. Enter either the IP address or the internet address. The Time zone is always the GMT. Please select the local deviation (±12h). The Poll interval describes how often the time is read from the NTP server. © SIEMENS AG 2008 Edition p3_3_2x 08/09 Page - 19...
-
Page 260: Swt 3000 Remote Access
The service program is connected with the menu or the corresponding button as shown in the figure below. Data source devi- ce button. Figure 13: Connecting the service PC Page - 20 Edition p3_3_2x 08/09 © SIEMENS AG 2008... -
Page 261: Remote Access Examples
SSB Remote Monitoring interface Service channel interface SSR Remote access interface SWT3000 RAS Remote access server PowerSys Figure 14: RAS connection to the SWT 3000 devices in the station A and B © SIEMENS AG 2008 Edition p3_3_2x 08/09 Page - 21... - Page 262 RAS Remote access server LID-1 Digital line interface PowerSys MUX Multiplexer Figure 16: The remote access to the SWT 3000 in station C is performed via SC with the LID-1 Page - 22 Edition p3_3_2x 08/09 © SIEMENS AG 2008...
- Page 263 Changing of the configuration and parameter (except date / time of the SWT 3000) in the remote device is possible if the configuration via inband RM channel is activated (see figure below). Figure 18: Configuration via RM inband channel © SIEMENS AG 2008 Edition p3_3_2x 08/09 Page - 23...
- Page 264 The PowerSys program is connected with or using the correspond- ing button. Subsequently the RM address of the SWT 3000 has to be entered. Data source remote device button Figure 20: Connection of the service PC via RM channel Page - 24 Edition p3_3_2x 08/09 © SIEMENS AG 2008...
-
Page 265: Index Directory
Grounding SNMP server functional diagram SNMP traps specific Installation procedure SWT 3000 alarms set commands SWT 3000 read information LED indicators TCP/IP connection temperature Transport polling Warning remote access © SIEMENS AG 2008 Edition p3_3_2x 08/09 Page - 25... -
Page 266: Appendix
Alarm severity ............................... 11 Table 2: LED indicators.............................. 16 Table 3: Pin assignment of the Sub D connector ......................16 Table 4: Setting options for the SNMP operating configuration................. 19 Page - 26 Edition p3_3_2x 08/09 © SIEMENS AG 2008... - Page 267 Protection Signaling Equipment SWT 3000 Equipment Manual Version P3.3.25x Functional description CLE Module Installation and Commissioning ALRS and ALR Module PowerSys Program Power Supply Interface Modules IFC-x Technical Data PU3 Module SNMP and Remote Access Exit...