
Related Manuals for Toshiba e350


Summary of Contents for Toshiba e350
- Page 1 User’s Manual Pocket PC e350 POCKET PC e350 POCKET PC e350 POCKET PC e350 TOSHIBA Choose freedom. Choose freedom. www.toshiba.co.jp/worldwide...
-
Page 2: Copyright Information
Introduction Thank you very much for your purchase of this Toshiba Pocket PC. Please be sure to read this user’s manual before using the Toshiba Pocket PC, and ensure that you are aware of the correct handling procedures. ■ Please be sure to read the “Safety precautions” section in this document to learn about important safety issues. -
Page 3: Safety Instructions
Safety instructions There are two categories of Safety Instructions included in this manual: Product Warnings, (i.e., what must never be done to assure avoiding those hazards that could cause bodily injury or property damage); and User Directions (i.e., what must always be done to assure the safe use of your Pocket PC). - Page 4 Introduction WARNING Certain locations, such as hospitals, may restrict the use of Pocket PCs and other devices that emit low-level RF energy. Always comply with posted prohibitions of the use of RF-emitting devices, such as in hospitals. Failure to follow such directives could result in the interference with medical equipment and/or devices.
- Page 5 Introduction Never drop your Pocket PC or subject it to severe shock. Drop ping your Pocket PC or subjecting it to severe shock could cause the built-in battery to leak, ignite and/or rupture. Always immediately remove your Pocket PC and its battery from the vicinity of any open flame in the event the built-in battery leaks liquid or emits an unusual odour.
- Page 6 If you connect your Pocket PC to a computer via the docking cradle for data transfer or data restoration purposes, Toshiba will not be responsible for any Pocket PC or computer malfunction, problems with data transfer (restoration creation or data communication) or data modification/loss that may occur in these environments.
- Page 7 Introduction Never use a worn or damaged AC Adaptor Power Supply Cable or plug, or a worn or damaged extension cord or plug. The use of a worn or damaged Power Supply Cable or plug could result in electric shock or fire.
- Page 8 Introduction Take care not to sit on your Pocket PC when it is located in the back pocket of trousers, etc. This could cause damage to your Pocket PC or malfunction of the Pocket PC functions. Do not place objects on top of your Pocket PC or drop them on top of your Pocket PC.
- Page 9 EMC (Electromagnetic compatibility) and safety standards. However, Toshiba cannot guarantee that this product still observes these EMC standards if options or cables not produced by Toshiba are connected or implemented. In this case, the persons who have connected / implemented those options / cables have to make sure that the system (PC plus options / cables) still fulfils the required standards.
- Page 10 Only peripherals complying with the FCC class B limits may be attached to this equipment. Operation with non-compliant peripherals or peripherals not recommended by Toshiba is likely to result in interference to radio and TV reception. Shielded cables must be used between the external devices and the computer’s USB ports, external monitor port,...
- Page 11 Regulation of the Canadian Department of Communications. Note that Canadian Department of Communications (DOC) regulations provide, that changes or modifications not expressly approved by TOSHIBA Corporation could void your authority to operate this equipment. This Class B digital apparatus meets all requirements of the Canadian Interference-Causing Equipment Regulations.
- Page 12 This device complies with Part 15 of the FCC Rules. Operation is subject to the following two conditions: (1) This device may not cause harmful interference, and (2) this device must accept any interference received, including interference that may cause undesired operation. Responsible Party: Toshiba America Information Systems, Inc. User's Manual...
-
Page 13: Table Of Contents
TOSHIBA Pocket PC e350 Table of Contents Chapter 1 Getting Started Welcome ...1-1 Where to Find Information...1-2 Chapter 2 Basic Skills Parts Names and Function ...2-1 Power Button...2-3 Battery Switch ...2-3 Battery Alarm LED ...2-3 How to Use the Stylus ...2-4 About the Cursor Button ...2-4... - Page 14 Enter Information on Your Toshiba Pocket PC...2-17 Entering Text Using the Input Panel ...2-17 Writing on the Screen ...2-19 Drawing on the Screen ...2-20 Recording a Message...2-21 Using My Text...2-23 Find and Organise Information ...2-24 Customise Your Toshiba Pocket PC ...2-25 Adjusting Settings...2-25...
- Page 15 Chapter 5 Companion Pocket Word ...5-1 Typing Mode...5-3 Writing Mode ...5-4 Drawing Mode ...5-5 Recording Mode ...5-5 Pocket Excel ...5-6 Tips for Working in Pocket Excel...5-7 Chapter 6 Pocket Internet The Mobile Favourites Folder...6-1 Favourite Links ...6-1 Mobile Favourites ...6-2 To save device memory...6-2 Using AvantGo Channels ...6-3 Using Pocket Internet Explorer ...6-3...
- Page 16 System Information ...8-13 Memory tab ...8-14 Driver tab ...8-14 System tab ...8-15 Tools Menu...8-16 Chapter 9 Additional Information Troubleshooting ...9-1 Resetting ...9-3 Initialising ...9-3 Specifications ...9-4 TOSHIBA's Worldwide Computer Representatives...9-5 User's Manual Table of Contents ...9-1...
-
Page 17: Chapter 1 Getting Started
■ A Calendar reminder alerts you that it is time to catch the bus. You grab your Toshiba Pocket PC device and catch the bus just in time. Because ActiveSync keeps the information on your device up-to-date, you leisurely review your task list, make notes about the new books and CDs you want to buy, and read and respond to e-mail messages. -
Page 18: Where To Find Information
Last-minute updates and detailed technical information Up-to-date information on your Toshiba Pocket PC User's Manual See this source: This User's Manual and device Help. The Quick Start Card or ActiveSync Help on your computer. To view Help, click Microsoft ActiveSync Help. -
Page 19: Chapter 2 Basic Skills
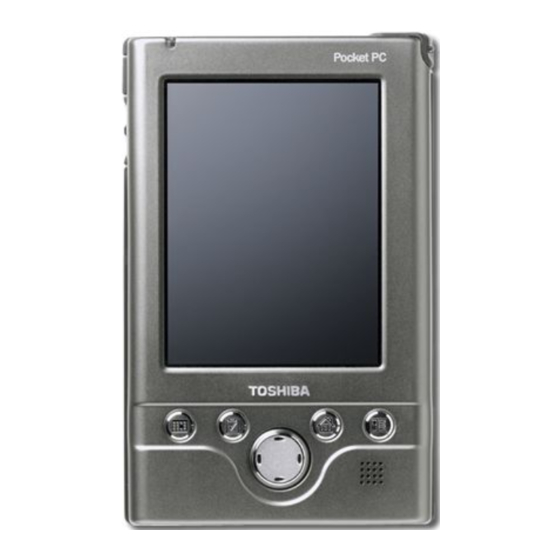
TOSHIBA Pocket PC e350 Basic Skills Your Toshiba Pocket PC e350 is easy to learn how to use. This chapter describes the use and customisation of your Toshiba Pocket PC e350. Parts Names and Function Main unit (front view) SD Card slot... -
Page 20: The Cradle
The Cradle Initial Setting of User Programmable Button Program Button 1 = Calendar Program Button 2 = Tasks Program Button 3 = Home Program Button 4 = Contacts Program Button 5 = Voice recorder Main unit (back view) Stylus Holder Stylus User's Manual SD Card slot... -
Page 21: Power Button
The battery switch supplies/cuts off the battery power to the Toshiba Pocket PC. The setting of this switch at shipment is “stop”. When using the Toshiba Pocket PC for the first time, slide this switch to the left (the “supply” side) with the stylus. -
Page 22: How To Use The Stylus
On the pop-up menu that appears, tap the action you want to perform. When you operate the touch screen of the Toshiba Pocket PC, use the supplied stylus. If the tip of the stylus is damaged, do not use it. If you operate the touch screen with a damaged stylus or a ballpoint pen, the touch screen may be damaged. -
Page 23: Battery Charging
Battery Charging A built-in battery is installed in the Toshiba Pocket PC. When using the Toshiba Pocket PC for the first time, set the battery switch to the supply side, and then charge the built-in battery with the supplied AC adapter. -
Page 24: How To Prolong Battery Life
■ Do not leave the Toshiba Pocket PC in a place of high or low temperature. It may shorten battery life. If you have not used the Toshiba Pocket PC for several days, its battery charge level reading may be inaccurate. -
Page 25: Battery Charge Level And Stored Data Protection
The built-in battery gradually discharges even if the device is not being used. When the Toshiba Pocket PC is left for a long time, the built-in battery of the Toshiba Pocket PC may completely discharge. As a precaution, it is recommended to save the Toshiba Pocket PC’s memory data to your computer or to a storage card. -
Page 26: Initial Setup
Initial Setup When using the Toshiba Pocket PC for the first time, follow the initial setup procedures below after the battery has been charged. Move the battery switch to the “supply” position. The Toshiba Pocket PC powers on automatically and the Welcome screen appears. -
Page 27: Using A Sd Card
Turn off the power Remove the dummy card. Insert the card with its contact surface (metal contact surface) facing the back of the Toshiba Pocket PC. Press down until a clicking sound is heard. To remove a card: Turn off the power Lightly press down the card until a clicking sound is heard. -
Page 28: Connecting To A Computer
Connecting to a Computer Before connecting your Toshiba Pocket PC to a computer, check the following. ■ ActiveSync has been installed on your computer. (See Chapter 3.) ■ Make sure that the Pocket PC and your computer are both turned off. -
Page 29: To Connect Directly Using A Connection Cable
Connect the Toshiba Pocket PC directly to your computer using an optional USB Client cable. When the Toshiba Pocket PC is connected to another device via a USB Client cable do not plug the AC adapter directly into the Pocket PC as this may lead to interference. -
Page 30: Today Screen
Today Screen When you turn on your device for the first time each day (or after 4 hours of inactivity), you’ll see the Today screen. You can also display it by tapping and then Today. On the Today screen, you can see at a glance important information for the day. - Page 31 Following are some of the status icons you may see. Status Icon If more notification icons need to be displayed than there is room to display them, the Notification icon, notification icons. User's Manual Meaning Turns all sounds on and off Main battery is charging Main battery is low Main battery is very low...
-
Page 32: Programs
Drag the stylus off the label so that the command is not carried out. The following table contains a partial list of programs that are on your device. Look on the Toshiba Pocket PC Companion CD for additional programs that you can install onto your device. Icon... -
Page 33: Navigation Bar And Command Bar
Navigation Bar and Command Bar The navigation bar is located at the top of the screen. It displays the active program and current time, and allows you to switch to programs and close screens. Use the command bar at the bottom of the screen to perform tasks in programs. -
Page 34: Pop-Up Menus
Pop-up Menus With pop-up menus, you can quickly choose an action for an item. For example, you can use the pop-up menu in the contact list to quickly delete a contact, make a copy of a contact, or send an e-mail message to a contact. -
Page 35: Enter Information On Your Toshiba Pocket Pc
Enter Information on Your Toshiba Pocket PC You have several options for entering new information: ■ Use the input panel to enter typed text, either by using the soft keyboard or other input method ■ Write directly on the screen ■... -
Page 36: To Type With The Soft Keyboard
When you use the input panel, your device anticipates the word you are typing or writing and displays it above the input panel. When you tap the displayed word, it is inserted into your text at the insertion point. The more you use your device, the more words it learns to anticipate. -
Page 37: Writing On The Screen
To use Block Recogniser: With Block Recogniser you can input character strokes using the stylus that are similar to those used on other devices. Tap the arrow next to the Input Panel button and then Block Recogniser. Write a letter in the box. When you write a letter, it is converted to typed text that appears on the screen. -
Page 38: Drawing On The Screen
To select writing: If you want to edit or format writing, you must select it first. Tap and hold the stylus next to the text you want to select until the insertion point appears. Without lifting, drag the stylus across the text you want to select. If you accidentally write on the screen, tap Tools, then Undo and try again. -
Page 39: Recording A Message
To select a drawing If you want to edit or format a drawing, you must select it first. ■ Tap and hold the stylus on the drawing until the selection handle appears. To select multiple drawings, deselect the Pen button and then drag to select the drawings you want. - Page 40 To stop recording, release the Recording button. Two beeps will sound. The new recording appears in the note list or as an embedded icon. You can also make a recording by tapping the Recording button on the Recording toolbar. To play a recording, tap it in the list or tap its icon in the note. User's Manual Basic Skills Indicates an embedded recording.
-
Page 41: Using My Text
Basic Skills Using My Text When using Inbox, use My Text to quickly insert preset or frequently used messages into the text entry area. To insert a message, tap My Text and tap a message. You can add text after inserting a My Text message before sending it. To edit a My Text message, in the Tools menu, tap Edit and then tap My Text Messages . -
Page 42: Find And Organise Information
Find and Organise Information The Find feature on your device helps you quickly locate information. ■ On the data type, and then tap Go to start the search. To quickly find information that is taking up storage space on your Pocket PC, select Larger than 64 KB in Type. -
Page 43: Customise Your Toshiba Pocket Pc
*.exe,, or *.zip file, a Setup.exe file, or several versions of files for different device types and processors. Be sure to select the program designed for the Toshiba Pocket PC and your device processor type. Read any installation instructions, Read Me files, or documentation that comes with the program. -
Page 44: To Add A Program To The Start Menu
Connect your device and computer. Double-click the *.exe file. ■ If the file is an installer, the installation wizard will begin. Follow the directions on the screen. Once the software has been installed on your computer, the installer will automatically transfer the software to your device. -
Page 45: Setting Password
Setting Password You can protect data or settings from a third person by setting a password which is requested when turning power on. and then Settings. On the Personal tab, tap Password. Select the type of password you would like to use. Enter a password and tap OK. - Page 46 -or set the screen light on External power Set the Brightness level When finished, tap OK to return to the System tab screen. User's Manual Basic Skills Tap and set the screen light brightness level by moving the cursor up or down. If Power Save is activated, the screen light turns off.
-
Page 47: Setting Power
Setting Power You can set to confirm the battery remaining power and the time that elapses until the power turns off after the last operation. and then Settings. On the System tab, tap Power. Set the Power. Select Option tab to adjust when battery alarm will come on, and to enable/disable Record and User programmable button wake up. -
Page 48: Setting Memory
Setting Memory You can adjust the data storing memory and the program running memory. You can also confirm the free space of a storage card and so on. Memory for the Pocket PC is managed automatically. To change Memory allocation: and then Settings. -
Page 49: Setting Advanced Sounds
Setting Advanced Sounds This program allows you to adjust the volume of the built-in speaker and headphone speaker on your Pocket PC. To adjust the system volume, tap Start, Settings, Personal tab, Sounds & Notifications. Tap Start and then Settings. On the System tab, tap Advanced Sounds. -
Page 50: Setting Microphone
When using headphones, select the Headphone tab and make adjustments as shown in the figure below. Setting Microphone This program sets the Automatic Gain Control (AGC). and then Settings. On the System tab, tap Microphone. Check the box below for auto or leave unchecked for manual control. User's Manual Basic Skills 2-32... -
Page 51: Chapter 3 Microsoft Activesync
Before you begin synchronization, install ActiveSync on your computer from the Toshiba Pocket PC Companion CD. ActiveSync is already installed on your device. After installation is complete, the ActiveSync Setup Wizard helps you... - Page 52 After your first synchronization, take a look at Calendar, Contacts, and Tasks on your device. You’ll notice that information you’ve stored in Microsoft Outlook on your computer has been copied to your device, and you didn’t have to type a word. Disconnect your device from your computer and you’re ready to go! Once you have set up ActiveSync and completed the first synchronization process, you can initiate synchronization from your device.
-
Page 53: Chapter 4 Microsoft Pocket Outlook
TOSHIBA Pocket PC e350 Microsoft Pocket Outlook ® Microsoft Pocket Outlook includes Calendar, Contacts, Tasks, Inbox, and Notes. You can use these programs individually or together. For example, e-mail addresses stored in Contacts can be used to address e- mail messages in Inbox. -
Page 54: Calendar: Scheduling Appointments And Meetings
Calendar: Scheduling Appointments and Meetings Use Calendar to schedule appointments, including meetings and other events. You can check your appointments in one of several views (Agenda, Day, Week, Month, and Year) and easily switch views by using the View menu. You can customize the Calendar display, such as changing the first day of the week, by tapping Options on the Tools menu. -
Page 55: To Create An Appointment
To create an appointment If you are in Day or Week view, tap the desired date and time for the appointment. Tap New. Using the input panel, enter a description and a location. Tap first to select the field. If needed, tap the date and time to change them. Enter other desired information. -
Page 56: Using The Summary Screen
Using the Summary Screen When you tap an appointment in Calendar, a summary screen is displayed. To change the appointment, tap Edit. Creating Meeting Requests You can use Calendar to set up meetings with users of Outlook or Pocket Outlook. The meeting request will be created automatically and sent either when you synchronize Inbox or when you connect to your e-mail server. -
Page 57: Contacts: Tracking Friends And Colleagues
Contacts: Tracking Friends and Colleagues Contacts maintains a list of your friends and colleagues so that you can easily find the information you’re looking for, whether you’re at home or on the road. Using the infrared (IR) port on your device, you can quickly share Contacts information with other device users. -
Page 58: To Create A Contact
To create a contact: Tap New. Using the input panel, enter a name and other contact information. You will need to scroll down to see all available fields. To assign the contact to a category, scroll to and tap Categories and select a category from the list. -
Page 59: Finding A Contact
Finding a contact There are four ways to find a contact: ■ In the contact list, enter a contact name in the box under the navigation bar. To show all contacts again, clear text from the box or tap the button to the right of the box. ■... -
Page 60: Tasks: Keeping A To Do List
Tasks: Keeping a To Do List Use Tasks to keep track of what you have to do. To change the way information is displayed in the list, tap Tools and then Options. User's Manual Microsoft Pocket Outlook Select the category of tasks you want displayed in the list. -
Page 61: To Create A Task
To create a task: Tap New. Using the input panel, enter a description. You can enter a start date and due date or enter other information by first tapping the field. If the input panel is open, you will need to hide it to see all available fields. -
Page 62: Using The Summary Screen
Using the Summary Screen When you tap a task in the task list, a summary screen is displayed. To change the task, tap Edit. User's Manual Microsoft Pocket Outlook View task details. Tap to show and hide additional summary information. View notes. -
Page 63: Notes: Capturing Thoughts And Ideas
Notes: Capturing Thoughts and Ideas Quickly capture thoughts, reminders, ideas, drawings, and phone numbers with Notes. You can create a written note or a recording. You can also include a recording in a note. If a note is open when you create the recording, it will be included in the note as an icon. -
Page 64: To Create A Note
To create a note: Tap New. Create your note by writing, drawing, typing, and recording. For more information about using the input panel, writing and drawing on the screen, and creating recordings, see Chapter 2. User's Manual Microsoft Pocket Outlook Tap to return to the note list (the note is saved automatically). -
Page 65: Inbox: Sending And Receiving E-Mail Messages
Inbox: Sending and Receiving E-mail Messages Use Inbox to send and receive e-mail messages by synchronizing e-mail messages with Microsoft Exchange or Microsoft Outlook on your PC. Synchronizing E-mail Messages E-mail messages can be synchronized as part of the general synchronization process. - Page 66 When you receive a message, tap it to open it. Unread messages are displayed in bold. When you connect to your e-mail server or synchronize with your computer, by default, you’ll receive messages from the last five days only, the first 100 lines of each new message, and file attachments of less than 100 KB in size.
-
Page 67: Composing Messages
Composing Messages To compose a message: Tap New. In the To field, enter an e-mail or SMS address of one or more recipients, separating them with a semicolon, or select a name from the contact list by tapping the Address Book button. All e-mail addresses entered in the e-mail fields in Contacts appear in the Address Book. -
Page 68: Managing E-Mail Messages And Folders
Managing E-mail Messages and Folders By default, messages are displayed in one of five folders for each service you have created: Inbox, Deleted Items, Drafts, Outbox, and Sent Items. The Deleted Items folder contains messages that have been deleted on the device. -
Page 69: Chapter 5 Companion Programs
Some of the programs listed above may need to be installed from a companion CD included with the Toshiba Pocket PC. Pocket Word Pocket Word works with Microsoft Word on your computer to give you easy access to copies of your documents. - Page 70 Pocket Word contains a list of the files stored on your device. Tap a file in the list to open it. To delete, make copies of, and send files, tap and hold a file in the list. Then, select the appropriate action on the popup menu. You can enter information in Pocket Word in one of four modes (typing, writing, drawing, and recording), which are displayed on the View menu.
-
Page 71: Typing Mode
Typing Mode Using the input panel, enter typed text into the document. For more information on entering typed text, see Chapter 2. To format existing text and to edit text, first select the text. You can select text as you do in a Word document, using your stylus instead of the mouse to drag through the text you want to select. -
Page 72: Writing Mode
Writing Mode In writing mode, use your stylus to write directly on the screen. Ruled lines are displayed as a guide, and the zoom magnification is greater than in typing mode to allow you to write more easily. For more information on writing and selecting writing, see Chapter 2. -
Page 73: Drawing Mode
Drawing Mode In drawing mode, use your stylus to draw on the screen. Gridlines appear as a guide. When you lift your stylus off the screen after the first stroke, you’ll see a drawing box indicating the boundaries of the drawing. Every subsequent stroke within or touching the drawing box becomes part of the drawing. -
Page 74: Pocket Excel
Pocket Excel Pocket Excel works with Microsoft Excel on your computer to give you easy access to copies of your workbooks. You can create new workbooks on your device, or you can copy workbooks from your computer to your device. Synchronize workbooks between your computer and your device so that you have the most up-to-date content in both locations. -
Page 75: Tips For Working In Pocket Excel
Tips for Working in Pocket Excel Note the following when working in large worksheets in Pocket Excel: ■ View in full-screen mode to see as much of your worksheet as possible. Tap View and then Full Screen. To exit full-screen mode, tap Restore. -
Page 76: Chapter 6 Pocket Internet Explorer
TOSHIBA Pocket PC e350 Pocket Internet Explorer Use Microsoft these ways: ■ During synchronization with your computer, download your favourite links and mobile favourites that are stored in the Mobile Favourites subfolder in Internet Explorer on the computer. ■ Connect to an Internet service provider (ISP) or network and browse the Web. -
Page 77: Mobile Favourites
Mobile Favourites If you are using Microsoft Internet Explorer 5.0 or later on your computer, you can download mobile favourites to your device. Synchronizing mobile favourites downloads Web content to your device so that you can view pages while you are disconnected from your ISP and computer. Use the Internet Explorer plug-in installed with ActiveSync to create mobile favourites quickly. -
Page 78: Using Avantgo Channels
Using AvantGo Channels AvantGo is a free interactive service that gives you access to personalized content and thousands of popular Web sites. You subscribe to AvantGo channels directly from your device. Then, you synchronize your device and computer, or connect to the Internet to download the content. -
Page 79: To View Mobile Favourites And Channels
To view mobile favourites and channels: Tap the Favourites button to display your list of favourites. Tap the page you want to view. You’ll see the page that was downloaded the last time you synchronized with your computer. If the page is not on your device, the favourite will be dimmed. -
Page 80: Chapter 7 Getting Connected
TOSHIBA Pocket PC e350 Getting Connected You can use your device to exchange information with other mobile devices as well as your computer. You have the following connection options: ■ Use the infrared (IR) port on your device to send and receive files between two devices. -
Page 81: Get Help On Connecting
End a Connection ■ When connected via cable or cradle, detach your device from the cable or cradle. ■ When connected via Infrared, move the device away from the PC. Get Help on Connecting ■ Online Help on the Pocket PC. Tap Installed Help, and then Inbox or Connections. -
Page 82: Chapter 8 Optional Functions
Launching an Application From the Home , Programs, and then Home to display the Home screen. You can also launch the Home by pressing the Toshiba Pocket PC Home button. Tap to select Paste or Add. -
Page 83: About Running
Tap the desired tab, and then tap the application icon you want to launch. The selected application starts up. Also, you can launch an application by moving the cursor button or scroller to select and pressing the centre of the cursor button to confirm. You can add tabs up to a maximum of 10 kinds and icons up to 18 in a tab. -
Page 84: Display Icon List
Display Icon List The following list shows the tabs and icons for the initial setup. Tabs Running Main Programs Games Moving an Application Icon into Another Tab The moved icon is placed next to the last icon on the tab screen. You cannot move an icon into a tab which already contains 18 icons. -
Page 85: Deleting An Icon
If the Application file is not designated, or if the Application name is not entered, you cannot add a new icon. You cannot launch the icon added from the storage card, if the same card is not inserted in the Toshiba Pocket PC. User's Manual Optional Functions Tap to designate a folder you want to browse. -
Page 86: Tab Setting
Tab Setting You can set to add, delete or rename the tab on the Tab Settings screen. You can also set to display a desired image on your screen background. To add a tab: Tap Tools and then Tab Settings to display the Tab Settings screen. Tap Tab Settings and then New to display a box to enter the new tab name. -
Page 87: Text Colour Setting
Text Colour Setting: You can set the colour of application name for each tab using Text Colour. Tap the tab whose colour you want to set to display the selected tab screen. Tap View and then Text Colour to display the colour list. You can set the colour of the application name as desired. -
Page 88: Switching The Icon Display
Switching the icon display Tap on the “View” menu to display the current display settings. Current display settings are indicated by check marks at the left. To switch the display, select “Large Icon” or “Small Icon”. Icon settings 1. Moving icons (using the pop-up menu) Tap and hold the icon you want to move on the tab screen. -
Page 89: Tab Settings
4. Browse Dialog Tap the “Folder” box to select the folder to be browsed. Tap the “Type” box to select the type of file to be browsed. The list of the files of the specified type and in the specified folder appears on the screen. - Page 90 3. Deleting tabs Select “Tab Settings” from the “Tools” menu. The “Tab Settings” screen appears. Tap the “Select tab” box to select the tab to be deleted. Tap the “Delete” button. A dialog asking you to confirm you want to delete the tab appears.
-
Page 91: How To Make A Backup
How to Make a Backup You can make a backup of the Toshiba Pocket PC data to a storage card. If you have backed up your data on the storage card, you can restore that data in your Toshiba Pocket PC. You can also delete backup file data from the storage card. -
Page 92: Making A Backup
Tap OK to return to the previous screen. If the available storage card capacity is inadequate to contain the data from the Toshiba Pocket PC, the backup process stops. Check the storage card capacity before starting the backup. If the SD card is write protected, you cannot save the backup data. -
Page 93: Carrying Out The Restore Operation
Toshiba Pocket PC. If the same file name exists in the main memory of your Toshiba Pocket PC, the file data is replaced with the backup data from the storage card. If files exist in the main memory but not in the backup file, they will not be overwritten. -
Page 94: System Information
System Information The System Information program displays the system information such as CPU clock, CPU stepping, Boot Loader Version, OS Version, PIC Version, and UUID. The information is displayed by accessing the Identity, Memory, Drivers, and System tabs. To launch the program, Click Start > Settings > System > System Information. -
Page 95: Memory Tab
Memory tab The Memory tab presents information about the systems RAM, and ROM. Driver tab The Driver tab displays the drivers used by the system’s software applications. User's Manual Optional Functions 8-14... -
Page 96: System Tab
Optional Functions System tab The System tab displays CPU, operating system, and other system information. User's Manual 8-15... -
Page 97: Tools Menu
Optional Functions Tools Menu The Tools menu displays the system information and allows it to be exported to a text (*.txt) file. Export exports all system information parameters to a text (*.txt), and About displays the system information version. User's Manual 8-16... -
Page 98: Chapter 9 Additional Information
TOSHIBA Pocket PC e350 Additional Information Troubleshooting Check the following guide for the possible cause of a problem and how to correct it. Symptom The power button is pressed but the power does not turn The power was suddenly cut off. - Page 99 Symptom The screen was tapped, but there is no response. The operation button does not work either. The screen is dark. The screen is hard to see. Can not connect to your computer. ActiveSync does not function when your Pocket PC is connected to your computer with a USB cradle or USB cable.
-
Page 100: Resetting
When the power is on, press the reset button with the stylus, then release. Initialising When you initialise your Toshiba Pocket PC, it returns to the status when it was purchased. When you initialise your Pocket PC, all data stored in the memory is deleted. -
Page 101: Specifications
Specifications External dimensions Weight Operating conditions Temperature: 0°C to 40°C, Humidity: 30% to Battery type Processor Memory Display Interfaces DC-IN Headphone SD card slot Cradle connection port Audio Options Although the display is manufactured using an extremely high order of technology, there may be a case that some dots do not light or always light. -
Page 102: Toshiba's Worldwide Computer Representatives
P.O. Box 1224, Cairo 11511 Estonia ServiceNet EE Pärnu str. 142A 11317 Tallinn Finland Scribona TPC OY / Toshiba Digital Media Sinimäentie 14,P.O.Box 83, 02630 ESPOO France Toshiba Systèmes (France) S.A. 7 Rue Ampère, 92804 Puteaux Cedex Germany Toshiba Europe GmbH Leibnizstraße 2, D-93055 Regensburg... - Page 103 Rue No 1 Immeuble 29, Sidi Maar 20190, Casablanca Netherlands Toshiba Information Systems Benelux B.V. Rivium Boulevard 41 2909 LK Capelle a/d IJssel Norway Scribona Norge A/S; Toshiba PC Service Stålfjæra 20, P.O.Box 51, Kalbakken 0901 Oslo User's Manual Additional Information Tel: +36-1-467 6100 Fax: +36-1-252 6470 http://www.technotrade.hu...
- Page 104 CS IT Solutions Unit 6A, Mifa Industrial Park, 399 George Street 1685 Midrand Spain Toshiba Information Systems (España) S.A. Parque Empresarial San Fernando Edificio Europa, 1a Planta, Escalera A 28831 (Madrid) San Fernando de Henares Sweden Scribona Toshiba PC AB Sundbybergsvägen 1, Box 1374...
- Page 105 Toshiba Information Systems (UK) Ltd. United Kingdom Toshiba Court, Weybridge Business Park Addlestone Road, Weybridge KT15 2UL United States Toshiba America Information Systems, Inc. 9740 Irvine Blvd., P.O. Box 19724 Irvine, CA 92713-9724 Yugoslavia CT Computers d.o.o. Vladimira Popovica 6...