Table of Contents
Table of Contents

Related Manuals for Electrolux EWF1041ZDWA


Summary of Contents for Electrolux EWF1041ZDWA
- Page 1 EWF1041ZDWA WASHING MACHINE USER MANUAL WI-FI CONNECTIVITY SETUP...
- Page 2 Products must be used, installed and operated in accordance with this manual. You may not be able to claim on the Electrolux manufacturer’s warranty in the event that your product fault is due to failure to adhere to this manual.
-
Page 3: Table Of Contents
5.4 Starting A Cycle ( ) ....26 13.1 Installing and configuring 5.5 Interruption Of A Program ..26 “Electrolux Life” App....48 5.6 Changing A Program ....26 13.2 Remote Start ..... 49 5.7 Changing The Options .... 26 5.8 Opening The Door .... -
Page 4: Safety Information
SAFETY INFORMATION 1.1 Conditions Of Use This appliance is intended to be used in household and similar applications such as: staff kitchen areas in shops, offices and other working environtment; farm houses; by clients in hotels, motels, and other residential type environments;... -
Page 5: Child Safety
1.2 Child Safety This washing machine is not intended for use by young children or infirm persons without supervision. Young children should be supervised to ensure that they do not play with the appliance. The packaging components (e.g. plastic film, polystyrene) can be dangerous to children - danger of suffocation! Keep them out of children’s reach. -
Page 6: Installation
Under no circumstances should you For safety reasons do not use attempt to repair the machine double adaptors, extension yourself. Repairs carried out by cords and multi-plug adapters. inexperienced persons may cause injury or serious malfunctioning. Contact your local Service Centre. -
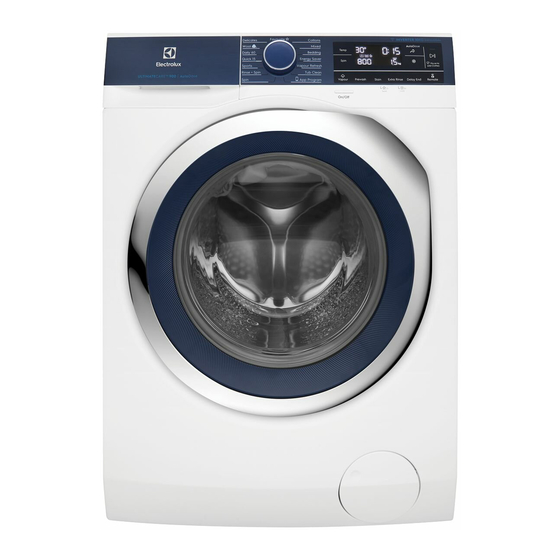
Page 7: Product Description
2. PRODUCT DESCRIPTION 2.1 Parts Worktop Detergent/Softener Control Panel Dispenser (see page 19) (see page 11) Cabinet Door Drain Pump Filter Front Panel (see page 33) Level Adjustment Feet (Front) Mains Cable Transit Bolts Transit Bolts & Hose Support Water Inlet Hose (see page 45) Water Drain Hose (see page 45) -
Page 8: Accessories
Detergent dispenser with AutoDose tanks and manual Level Adjustment Feet compartments Transit Bolt (when remove) For more informations (see page 19) Door (when open) for more informations , see page 19 Drum Lifter Stainless Steel Transit bolts must be removed Washing before using the appliance. -
Page 9: Load Sensor
ENGLISH 2.3 Load Sensor This machine has “Load Sensing Device” which shows how much load you put in the machine and maximum load recommended for selected wash program. The display shows these indicators when the door is open. The weight shown on display is an approximate weight only. -
Page 10: The Autodose Technology (Autodosing)
2.4 The Autodose Technology Auto dose detergent is available for the following wash programs: (Autodosing) • Cottons Introduction • Mixed • Bedding Using the right amount of detergent and fabric • Energy Saver softener not only improves the wash performance •... -
Page 11: Control Panel
3. CONTROL PANEL 3.1 Control Panel Description Delay End Touchpad Program Selector Knob Extra Rinse Touchpad Spin Selection Touchpad Stain Touchpad Temperature Selection Touchpad Prewash Touchpad Display On/Off Button AutoDose Softener Touchpad Vapour Touchpad AutoDose Detergent Touchpad Save Favourite Program Option Start/Pause and Add Clothes Touchpad Remote Touchpad Child Lock Option... -
Page 12: Program Chart
3.2 Program Chart Program; Max. Max. Load Type of load and soil level Temperature Spin (Dry Clothes) range Speed Cottons; 1400 10 kg White and coloured cotton. Cold to 90°C Mixed; 1200 4 kg Synthetic or mixed fabric items. - Page 13 Program; Max. Max. Load Type of load and soil level Temperature Spin (Dry Clothes) range Speed Wool 1200 2 kg Specially tested program for woollen garments bearing the “Pure new woollen, Cold to 40°C non-shrink, machine washable” label. 1200 4 kg Delicate fabrics such as acrylics, viscose, Delicates;...
-
Page 14: Program Options Compatibility
3.3 Program Options Compatibility Program Option Rinse Extra AutoDose AutoDose Vapour Prewash Stain Extra Delay Spin Hold Silent Detergent Softener Rinse Cottons Mixed Bedding Energy Saver Vapour Refresh Tub Clean App Program − − − − − − −... - Page 15 Delay End ( ) Touchpad AutoDose Liquid Detergent Touchpad Before you start the program, this option makes it possible to define the end of the For activating and deactivating the washing program from minimum of 1 hour automatic detergent dosing refer to to maximum of 20 hours.
- Page 16 Extra Rinse Touchpad Prewash Touchpad This option is recommended for people Select this option if you wish your who are allergic to detergents, and in laundry to be pre-washed before the areas where the water is very soft. Use main wash.
-
Page 17: Settings
To set “Child Lock” option: • At the end of the Vapour cycle, the clothes will be warmer, softer and detached from • To activate the function, press and the drum. hold “Extra Rinse” touchpad about 2 If Vapour option is selected, rinse seconds until the display shows the temperatures will be elevated. -
Page 18: Start/Pause ( ) And Add Clothes ( ) Touchpad
3.6 Start/Pause ( ) and Add Add Clothes ( Clothes ( ) Touchpad You can only add clothes when the icon “ ” shown on the This touchpad has 2 functions: display. Start/Pause ( To add clothes: Pressing the “Start/Pause”... -
Page 19: Daily Use
5. DAILY USE 5.1 Loading The Laundry 5.2 Detergent Dispenser With Autodose Tanks And Manual Turn the water tap on. Compartments 2. Connect the main plug to the main socket. NOTE Press the On/Off button to turn on the When using detergent and any other washing machine. - Page 20 Detergent Mode or Link Mode, you the product container refers to need to complete the setup on the lower capacity appliances, the mobile application “Electrolux Life” customized dosage should be Advance functions like fine-tuning, increased. can be enabled on the app to make...
- Page 21 Filling the detergent and 4. Gently pour only liquid softener in the AutoDose fabric softener tank . Fill additives on AutoDose system up to the maximum indicated level Please read “Detergents Type And Quantity Of Detergent” on page We recommend that you do not exceed the maximum indicated level ( 1.
- Page 22 2. Dual-Detergent Mode (by To Select Detergent Amounts (by using Electrolux Life App) using Electrolux Life App) If you have enabled the fine-tuning In Dual-Detergent Mode, you can select feature in the App to allow it to be which of the 2 different detergents that...
- Page 23 “permanent”, and will return to normal dose after the cycle ends. normal dose after the cycle ends. 3. Link Mode (by using AutoDose configuration Electrolux Life App) mode In Link Mode, both compartments are Enter the AutoDose configuration filled with the same detergent. You...
- Page 24 Drawer open indication 5. Press Softener touchpad to select configure softener dosage. When a program is running, the detergent Touch the “Temp” touchpad repeatedly to drawer must always be closed. increase and “Spin” touchpad to reduce. Minimum step is 1 ml (you can press and...
-
Page 25: Options Setting
3. Put the powder detergent in the 3. Gently close the detergent dispenser compartment . If using liquid by pushing all the way in. detergent, make sure special If the machine has not been container is inserted. used for more than 4 weeks with full tanks, detergent/ softener can become viscous or dry out. -
Page 26: Starting A Cycle ( )
5.4 Starting A Cycle ( 5.7 Changing The Options To start a program, press the Start/Pause It may be possible to change some of the touchpad. The corresponding pilot light options after a wash program has started. will stop flashing and a default program Press the touchpad Start/Pause. -
Page 27: At The End Of The Program
5.9 At The End Of The To drain the water: Program Press the “Start/Pause ” touchpad. The appliance drains the water and − The appliance stops automatically. spins with the maximum spin speed − for selected program. The acoustic signal will operate. −... -
Page 28: Washing Hints
6. WASHING HINTS 6.1 Sorting The Laundry Wash bras, pantyhose and other delicates in a Follow the wash code symbols on each mesh laundry bag, garment label and the manufacturer’s which you can purchase washing instructions. Sort the laundry as from your supermarket. -
Page 29: Detergents Type And Quantity Of Detergent
6.6 Detergents Type And Stubborn stains may not be removed by just water and detergent. It is therefore Quantity Of Detergent advisable to treat them prior to washing. Low sudsing detergent is required for this Blood: treat fresh stains with cold water. washing machine to prevent oversudsing For dried stains, soak overnight in water problems, unsatisfactory washing result... -
Page 30: International Wash Code Symbols
Not enough detergent causes: the washload to turn grey, greasy clothes. Too much detergent causes: oversudsing, reduced washing effect, inadequate rinsing. Use less detergent if: you are washing a small load, the laundry is lightly soiled, large amounts of foam during washing. -
Page 31: Care And Cleaning
8. CARE AND CLEANING 8.5 Cleaning The Detergent WARNING! Dispenser And The Autodose You must DISCONNECT the appliance Tanks from the electricity supply, before you can carry out any cleaning or maintenance Before cleaning, make sure that work. the all compartments are empty. 8.1 External Cleaning To prevent possible deposits of dried detergent, clotted fabric softener,... - Page 32 CAUTION! Do not use sharp or metal brushes and sponges. 6. Turn the dispenser up side down and open the bottom cover as indicated in the picture. 3. Open the drain plugs of each tank and empty them into a sink.
-
Page 33: Cleaning The Pump
To restore the functionality, refill WARNING! tanks with detergent and softener. If you place a wrong additives in If some residues remain on the back the tanks, you can easily recover area of tanks, soak detergent drawer in it by using the drain plug on a warm water. - Page 34 3. When the container is full of water, WARNING! put the drainage duct back again and Disconnect the mains plug from the empty the container. Do step 2, 3 mains socket. again and again until no more water Do not remove the filter while the flows out from the drain pump.
-
Page 35: Cleaning The Water Inlet Filter
5. Remove fluff and objects from the Put the filter back into the housing pump (if there are any). with exposed section facing up. Make sure that you correctly tighten the filter to prevent leakages. Guide 6. Make sure that the impeller of the pump can turn. - Page 36 Clean the filter in the inlet hose with a stiff brush. Clean the filter under the water tap. Remove the inlet hose behind the appliance. Install the valve filter back to the housing. Use a suitable tool pulling filter from the valve (eg.
-
Page 37: Frost Precautions
8.8 Frost Precautions If the appliance is installed in an area where the temperature can be less than 0 °C, remove the remaining water from the inlet hose and the drain pump. Emergency Drain 1. Disconnect the main plug from the main socket. -
Page 38: Troubleshooting
9. TROUBLESHOOTING 9.1 Possible Failures Alarm Code: Certain problems are due to lack of The appliance does not fill with water simple maintenance or oversights, properly. which can be solved easily without The appliance does not drain the water. - Page 39 Malfunction Possible cause Solution The drain hose is squashed or Check the drain hose kinked. (Error code: connection. The drain pump is clogged. Clean the drain filter. Machine (Error code: does not empty and/or The option “Rinse Hold” has been Press Start/Pause does not selected.
- Page 40 Malfunction Possible cause Solution The laundry is not evenly distributed in Pause the machine and the drum. redistribute laundry manually. Machine vibrates or There is very little laundry in the drum. Load more laundry. is noisy: Unstable floors eg. wooden floors.
-
Page 41: Emergency Door Opening
If you are unable to identify or solve the problem, contact our service centre. Before calling service centre, make a note of the model, serial number and purchase date of your machine: the Service Centre will require this information. 9.2 Emergency Door Opening In case of power failure or appliance failure, the appliance door remains locked. -
Page 42: Technical Data
10. TECHNICAL DATA Dimensions (Height / Width / Depth) 85 X 60 X 65.9 cm Power supply (Voltage / Frequency) 220-240 V~ / 50 Hz Total power absorbed 2100 W Water supply pressure (Maximum / Minimum) 0.8 MPa / 0.05 MPa Program Max. - Page 43 Remove the cardboard top. Put one of the polystyrene packaging elements on the floor behind the Remove the polystyrene packaging appliance. Carefully put down the materials. appliance with the rear side on it. Remove the plastic bag which cover Make sure not to damage the hoses. the machine.
-
Page 44: Positioning
Remove the three transit bolts. 11. Pull out the plastic spacers. 11.2 Positioning It is important that your washing machine stands firm and leveled on the floor to ensure correct operation. The appliance must not be installed behind a lockable... -
Page 45: Water Inlet
11.3 Water Inlet Loosen or tighten the feet to adjust the level. A correct adjustment of the Connect the water inlet hose to a tap appliance level prevents vibration, noise with 3/4” BSP thread. and the movement of the appliance when in operation. - Page 46 In a sink, drain pipe branch. Fitting Hose Guide This branch must be above the trap so that the bend is at least 60 cm above Pull apart to the ground. Hose bend insert hose. Guide hose Max. 90 cm pull hose Min.
-
Page 47: Electrical Connection
11.5 Electrical Connection Should the appliance power supply cable need to be This machine is designed to operate on a replaced, this shall be carried 220-240 V, single-phase, 50 Hz supply. out by our Service Centre. “An incorrect power supply may void When the appliance is installed, the your warranty.”... -
Page 48: Wi-Fi Connectivity Setup
Terms and Conditions Tap the home button to exit your and Electrolux’s Privacy Policy in the App to phone settings and then return to the use the connected features of the laundry Electrolux Life App. -
Page 49: Remote Start
Remote touch button. Press the Now you’re all set up. You can start icon is off and the remote start is exploring the Electrolux Life App. deactivated. To switch the wireless connection If the door is unlock, the Remote off, Press and hold Remote touch Start is deactivated. - Page 50 NOTE...
-
Page 51: Warranty
WARRANTY...