Quick Links
Installing the Network Gateway Unit (NGU)
Installing the Network Gateway Unit (NGU)
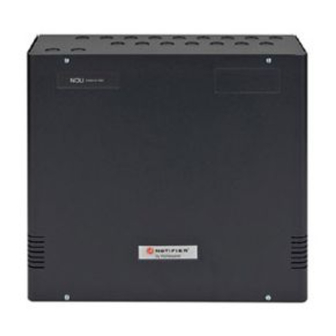
The Network Gateway Unit (PN: 002-467) consists of a Back Box (with cover) with the following fitted on a chassis: a PSU3A
The Network Gateway Unit (PN: 002-467) consists of a Back Box (with cover) with the following fitted on a chassis: a PSU3A
to Network Interface PCB and a Network Gateway Module (NGM) PCB. There is space for a PSU3A and two 12Ah batteries.
to Network Interface PCB and a Network Gateway Module (NGM) PCB. There is space for a PSU3A and two 12Ah batteries.
This basic configuration is used as an ID net Network Booster. The chassis allows a Fibre-optic PCB and RS232 PCB (for
This basic configuration is used as an ID net Network Booster. The chassis allows a Fibre-optic PCB and RS232 PCB (for
connection of a network repeater) to be fitted.
connection of a network repeater) to be fitted.
The PSU3A provides a 28V output and a battery charger. The PSU3A to Network Interface PCB provides battery and PSU
The PSU3A provides a 28V output and a battery charger. The PSU3A to Network Interface PCB provides battery and PSU
fault monitoring, controls the battery charger and converts 28V dc to 5V dc (for the Network PCB). Alternatively, the NGU can
fault monitoring, controls the battery charger and converts 28V dc to 5V dc (for the Network PCB). Alternatively, the NGU can
be powered by an external 28V supply connected at the PSU3A to Network Interface PCB.
be powered by an external 28V supply connected at the PSU3A to Network Interface PCB.
ATTENTION
ATTENTION
OBSERVE PRECAUTIONS FOR HANDLING
OBSERVE PRECAUTIONS FOR HANDLING
ELECTROSTATIC SENSITIVE DEVICES
ELECTROSTATIC SENSITIVE DEVICES
Your Network Gateway Unit, PN: 002-467 should contain:
Your Network Gateway Unit, PN: 002-467 should contain:
Back box, NGU, with electronics and cover.
Back box, NGU, with electronics and cover.
Anti-static Warning Instructions
Anti-static Warning Instructions
Accessory kit, NGU
Accessory kit, NGU
The Accessory kit should contain:
The Accessory kit should contain:
Battery interlink assembly
Battery interlink assembly
Screw M3 x 6mm button head (8 off)
Screw M3 x 6mm button head (8 off)
Hex key 2mm
Hex key 2mm
Fuse T 2A H 250V (2 off)
Fuse T 2A H 250V (2 off)
Fuse T 500mA 250V
Fuse T 500mA 250V
Ferrite (5 off)
Ferrite (5 off)
Cable tie (1 off)
Cable tie (1 off)
NGU EN54-compliant label
NGU EN54-compliant label
Cable Assembly (PSU3A dc power)
Cable Assembly (PSU3A dc power)
Cable Assembly (short: NGM/RS232)
Cable Assembly (short: NGM/RS232)
Cable Assembly (x-over: NGM/repeater) PN: 082-255
Cable Assembly (x-over: NGM/repeater) PN: 082-255
BACK
BACK
(OPTIONAL)
(OPTIONAL)
BOX
BOX
MAINS
MAINS
TERMINATION
TERMINATION
BLOCK
BLOCK
CHASSIS
CHASSIS
FIBRE-OPTIC
FIBRE-OPTIC
PCB
PCB
NETWORK
NETWORK
(OPTIONAL)
(OPTIONAL)
PCB (NGM)
PCB (NGM)
2
2
PN: 997-180
PN: 997-180
PN: 020-685
PN: 020-685
PN: 082-082-002
PN: 082-082-002
PN: 775-059
PN: 775-059
PN: 334-051
PN: 334-051
PN: 570-106
PN: 570-106
PN: 570-105
PN: 570-105
PN: 670-068
PN: 670-068
PN: 233-144
PN: 233-144
PN: 345-497 or
PN: 345-497 or
PN: 345-499
PN: 345-499
PN: 082-244
PN: 082-244
PN: 082-177-001
PN: 082-177-001
EARTH
EARTH
PSU3A
PSU3A
TERMINATION
TERMINATION
KIT (OPTIONAL)
KIT (OPTIONAL)
ISOLATED
ISOLATED
RS232 PCB
RS232 PCB
(OPTIONAL)
(OPTIONAL)
PSU3A TO
PSU3A TO
NETWORK
NETWORK
INTERFACE
INTERFACE
BATTERIES
BATTERIES
(NOT SUPPLIED)
(NOT SUPPLIED)
Check your equipment....
Check your equipment....
Take suitable anti-static precautions, such as wearing a grounded
Take suitable anti-static precautions, such as wearing a grounded
wrist strap, when following ALL instructions. Remove all packaging
wrist strap, when following ALL instructions. Remove all packaging
from the kit and ensure that it has not been damaged in transit (and
from the kit and ensure that it has not been damaged in transit (and
that no items are missing - see checklist on the left) before proceeding
that no items are missing - see checklist on the left) before proceeding
any further. If no damage is evident, proceed using the instructions
any further. If no damage is evident, proceed using the instructions
below. In the unlikely event that damage has occurred or items are
below. In the unlikely event that damage has occurred or items are
missing, DO NOT PROCEED, contact your supplier and refer to the
missing, DO NOT PROCEED, contact your supplier and refer to the
panel's
panel's Installation & Commissioning Manual.
Installation & Commissioning Manual
To install the Network Gateway Unit it is necessary to remove the
To install the Network Gateway Unit it is necessary to remove the
supplied electronics chassis (to prevent damage), fit the back box to
supplied electronics chassis (to prevent damage), fit the back box to
the wall, re-install the supplied electronics chassis, and fit any
the wall, re-install the supplied electronics chassis, and fit any
required options. Instructions are given on the following pages.
required options. Instructions are given on the following pages.
MAINS
L, N, E
TERMINAL
BLOCK
L, N
SAFETY
EARTH TO
BACK BOX
EARTH TO
PSU
EARTH TO
UNIT COVER,
& EARTH TO
CHASSIS
Note:
See Section 'PSU3A to Network
Interface PCB - if using PSU3A'
for 28V supplies to external
equipment.
PCB
PCB
1
by Honeywell
(OPTION)
PSU
PCB -
RIBBON
3A
PSU3A
28V DC
TO
NETWORK
INTERFACE
28V
28V DC
FROM
EXTERNAL
SOURCE
(OPTION)
BATTERIES
(OPTION)
CROSS-
OVER
RIBBON
(OPTION)
997-451, Issue 6 July 2006
.
2
ID NET
CH1
CH2
5V DC
PCB -
NETWORK
PSU
(NGM)
FAULT
RIBBON
PCB -
FIBRE-
OPTIC
(OPTION)
CH1
CH2
RX/TX
RX/TX
2
ID NET
PCB -
ISOLATED
RS232
(OPTION)
REPEATER
RS232

Related Manuals for Honeywell Notifier 002-467


Summary of Contents for Honeywell Notifier 002-467
- Page 1 Honeywell Installing the Network Gateway Unit (NGU) Installing the Network Gateway Unit (NGU) The Network Gateway Unit (PN: 002-467) consists of a Back Box (with cover) with the following fitted on a chassis: a PSU3A The Network Gateway Unit (PN: 002-467) consists of a Back Box (with cover) with the following fitted on a chassis: a PSU3A to Network Interface PCB and a Network Gateway Module (NGM) PCB.
- Page 2 Installing the Network Gateway Unit (Continued) FOR CLARITY, INTERNAL EQUIPMENT IS NOT FOR CLARITY, INTERNAL EQUIPMENT IS NOT Preparing the Back Box SHOWN. SHOWN. 1 Remove and retain the four screws that secure the front cover. Disconnect 1 Remove and retain the four screws that secure the front cover. Disconnect the cover earth lead from the blade on the cover.
- Page 3 Installing the Network Gateway Unit (Continued) Fitting a PSU3A (Kit PN: 020-648) - Optional Fitting a PSU3A (Kit PN: 020-648) - Optional TRANSIT CABLE CLIP: Before proceeding, CAREFULLY cut the cable TRANSIT CABLE CLIP: Before proceeding, CAREFULLY cut the cable clip that secures the ferrite cable loop to the chassis (at 'X' on drawing).
- Page 4 Installing the Network Gateway Unit (Continued) Wiring Connections - Batteries This procedure only applies if the PSU3A is fitted. This procedure only applies if the PSU3A is fitted. CAUTION - ENERGY HAZARD! NEVER short the battery CAUTION - ENERGY HAZARD! NEVER short the battery terminals.
- Page 5 Installing the Network Gateway Unit (Continued) Wiring Connections - Network PCB (NGM) Network cables - Conventional wire cables are terminated at connectors J1 Network cables - Conventional wire cables are terminated at connectors J1 (Channel 1) and J2 (Channel 2). Fibre-optic cable connections are made using (Channel 1) and J2 (Channel 2).
- Page 6 Installing the Network Gateway Unit (Continued) Wiring Connections - PSU3A to Network Interface SERIAL No. PCB - if using PSU3A PSU/CHGR FLT BATT SK1 is used with the PSU3A (ribbon connector). SK1 is used with the PSU3A (ribbon connector). PARK SK2 is used with the PSU3A (four-wire dc output connector).
- Page 7 Installing the Network Gateway Unit (Continued) Fitting Optional PCBs CAUTION - Isolate mains and battery power or external CAUTION - Isolate mains and battery power or external power before installing or removing the optional PCB. power before installing or removing the optional PCB. Fibre-Optic PCB (Kit PN: 020-643, PCB PN: 124-319) Fibre-Optic PCB (Kit PN: 020-643, PCB PN: 124-319) 1 Position the Fibre-Optic Board (A) as shown and secure it to the chassis...
- Page 8 Installing the Network Gateway Unit (Continued) Connecting an IDR-6A Network Repeater To achieve the transmission path integrity required by EN54-2: To achieve the transmission path integrity required by EN54-2: 12.5.3, the repeater and NGU must be physically connected as 12.5.3, the repeater and NGU must be physically connected as shown opposite to create a single enclosure.
-
Page 9: Low Voltage Shut Down
Installing the Network Gateway Unit (Continued) NGU Electrical Specifications NGU Electrical Specifications Input Rating when used with external PSU: Input Rating when used with external PSU: Input voltage: Input voltage: 22V - 28Vdc 22V - 28Vdc Maximum current consumption: 100mA Maximum current consumption: 100mA Input Rating when used with PSU3A: Input Rating when used with PSU3A:...