
Related Manuals for Hunter Stoves Di Lusso Series


Summary of Contents for Hunter Stoves Di Lusso Series
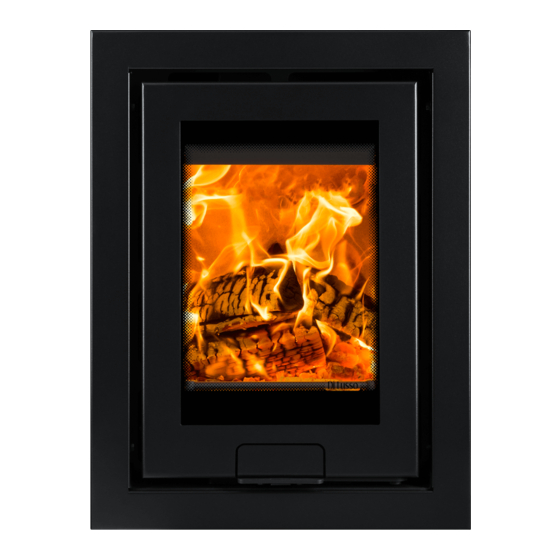
- Page 1 Eco R4 Inset Eco R5 Inset Eco R6 Inset Eco R6 Slimline Inset Wood Burning Inset Stove Instructions for: Installation/Operating/Maintenance/Servicing Instructions JINEDLUIN REV B 27/03/2019...
-
Page 2: Stove Models
STOVE MODELS ECO R4 INSET (FOUR-SIDED FRAME) ECO R4 INSET (THREE-SIDED FRAME) STOVE - EDDLR04 STOVE – EDDLR04 FRAME – DLR4FP4B50 (BLACK) FRAME – DLR4FP3B50 (BLACK) FRAME – DLR4FP4P50 (PEWTER) FRAME – DLR4FP3P50 (PEWTER) ECO R5 INSET (FOUR-SIDED FRAME) ECO R5 INSET (THREE-SIDED FRAME) STOVE –... -
Page 3: Table Of Contents
Welcome to the Hunter Stoves family and thank you for purchasing an Eco Di Lusso Inset stove. This stove was designed and built to be a high-performance heating appliance, and we hope it will bring you great enjoyment. The natural environment is important to us, so our stoves are manufactured to provide you with a clean and efficient burn that will keep you warm through cold winter nights. -
Page 4: Technical Specification
Technical Specification Eco R4 Eco R5 R6/R6 Slimline Energy Efficiency Class Nominal Heat Output Wood 4.9kW 6.3kW 6.2kW Energy Efficiency Efficiency Wood Mean CO (@13% O₂) Wood 0.09% 0.12% 0.09% Appliance Mass 70kg 121kg 116kg Recommended Fuels Wood Seasoned Wood (less than 20% moisture content) Maximum Log Length 250mm 350mm... -
Page 5: General Guidance
COMPLETED PRIOR TO USE. General Guidance It is important that your stove is correctly installed and operated as Hunter Stoves Group cannot accept responsibility for any fault arising through incorrect installation, use, maintenance or servicing. These instructions cover the basic principles to ensure satisfactory installation of the stove, although detail may need slight modification to suit local site conditions. -
Page 6: Safety
Handling Adequate facilities must be available for loading, unloading and site handling. Fire Cement Some types of fire cement are caustic and should not be allowed to come into contact with the skin. In case of contact, wash immediately with plenty of water. Asbetos This stove contains no asbestos. -
Page 7: Installation
IN THE EVENT OF A CHIMNEY FIRE - • Raise the alarm • Call the Fire Brigade • Close appliance air controls • Move furniture, ornaments etc. away • Place a fireguard in front of stove • Check the chimney breast for signs of excessive heat. If the wall is becoming excessively hot, move furniture away. - Page 8 ECO R5 Flue Outlet Position The flue outlet angle and position are determined by the orientation of the flue collar. The outlet can be either vertical or leant backwards by 30°. To change the angle, rotate the flue collar by 180°. The effective centre dimensions in millimetres are shown below.
-
Page 9: Flue Requirements
Flue Outlet Position The flue outlet angle and position are determined by the orientation of the flue collar. The outlet can be either vertical or leant backwards by 30°. To change the angle, rotate the flue collar by 180°. The effective centre dimensions in millimeters are shown below. -
Page 10: Di Lusso Eco R4 Installation
Terminal Position Clearances to Flue Outlet At or within 600mm of the At least 600m above the ridge ridge Elsewhere on a roof (whether At least 2300mm horizontally from pitched or flat) the nearest point on the weather surface and: At least 1000mm above the highest point of intersection of the chimney and the weather... - Page 11 The wall above the stove will become hot and should therefore be finished in a heat resistant plaster. IMPORTANT Do not hang pictures, electrical equipment or ornaments above the stove, as these could be damaged and could potentially create a fire hazard. Please check the suitability of any fireplace/surround for closed solid fuel appliances before installation.
- Page 12 Appliances installed on a surface more than 300mm above the hearth require a constructional hearth with a depth of 225mm in front of the stove. The base on which the appliance is mounted should be an extension of the constructional hearth – i.e. all material between the stove base and the constructional hearth must be solid- noncombustible material.
- Page 13 2. Remove the log retainer by lifting it clear of the two support pins. 3. Remove the baffle brick (Eco R4/Eco R5 by lifting it up, sliding it to the right and then lowering the left-hand edge into the firebox. For the Eco R6/R6 Slimline slide both baffle plates to the centre with left hand baffle on top of right-hand baffle and lift out of stove together.
-
Page 14: Di Lusso Eco R5 Installation
7. Remove the Air Valve Cassette by removing the socket screw holding it in place, turning both air controls to the fully open position (clockwise) and then gently pulling on the fascia to slide the cassette out from under the firebox. N.B. DO NOT Remove the Air Valve Cassette with the controls in the closed position as this will damage the valve gaskets. - Page 15 The wall above the stove will become hot and should therefore be finished in a heat resistant plaster. IMPORTANT Do not hang pictures, electrical equipment or ornaments above the stove, as these could be damaged and could potentially create a fire hazard. Hearth Requirements A constructional hearth with a minimum thickness of 125mm should be provided.
- Page 16 Clearances To Combustible Materials There should be no combustible materials for a distance of 450mm either side of the stove or 750mm above. No combustible furniture should be placed any closer than 1100mm from the front of the stove. Allow sufficient clearance between the stove and pictures, electrical equipment or ornaments etc., as these could be damaged and could potentially create a fire hazard.
-
Page 17: Di Lusso Eco R6 Installation
3. Remove the Air Valve Cassette by removing the two fixing screws holding it in place, turning both air controls fully clockwise and gently pulling on the fascia to slide the cassette out from under the firebox. N.B. DO NOT remove the Air Valve Cassette with the controls in the closed position as this will damage the valve gaskets. - Page 18 Any non-combustible walls within 50mm of this appliance should be at least 200mm thick and should extend at least 300mm above the top of the appliance and at least 1.2 metres above the hearth. Any walls more than 50mm from the appliance may be reduced to a thickness of 75mm. Ensure the inter-connecting flue pipe also has adequate clearances to combustible materials.
-
Page 19: Fitting The Stove - All
Appliances installed on a surface more than 560mm above the hearth require a constructional hearth with a depth of 225mm in front of the stove. The base on which the appliance is mounted should be an extension of the constructional hearth – i.e. all material between the stove base and the constructional hearth must be solid- noncombustible material. - Page 20 2. Remove the nuts, washers, secondary baffle plate and three M8 x 25mm studs located at either side of the flue outlet. 3. Remove the Air Valve Cassette by removing the two fixing screws holding it in place, turning both air controls fully clockwise and gently pulling on the fascia to slide the cassette out from under the firebox.
-
Page 21: Di Lusso Eco R4 Flue Connection
Fitting The Stove – ECO R4 and R5 IMPORTANT – Read this section carefully and ensure that any required access holes, register plates or flue connections are in place before carrying out the installation. If the installation is to be back filled with vermiculite concrete the convection chamber flange should be sealed to the fireplace using fire cement, heat proof silicone or similar. -
Page 22: Di Lusso Eco R5 Flue Connection
ECO R5 The flue connection is made to the convection chamber and not to the firebox. The connection between the flue and firebox is completed when the firebox is re-fitted to the convection chamber. Dependent on the type of installation, the flue collar may need to be connected to the convection chamber before or after installation of the flue/liner. -
Page 23: Di Lusso Eco R6/R6 Slimline Flue Connection
If connecting to an existing masonry chimney it is recommended that a flue forming pipe (short length of flue pipe) is used and the void between the flue forming pipe and the chimney is filled with vermiculite concrete. A suitable access hole will need to be made in the chimney breast to allow the back filling to be carried out and then filled and sealed once the installation is complete. - Page 24 If connecting to a stainless-steel liner, the flue liner and single skin adaptor can be lowered down the chimney and the spigot end of the adaptor lowered into the firebox. The flue collar can then be connected to the adaptor. The completed flue collar assembly can then be pushed up to the top plate of the stove and secured in position using the four M8 nuts and washers.
- Page 25 • The clearances to combustible material shown on page 12 must be met (N.B the side distance is for material proud of the front face of the wall). • The enclosure should be stood wholly above a non-combustible hearth with a minimum thickness of 12mm. The hearth should extend at least 225mm in front of the stove and 150mm either side.
-
Page 26: Di Lusso Eco R5/R6/R6 Slimline Enclosure Installation
ECO R5 Enclosure Details (all dimensions in millimetres) Internal heat shield All panels including heat shield to be produced from 30mm Skamol Super Isol Board Internal heat shield N.B. Ventilation openings are identical on both sides of the enclosure... - Page 27 ECO R6/R6 Slimline Enclosure Details (all dimensions in millimetres) Internal heat shield All panels including heat shield to be produced from 30mm Skamol Super Isol Board Internal heat shield N.B. Ventilation openings are identical on both sides of the enclosure.
-
Page 28: Re-Assembling The Stove
Re-Assembling The Stove ECO R4 1. Refit the base fixing access plate and gasket, Air Valve Cassette (with the air controls set to maximum), firebricks, brick baffle and log retainer. 2. Wind the M6 Nuts to the ends of the studs on the convection chamber sides. 3. - Page 29 ECO R5 1. Smear some fire cement around the flue outlet on the outside of the firebox. Fire cement 2. Offer the firebox into position and push it as far back as possible. 3. Refit the fixing screws through the firebox legs. Tighten the screws equally to draw the firebox into position. Do not over-tighten! 4.
- Page 30 4. Lift the two baffles up together inside the firebox to the right-hand side of the baffle support bracket, slide the baffles to the left and rest them on the support bracket at the front of the stove and Tertiary Air Bar. Tertiary Air Bar Support Bracket 5.
-
Page 31: Operating Instructions
4. Offer the door fascia into position, passing the three M6 studs through the holes. Ensure that the fascia is resting on the two clips at the top of the door and fix in position using the nuts and washers provided. Fascia resting on clips Close the door and check that there is an even gap between the frame and door fascia on the left and right-hand... - Page 32 Refuelling on to a low fire bed If there is insufficient burning material in the firebed to light a new fuel charge, excessive smoke emission can occur. Refuelling must be carried out onto a sufficient quantity of glowing embers and ash that the new fuel charge will ignite in a reasonable period.
- Page 33 Secondary Air Control Primary Air Control Primary Air control Regulates air flow directly into the firebed. This is used when lighting from cold or when reviving a fire that has nearly burnt out. Turn clockwise to open and anti- clockwise to close. The Primary Air Control must be closed once the fire is established.
-
Page 34: Maintenance
Recommended Setting Once the fire is established, the Primary Air Control should be fully closed, and the Secondary Air Control turned to a setting of approximately- R4 – 50 -60% open R5 – 30-40% open R6/R6 Slimline – Primary 20% and Secondary 60-70% open This setting should allow the nominal output and efficiency to be achieved. - Page 35 The stove is finished with a heat resistant paint and this can be cleaned with a dry microfiber cloth or a dry soft brush only. Do not clean whilst the stove is hot. At no point should any water based or other cleaning products be used on the stove. The finish can be renovated with Hunter Stoves paint. Door Catch Over time, the rope seal in the door will become compressed.
-
Page 36: Troubleshooting
TROUBLESHOOTING ISSUE CAUSE RESOLUTION Problem starting the fire and Low flue draught Speak to your installer keeping it burning Wood with moisture content over 20% Ensure use of dry seasoned wood with less than 20% moisture content Unable to control fire High flue draught Speak to your installer Short burn time... - Page 37 ISSUE CAUSE RESOLUTION Creosote build-up in chimney Wood with moisture content over 20% Use dry seasoned wood (less than 20% moisture content). Operate at a high temperature for short periods each time the appliance is used to avoid large build-ups of tars and creosotes. Tar coming from flue joints Appliance operated at continuous low Operate at a high temperature for...
-
Page 38: Spares
SPARES R4 B PARES R5 B PARES... -
Page 39: Spares
R6 B PARE R6 S LIMLINE PARE... - Page 40 PARES R4 – C : HMR04ARRT027 OMPLETE R5 – C : HMR05ARRT005 OMPLETE Complete Rope Seal Kit – SCPDL5RSK Stove Spares ALVE ASSETTE PARES...
- Page 41 R6/R6 S – C : HMR06ARRT005 LIMLINE OMPLETE Complete Rope Seal Kit – SCPDL6RSK Door Handle Fascia Air Valve Cassette Spares R4 – COMPLETE AIR VALVE CASSETTE : HMR04ARRT004...
- Page 42 R5/R6 SLIMLINE – COMPLETE AIR VALVE CASSETTE : DER05ARRT009 Air Valve Cassette Spares R6 – COMPLETE AIR VALVE CASSETTE : DER06ARRT008...
-
Page 45: Full Warranty Information
This is needed in the event of a claim during the warranty period. Only genuine Hunter Stoves spare parts or consumables can be used in the servicing and maintenance of the appliance during any standard or extended warranty period. These can be sourced from your authorised supplier directly or through our website spares portal. - Page 46 Cost associated with the removal and re-installation of an appliance subject to a warranty claim. Hunter Stoves Group total liability will only extend to the total purchase price paid for the goods in any warranty claim. Hunter Stoves Group reserve the right to replace, repair or refund to value of goods purchased.