Table of Contents
Quick Links
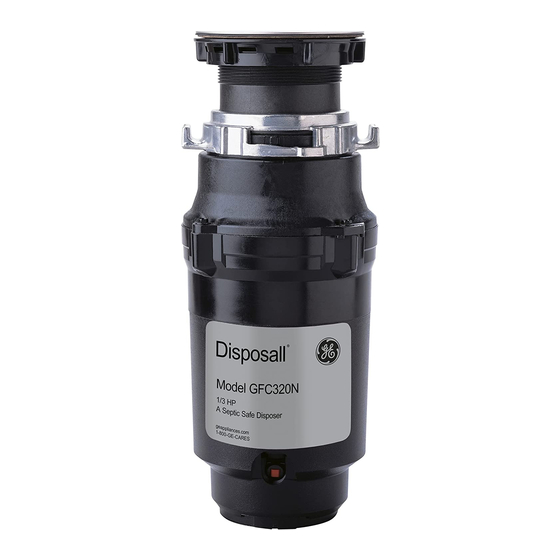
FOOD WASTE DISPOSER
INSTALLATION/USE & CARE
INSTRUCTIONS
IMPORTANT:
• READ THESE INSTRUCTIONS COMPLETELY
BEFORE BEGINNING
• OBSERVE ALL GOVERNING CODES AND
ORDINANCES
• THIS APPLIANCE MUST BE PROPERLY
GROUNDED
• SAVE INSTRUCTIONS FOR FUTURE REFERENCE
• QUESTIONS...CALL GE ANSWER CENTER
800.826.2000
TOOLS AND MATERIALS YOU WILL NEED:
• Blade screwdriver
• Hack saw
• 1/4" Nut driver
• Hammer
• Adjustable pipe
• Plumber's putty
wrench
(approx. 4 ounces)
• Channel lock pliers,
• Cable connector
slip joint
• Wire nuts (2)
FEATURES
Model
Horse Electrical Power Sound Dim
Power (VOL/Hz)
Cord
GFC290Y
1/3
120,60Hz
NO
GFC295Y
1/3
120,60Hz
YES
GFC300Y
1/2
120,60Hz
NO
GFC305Y
1/2
120,60Hz
YES
GFC700Y
1/2
120,60Hz
NO
GFC705Y
1/2
120,60Hz
YES
GFC800Y
1/2
120,60Hz
NO
GFC1000Y
3/4
120,60Hz
NO
ADDITIONAL MATERIALS YOU MAY NEED
Clamp nut kit for wide sink installations WC1X286
(See Step 4).
Dishwasher Drain Connector (See Step 9).
Drain adapter kit (flexible) WC14X29 (See Step 8).
STEP 1
PREPARATION
1 Remove old disposer or sink flange assembly.
2 Inspect drain line. If it is heavily coated with
hardened grease and accumulations, rout out
with a plumber's snake.
3 Remove old sealing materials and gasketing from
sink opening. Both top and bottom.
NOTE: Top and bottom of sink surfaces must be
free of any materials to prevent leaks.
Disposall
DIMENSIONS
DIMENSIONES
1
3
/
"
4
5 "
14 5 /8 "
Dim.
A
®
SOME TYPICAL INSTALLATIONS
ALGUNAS INSTALACIONES TIPICAS
Double Bowl Center Outlet
Boca de Salida Central de Doble Cubeta
Shield
A
NONE
6.4
Double Bowl End Outlet
Boca de Lalida Extrema de Doble Cubeta
NONE
6.4
NONE
6.4
NONE
6.4
SHORT 8.1
SHORT 8.1
FULL
8.1
FULL
8.1
Single Bowl
Cubeta Simple
NOTE A: It is essential
for the proper
operation of the
disposer that this
dimension be 8 1/2"
or greater, to avoid
standing water in
disposer motor
housing.
DESECHADOR DE SOBRAS DE COMIDA
INSTRUCCIONES DE INSTALACION/USO Y
Wall
Pared
IMPORTANTE:
10 " See
1
8
/
"
note A
4
• LEA COMPLETAMENTE ESTAS INSTRUCCIONES ANTES
10 " Vea
DE COMENZAR
nota A
• RESPETE TODOS LOS CODIGOS Y ORDENANZAS QUE
RIGEN LA MATERIA
• ESTE ELECTRODOMESTICO DEBE CONECTARSE
APROPIADAMENTE A TIERRA
• CONSERVE ESTAS INSTRUCCIONES PARA REFERENCIA
EN EL FUTURO
• ¿ALGUNA PREGUNTA? ... LLAME AL ANSWER CENTER
(CENTRO DE RESPUESTA) DE GE: 800-826-2000
LAS HERRAMIENTAS Y MATERIALES QUE NECESITARA SON:
• Destornillador de paleta
• Llave para tuercas de 1/4"
Approx. 10 "
• Llave ajustable de
See note A
mordazas para tuberías
Approx. 10 "
Vea nota A
• Tenazas de acanaladura
fijadora, de unión partida
CARACTERISTICAS
Modelo
GFC290Y
GFC295Y
GFC300Y
GFC305Y
Approx. 10 "
GFC700Y
See note A
Approx. 10 "
GFC705Y
Vea nota A
GFC800Y
GFC1000Y
MATERIALES ADICIONALES QUE USTED PUEDE
NECESITAR
Juego de tuercas de fijación para instalaciones de
fregadero ancho WCIX286 (Vea el Paso 4).
Conector de Desagüe de Lavaplatos (Vea el Paso 9).
Approx. 10 "
Juego adaptador de desagüe (flexible) WC14X29 (Vea el
See note A
Approx. 10 "
Paso 8).
Vea nota A
1 Saque el viejo desechador o el conjunto de reborde de
fregadero.
2 Inspeccione la tubería de desagüe. Si está densamente
cubierta con grasa y acumulaciones endurecidas, hágalas
NOTA A: Para que el
desechador funcione
salir con un serpentín de plomero.
correctamente es
3 Saque los materiales viejos de juntas y empaquetaduras
esencial que esta
herméticas de la abertura del fregadero. Tanto por arriba
dimensión sea 8-1/2"
como por abajo.
o más para evitar que
NOTA: Las superficies superiores e inferiores del fregadero
el agua se estanque
deben estar libres de cualquier material para prevenir fugas.
en la caja del motor
del desechador.
®
CUIDADO
• Sierra cortametales
• Martillo
• Masilla de plomero
(aproximadamente 4 onzas)
• Conector de cable
• Tuercas para alambres (2)
Caballaje Eléctricas
Cordón
Blindaje
(Voltios/Hz) Eléctrico
Acústico
1/3
120,60Hz
NO
NINGUNO
1/3
120,60Hz
Si
NINGUNO
1/2
120,60Hz
NO
NINGUNO
1/2
120,60Hz
Si
NINGUNO
1/2
120,60Hz
NO
CORTO
1/2
120,60Hz
Si
CORTO
1/2
120,60Hz
NO
COMPLETO
3/4
120,60Hz
NO
COMPLETO
PASO 1
PREPARATION
®
Dim
A
6.4
6.4
6.4
6.4
8.1
8.1
8.1
8.1
Table of Contents

Related Manuals for GE Disposall GFC290Y


Summary of Contents for GE Disposall GFC290Y
- Page 1 SOME TYPICAL INSTALLATIONS ® • ¿ALGUNA PREGUNTA? ... LLAME AL ANSWER CENTER 800.826.2000 ALGUNAS INSTALACIONES TIPICAS (CENTRO DE RESPUESTA) DE GE: 800-826-2000 TOOLS AND MATERIALS YOU WILL NEED: Double Bowl Center Outlet LAS HERRAMIENTAS Y MATERIALES QUE NECESITARA SON: • Blade screwdriver •...
- Page 2 STEP 2 PASO 2 Sink flange Reborde del fregadero SINK FLANGE DISASSEMBLY DESMONTAJE DEL REBORDE DE FREGADERO Fiber washer Support ring 1 Loosen the screw on the support ring and lift 1 Afloje el tornillo en el aro de soporte y levante el conjunto de Arandela de fibra Aro de soporte mounting assembly off the unit.
-
Page 3: Electrical Connections
STEP 6 PASO 6 CONEXIONES ELECTRICAS ELECTRICAL CONNECTIONS DANGER PELIGRO —Improper connection of the equipment-grounding conductor —La conexión incorrecta del conductor de puesta a tierra puede ocasionar can result in a risk of electric shock. Check with a qualified electrician if you riesgos de descarga eléctrica. -
Page 4: Final Assembly
Step 7. ¿ALGUNA PREGUNTA? LLAME AL 800-626-2000 DEL ANSWER ® QUESTIONS ???? CENTER (CENTRO DE RESPUESTA) DE GE ® CALL GE ANSWER CENTER 800.626.2000 2 Complete la conexión de la manguera de desagüe del lavaplatos al puerto de desagüe del lavaplatos en el desechador. Asegúrese de 2 Complete connection of dishwasher drain que todas las abrazaderas estén bien apretadas. -
Page 5: Important Safety Instructions
USE AND CARE OF DISPOSER USO Y CUIDADO DEL DESECHADOR INSTRUCTIONS PERTAINING TO A RISK OF FIRE, ELECTRIC SHOCK OR INSTRUCCIONES RELACIONADAS CON LOS RIESGOS DE INJURY TO PERSONS. INCENDIO/DESCARGAS ELECTRICAS O LESIONES PERSONALES IMPORTANT SAFETY INSTRUCTIONS INSTRUCCIONES IMPORTANTES DE SEGURIDAD WARNING—When using electrical appliances, basic precautions should be ADVERTENCIA—Al usar electrodomésticos, se deben tomar las siguientes followed:... -
Page 6: Care And Cleaning
CARE & CLEANING CUIDADO Y LIMPIEZA • Your disposer is self-cleaning when a rapid flow of • Su desechador se limpia automáticamente cuando se usa un flujo rápido de agua fría y si opera durante bastante cold water is used, and unit is run long enough. tiempo. - Page 7 Páginas Amarillas de su directorio telefónico esta garantía, escriba a: Manager— pieza por cuenta del propietario. Para mayor GENERAL ELECTRIC COMPANY, GENERAL Consumer Affairs, GE Appliances, información, haga una llamada gratuita al ELECTRIC-HOTPOINT FACTORY SERVICE Louisville, KY 40225 ®...
-
Page 8: Warranty
Warrantor: General Electric Company COMPANY, GENERAL ELECTRIC-HOTPOINT If further help is needed concerning FACTORY SERVICE or GENERAL ELECTRIC ® this warranty, write: Manager— CUSTOMER CARE SERVICE. Consumer Affairs, GE Appliances, Louisville, KY 40225 D-946-0851-003 Part No. 165D4700P148-1 Pub No. 49-5812-1 7-97 CG...