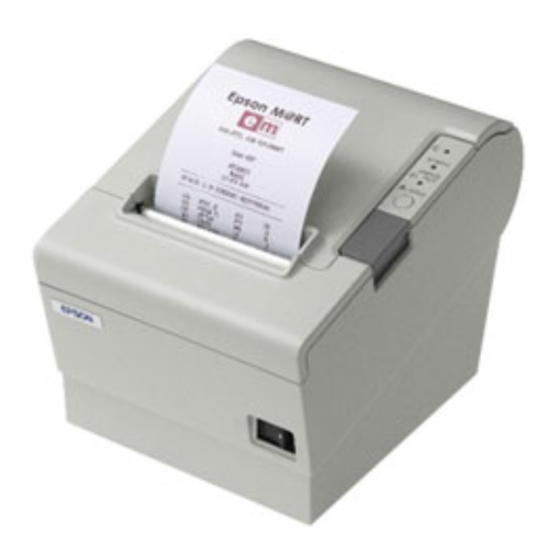
Epson TM-U200 Series Manual
How to connect an epson pos printer with an ethernet adapter
Hide thumbs
Also See for TM-U200 Series:
- Technical manual (187 pages) ,
- User manual (69 pages) ,
- Operator's manual (55 pages)
Table of Contents
Quick Links
How to connect an Epson POS printer with Ethernet Interface
Home
Sale Specials
How to connect an Epson POS Printer with an Ethernet Adapter
Printers
TM-
U220
Overview
TM-
Installing Adapter
U200
Checking Adapter Settings
Configuring Adapter
TM-
Installing Driver
U295
Troubleshooting
TM-
U375
TM-
T88III
Overview
TM-
An Ethernet connection uses the existing network to connect the computer to the POS printer. The printer plugs into
U88IV
the LAN and, once configured, the computer can use the printer like it was attached directly.
TM-
T88V
Required Components
TM-
Epson POS Printer with Connect-It Ethernet adapter
U675
TM-
Local Area Network (LAN) running TCP/IP
U590
Windows computer with LAN connection
TM-
H6000
Power
Supplies
Interface
Cards
Cables
Ribbons
Paper
Step by Step Installation
The installation step vary slighting depending on the type of Ethernet card you have.
Over the past few years Epson has offered 3 types of Ethernet cards, Type II, II and IV.
Each has a different set of features and a different way of setting them up.
Type II
http://www.beaglehardware.com/howtoethernet.html[3/4/2011 12:27:20 PM]
Printers
Accessories
Service
Support
About Us
Epson Printers Covered
TM-T88III
TM-T88IV
TM-T88V
TM-U220
TM-U230
TM-U590
TM-U675
TM-H6000III
Contact
Catalog
Table of Contents

Related Manuals for Epson TM-U200 Series


Summary of Contents for Epson TM-U200 Series
- Page 1 The installation step vary slighting depending on the type of Ethernet card you have. Over the past few years Epson has offered 3 types of Ethernet cards, Type II, II and IV. Each has a different set of features and a different way of setting them up.
- Page 2 The Type IV adapter can replace the existing adapter and is held in place by 2 screws. If changing a printer to Ethernet you must change the specific dip switch on the Epson printer to allow for the Ethernet card.
- Page 3 How to connect an Epson POS printer with Ethernet Interface (Key: DIP SW2-8 On: refers to slide switch number 8, on switch bank 2, is turned On) Cabling Use a regular LAN patch cord to connect the printer to the LAN.
-
Page 4: Resetting The Adapter
How to connect an Epson POS printer with Ethernet Interface A strip will print showing the MAC address, Gateway (GW), IP address and IP assignment method (manual/auto). Changing the IP Address of the Adapter Now comes the tricky part. To be able to change the IP address on the adapter you need to be able to connect with it. To do this you most likely need to change the IP address of your computer to a value that makes the adapter accessible. - Page 5 Setting the IP Address using TMNet WinConfig (Type IV) To use the UB-E02 with TCP/IP, you first need to set its IP address. You can set the IP address by using the EPSON TMNet WinConfig or arp/ping command. Running the TMNet WinNet configuration utility on the Computer Once connected you can run the TMNet configuration utility to view or change the settings on the Ethernet card.
- Page 6 Configuration of Ethernet Type II Module The earlier type of Epson Connect-It Interface used a manual configuration scheme and a simple web interface. The Type II module can be identified by the red or blue 8 position DIP switch visible on the front of the adapter An Epson Type II Ethernet Interface Adapter http://www.beaglehardware.com/howtoethernet.html[3/4/2011 12:27:20 PM]...
- Page 7 How to connect an Epson POS printer with Ethernet Interface Printer Sale! TM-U220 $129 TM-U295 $184 TM-U375 $199 U675 (Key: 2-7 On: refers to the switch number 7 is turned On) $199 Confirm the initial settings of the Printer H6000III $349 Run the printer self test (hold down the feed button while turning on the printer).
-
Page 8: Installation Steps
Installation Steps $199 (Type II or Type III) 1. Disconnect power and other cables from the EPSON printer, and remove the printer DIP switch cover plate. H6000III 2. Remove the existing interface board from the printer by unscrewing 2 screws. - Page 9 These numbers are important when configuring the adapter- It is advisable to make a note of these values in a secure place. The Internet or IP address can be set using the web interface or Epson EEI utility. It can be dynamically reassigned via DHCP, BOOTP, or ARP/Ping.
-
Page 10: Installing The Printer Driver In Windows
Epson Flash Utility The Epson Flash Utility is normally installed with the Epson printer drives. It is used to upload bitmaps to Epson printers, but has a simple communication test which will check for basic connectivity between the computer and the printer. - Page 11 How to connect an Epson POS printer with Ethernet Interface This will open up the Add Standard TCP/IP Printer Port Wizard. Enter the IP address of the Ethernet adapter (192.168.2.29 shown here). The utility will then locate the printer on the Ethernet network and create the port.
-
Page 12: Testing The Printer
How to connect an Epson POS printer with Ethernet Interface Accessing the Printer Driver in Windows After installing the printer drivers, the printer should be visible in the printers folder of the Windows Control Panel. Right clicking on the icon should let you open the printer properties. -
Page 13: Printing Is Slow
Ethernet adapter units as the factory setting. Do not use more than one printer with the Ethernet adapter on the same network without changing the IP address. The Epson printer driver has not been installed for the Ethernet adapter and printer in use. No longer prints The TM printer is turned off.