
Related Manuals for Miele H2265BP


Summary of Contents for Miele H2265BP
- Page 1 Operating and installation instructions Oven To avoid the risk of accidents or damage to the appliance it is essential to read these instructions before it is installed and used for the first time. en-GB M.-Nr. 10 634 330...
-
Page 2: Table Of Contents
Contents Warning and Safety instructions................ 5 Caring for the environment ................ 15 Oven overview ..................... 16 Oven controls....................... 17 Function selector ....................18 Temperature selector .................... 18 Temperature indicator light ................ 18 Clock/timer ......................19 Display...................... 19 Sensor controls .................... 19 Features........................ - Page 3 Contents Clock/timer ...................... 38 Display........................38 Symbols on the display .................. 38 Sensors ......................... 38 Setting the time ..................... 39 Time display ..................... 39 At the end of the duration................. 39 Using the minute minder ................... 40 To set the minute minder.................. 40 To change the minute minder duration.............
- Page 4 Contents Further applications .................... 72 Defrost........................72 Gentle bake ......................73 Frozen food/Ready meals..................74 Drying food......................75 Heat crockery ......................76 Cleaning and care .................... 77 Unsuitable cleaning agents ................... 77 Tips........................78 Normal soiling......................78 Stubborn soiling (excluding the FlexiClip runners) ..........79 Stubborn soiling on the FlexiClip runners .............
-
Page 5: Warning And Safety Instructions
They contain important notes on installation, safety, use and maintenance. Miele cannot be held liable for damage or injury caused by non- compliance with these instructions. Keep these instructions in a safe place and ensure that new users... - Page 6 Warning and Safety instructions Correct application This oven is intended for use in domestic households and similar working and residential environments. The oven is not intended for outdoor use. This oven is intended for domestic use only to cook food, and in particular to bake, roast, grill, cook, defrost and dry food.
- Page 7 Warning and Safety instructions Safety with children Children under 8 years of age must be kept away from the appli- ance unless they are constantly supervised. Children 8 years and older may only use the oven unsupervised if they have been shown how to use it safely and recognise and under- stand the consequences of incorrect operation.
- Page 8 Unauthorised installation, maintenance and repairs can cause considerable danger for the user. Installation, maintenance and re- pairs must only be carried out by a Miele authorised technician. Never use a damaged oven. It could be dangerous. Check it for visible signs of damage before using it.
- Page 9 Warning and Safety instructions Miele can only guarantee the safety of the appliance when genu- ine original Miele replacement parts are used. Faulty components must only be replaced by Miele spare parts. If the connection cable is damaged or if the oven is supplied without a cable, it must be replaced or fitted with a special connec- tion cable by a Miele authorised technician (see "Electrical connec-...
- Page 10 Warning and Safety instructions Correct use Danger of burning. The oven becomes hot when in use. You could burn yourself on the heating elements, oven interior, cooked food or oven accessories. Wear oven gloves when placing food in the oven, turning or re- moving it and when adjusting oven shelves etc.
- Page 11 Warning and Safety instructions When using residual heat to keep food in the oven warm, the high moisture content and amount of condensation in the oven can cause corrosion damage. The control panel, the worktop or the housing unit can also suffer damage. When using residual heat do not switch the oven off.
- Page 12 Warning and Safety instructions Plastic containers which are not suitable for use in an oven can melt at high temperatures and can even damage the oven or catch fire. Only use plastic containers which are declared by the manufacturer as being suitable for use in an oven.
- Page 13 Warning and Safety instructions Stainless steel appliances Adhesives will damage the stainless steel surface and cause it to lose its dirt-repellent protective coating. Do not use sticky notes, transparent adhesive tape, masking tape or other types of adhesive on the stainless steel surface. ...
- Page 14 Never place a Miele oven dish on the top rail of Shelf level 1 as it will not be held securely in this position by the anti-tip notches on the runners.
-
Page 15: Caring For The Environment
/ recycling centre for electrical and electronic ap- pliances, or contact your dealer or Miele for advice. You are also respons- ible (by law, depending on country) for deleting any personal data that may be stored on the appliance being disposed of. -
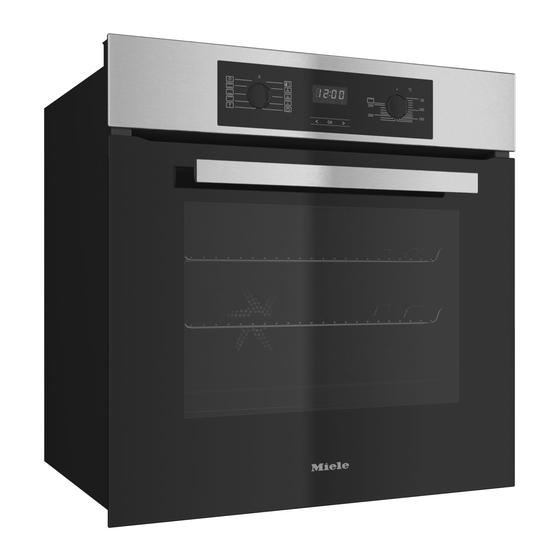
Page 16: Oven Overview
Oven overview a Oven controls b Door lock - Pyrolytic cleaning c Top heat/grill element d Air inlet for the fan with ring heating element behind it e Side runners with 5 shelf levels f Oven floor with bottom heat element underneath it g Front frame with data plate h Door... -
Page 17: Oven Controls
Oven controls a Function selector For selecting oven functions b Clock/timer For displaying the time of day and settings c Temperature selector For setting the temperature d Button For modifying times and settings e OK button For selecting functions and confirming settings f Button ... -
Page 18: Function Selector
Oven controls Function selector Temperature selector Use the function selector to select the Use the temperature selector to select required function and switch on the the temperature for the cooking pro- oven lighting independently. cesses. It can be turned clockwise or anti- It can be turned clockwise until a resist- clockwise. -
Page 19: Clock/Timer
Oven controls Clock/timer The clock/timer is operated via the dis- play and the , OK and sensor con- trols. Display The display shows the time of day or your settings. It goes dark if settings are not being entered. Please refer to "Clock/timer" for more information. -
Page 20: Features
Miele ovens. Please have this information to hand, These are available to order via the should you need to contact Miele re- Miele Webshop, the Miele Spare Parts garding any questions or problems. Department (see end of this booklet for... -
Page 21: Side Runners
Features Side runners Baking tray, universal tray and rack with non-tip notches Side runners for trays, racks and Miele oven dishes are fitted on either side of Baking tray HBB 71: the oven cavity for shelf levels . The numbers for the shelf levels are marked on the front frame. -
Page 22: Flexiclip Telescopic Runners Hfc 70-C
Features FlexiClip telescopic runners HFC 70-C FlexiClip telescopic runners can only be fitted on levels 1, 2 and 3. To prevent the risk of accessories slid- The FlexiClip telescopic runners can be ing off the telescopic runners: drawn right out of the oven individually to give a good overview of cooking in –... - Page 23 Features If you are using the universal tray with a Because the FlexiClip telescopic run- rack on top of it: ners sit on the top rail of the side run- ners, the gap between the level the FlexiClip telescopic runners are on and the one above is smaller than if, for instance, racks were fitted on each level.
- Page 24 The FlexiClip telescopic runner with the Miele logo is fitted on the right. When fitting the FlexiClip telescopic runners, do not extend them. If the ...
- Page 25 Features Removing the FlexiClip telescopic runners Push the FlexiClip telescopic runner in all the way. Slide the FlexiClip telescopic runner at an angle along the top rail as far as it will go (3). Push down on the tab at the front of the FlexiClip telescopic runner (1.).
- Page 26 Features Round baking tray HBF 27-1 Baking stone HBS 60 The round baking tray is suitable for The baking stone is ideal for items cooking pizza, shallow cakes made with which need a well baked base such as yeast or whisked mixtures, sweet and pizza, quiche, bread, bread rolls and sa- savoury tarts, baked desserts, flat voury snacks.
- Page 27 Suitable lids are available separately. cloth. Please quote the model number when Miele oven cleaner ordering a lid. Miele oven cleaner is suitable for re- Depth: 22 cm Depth: 35 cm moving very stubborn soiling. It is not necessary to pre-heat the oven before- HUB 5000-M...
-
Page 28: Oven Controls
Features Cooling fan Oven controls The cooling fan will come on automatic- The oven controls are used to operate ally when a cooking programme is star- the various cooking functions for bak- ted. The cooling fan mixes hot air from ing, roasting and grilling. -
Page 29: Perfectclean Treated Surfaces
Features PerfectClean treated surfaces PerfectClean surfaces have very good non-stick properties and are much easier to keep clean than conventional enamel surfaces, if cleaned regularly. Food can be taken off these surfaces easily, and soiling from baking and roasting is simple to remove. Food can be sliced or cut up on PerfectClean surfaces. -
Page 30: Using For The First Time
Using for the first time Before using for the first time Setting the time of day for the first time The oven must not be operated The time of day is shown in 24 hour until it has been correctly installed in clock format. -
Page 31: Heating Up The Oven For The First Time
Using for the first time Clean the oven interior with a clean Heating up the oven for the sponge and a solution of hot water first time and washing-up liquid or a damp mi- New ovens can give off an unpleasant crofibre cloth. -
Page 32: Overview Of Functions
Overview of functions Your oven has a range of oven functions for preparing food. Function Description Conventional heat For baking and roasting traditional recipes, cooking soufflés and cooking at low temperatures. If using an older recipe or cookbook, set the oven tem- perature for Conventional heat 10 °C lower than that re- commended. - Page 33 Overview of functions Function Description Fan plus This function is used for baking and roasting on different levels at the same time. A lower temperature can be se- lected than when using Conventional heat , as the fan distributes the heat around the oven compartment straight away.
-
Page 34: Tips On Saving Energy
Tips on saving energy Wherever possible set the cooking Cooking duration, or use a food probe. Remove any accessories from the Fan plus can be used for cooking oven that you do not require for many types of food. Because the fan cooking. - Page 35 Tips on saving energy Using residual heat The temperature in cooking pro- grammes using temperatures above 140 °C which take longer than 30 minutes to cook can be turned down to the lowest possible temper- ature about 5 minutes before the end of cooking.
-
Page 36: Using The Oven
Using the oven Simple operation Cooling fan Place the food in the oven. The cooling fan will continue to run for a while after the oven has been switched Select the required oven function with off to prevent any humidity building up the function selector. -
Page 37: Pre-Heating The Oven
Using the oven Rapid heat-up Pre-heating the oven With Rapid heat-up the heating up It is only necessary to pre-heat the oven phase can be shortened. in a few instances. Most dishes can be placed in a cold Do not use Rapid heat-up to oven. -
Page 38: Clock/Timer
Clock/timer The clock/timer offers the following You can only set or change a function if functions: the function selector is in the correct position. – Time of day display Sensors – Minute minder – Switching cooking processes on and Senso off automatically ... -
Page 39: Setting The Time
Clock/timer Time display Setting the time The symbols and or will show The time of day is set in segments: if you have set times. – for the time of day and cooking dura- If you are using the minute minder , tions, first the hours, then the cooking duration ... -
Page 40: Using The Minute Minder
Clock/timer Using the minute minder The minute minder can be used to time other activities in the kitchen, e.g. boil- ing eggs. The minute minder can also be used at the same time as a cooking programme ... -
Page 41: To Change The Minute Minder Duration
Clock/timer At the end of the minute minder dura- To delete the minute minder duration tion: Press continuously until flashes. – flashes. Confirm with OK. – The display will show the time count- The minutes will flash. ing upwards. ... -
Page 42: Switching On And Off Automatically
Clock/timer Setting a cooking duration Switching on and off automat- ically Example: a cake needs to bake for 1 hour and 5 minutes. Cooking programmes can be switched off, or on and off automatically. Place the food in the oven. To do this, set a duration or a duration ... -
Page 43: At The End Of The Cooking Duration
Clock/timer At the end of the cooking duration: – will appear. – will flash. – The oven heating will switch off auto- matically. Use or to set the hours. – The cooling fan continues to run. ... -
Page 44: Setting A Cooking Duration And End Of Cooking Duration
Clock/timer Setting a cooking duration and end of cooking duration To switch a cooking process on and off automatically you can set a cooking duration and an end of cooking dura- tion. The symbol indicates the cooking Example: the current time of day is duration. -
Page 45: Changing The Cooking Duration
Clock/timer The hours are saved and the minutes Changing the cooking duration will flash. Press continuously until flashes. The time remaining will appear in the display. Confirm with OK. The hours will flash. Use or to set the hours. ... -
Page 46: Deleting A Cooking Duration
Clock/timer Deleting a cooking duration Deleting the end of cooking duration Press or continuously until Press or continuously until flashes. flashes. Confirm with OK. Confirm with OK. The hours will flash. The hours will flash. ... -
Page 47: Changing The Time Of Day
Clock/timer Changing the time of day The time of day can only be changed when the function selector is at 0. Turn the function selector to 0. Press continuously until flashes. Confirm with OK. The hours will flash. ... -
Page 48: Changing Settings
Clock/timer To change the status: Changing settings Press or continuously until the Default settings are set in the oven con- status you want is shown. trols at the factory (see "Settings over- view"). Confirm with OK. You change a setting ... - Page 49 Clock/timer Settings overview Setting Status The buzzer is switched off. Buzzer to The buzzer is switched on. volume * The volume can be altered. When you select a status you will hear the corresponding buzzer. ...
-
Page 50: Baking
Baking Baking paper, greasing the tin Eating food which has been cooked correctly is important for good Miele accessories, e.g. the universal health. tray are treated with PerfectClean Only bake cakes, pizza, chips etc. enamel (see "Features"). until they are golden. Do not over- Surfaces treated with PerfectClean cook them. -
Page 51: Notes On Using The Baking Charts
Baking Shelf level Notes on using the baking charts The shelf level on which you place your food for baking depends on the oven The data for the recommended function function and number of trays being is printed in bold. used. -
Page 52: Baking Charts
Baking Baking charts Creamed mixture Cakes / biscuits [°C] [min] Muffins (1 tray) 140–150 35–45 150–160 30–40 Muffins (2 trays) 140–150 2+4 35–45 Small cakes (1 tray) * 30–40 20–30 Small cakes (2 trays) * 23–33 Small cakes/biscuits (1 tray) ... - Page 53 Baking Creamed mixture Cakes / biscuits [°C] [min] Foam cake (tray) 150–160 25–35 150–160 30–40 Marble, nut cake (tin) 150–160 55–75 150–160 55–75 Fresh fruit cake, with meringue topping (tray) 150–160 40–50 ...
-
Page 54: Rubbed In Mixture
Baking Rubbed in mixture Cakes / biscuits [°C] [min] Small cakes/biscuits (1 tray) 140–150 20–30 160–170 15–25 Small cakes/biscuits (2 trays) 140–150 1+3 20–30 Drop cookies (1 tray) * 35–45 20–30 Drop cookies (2 trays) * 35–45 Flan base ... - Page 55 Baking Rubbed in mixture Cakes / biscuits [°C] [min] Apple cake (Apple pie) (baking tin 20 cm) * 90–100 90–100 Apple pie 160–170 50–70 170–180 60–70 160–170 50–70 Fresh fruit tart, glazed (tin) ...
-
Page 56: Yeast Mixtures And Quark Dough
Baking Yeast mixtures and quark dough Cakes / biscuits [°C] [min] Gugelhupf 150–160 50–60 160–170 50–60 Stollen 150–160 45–65 160–170 45–60 Streusel cake 150–160 35–45 170–180 35–45 Fresh fruit cake (tray) ... - Page 57 Baking Yeast mixtures and quark dough Cakes / biscuits [°C] [min] White bread 180–190 35–45 190–200 30–40 Wholegrain bread 180–190 55–65 200–210 45–55 Pizza (tray) 170–180 30–45 2) 3) 190–200 30–45 2) 3) ...
-
Page 58: Whisked Mixture
Baking Whisked mixture Cakes / biscuits [°C] [min] Tart / flan base (2 eggs) 160–170 20–30 160–170 15–25 Sponge cake (4–6 eggs) 170–180 20–35 150–160 30–45 Whisked sponge * 20–30 150–170 30–45 Swiss roll ... -
Page 59: Choux Pastry, Puff Pastry, Meringue
Baking Choux pastry, puff pastry, meringue Cakes / biscuits [°C] [min] Choux buns (1 tray) 160–170 30–45 180–190 25–35 Choux buns (2 trays) 160–170 1+3 30–45 Puff pastry (1 tray) 170–180 20–30 190–200 20–30 ... -
Page 60: Roasting
You can use any heat-resistant dishes: – At the end of the programme, take the roast out of the oven, wrap in alu- Miele Gourmet oven dishes, roasting minium foil and leave to stand for pans, ovenproof glass dishes, roasting about 10 minutes. -
Page 61: Notes On Using The Roasting Charts
Roasting Pre-heating Notes on using the roasting charts Pre-heating is generally only required when roasting beef sirloin joints and fil- The data for the recommended function let. is printed in bold. Roasting duration Unless otherwise stated, the durations given are for an oven which has not The traditional British method for calcu- been pre-heated. -
Page 62: Roasting Charts
Roasting Roasting charts Beef, veal * [°C] [min] Topside of beef, approx. 1 kg 170–180 100–130 190–200 110–140 Fillet of beef approx. 1 kg 150–160 20–50 180–190 20–50 Sirloin joint, approx. 1 kg 150–160 30–60 ... -
Page 63: Pork
Roasting Pork * [°C] [min] Pork joint, approx.1 kg 170–180 100–120 190–200 90–110 Pork joint with crackling, approx. 2 kg 170–180 120–160 190–200 130–150 Gammon joint, approx. 1 kg 150–160 60–80 170–180 80–100 Meat loaf, approx. -
Page 64: Lamb, Game
Roasting Lamb, game * [°C] [min] Leg of lamb, approx. 1.5 kg 170–180 90–110 180–190 90–110 Saddle of lamb, approx. 1.5 kg 220–230 40–60 230–240 40–60 Venison, approx. 1 kg 200–210 80–100 200–210 80–100 Function / Temperature / Shelf level / Cooking duration Fan plus / Conventional heat... -
Page 65: Poultry, Fish
Roasting Poultry, fish * [°C] [min] Poultry, 0.8–1 kg 180–190 60–70 190–200 60–70 Poultry, approx. 2 kg 180–190 100–120 190–200 100–120 Poultry, stuffed, approx. 2 kg 180–190 110–130 190–200 110–130 Poultry, approx. 4 kg ... -
Page 66: Low Temperature Cooking
Low temperature cooking This method is ideal for cooking beef, Procedure pork, veal or lamb when a tender result Use the universal tray with the rack is required. placed on top of it. First sear the meat all over at a high Do not use the Rapid Heat-up ... - Page 67 Low temperature cooking After cooking Cooking duration / Core tem- peratures – Meat can be carved straight from the oven. It does not need to rest. Meat [min] [°C] – The cooking result will not be af- fected if the meat is left in the oven Fillet of beef 80–100 after the programme has finished.
-
Page 68: Grilling
Grilling Trays and racks Danger of burning. Grill with the oven door closed. If you grill with the door open, hot air will escape from the oven instead of be- ing cooled by the cooling fan. The controls will get hot. Functions Grill ... - Page 69 Grilling Preparing food for grilling Grilling Place the rack or the anti-splash in- Trim the meat. Do not season meat with salt before grilling as this draws the sert (if available) in the universal tray. juices out. Place the food on top. Add a little oil to lean meat if necessary.
-
Page 70: Notes On The Grilling Chart
Grilling Grilling duration Notes on the grilling chart – Thin pieces of fish and meat usually The data for the recommended function take 6–8 minutes per side. is printed in bold. Thicker pieces require more time for Check the food after the shortest dura- each side. -
Page 71: Grilling Chart
Grilling Grilling chart Pre-heat the grill for approx. 5 minutes with the door closed. Food to be grilled [°C] [min] [°C] [min] Thin cuts Burgers * 12–24 – – Kebabs 12–17 12–17 Chicken kebabs 12–17 12–17 ... -
Page 72: Further Applications
Further applications Defrosting durations Defrost The duration needed for defrosting de- Use Fan plus without setting the pends on the type and weight of the temperature for gently defrosting food. food. The fan will switch on and circulate air Frozen food ... -
Page 73: Gentle Bake
Further applications Examples of use: Gentle bake Gentle Bake is suitable for small Food amounts, e.g. frozen pizzas, bake-off [°C] [min] rolls, biscuits and for meat dishes and Biscuits 150 25–30 roasts. The optimal use of residual heat Ratatouille 180 40–60 enables savings of up to 30% energy to... -
Page 74: Frozen Food/Ready Meals
Further applications Method Frozen food/Ready meals Eating food which has been cooked Tips correctly is important for good Cakes, pizza, baguettes health. Only bake cakes, pizza, chips etc. – Large frozen items such as cakes, until they are golden. Do not over- pizzas or baguettes cover an extens- cook them. -
Page 75: Drying Food
Further applications Drying food Food [min] 120–480 Fruit Drying is a traditional method of pre- 180–480 Vegetables serving fruit, certain vegetables and herbs. Herbs 50–60 It is important that fruit and vegetables Function / Drying time are ripe and not bruised before they are Fan plus / Conventional heat dried. -
Page 76: Heat Crockery
Further applications Heat crockery Use Fan plus for pre-heating crock- ery. Only pre-heat heat-resistant dishes. Place the rack on shelf level 2 and place the crockery on it. Depending on the size of the crockery you can also use the oven floor and also take the side runners out to make more room. -
Page 77: Cleaning And Care
Cleaning and care Unsuitable cleaning agents Danger of burning. Make sure the oven heating ele- To avoid damaging the surfaces, do not ments are switched off and that the use: oven cavity is cool. – cleaning agents containing soda, am- monia, acids or chlorides ... -
Page 78: Tips
Cleaning and care Normal soiling The accessories are not dishwasher- proof. The fibre glass seal around the front of the oven should be handled care- Tips fully. Do not rub and scour it. If possible you should avoid trying to –... -
Page 79: Stubborn Soiling (Excluding The Flexiclip Runners)
Cleaning and care Stubborn soiling (excluding the Non-Miele oven cleaner must only be FlexiClip runners) used in a cold oven and for no longer than a maximum of 10 minutes. Spilt fruit and roasting juices may You can then also use the scouring cause lasting discolouration or matt patches on enamelled surfaces. -
Page 80: Stubborn Soiling On The Flexiclip Runners
Cleaning and care Stubborn soiling on the Flexi- Clip runners Never attempt to clean FlexiClip tele- scopic runners in a dishwasher. This would remove the special grease which is essential for their smooth functioning. For stubborn surface soiling or if the bearings become sticky with spilled fruit juices proceed as follows: ... -
Page 81: Pyrolytic Cleaning Of The Oven Interior
Cleaning and care Setting up for pyrolytic cleaning Pyrolytic cleaning of the oven interior Remove all accessories as well as the runners and any extra accessor- Instead of cleaning the oven manually ies such as FlexiClip runners from you can run the Pyrolytic cleaning pro- the oven interior before starting the gramme . -
Page 82: Starting Pyrolytic Cleaning
Cleaning and care will also appear in the display. Starting Pyrolytic cleaning Danger of burning. The oven door gets much hotter dur- ing pyrolytic operation than during normal use. Prevent children from touching the oven during pyrolytic cleaning. While ... -
Page 83: To Delay The Start Time Of The Pyrolytic Cleaning Programme
Cleaning and care To delay the start time of the pyro- At the end of pyrolytic cleaning lytic cleaning programme First , and appear. Start the pyrolytic cleaning programme As long as lights up, the door is as described and delay the end time locked. -
Page 84: If Pyrolytic Cleaning Is Cancelled
Cleaning and care Clean the oven cavity to remove any If pyrolytic cleaning is cancelled pyrolytic residues (e.g. ash) that can If pyrolytic cleaning is cancelled, the build up depending on the degree of oven door will remain locked until the soiling in the oven cavity. -
Page 85: Removing The Door
Cleaning and care Removing the door Do not attempt to take the door off the retainers when it is in the hori- The door weighs approx. 10 kg. zontal position as the retainers will spring back against the oven. Do not use the handle to pull the door off the retainers as the handle could break. -
Page 86: Dismantling The Door
Cleaning and care Dismantling the door Take particular care as scratches can damage the glass. When cleaning The oven door is an open system with the glass panes do not use abrasive 4 glass panes which have a heat-re- cleaning agents, hard sponges or flective coating on some of their sur- brushes and do not use sharp metal face. - Page 87 Cleaning and care You can now remove the inner panes Danger of injury. and the two middle panes one after the Always remove the door before dis- other. assembling it. Place the door on a protective sur- face (e.g. on a tea towel) with the out- side pane facing downwards to pre- vent it getting scratched.
- Page 88 Cleaning and care Then reassemble the door carefully: The two middle panes are identical. To help you put them back in correctly the material number is printed on the panes. Refit the lower of the two middle panes in such a way that the material number is legible (not a mirror image).
- Page 89 Cleaning and care Refit the seal. Flip both the glass pane retainers in- wards to close them. The door is now reassembled and is ready to fit back on the oven. Push the inner pane with the matt printed side facing downwards into the plastic strip and place it between the retainers.
-
Page 90: Refitting The Door
Cleaning and care Open the door fully. Refitting the door If the locking clamps are not locked, the door could work loose resulting in damage. Ensure that the locking clamps are locked after refitting the door. Flip both locking clamps back up as far as they will go into a horizontal position. -
Page 91: Removing The Side Runners With Flexiclip Runners
Cleaning and care Removing the side runners Danger of burning. with FlexiClip runners Make sure the oven heating ele- ments are switched off and cool. You can remove the side runners to- gether with the FlexiClip runners (if present). If you wish to remove the FlexiClip run- ners separately beforehand, please fol- low the instructions in "Features –... -
Page 92: Lowering The Top Heat/Grill Element
Cleaning and care Lowering the top heat/grill ele- ment Danger of burning. Make sure the oven heating ele- ments are switched off and that the oven cavity is cool. Remove the side runners. Undo the wing nut. Use caution not to damage the top heat/grill element. -
Page 93: Problem Solving Guide
The display is dark. There is no power to the oven. Check whether the mains fuse has tripped. If it has, contact a qualified electrician or Miele. The oven does not heat You have only selected an oven function or a temper- ature. - Page 94 Turn the function selector to the 0 position and se- lect the Pyrolytic programme you want again. If the problem persists, contact Miele Service. appears in the dis- The door lock has not unlocked after the Pyrolytic play.
- Page 95 Only use this special lubricant, as it is designed to withstand high temperatures in the oven. Other lubricants can harden and stick to the FlexiClip runners when they are heated. The Miele lubricant is available to order from Miele or via the online Miele shop.
- Page 96 Pyrolytic cleaning pro- Turn the function selector to 0. gramme. If the door lock still does not release itself call Miele Service. There is soiling in the The Pyrolytic cleaning programme burns off soiling in oven after the Pyrolytic the oven and leaves it as ash.
-
Page 97: After Sales / Warranty
For information on the appliance war- Please note that telephone calls may ranty specific to your country please be monitored and recorded for training contact Miele. See end of this booklet purposes. for contact details. N.B. A call-out charge will be applied to... -
Page 98: Electrical Connection
Installation, repairs and other work on the data plate located on the oven by unqualified persons could be dan- trim visible when the door is open. gerous. Miele cannot be held liable for unauthorised work. Ensure that these match the mains sup- ply. -
Page 99: Electrical Connection: Other Countries
(RCD) / ground fault interrupter (GFI). Contact a qualified electrician for ad- vice. If the cord is damaged a new cord must be fitted by a Miele approved service technician. WARNING - THIS APPLIANCE MUST BE EARTHED... -
Page 100: Building-In Diagrams
Building-in diagrams Appliance and niche dimensions Dimensions are given in mm. Installation in a base unit When building the appliance into a base unit underneath a hob please also ob- serve the installation instructions for the hob as well as the building-in depth re- quired for the hob. -
Page 101: Installation In A Tall Unit
Building-in diagrams Installation in a tall unit Ovens with glass front Ovens with metal front... -
Page 102: Dimensions Of Oven Front
Building-in diagrams Dimensions of oven front Dimensions are given in mm. H22xx: 42 mm Ovens with glass front: 2.2 mm Ovens with metal front: 1.2 mm... -
Page 103: Installing The Oven
Installing the oven It is advisable to dismantle the door The oven must not be operated before installing the appliance (see until it has been correctly installed in "Cleaning and Care - Dismantling the its housing unit. door") and remove accessories from the oven cavity. -
Page 104: Note For Test Institutes
Note for test institutes Test food acc. to EN 60350-1 * Test food Accessories Pre-heat [°C] [min] Drop cookies 35–45 1 tray 20–30 35–45 2 trays Small cakes 30–40 1 tray 20–30 2 trays ... -
Page 105: Energy Efficiency Class
Note for test institutes Energy efficiency class The energy efficiency class is calculated in accordance with EN 60350-1. Energy efficiency class: A+ Please observe the following advice when testing: – Use the Gentle bake programme for testing purposes. – During testing make sure that only those accessories required for the test are in the oven cavity. - Page 106 Data sheet for household ovens In acc. with delegated regulation (EU) No. 65/2014 and regulation (EU) No. 66/2014 MIELE Model name / identifier H2265BP; H2267BP Energy efficiency index/cavity (EEI 81,9 cavity Energy efficiency class/cavity A+++ (most efficient) to D (least efficient)
- Page 107 Tel. +971 4 3044 999 Tel: (01) 461 07 10, Fax: (01) 461 07 97 Fax. +971 4 3418 852 E-Mail: [email protected], Internet: www.miele.ie 800-MIELE (64353) Manufacturer: Miele & Cie. KG E-Mail: [email protected] Website: www.miele.ae Carl-Miele-Straße 29, 33332 Gütersloh, Germany...
- Page 108 H2265BP; H2267BP en-GB M.-Nr. 10 634 330 / 00...