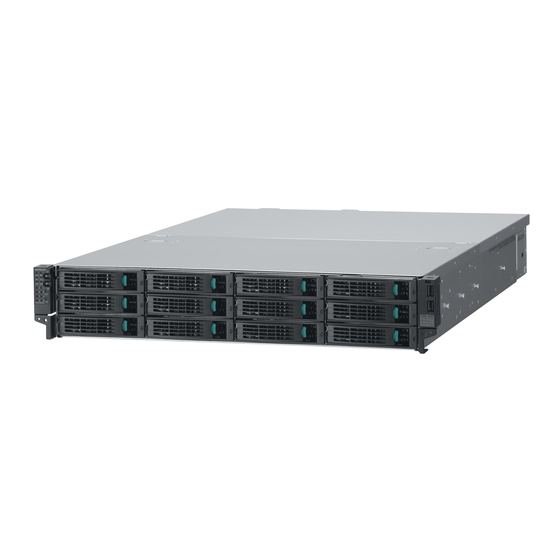
Hitachi Compute Rack 220H Replacement Manual
Hide thumbs
Also See for Compute Rack 220H:
- User manual (80 pages) ,
- Getting started manual (78 pages) ,
- Bios manual (145 pages)

Related Manuals for Hitachi Compute Rack 220H


Summary of Contents for Hitachi Compute Rack 220H
- Page 1 Hitachi Compute Rack 220H CRU Replacement Guide INKS Document Organization Product Version Getting Help Contents MK-90CRH005-02...
- Page 2 Hitachi, Ltd. Hitachi, Ltd., reserves the right to make changes to this document at any time without notice and assumes no responsibility for its use. This document contains the most current information available at the time of publication.
-
Page 3: Table Of Contents
Location ......................2-5 Preparation ..................3-1 Basic Replacement Procedure ................3-2 Unpack a spare component ................3-4 Powering off system unit ................... 3-4 Sliding out the system unit for maintenance ............3-5 Contents Hitachi Compute Rack 220H CRU Replacement Guide... - Page 4 Notice of maintenance by maintenance person ........... 5-2 Changing a network adapter's MAC address ............5-2 Restoring the Web console or Remote Console settings ........5-3 BIOS resetting ....................5-3 Windows BitLocker recovery password ............... 5-4 Contents Hitachi Compute Rack 220H CRU Replacement Guide...
-
Page 5: Preface
Convention for storage capacity values Getting Help Comments Notice: The use of Compute Rack and all other Hitachi Data Systems products is governed by the terms of your agreement(s) with Hitachi Data Systems. Preface Hitachi Compute Rack 220H CRU Replacement Guide... -
Page 6: Intended Audience
Product Version This document revision applies to Compute Rack 220H version 0021R22500. Release Notes Read the release notes before installing and using this product. They may contain requirements or restrictions that are not fully described in this document or updates or corrections to this document. -
Page 7: Referenced Documents
Referenced Documents Compute Rack 220H (CR 220H) documents: • Hitachi Compute Rack 220H Getting Started Guide, MK-90CRH001 • Hitachi Compute Rack 220H User's Guide, MK-90CRH003 • Hitachi Compute Rack 210H/220H Windows Installation Guide, MK-90CRH007 • Hitachi Compute Rack 210H/220H BIOS Guide, MK-90CRH008 •... -
Page 8: Convention For Storage Capacity Values
Getting Help The Hitachi Data Systems customer support staff is available 24 hours a day, seven days a week. If you need technical support, log on to the Hitachi Data Systems Portal for contact information: https://portal.hds.com. Comments Please send us your comments on this document: [email protected]. -
Page 9: Safety Guidelines
Safety guidelines This section contains warnings and important safety guidelines for using a Hitachi Compute Rack System. Read and understand the information in this section before removing, replacing and installing system components. This section includes the following key topics: Safety information ... -
Page 10: Safety Information
This indicates a general action to take. Action by following the instructions Mandatory in this guide. Sign Unplug Power This indicates unplugging the power cable from the outlet to avoid electric cord shock and fire. Safety guidelines Hitachi Compute Rack 220H CRU Replacement Guide... -
Page 11: Common Precautions Concerning Safety
• Do not touch the power plug with moistened hands. • Do not place any objects around the electrical outlets in order to allow users to quickly unplug the power cables. Safety guidelines Hitachi Compute Rack 220H CRU Replacement Guide... - Page 12 After removing a power supply, install a power slot cover. Inside the power slot, some conductors are exposed. If you touch them with your hand or tool, it may cause electric shock or equipment failure. Safety guidelines Hitachi Compute Rack 220H CRU Replacement Guide...
- Page 13 Use peripherals, internal components, signal cables, and AC cables that the manual describes as supported. Otherwise, compatibility issues might occur and malfunction of the peripherals, internal component, and the system unit. Also burn, smoke, or fire might occur. Safety guidelines xiii Hitachi Compute Rack 220H CRU Replacement Guide...
- Page 14 Contact with metal edges When moving the equipment or adding parts, take care not to hurt yourself on the metal or plastic edges. You can wear cotton gloves to protect your hands. Safety guidelines Hitachi Compute Rack 220H CRU Replacement Guide...
- Page 15 When storing batteries, apply adhesive tape on the terminals for insulation. If the batteries are stored without insulation, the terminals can contact each other to cause a short-circuit and overheat or burst, leading to injury or fire. Safety guidelines Hitachi Compute Rack 220H CRU Replacement Guide...
-
Page 16: Precautions Against Damage To Equipment
Using devices other than those mentioned above would cause a failure in peripheral devices and equipment due to the difference in connection specifications. Safety guidelines Hitachi Compute Rack 220H CRU Replacement Guide... - Page 17 When you change the configuration of the system unit (DIMM, fan, PCI card, or peripherals), disconnect all the power plugs and wait 30 seconds and more before the procedure. Otherwise, residual electric charge might cause malfunction. Safety guidelines xvii Hitachi Compute Rack 220H CRU Replacement Guide...
- Page 18 When you are using an OS which requires the shut down procedure, be sure to finish the shut down procedure before turning off the power. Otherwise, data may be lost. xviii Safety guidelines Hitachi Compute Rack 220H CRU Replacement Guide...
- Page 19 • Reliable Earthing Reliable earthing of rack-mounted equipment should be maintained. Pay particular attention to supply connections other than direct connections to the branch circuit (e.g. use of power strips)." Safety guidelines Hitachi Compute Rack 220H CRU Replacement Guide...
-
Page 20: Safety And Warning Labels
Safety and warning labels The location and content of the warning and safety labels on the CR 220H are shown here. Safety guidelines Hitachi Compute Rack 220H CRU Replacement Guide... -
Page 21: Introduction
Introduction This chapter describes user replacement overview for the Hitachi Compute Rack System. User Replacement Guideline User maintenance tasks When a failure occurs LED overview Introduction Hitachi Compute Rack 220H CRU Replacement Guide... -
Page 22: User Replacement Guideline
The LEDs are described in this chapter. User maintenance tasks The maintenance tasks described in this manual follow the Hitachi Data Systems Customer Support program. • The Hitachi Data Systems self-service program allows users to perform allowable installation and configuration tasks and maintenance tasks on the Hitachi Compute Rack System. -
Page 23: When A Failure Occurs
Replacing the parts after the spare parts arrive and Follow instructions in this checking the recovery from the failure. document to replace the failed part. Return the failed part Return the replaced parts. Introduction Hitachi Compute Rack 220H CRU Replacement Guide... -
Page 24: Led Overview
The operation panel has switches to control the system and LEDs for displaying system status. Operation panel Operation panel on page 1-5 * The LED lights green while the HDD/SSD is being accessed for rebuilding. Introduction Hitachi Compute Rack 220H CRU Replacement Guide... - Page 25 HDD errors, fan errors, power supply errors, or other Amber-On ERROR LED hardware errors occur. Green-On Accessing HDD/SSD. Amber-On Error occurred. ACCESS LED Amber-Blink* On-going data rebuild. * The LED lights green while the HDD/SSD is being accessed for rebuilding. Introduction Hitachi Compute Rack 220H CRU Replacement Guide...
- Page 26 LED. Table 1-5: Event code indicate MAINTENANCE Where the error MAINTENANCE Where the error occurred occurred Normal operation Other hardware Motherboard Temperature Memory Fans CPUs Power / Voltage (Other codes) (Multiple locations) Introduction Hitachi Compute Rack 220H CRU Replacement Guide...
- Page 27 The upper digit (left side) indicates the 100's digit, and the lower digit (right side) indicates the 10's digit. The indicated power consumption value is not accurate. Use this value only as a reference. Introduction Hitachi Compute Rack 220H CRU Replacement Guide...
- Page 28 The system unit doesn't start unless the SERVICE LEDs finish blinking. So you will have to wait the system to start until the LEDs finish blinking if you press the POWER switch while the SERVICE LEDs are still blinking. Introduction Hitachi Compute Rack 220H CRU Replacement Guide...
- Page 29 If you install an optional LAN mezzanine, you can add two interface network interface connectors. connectors * When the AC power supplied to the system unit, this LED may blink in amber. Introduction Hitachi Compute Rack 220H CRU Replacement Guide...
- Page 30 Onboard LAN2: PCI bus 8, device 0, function 1 – The number of the network adapter which is the network interface • connector recognized by the device manager may not match to the network interface connector number. 1-10 Introduction Hitachi Compute Rack 220H CRU Replacement Guide...
- Page 31 If you find the communication is unstable, turn off the system unit, • shut down the AC power by, for example, disconnecting the AC cable, wait 30 seconds or more, and then reconnect AC power and turn on the system unit. Introduction 1-11 Hitachi Compute Rack 220H CRU Replacement Guide...
- Page 32 * AC power is still supplied even if the power of the system unit is turned off, but this LED will be turned off because only link by 10BASE-T can be established. 1-12 Introduction Hitachi Compute Rack 220H CRU Replacement Guide...
- Page 33 A link with a hub has not been established. Green-On A link with a hub has been established. Green-Blink Activity LED Data is being transmitted or received. A link with a hub has not been established. Introduction 1-13 Hitachi Compute Rack 220H CRU Replacement Guide...
- Page 34 10 Gbps (10GBASE-SR). If the links speed of the LAN mezzanine interface is 1000 Mbps (1000BASE-SX link established, the Link LED is lights solid amber), you need to reconfigure the network connected to the LAN mezzanine interface. 1-14 Introduction Hitachi Compute Rack 220H CRU Replacement Guide...
-
Page 35: Replaceable Parts
Replaceable parts This chapter describes the user replaceable parts of the CR 220H. Overview Location Replaceable parts Hitachi Compute Rack 220H CRU Replacement Guide... -
Page 36: Overview
Memory, 2GBx1, 1600MHz DDR3 RDIMM Memory 4GBx1, 1600 RDIMM GQ-MJ7004H4-R Memory, 4GBx1, 1600MHz DDR3 RDIMM Memory 8GBx1, 1600 RDIMM GQ-MJ7008H4-R Memory, 8GBx1, 1600MHz DDR3 RDIMM Memory 16GBx1, 1600 RDIMM GQ-MJ7016H4-R Memory, 16GBx1, 1600MHz DDR3 RDIMM Replaceable parts Hitachi Compute Rack 220H CRU Replacement Guide... - Page 37 Or disk array is performing or finishing rebuilding data to a reserve disk with hot spare function. When replacing a failed power supply in hot-swap condition, • confirm that another power supply is installed and active status. Replaceable parts Hitachi Compute Rack 220H CRU Replacement Guide...
- Page 38 In the CR 220H, the following CRUs are non hot-swappable: – Fan. See Replacing a fan on page 4-9. – DIMM. See Replacing a DIMM on page 4-12. – PCI card. See Replacing a PCI card on page 4-18. Replaceable parts Hitachi Compute Rack 220H CRU Replacement Guide...
-
Page 39: Location
2.5 inch SSD SATA 100GB, EMLC, 2.5 inch GQ-UH7100NDM-R SSD SATA 200GB, EMLC, 2.5 inch GQ-UH7200XCM-R SSD SAS 400GB, EMLC, 2.5 inch GQ-UH7400NCM-R Power Power Supply 800W GQ-BP2361-R supply* * Hot-swappable component. Replaceable parts Hitachi Compute Rack 220H CRU Replacement Guide... - Page 40 Memory 8GBx1, LV RDIMM GQ-MJ708GL3-R Memory 16GBx1, LV RDIMM GQ-MJ716GL3-R DIMM Memory 2GBx1, 1600 RDIMM GQ-MJ7002H4-R Memory 4GBx1, 1600 RDIMM GQ-MJ7004H4-R Memory 8GBx1, 1600 RDIMM GQ-MJ7008H4-R Memory 16GBx1, 1600 RDIMM GQ-MJ7016H4-R Replaceable parts Hitachi Compute Rack 220H CRU Replacement Guide...
- Page 41 2 1600 RDIMM (1600 MHz) and LV RDIMM (1333 MHz DDR3) cannot be mounted together in the system unit. 3 CN7721-Y/CN7721-R and CN7723-Y/CN7723-R cannot be mounted together in the system unit. Replaceable parts Hitachi Compute Rack 220H CRU Replacement Guide...
- Page 42 Replaceable parts Hitachi Compute Rack 220H CRU Replacement Guide...
-
Page 43: Preparation
This chapter describes a preparation of replacing components of the system unit. Basic Replacement Procedure Unpack a spare component Powering off system unit Sliding out the system unit for maintenance Removing/Installing the cover Preparation Hitachi Compute Rack 220H CRU Replacement Guide... -
Page 44: Basic Replacement Procedure
Remove failed part Install spare part Install spare part Rebuild/copy automatically After Replacing After Replacing Check the ERROR LED turned off Check the ERROR LED turned off Figure 3-1: Basic procedure – hot-swappable component Preparation Hitachi Compute Rack 220H CRU Replacement Guide... - Page 45 Push back the system unit Push back the system unit Power on Power on Check the ERROR LED turned off Check the communication is back Figure 3-2: Basic procedure – non hot-swappable component Preparation Hitachi Compute Rack 220H CRU Replacement Guide...
-
Page 46: Unpack A Spare Component
POWER switch. In this case, wait until the power will be turned off. The fans inside the power supplies of the system unit continue • running unless the AC power source is turned off. 4. Turn off the peripherals. Preparation Hitachi Compute Rack 220H CRU Replacement Guide... -
Page 47: Sliding Out The System Unit For Maintenance
When do maintenance of the system unit, slide out the system unit from the rack cabinet. 1. Disconnect all the cables from the system unit. See Hitachi Compute Rack 220H Getting Started Guide. 2. Remove the front bezel (AU7705-Y/AU7705-R), if any. See Hitachi Compute Rack 220H Getting Started Guide. - Page 48 The cable clamps may be damaged. 2. Perform reverse procedure of the removal to install a front bezel and connect external cables. Sliding out the system unit from a rack cabinet. Preparation Hitachi Compute Rack 220H CRU Replacement Guide...
-
Page 49: Removing/Installing The Cover
2. Press the two release latches and slide the front top cover toward the front of the system. 3. Lift up and remove the top cover from the system. Release latch Release latch Figure 3-5: Remove the front top cover Preparation Hitachi Compute Rack 220H CRU Replacement Guide... - Page 50 4. Press and slide the rear top cover toward the rear of the system. 5. Lift up and remove the rear top cover from the system. Figure 3-6: Remove the rear top cover Preparation Hitachi Compute Rack 220H CRU Replacement Guide...
- Page 51 3. Tighten the captive screw at the rear of the system. Figure 3-7: Install the rear top cover 4. Reinstall the system to the rack cabinet. Sliding the system unit into a rack cabinet on page 3-6. Preparation Hitachi Compute Rack 220H CRU Replacement Guide...
- Page 52 4. Make sure that the front top cover is locked by the two release latches. Release latch Release latch Figure 3-8: Install the front top cover 5. Reinstall the system to the rack cabinet. Sliding the system unit into a rack cabinet on page 3-6. 3-10 Preparation Hitachi Compute Rack 220H CRU Replacement Guide...
-
Page 53: Replacing Parts
This chapter describes the procedure for removing and installing components of the system. Replacing an HDD/SSD Replacing a power supply Replacing a fan Replacing a DIMM Replacing a PCI card Replacing parts Hitachi Compute Rack 220H CRU Replacement Guide... -
Page 54: Replacing An Hdd/Ssd
The HDD status LED on the HDD tray lights solid amber. 2. Push the tab of HDD tray to unlock the HDD/SSD. 3. Pull the lever open, and then pull out the failed HDD/SSD slightly. Replacing parts Hitachi Compute Rack 220H CRU Replacement Guide... - Page 55 Otherwise, the HDD/SSD may not be rebuilt correctly or may incur abnormal operation. 1. Open the HDD tray lever of the replacing HDD/SSD. 2. Insert the HDD/SSD into the extension storage bay along the guide slowly. Replacing parts Hitachi Compute Rack 220H CRU Replacement Guide...
- Page 56 4. After a while, confirm that the HDD status LED on the HDD tray of the replacing HDD/SSD turns off or lights solid green. During rebuilding data in progress, the HDD status LED blinks amber. Do not turn off the system power during the data rebuild. Replacing parts Hitachi Compute Rack 220H CRU Replacement Guide...
-
Page 57: Replacing A Power Supply
Do not disconnect the AC cable connected to the power supply NOTICE which is operating normally. If you do, the power to the system will be turned off and the data may be lost. Replacing parts Hitachi Compute Rack 220H CRU Replacement Guide... - Page 58 4. Grasp the handle and push the lock tab, and then pull out the failed power supply straightly. 5. Hold the body of the failed power supply, and then pull out it straight forward. Handle Lock tab Figure 4-6: Remove a failed power supply Replacing parts Hitachi Compute Rack 220H CRU Replacement Guide...
- Page 59 4. Fix the AC cable using a cable clamp attached to the power supply in order to avoid unintended disconnection. After the AC cable is fixed, push the cable clamp all the way toward the power plug. Replacing parts Hitachi Compute Rack 220H CRU Replacement Guide...
- Page 60 Improper position Proper position Figure 4-8: Fixing AC cable using the cable clamp 5. Make sure that the power supply LED of installed power supply lights solid green. Replacing parts Hitachi Compute Rack 220H CRU Replacement Guide...
-
Page 61: Replacing A Fan
Fan slot 6 Fan slot 2 Fan slot 7 Fan slot 3 Fan slot 8 Fan slot 4 Fan slot 9 Fan slot 5 Fan slot 10 Figure 4-9: Location of fan slot Replacing parts Hitachi Compute Rack 220H CRU Replacement Guide... - Page 62 4. Check which fan slot you need to remove the fan module from. 5. Grasp the fan, press the release latch of fan, and then lift it out of straight upward. Release latch Figure 4-10: Remove a fan 4-10 Replacing parts Hitachi Compute Rack 220H CRU Replacement Guide...
- Page 63 3. Install the front top cover of the system. Installing the front top cover on page 3-10. 4. Reinstall the system to the rack cabinet. Sliding the system unit into a rack cabinet on page 3-6. Replacing parts 4-11 Hitachi Compute Rack 220H CRU Replacement Guide...
-
Page 64: Replacing A Dimm
Memory slot indicator on the motherboard CPU1_DIMM1 CPU2_DIMM1 CPU1_DIMM2 CPU2_DIMM2 CPU1_DIMM3 CPU2_DIMM3 CPU1_DIMM4 CPU2_DIMM4 CPU1_DIMM5 CPU2_DIMM5 CPU1_DIMM6 CPU2_DIMM6 CPU1_DIMM7 CPU2_DIMM7 CPU1_DIMM8 CPU2_DIMM8 CPU1_DIMM9 CPU2_DIMM9 CPU1_DIMM10 CPU2_DIMM10 CPU1_DIMM11 CPU2_DIMM11 CPU1_DIMM12 CPU2_DIMM12 4-12 Replacing parts Hitachi Compute Rack 220H CRU Replacement Guide... - Page 65 5. If the RAID card with cache backup module is installed, remove the two SAS cables and the cache backup cable from the RAID card. Cache backup cable SAS cable Figure 4-12: Remove the SAS cable and cache backup cable Replacing parts 4-13 Hitachi Compute Rack 220H CRU Replacement Guide...
- Page 66 Figure 4-13: Remove the PCI riser bracket 8. Remove the two screws from the center bar. 9. Lift up and remove the center bar. Figure 4-14: Remove the center bar 4-14 Replacing parts Hitachi Compute Rack 220H CRU Replacement Guide...
- Page 67 Make sure you do not bend the electrolytic capacitors when • opening the lock tabs of a memory slot. Otherwise, the motherboard may be damaged. Lock tab Lock tab Figure 4-16: Remove a DIMM Replacing parts 4-15 Hitachi Compute Rack 220H CRU Replacement Guide...
- Page 68 Insert the DIMM vertically to the slot. Otherwise, it may cause NOTICE damages to pins of the connector such as bent pins. The shape of DIMM differs depending on the Product code. Figure 4-17: Install a DIMM 4-16 Replacing parts Hitachi Compute Rack 220H CRU Replacement Guide...
- Page 69 7. Install the system front top cover. Installing the front top cover on page 3-10. 8. Reinstall the system to the rack cabinet. Sliding the system unit into a rack cabinet on page 3-6. Replacing parts 4-17 Hitachi Compute Rack 220H CRU Replacement Guide...
-
Page 70: Replacing A Pci Card
PCI slot 2 PCI slot 5 PCI slot 1 PCI slot 4 PCI slot 3 Figure 4-18: Location of PCI slot The specification of each PCI slot is as follows. 4-18 Replacing parts Hitachi Compute Rack 220H CRU Replacement Guide... - Page 71 3. Remove the front top cover of the system. Removing the front top cover on page 3-7. 4. Remove the rear top cover of the system. Removing the rear top cover on page 3-8. Replacing parts 4-19 Hitachi Compute Rack 220H CRU Replacement Guide...
- Page 72 7. Grasp the handle of the PCI riser bracket, and then pull out the PCI riser bracket straight upward from the PCI riser slot. Figure 4-20: Remove the PCI riser bracket 4-20 Replacing parts Hitachi Compute Rack 220H CRU Replacement Guide...
- Page 73 8. Check which PCI slot you need to remove the PCI card from. 9. Remove the screw, and then pull out the PCI card from the PCI riser. Figure 4-21: Remove a PCI card Replacing parts 4-21 Hitachi Compute Rack 220H CRU Replacement Guide...
- Page 74 4. Install the front top cover of the system. Installing the front top cover on page 3-10. 5. Reinstall the system to the rack cabinet. Sliding the system unit into a rack cabinet on page 3-6. 4-22 Replacing parts Hitachi Compute Rack 220H CRU Replacement Guide...
-
Page 75: Setup After Maintenance
Notice of maintenance by maintenance person Changing a network adapter's MAC address Restoring the Web console or Remote Console setting BIOS resetting Windows BitLocker recovery password Setup after maintenance Hitachi Compute Rack 220H CRU Replacement Guide... -
Page 76: Notice Of Maintenance By Maintenance Person
Notice of maintenance by maintenance person Hitachi Data Systems basically provides the latest version of components, BIOS and firmware, when replacement is required for some components due to system failure. As required, unreplaced components or parts, BIOS or firmware might be updated to the latest version. -
Page 77: Restoring The Web Console Or Remote Console Settings
If you change the BIOS settings from the factory defaults, note down all the changed setting values after replacement in case of failure. For system BIOS and RAID BIOS settings, see Hitachi Compute Rack 210H/220H BIOS Guide. Similarly, BIOS settings of a PCI card might be returned to the factory defaults when replace a PCI card. -
Page 78: Windows Bitlocker Recovery Password
TPM board (EQ7000-Y/EQ7000-R) is installed in the system unit. Strictly manage the recovery password. If the recovery password is • lost, the OS will be unbootable or data will be inaccessible. Setup after maintenance Hitachi Compute Rack 220H CRU Replacement Guide... - Page 79 Hitachi Compute Rack 220H CRU Replacement Guide...
- Page 80 Hitachi Data Systems Corporate Headquarters 2845 Lafayette Street Santa Clara, California 95050-2639 U.S.A. www.hds.com Regional Contact Information Americas +1 408 970 1000 [email protected] Europe, Middle East, and Africa +44 (0) 1753 618000 [email protected] Asia Pacific +852 3189 7900 [email protected] MK-90CRH005-02...